User manual
Mise · catering management
From the first quote to the plated dish: events, kitchen and costing, purchasing, food traceability, staff and finance, explained section by section with screenshots of the app.
Getting started
Welcome
What Mise is, how all the work of a catering business fits into the app, and how to get the most out of this manual.
Mise (from mise en place, “everything in its place”) is a catering management app. It brings the whole life of each event together in one place: the client's first enquiry and the quote, the event with its menu, guests, staff and set-up, kitchen production with the real cost of every dish, purchasing from suppliers, the food traceability of every batch, and the collection and payment of invoices.
Everything is connected: the price you pay for an ingredient flows through on its own to the cost of each dish, each menu, each quote and the profitability of each event; what you cook for an event deducts stock batch by batch; and for every dish served you know which batch from which supplier went into it.
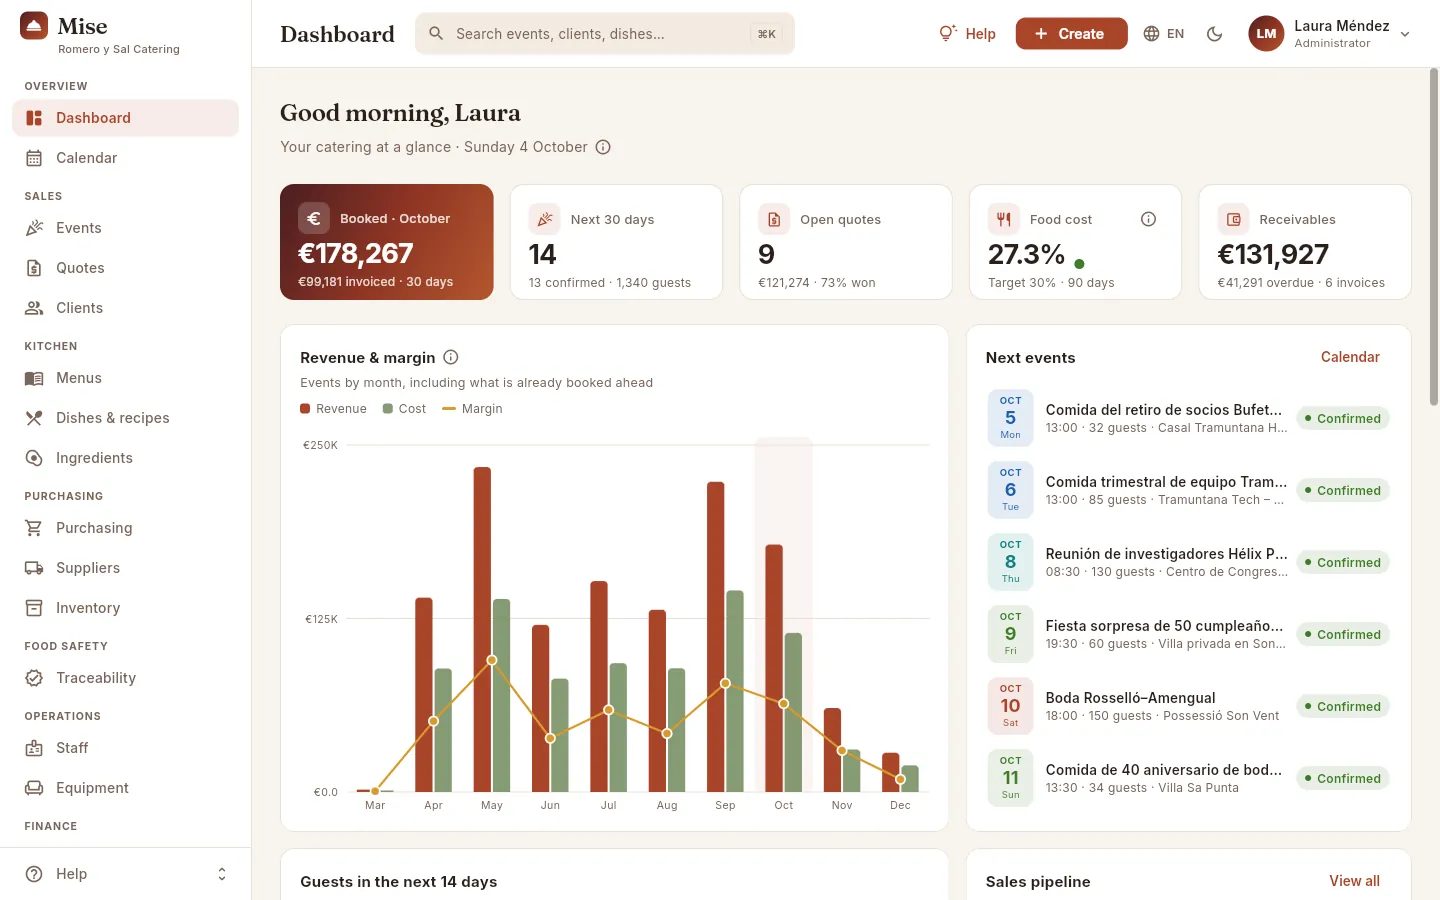 12345
12345
- 1The sidebar takes you to each section, grouped by area: Overview, Sales, Kitchen, Purchasing, Food safety, Operations and Finance.
- 2The search box finds any event, client, dish, ingredient, batch or invoice from any screen.
- 3Create adds an event, quote, client, dish… without leaving where you are.
- 4Your user: your profile, your language and your theme, and sign out. If you are an administrator, also Users and Settings.
- 5The Help menu opens this manual —at the chapter for the screen you are on— and the interactive guides.
#The journey of an event
This is how an event travels through Mise, from the first phone call to the final payment. Each step is a section of the app and a chapter of this manual (click any of them to jump to it):
- 1QuoteMenu, services, discount and VAT, with its estimated margin. Sent as a PDF.
- 2EventOnce accepted, the event is born: guests, allergies, staff, set-up and run sheet.
- 3Menu and costingEach dish with its recipe, its cost per portion and its allergens.
- 4PurchasingThe planner works out what is missing and prepares the orders by supplier.
- 5Receiving and batchesEach delivery comes in as a batch, with its expiry date and its temperature.
- 6ProductionThe kitchen produces: it uses first whatever expires soonest and keeps the witness sample.
- 7Invoice and collectionDeposit and final invoice; collection closes the circle.
#Where to start, depending on your role
Everyone sees in Mise what their access profile allows (see Profiles and permissions). These are the chapters you will use most, depending on your job:
| If you work in… | Start with | And then |
|---|---|---|
| Management | Dashboard, Reports | Events, Invoices, Users |
| Sales and events | Quotes, Clients | Events, Calendar, Menus |
| Kitchen | Dishes & recipes, Events (production sheet) | Ingredients, Traceability, Inventory |
| Purchasing | Purchasing, Suppliers | Ingredients, Inventory, Traceability |
| Operations | Events (staff, set-up, run sheet) | Staff, Equipment, Calendar |
| Administration | Invoices, Payables | Clients, Suppliers, Reports |
If this is your first time signing in, read Signing in to Mise and The screen and what is common to all sections first: they explain what works the same way in every section (searching, filtering, opening a record, filling in a form).
#How to read this manual
- Screenshots with marks. Every screenshot comes from the real app. The numbers 1 point to the parts explained below, in the legend. Hover over a mark or its line in the legend and the area is highlighted in the screenshot; click the screenshot to see it full screen.
- Screen labels. What you see written on a button, a tab or a field appears like this: New event, Save. Keys look like this: ⌘K.
- Steps. Tasks are explained step by step in numbered boxes, with what happens at the end.
- Coloured boxes. Tips are green, important points yellow, regulations maroon, how a figure is calculated terracotta, and what changes depending on your access profile comes with a padlock.
- Searching. The search box on the left (or the / key) finds any word throughout the manual.
- Printing. Print or save as PDF, at the bottom left, outputs the manual on paper or as a PDF, with each chapter on its own page.
#How this manual is organised
After these first steps, each chapter corresponds to a section in the app's sidebar, in the same order and with the same icon. At the end come the appendices: profiles and permissions, glossary and frequently asked questions.
Overview
DashboardYour catering at a glanceCalendarHow busy each day isConnect to ClaudeMise from a chat with ClaudeSales
EventsFrom the brief to the invoiceQuotesFrom draft to confirmed eventClientsRecords, history and balanceKitchen
MenusCost per guest and allergensDishes & recipesWhat each dish costsIngredientsPrices, suppliers and wasteGetting started
Signing in to Mise
How to sign in with your account, the demo accounts, your profile (language and theme) and how to sign out.
Everyone on the team signs in to Mise with their own user account: an email and a password. What they see afterwards depends on their access profile (management, kitchen, sales, administration, purchasing or operations): the sidebar sections, the figures they can view and what they can create or change. Accounts are created by an administrator in Users; there is no open sign-up.
- 1The administrator creates your userWith your email, your name, your job title and a password.
- 2They assign you an access profileKitchen, sales, administration… it decides what you see and what you can do.
- 3You sign in with your emailOn the sign-in screen, with your password.
- 4You start on the DashboardWith the sections and figures for your profile.
#The sign-in screen
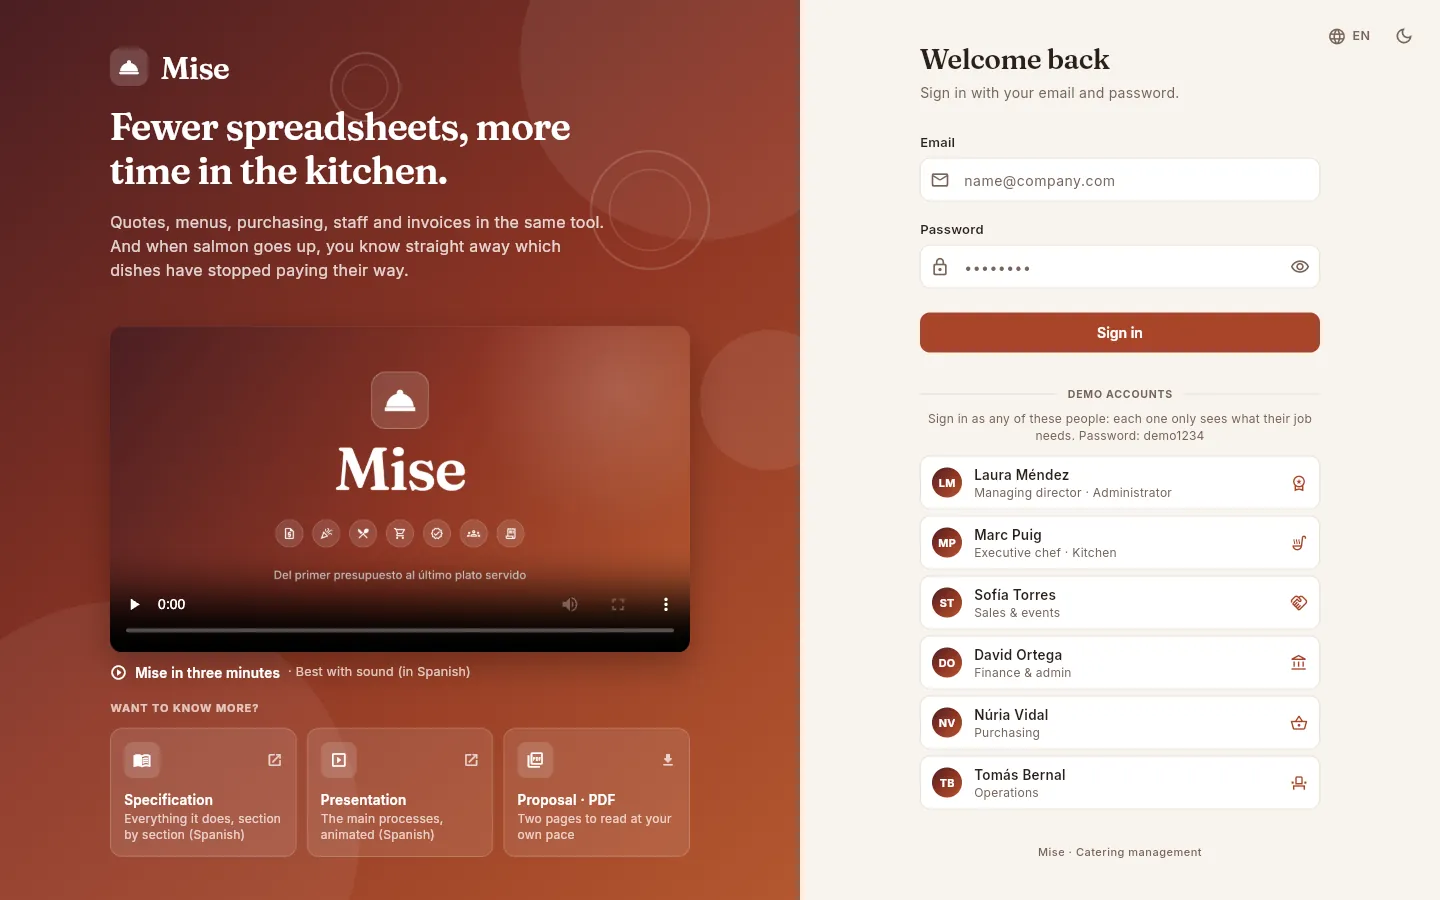 12345678
- 1Email: the address the administrator registered you with.
- 2Password. The eye on the right shows or hides it as you type.
- 3Sign in (or the Enter key in the password field) opens your workspace.
- 4Demo accounts: in the demo, one click on a person signs in directly with their account.
- 5The introduction video: three minutes on what Mise does. Press ▶ to watch it (best with sound; it is in Spanish).
- 6Want to know more? The specification, the presentation and the PDF summary of Mise.
- 7The app's language (Spanish, Catalan or English), right from the sign-in screen.
- 8Switches between light and dark mode.
On narrow screens (a phone or a small window) the introduction on the left disappears and only the form remains, with the logo at the top and, below the demo accounts, the video and the proposal documents.
Type your email in the Email field.
Type your password in Password. If you want to check what you have typed, click the eye on the right.
Click Sign in or press Enter.
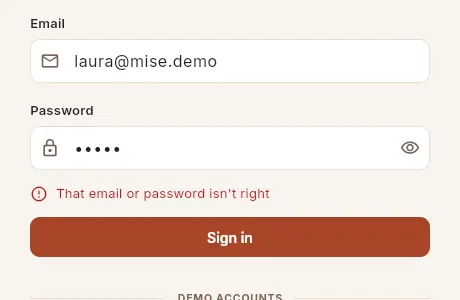 12
12
- 1That email or password isn't right: check both fields (capital letters matter in the password). If the message is “Can't reach the server”, the problem is the connection, not your details.
- 2The eye shows the password so you can see what you have typed.
#The demo accounts
In the demo version, six fictitious people from the sample company (“Romero y
Sal Catering”) appear below the form. Each has a different access profile, so you see the same app as each role would see it.
They all use the password demo1234.
| Person | Role (profile) | What they see, in short |
|---|---|---|
| Laura Méndez | Managing director · Administrator | Everything, and also manages users, profiles and the company settings |
| Marc Puig | Executive chef · Kitchen | Dishes, menus, ingredients, purchasing, inventory and traceability, with costs and food cost; no invoices or payables |
| Sofía Torres | Sales & events | Quotes, clients, events and calendar with the selling prices, but no costs or margins |
| David Ortega | Finance & admin | Invoices, collections, supplier payments and reports, with every amount |
| Núria Vidal | Purchasing | Orders, suppliers, ingredients, inventory and traceability, with the costs but not the selling prices |
| Tomás Bernal | Operations | Event set-up: staff, equipment, calendar and run sheets, with no amounts or costs |
The chapter “The screen and what is common to all sections” explains how you can tell on screen what a profile cannot see (a padlock instead of the figure).
#The video and the proposal documents
Below the introduction on the left there is a three-minute video about what Mise does. Press ▶ to watch it, best with sound; the full-screen button enlarges it and, in the player's ⋮ menu, you can turn on subtitles (in Spanish).
Below it, the Want to know more? block brings together three documents about Mise, meant for anyone evaluating it:
- Specification — everything it does, section by section. Opens in a new tab.
- Presentation — the main processes, animated. Opens in a new tab.
- Proposal · PDF — a two-page summary that downloads to your computer.
If the browser blocks the new tab, Mise shows “Could not open the document”: allow pop-ups for the page and click again.
#If you forget your password
Mise does not send emails to recover a password: accounts are managed by an administrator. Ask them to go to Users (in their user menu), open your record and use Reset password: they will set a new one for you (of at least 8 characters) that they must pass on to you securely. The old one stops working immediately.
#Your user menu and “My profile”
At the top right is your user button: your initials, your name and your access (the name of your profile or “Administrator”). Click it and your menu opens.
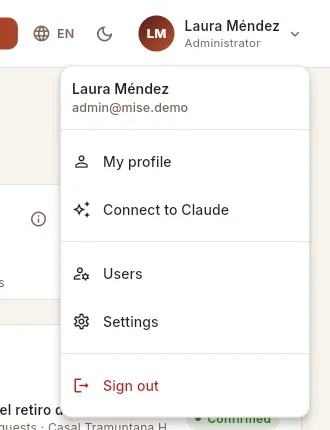 12345
12345
- 1Your name and your access (“Administrator” or the name of your profiles). Click to open the menu.
- 2My profile: your details, language and theme.
- 3Connect to Claude: work with Mise from a chat with Claude (see Connect to Claude).
- 4Only administrators see Users and Settings here.
- 5Sign out takes you back to the sign-in screen.
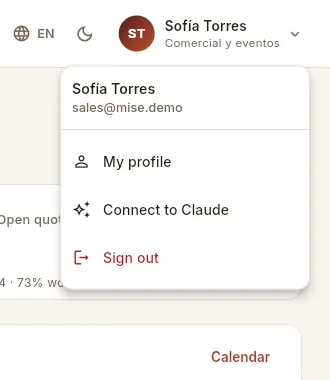 12
12
- 1Below the name, the person's access profile: here “Comercial y eventos”.
- 2Everyone else has My profile, Connect to Claude and Sign out.
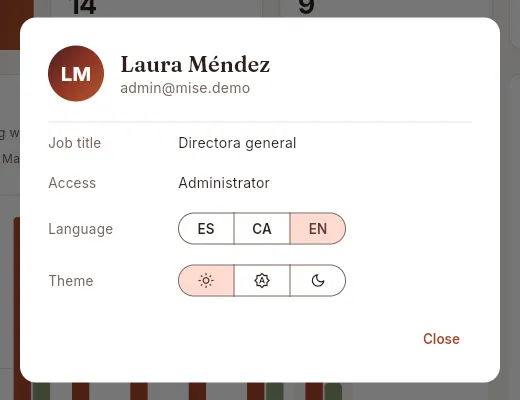 12345
12345
- 1Job title: your position in the company, as the administrator recorded it.
- 2Access: “Administrator” or your access profiles. If you have several, they are joined with “+”.
- 3Language: ES (Spanish), CA (Catalan) or EN (English). Changes the whole app instantly.
- 4Theme: light, “System” (whatever your computer or phone uses) or dark.
- 5Close the dialogue: the changes are already applied.
Click your user button, at the top right, and choose My profile.
Under Language, click ES, CA or EN.
Under Theme, click the sun (light), the cog (“System”) or the moon (dark).
Click Close.
#Signing out
Click your user button, at the top right.
Choose Sign out (in red, at the end of the menu).
#If your user has no access profile
A user who is not an administrator needs at least one access profile to see anything. If an administrator creates your account without a profile (or removes them all), when you sign in you will see the No access profile screen: “Your user has no access profile assigned yet, so nothing can be shown. Ask an administrator to assign one.”, with your email and the Sign out button. Once the administrator assigns you a profile, sign in again.
#Signing in from a phone
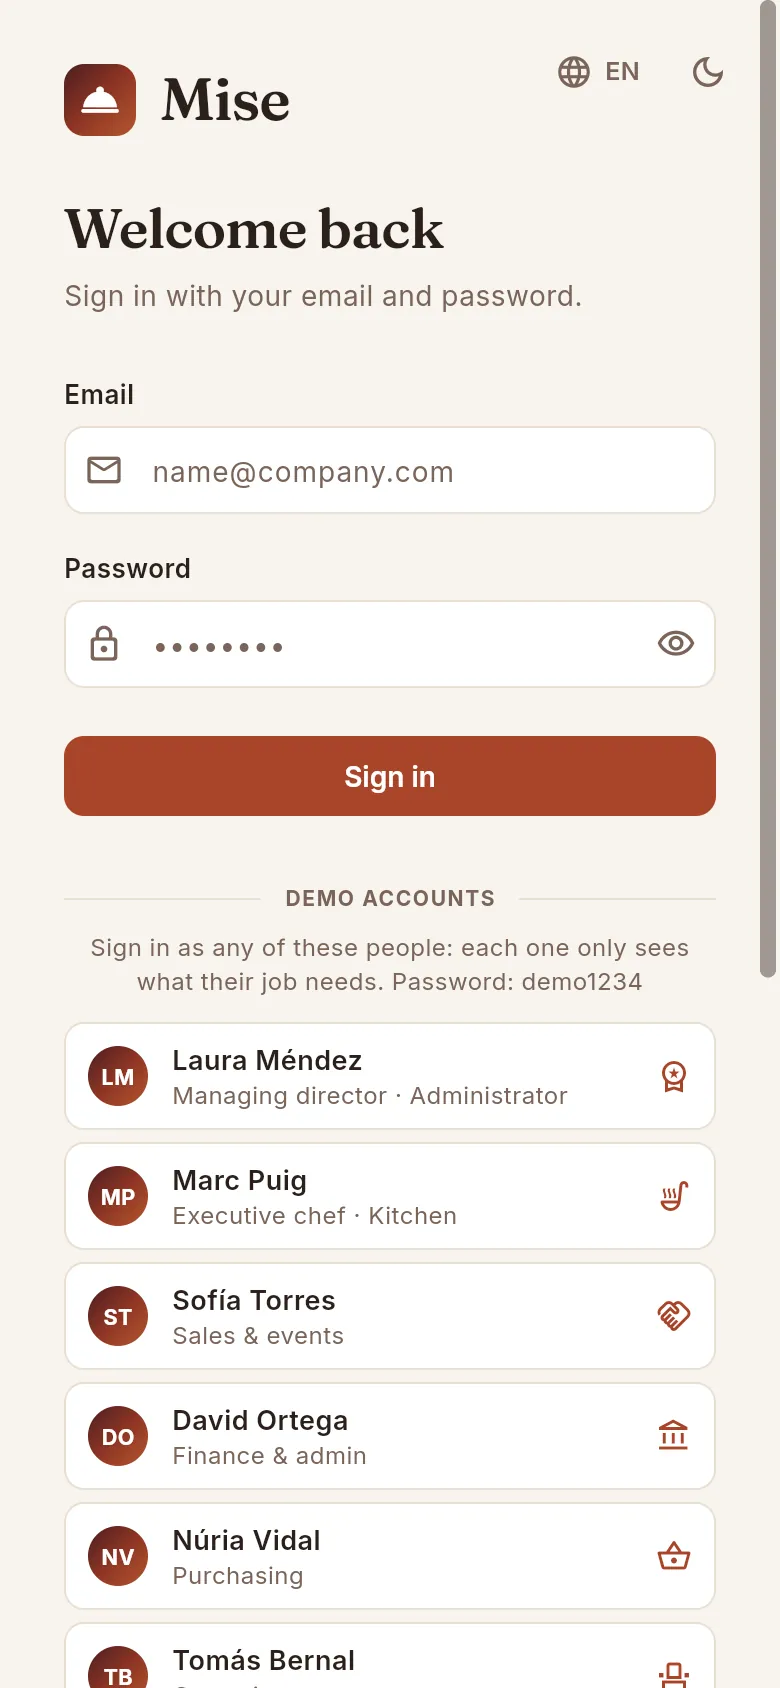 12
12
- 1The same form: email, password and Sign in.
- 2The demo accounts, one below the other. Scroll down to see the rest and the proposal documents.
Mise works the same way in the browser on a phone or tablet. If you are going to use it often, add it to the home screen from the browser menu (“Add to Home Screen”): it will open like any other app.
Getting started
The screen and what is common to all sections
The parts of the screen and everything that works the same way in every section: searching, creating, lists, records, forms, help, permissions, mobile and shortcuts.
Every section of Mise shares the same structure and the same building blocks: the sidebar for moving around, the top bar with the search box and the button for creating things, lists that are searched and filtered the same way, records that open on the right and forms with the same buttons. What you learn here works on any screen.
#The parts of the screen
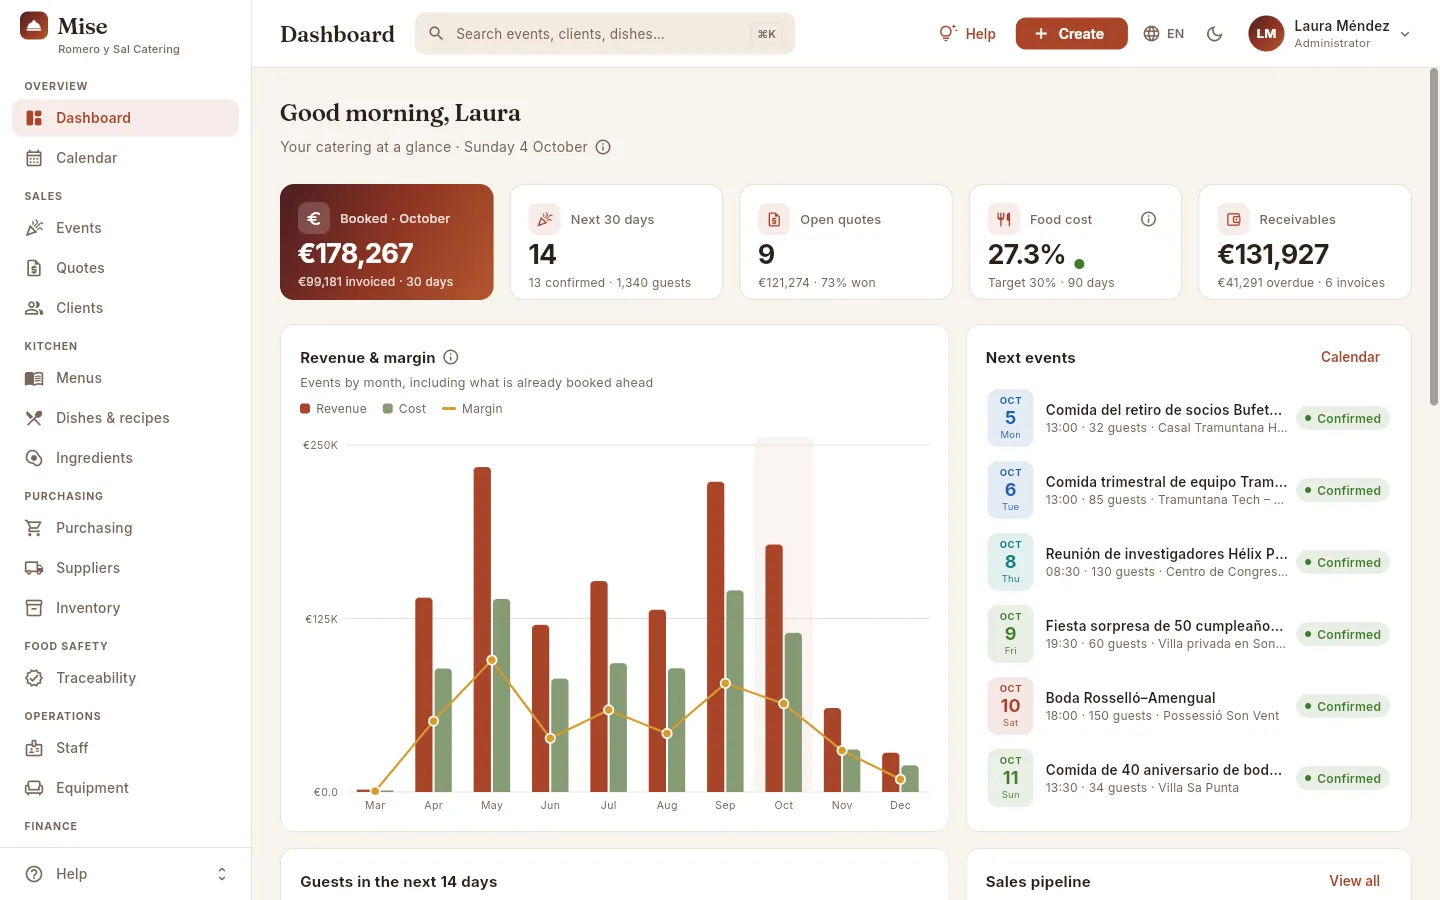 1234
1234
- 1Sidebar: the sections, grouped by area. The section you are in is highlighted.
- 2Help menu, fixed at the bottom: this manual and the interactive guides.
- 3Top bar: the section title and the tools that work on any screen (details below).
- 4The section's content; it changes when you choose another section in the sidebar.
 12
12
- 1The title of the section you are in.
- 2The global search box: click it or use ⌘K (Mac) / Ctrl+K (Windows).
 1234
1234
- 1Help for the screen you are on (also with the F1 key).
- 2Create: adds an event, quote, client, dish… from any screen.
- 3Language (the globe) and light or dark theme (the moon).
- 4Your user menu: “My profile”, “Connect to Claude”, sign out and, if you are an administrator, Users and Settings.
#The sidebar
The sections are grouped by area, in the order of a catering business's work. You only see the ones your access profile allows: kitchen staff do not get Invoices or Payables, for example.
| Area | Sections |
|---|---|
| Overview | Dashboard · Calendar |
| Sales | Events · Quotes · Clients |
| Kitchen | Menus · Dishes & recipes · Ingredients |
| Purchasing | Purchasing · Suppliers · Inventory |
| Food safety | Traceability |
| Operations | Staff · Equipment |
| Finance | Invoices · Payables · Reports |
| Administration | Users · Settings (administrators only; on a computer they are in the user menu) |
When you change section, the screen you leave goes back to its initial state: if you had searched or filtered something, you find it unfiltered when you come back.
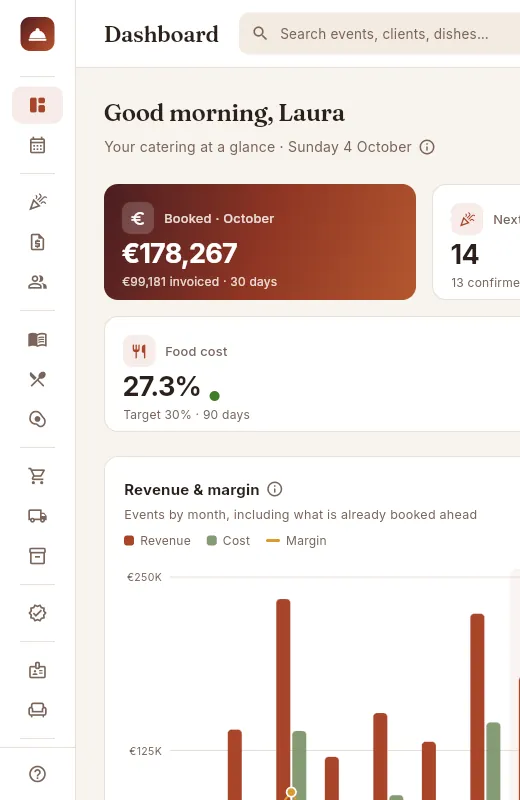 12
12
- 1Each icon is a section; hover over it and its name appears. The areas are separated by a line.
- 2The Help menu stays at the bottom.
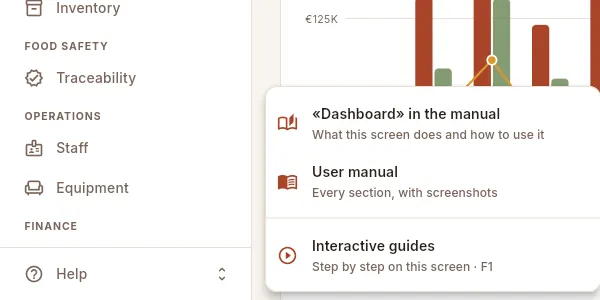 123
123
- 1Opens this manual at the chapter for the screen you are on (here, the Dashboard), in another tab.
- 2Opens the full manual, from the cover page.
- 3Opens the screen's interactive guides (the same as the Help button above, or F1).
#Help: interactive guides and this manual
There are two kinds of help inside Mise:
- This manual, which opens from the Help menu at the bottom of the sidebar, directly at the chapter for the screen you are on.
- The screen's help, with its interactive guides: the Help button in the top bar (or the F1 key) opens a panel on the right with what the section is and the tasks you can do in it. Each guide plays over real screenshots: a pointer goes to the spot, highlights it and performs the action while each step is explained.
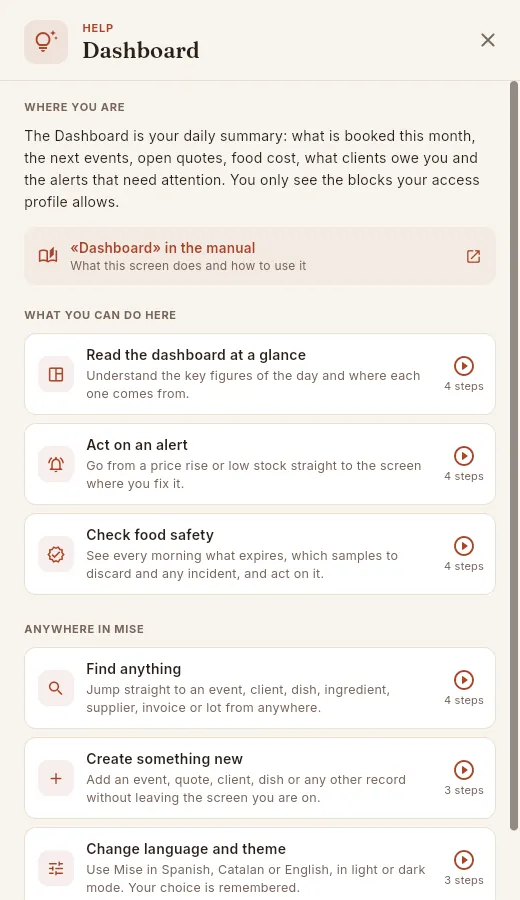 1234
1234
- 1Where you are: what this section is and what it is for.
- 2Link to this section's chapter in the manual.
- 3What you can do here: one guide per task, with its goal and the number of steps. Click it to watch it.
- 4Guides that work on any screen: searching, creating, changing the language and the theme.
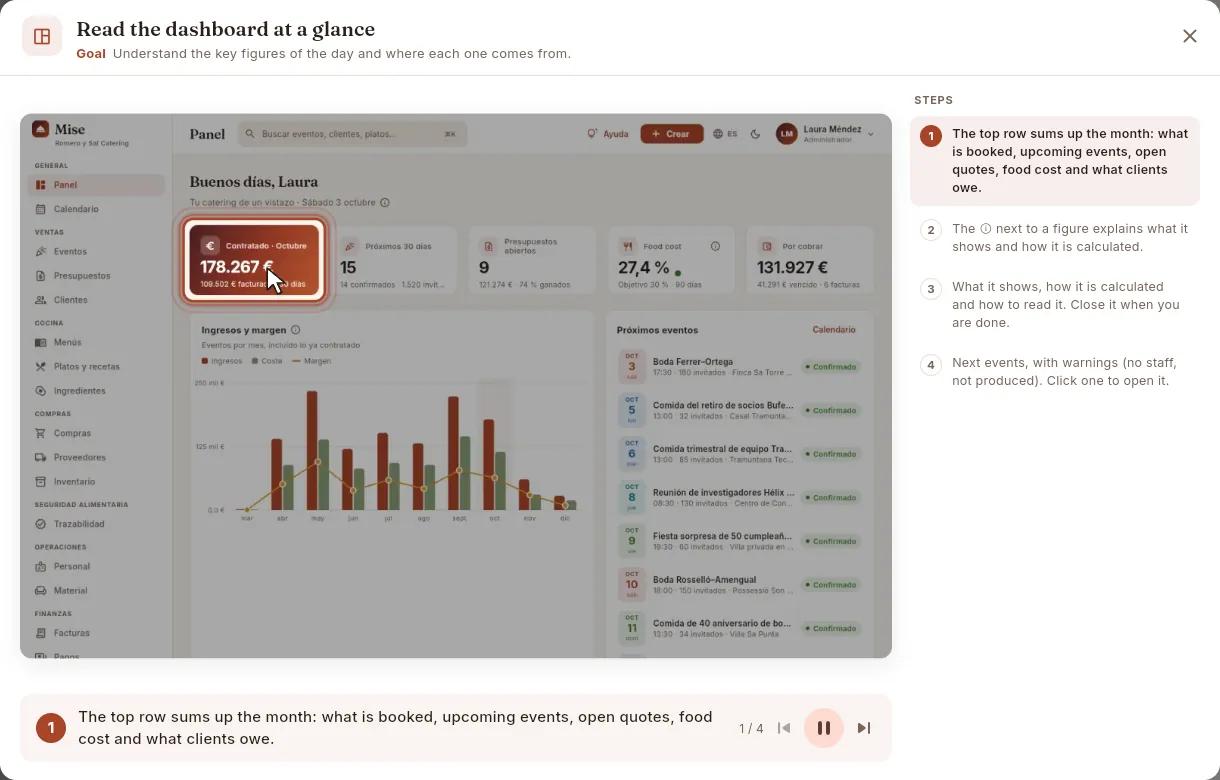 12345
12345
- 1The guide's goal: what you are going to learn to do.
- 2The animated screenshot: the element for each step is highlighted and the pointer performs the action (click, type, scroll).
- 3The explanation of the current step.
- 4Controls: previous step, pause / play (at the end, “watch again”) and next step. The guide advances by itself.
- 5The list of steps: click any of them to jump straight to it.
#Searching for anything
The global search box in the top bar finds, from any screen, events, clients, quotes, dishes and preparations, menus, ingredients, batches, suppliers, staff, equipment and invoices. It searches by name and also by code or number: “EV-2026-0088”, “Q-2026-0047”, “INV-2026-0097” or a batch code (“L-2026-…”), its supplier batch or its delivery note. It only shows what your profile can see.
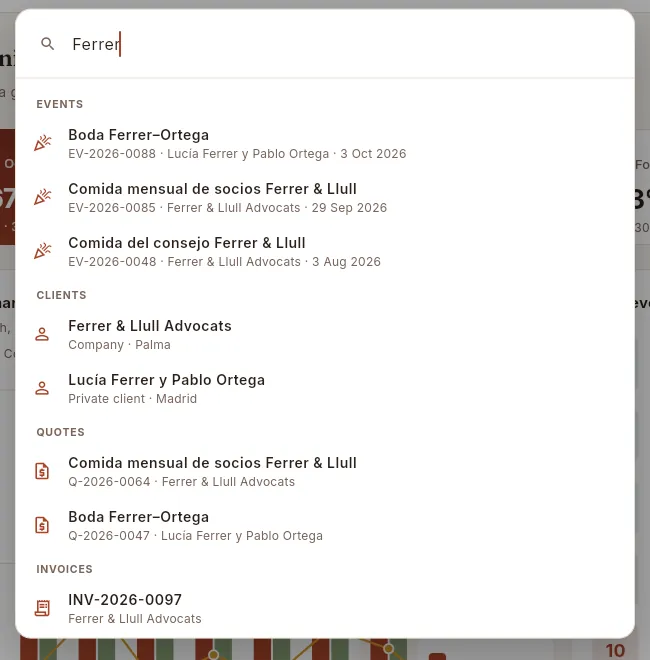 1234
1234
- 1Type at least two letters; the results appear by themselves as you type.
- 2The results come grouped by type (Events, Clients, Quotes, Invoices…).
- 3Each result with a detail that identifies it (code, client, date). Click it to go to its section with the record open.
- 4One and the same term can find the client, their events, their quotes and their invoices.
Click the search box in the top bar, or press ⌘K (Mac) / Ctrl+K (Windows).
Type part of the name, the code or the number (for example “Ferrer” or “salmón”).
Click the result you are looking for.
#Creating something new
The Create button in the top bar adds, without leaving where you are, any record your profile can create. When you save it, Mise takes you to its section; in the case of an event, a dish or a menu it also opens its record so that you can carry on completing it (the event's menu and staff, the dish's costing, the menu's dishes).
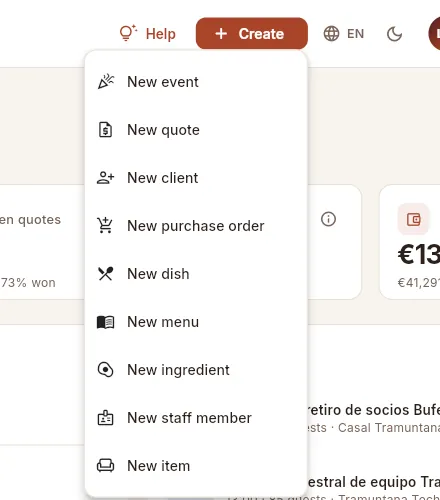 1234
1234
- 1Create opens out the available options.
- 2Sales: event, quote and client.
- 3Purchasing and kitchen: order, dish, menu and ingredient.
- 4Operations: a team member and equipment.
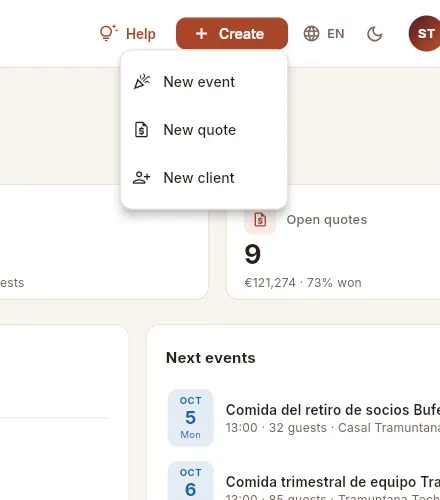 1
1
- 1Only the options the profile allows appear: here event, quote and client.
| Option | Takes you to | Who sees it |
|---|---|---|
| New event | Events (opens the event record) | anyone who can edit events |
| New quote | Quotes | anyone who can edit quotes |
| New client | Clients | anyone who can edit clients |
| New purchase order | Purchasing | anyone who manages orders |
| New dish · New menu · New ingredient | Dishes & recipes · Menus · Ingredients | anyone who edits recipes and menus |
| New staff member | Staff | anyone who edits staff |
| New item | Equipment | anyone who edits equipment |
If you cancel the form, nothing is created and you stay where you were. If your profile cannot create anything, the button does not appear.
#Language and theme
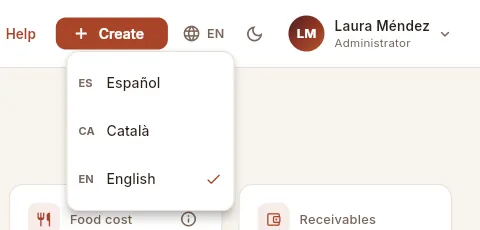 12
12
- 1The globe shows the current language (ES).
- 2Choose Spanish, Catalan or English: the whole app changes instantly.
 12
12
- 1In dark mode, the sun goes back to light mode; in light mode, the moon switches to dark.
- 2Everything adapts: dark backgrounds, light text and the same colours for the types and statuses.
The language and theme are remembered in the browser you use. In My profile (user menu) you can also choose the “System” theme, which follows the light or dark mode of your computer or phone. More details in the chapter “Signing in to Mise”.
#Lists
Almost every section starts with a list: events, quotes, clients, dishes, ingredients, orders, invoices… They all work the same way. This one is the Clients list.
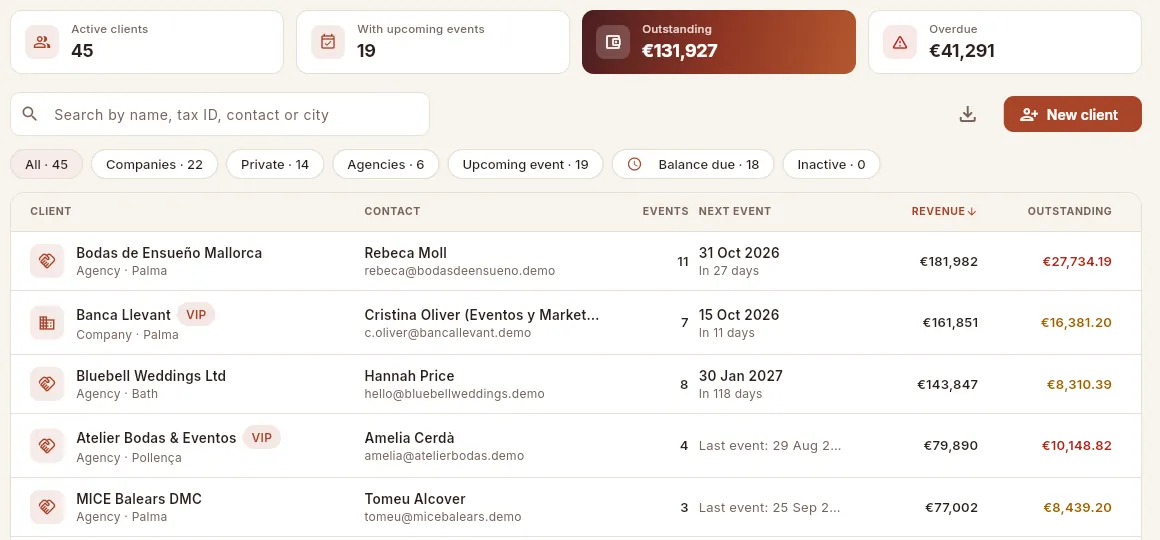 1234567
- 1The section's indicators (here, active clients, with upcoming events, outstanding and overdue).
- 2List search box: filters instantly by the main columns (name, tax ID, contact, city…).
- 3Export CSV: downloads what you see (with the filter and search applied) as a file that Excel opens.
- 4The button for adding a record in this section.
- 5Quick filters: each with its count. Only one is active at a time.
- 6Sorting: click a header to sort from lowest to highest, again from highest to lowest (arrow) and a third time to remove the sort.
- 7Each row is a record: click it to open its record.
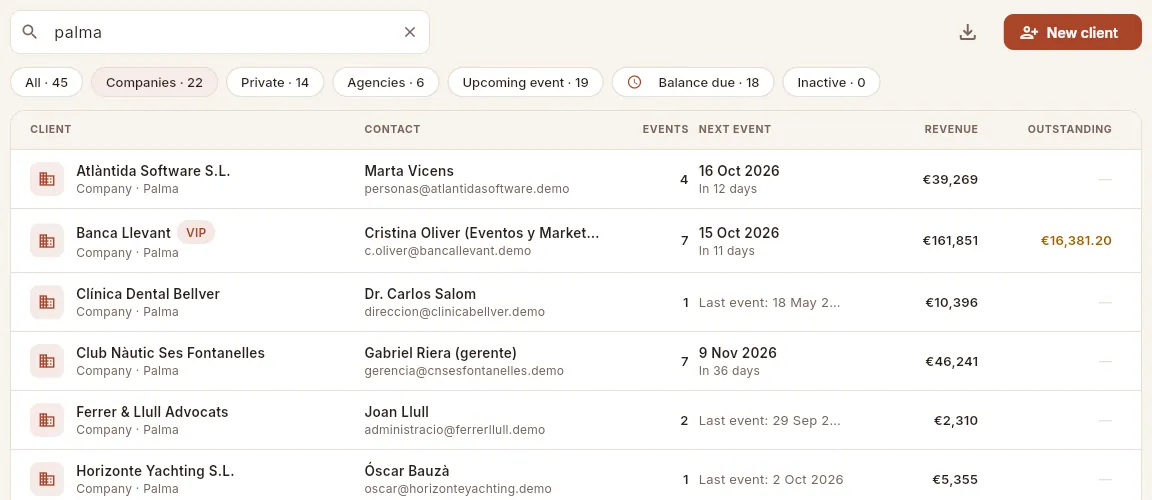 123
123
- 1What you type is searched in all the main columns; the ✕ on the right clears the search.
- 2The active filter, highlighted. The search applies within the filter; the count of each filter does not change when you search.
- 3Only the rows that meet the filter and contain the searched text remain.
Choose a quick filter (for example Balance due). The number beside each filter tells you how many records it has.
Type one or more words in the list search box: the rows that contain all of them are shown, regardless of accents or capital letters.
Click a column header to sort by it; click again to reverse the order.
If your profile allows it, click Export CSV (the download icon) to take those rows to Excel.
Click a row to open its record.
#Records
When you click an entry, its record opens in a panel that slides in from the right, without losing the list behind it. They all follow the same layout: a header with the name and the actions, and tabs with the information grouped together.
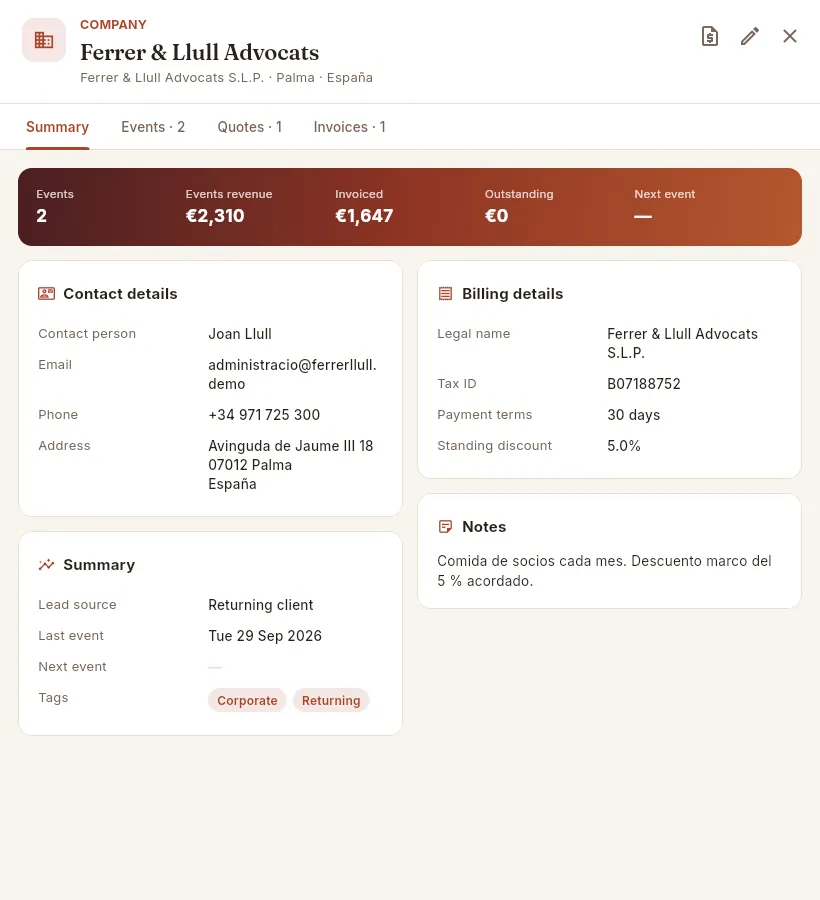 1234567
- 1The overline: the type or code of the record. Next to it, in many records, a coloured label with the status (Confirmed, Overdue…).
- 2The name and, below it, its main details.
- 3The record's actions (here, create a quote for the client and edit). Hover over an icon to see what it does.
- 4Close the record (also with Esc or by clicking outside the panel).
- 5Tabs: each groups a part of the information; many show their count.
- 6The strip with the record's key figures.
- 7Cards with the grouped details. Some have the ⓘ help next to the title or an action button.
If you change something in a record, when you close it the list behind it updates by itself. From a record you can open others (for example, an event from its client's record): they open on top and, when you close them, you return to the previous one. On a phone, records fill the whole screen.
#Forms
To create or change a record you use a form in a window. They are all filled in and saved the same way.
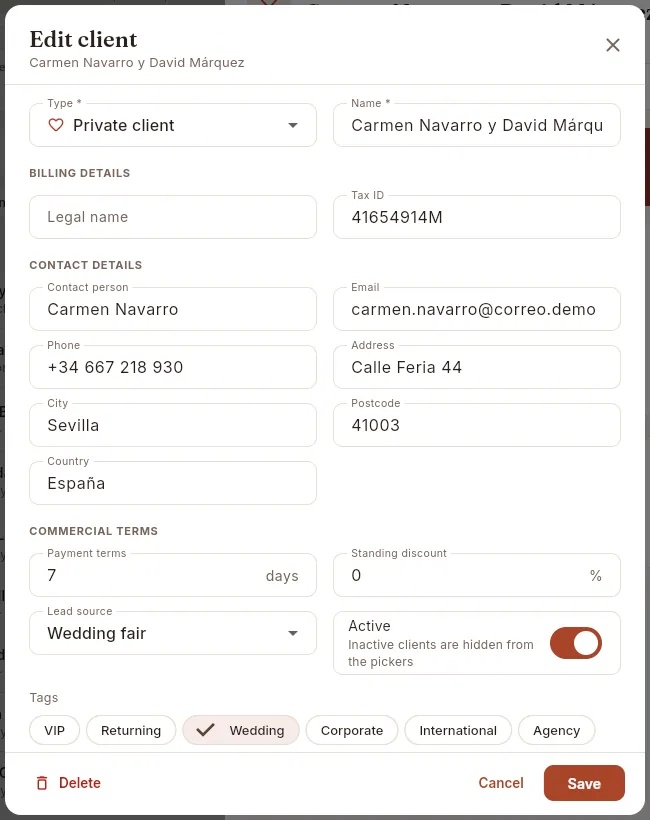 1234567
- 1The title says what you are doing (“Edit client”, “New event”…) and, when editing, which record.
- 2Fields with an asterisk are required. Those with an arrow are chosen from a list.
- 3Numbers accept a comma or a decimal point, with no thousands separators; on the right, the unit (days, %, €…).
- 4A switch for yes-or-no options, with its explanation.
- 5Tags: several can be ticked at once.
- 6Delete only appears when the record can be deleted; it always asks for confirmation.
- 7Save the changes, or Cancel to leave without saving.
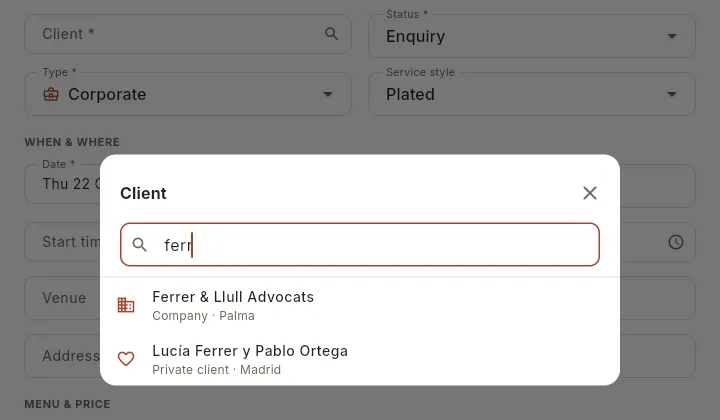 12
12
- 1Fields that point to another record (client, menu, supplier…) open a picker with a search box: type a few letters to narrow the list.
- 2Click the option to choose it; below each one, a detail that tells it apart.
Fill in at least the fields with an asterisk (*). If one is missing, when you save it is marked in red with “Required”.
Dates are chosen on a calendar and times on a 24-hour clock; lists by opening them; related records with the picker and its search box.
Click Save.
#The ⓘ help on indicators
Next to many indicators, charts and cards there is a small ⓘ. Click it and an explanation opens in three parts: what it shows, how it is calculated and how to read it. It is the quickest way to find out where a figure comes from.
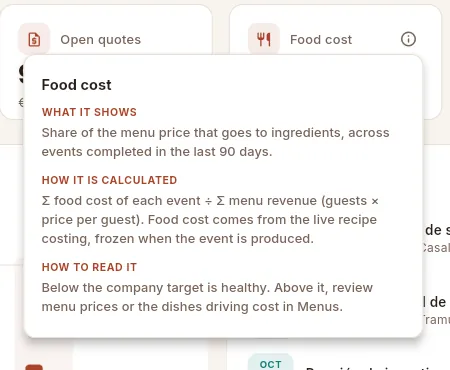 1234
1234
- 1The ⓘ next to the indicator's title.
- 2What the figure shows.
- 3How it is calculated, with its formula.
- 4How to read it: when it is a good or bad sign and what to do. Click outside or press Esc to close it.
#What your profile does not let you see
Each access profile decides which sections you see, which figures you can view and what you can create or change. What is not meant for you shows up like this:
- Sections: the ones your profile does not allow do not appear in the sidebar.
- Figures: an amount or cost you cannot see appears as a grey padlock (when you hover over it: “Hidden by your access profile”), or the whole column or indicator does not appear.
- Buttons: those for creating, editing or deleting do not appear if you do not have permission for that action.
- Forms: they do not show the fields you cannot see (for example, the price per guest).
- Export: the CSV export button only appears if your profile allows it.
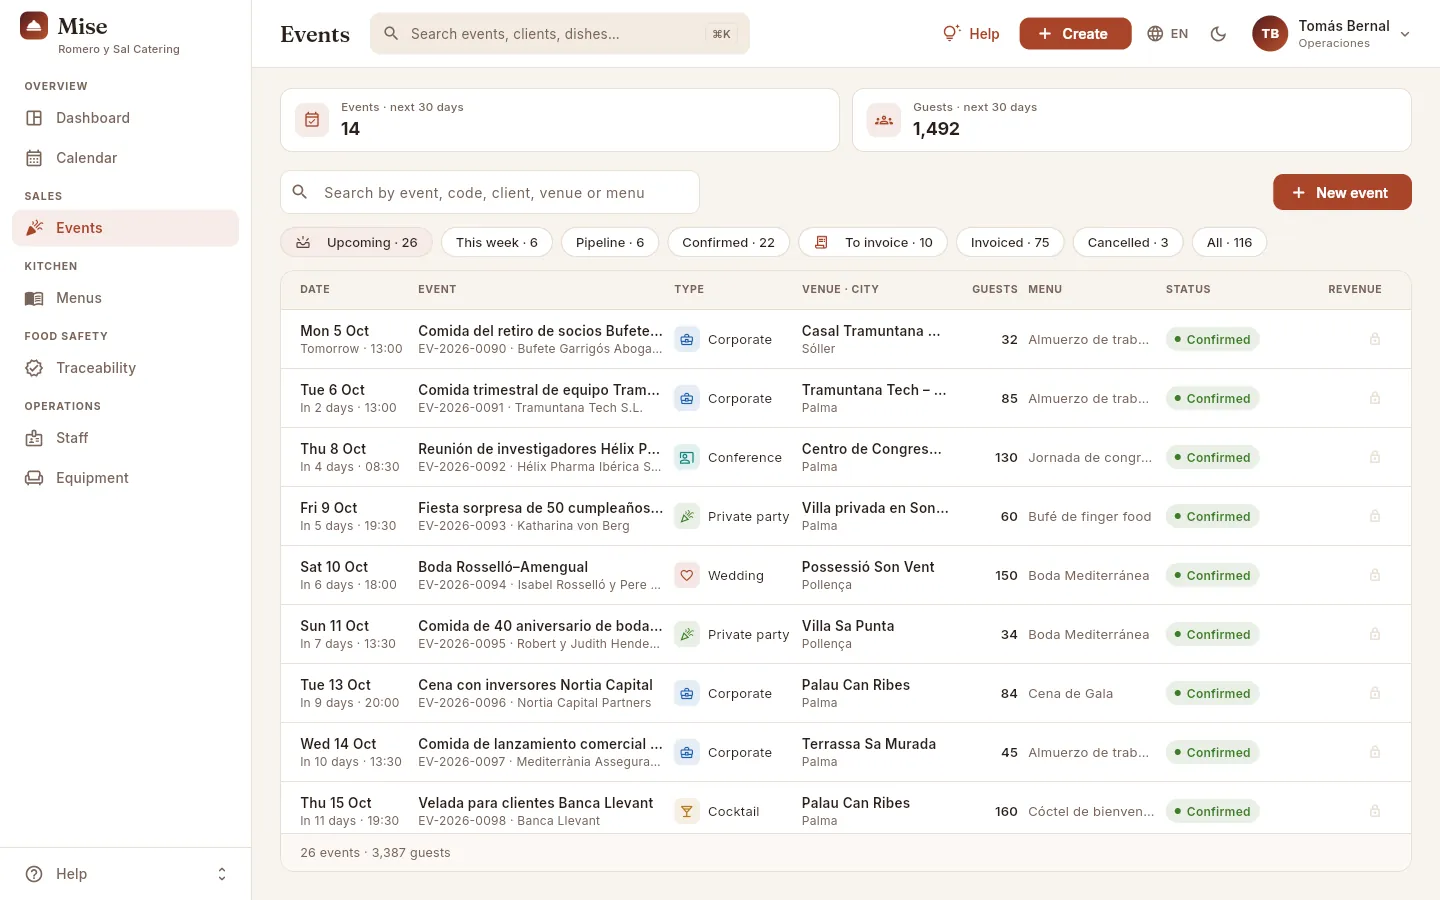 1234
1234
- 1Tomás has the Operaciones profile.
- 2His sidebar only has the sections for his work: Dashboard, Calendar, Events, Menus, Traceability, Staff and Equipment.
- 3He can create and edit events: he has that permission.
- 4But he cannot see the revenue: a padlock appears instead.
#Mise on a phone
On a phone (or a narrow window) Mise rearranges the screen: the sidebar hides in a drawer, lists turn into cards (one per record, no columns) and records and forms fill the whole screen.
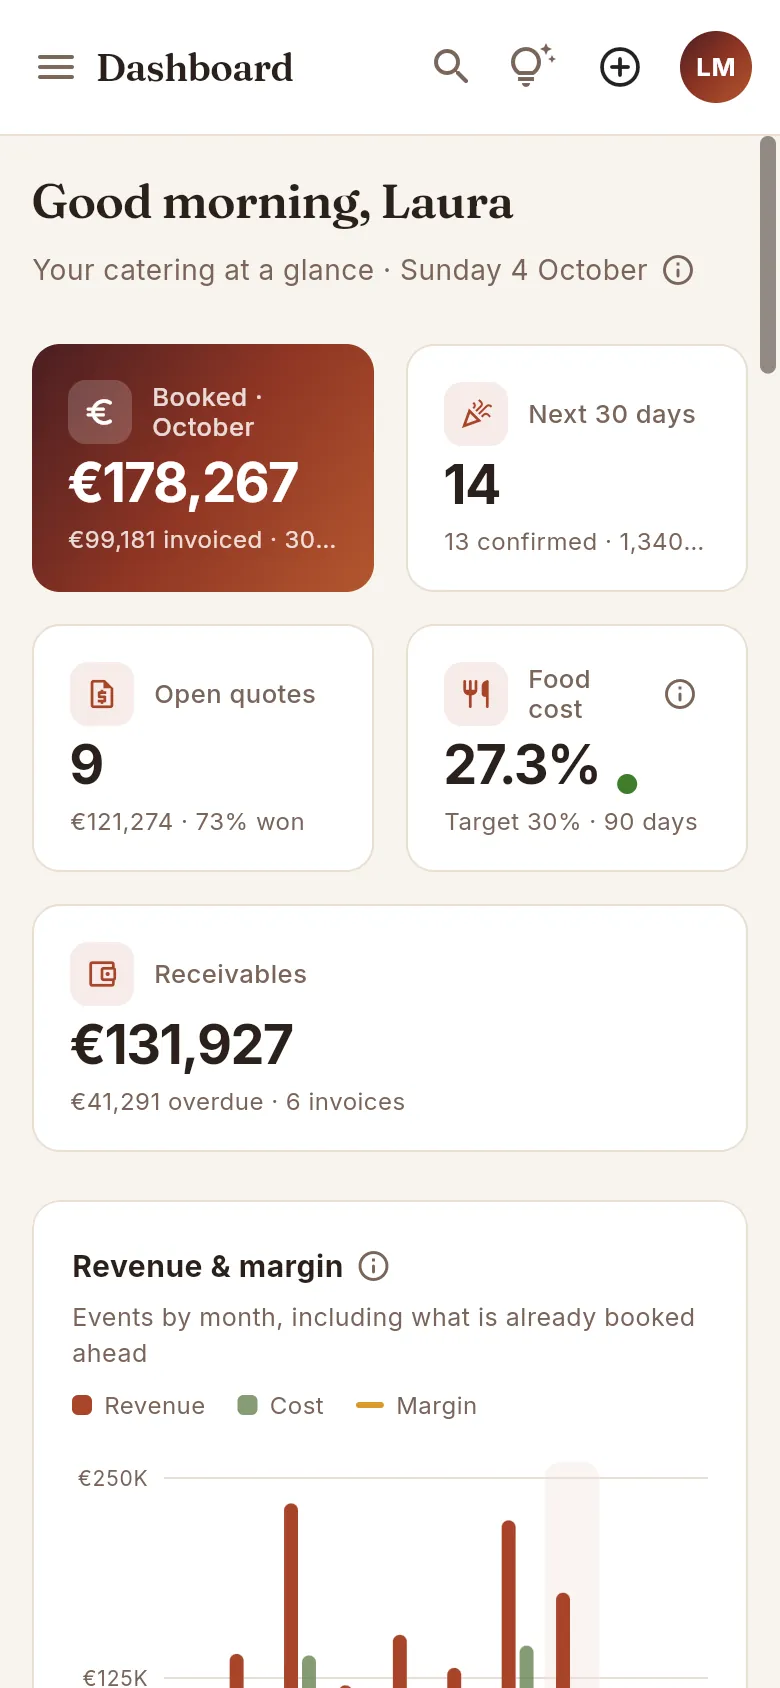 12345
12345
- 1The menu (☰) opens the drawer with the sections.
- 2The magnifying glass opens the global search.
- 3Help for the screen.
- 4Create (⊕).
- 5Your user menu: the language and theme are changed from “My profile”.
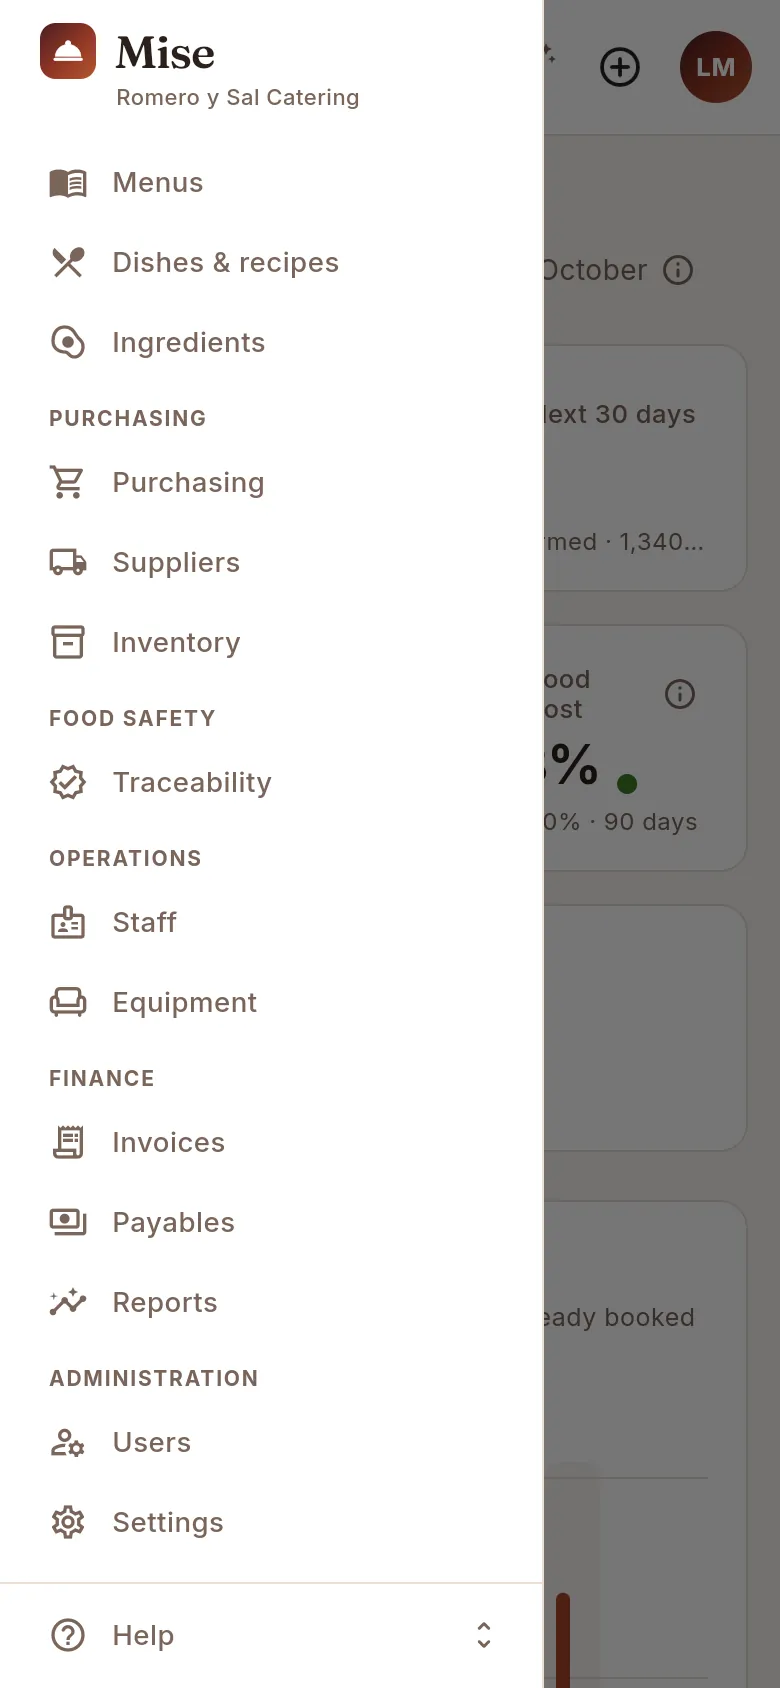 123
123
- 1The same areas and sections as on a computer; swipe to see them all.
- 2On a phone, administrators have Users and Settings here.
- 3The Help menu, at the bottom.
#Keyboard shortcuts
| Key | What it does |
|---|---|
| ⌘K (Mac) / Ctrl+K (Windows) | Opens the global search |
| F1 | Opens the help and guides for the screen you are on |
| Esc | Closes the open record, dialogue, menu or ⓘ help |
| Enter | On the sign-in screen, with the password typed, signs you in |
The ⌘K/Ctrl+K and F1 shortcuts work from the page; if you have a record or a dialogue open, close it first.
#Direct links
You can bookmark a specific section or share a link that opens Mise there, by adding to the end of the address:
| Add | To |
|---|---|
?seccion=calendario |
open that section directly (panel, eventos, presupuestos, clientes, compras, facturas…) |
?lang=ca |
open Mise in Catalan (es Spanish, en English) |
?tema=dark |
open in dark mode |
They can be combined with &: for example ?seccion=calendario&lang=ca. On the public demo, ?demo=chef signs in
directly with Marc's account (also admin, sales, finance, buyer or ops).
Overview
Dashboard
The day's summary: what has been booked, upcoming events, open quotes, food cost, what you are owed and the alerts for kitchen, purchasing, food safety and cash flow.
The Dashboard is the first screen when you sign in to Mise: a summary of what needs attention today. It brings together, live, the figures for events, quotes, invoices, orders, stock and food safety, and from each one takes you to the screen where it is dealt with. It is made up of blocks (sales, operations, kitchen and purchasing, finance) and each person sees the ones their profile allows: management sees them all; the kitchen, those for operations and kitchen; administration, those for sales and finance…
#The Dashboard at a glance
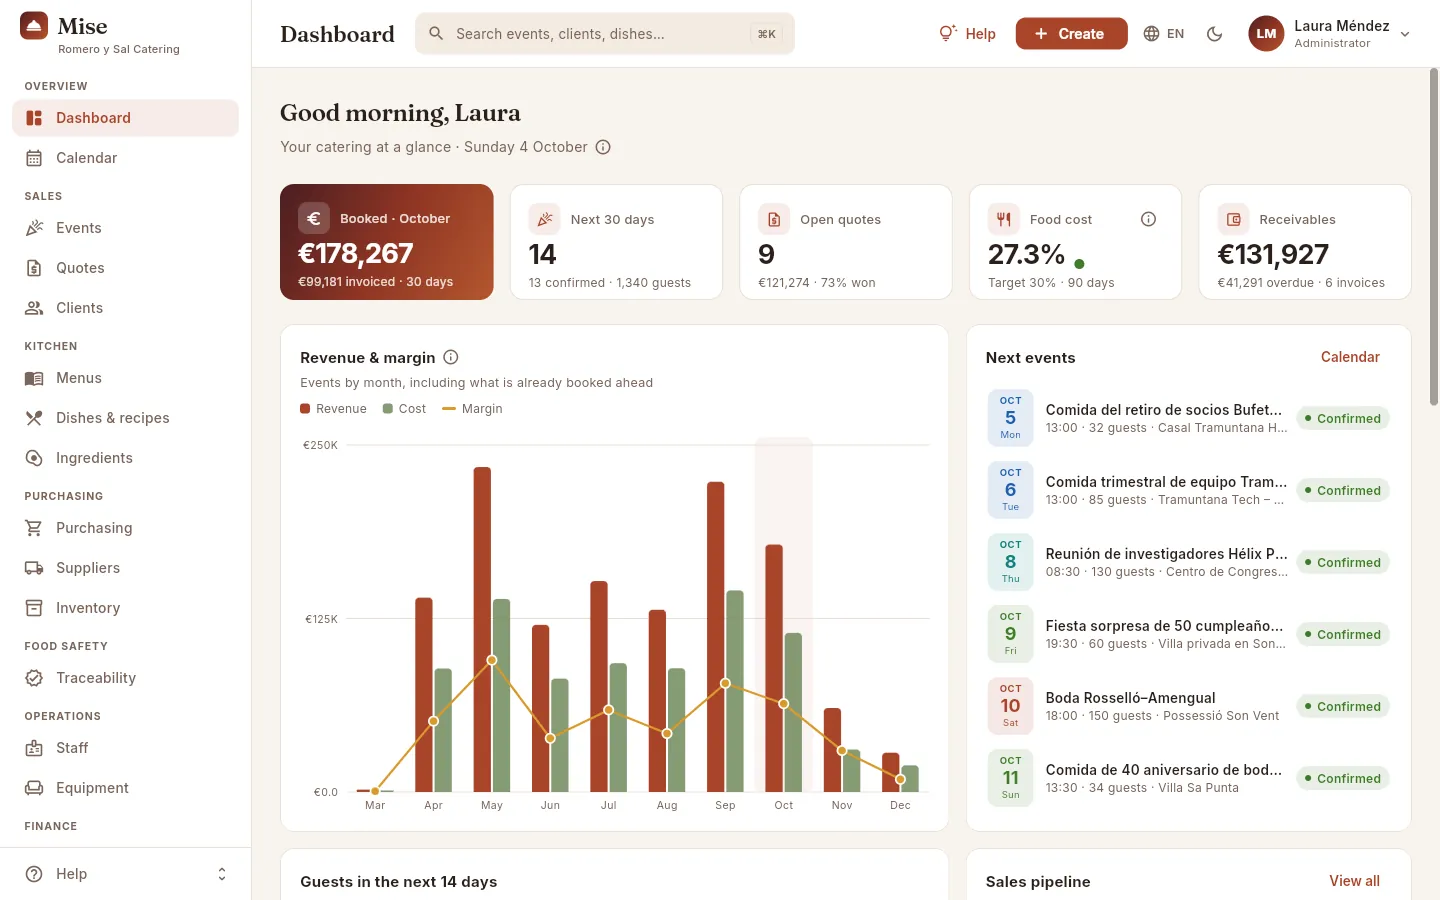 1234
1234
- 1The greeting and today's date. The ⓘ explains where the Dashboard's figures come from.
- 2The row of indicators: up to five key figures. Click one to go to its list.
- 3Revenue and margin by month.
- 4The next events.
Below, as you scroll, the other blocks follow, in this order:
| Row | Blocks | From which profile block |
|---|---|---|
| 1 | Revenue & margin · Next events | sales · operations |
| 2 | Guests in the next 14 days · Sales pipeline | operations · sales |
| 3 | Price alerts · Low stock · Deliveries due | kitchen and purchasing |
| 4 | Food safety · Use first (FEFO) | kitchen and purchasing |
| 5 | Cash flow · next 8 weeks · Overdue invoices | finance |
| 6 | Events by type | sales |
If your profile lacks one of the blocks in a row, the other takes the full width. The figures are calculated when you open the Dashboard: to see them up to date after working in another section, click Dashboard in the sidebar again.
#The indicators in the top row
 12345
12345
- 1Booked this month and, below, what was invoiced in the last 30 days.
- 2Next 30 days: events ahead; below, the confirmed ones and their guests.
- 3Open quotes (sent, awaiting a reply), their value and the percentage that is won.
- 4Food cost for the last 90 days, with a green, amber or red dot against the target.
- 5Receivables: what clients owe you; below, the overdue part and how many invoices it covers.
| Indicator | What it is | When you click it |
|---|---|---|
| Booked · |
Revenue (excl. VAT) from this month's events that are confirmed, completed or invoiced, including those not yet held. Below: what was invoiced (excl. VAT) in the last 30 days | Events, Upcoming filter |
| Next 30 days | Events from today to 30 days ahead that are enquiries, quoted or confirmed. Below: how many are confirmed and their guests | Events, Upcoming filter |
| Open quotes | Quotes sent to the client and awaiting a reply. Below: their value (excl. VAT) and the % of quotes won in the last 6 months | Quotes, Open filter |
| Food cost | What share of the menu price goes on ingredients, for events already completed in the last 90 days. Below: the company target | — (has ⓘ) |
| Receivables | What is outstanding (VAT included) on issued invoices. Below: the overdue part and the number of overdue invoices | Invoices, Overdue filter |
| Guests · 7 days | Guests at confirmed events in the next 7 days. Below: the team members assigned to them | Calendar |
| Low stock | Ingredients with stock below their minimum. Below: the confirmed events in the next 7 days that have not yet been produced | Inventory (Below minimum filter to see them) |
| Payables · 7 days | Pending supplier invoices falling due in the next 7 days (including those already overdue). Below: everything pending payment | Payables |
Five fit: on the management Dashboard the first five appear; the other three appear on profiles that lack some of those (for example, the kitchen profile sees “Guests · 7 days” and “Low stock”).
#Revenue and margin
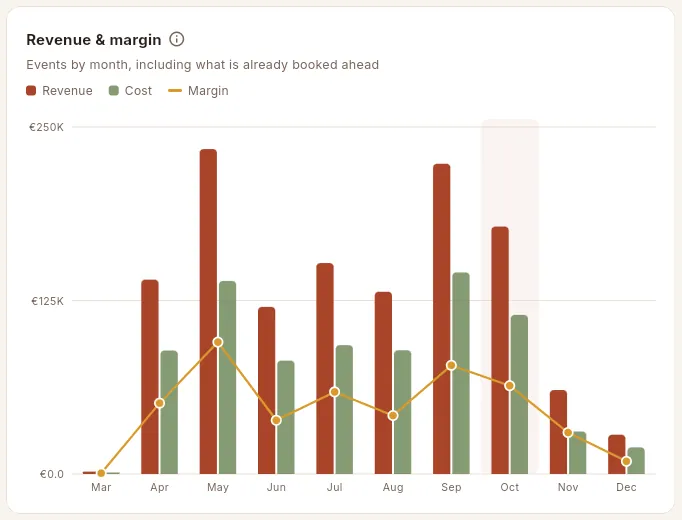 1234
1234
- 1The ⓘ explains what goes into revenue and cost.
- 2Legend: Revenue and Cost as bars, Margin as a line.
- 3The current month, highlighted.
- 4The following months: events already booked that have not yet been held.
Each bar adds up the confirmed, completed and invoiced events by the month in which they are held, from the first month with events up to two months ahead. When you hover over a month you see its detail: the number of events and the amount for each series (“booked” in future months). If your profile cannot see costs, you will only see revenue; if it cannot see amounts, the number of events per month.
#Next events
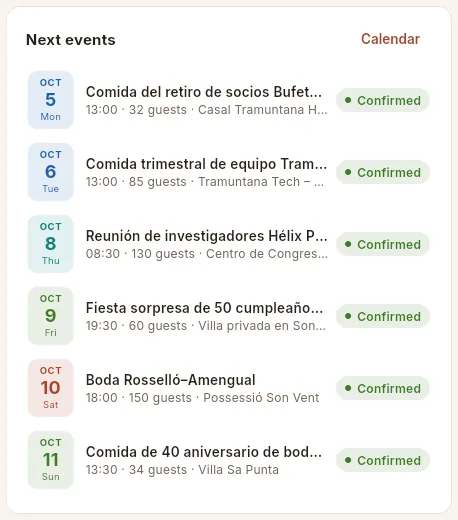 1234
1234
- 1Calendar opens the month's calendar.
- 2The date, in the colour of the event type (wedding, corporate, cocktail…).
- 3The name and, below it, the time, guests and venue.
- 4The event's status. Click the row to open its record.
The next events that are not cancelled are shown (up to eight), by date and time. Two icons warn you, next to the status, of what is worth checking:
- an amber crossed-out person (“No staff assigned”): the event is confirmed but has nobody from the team assigned yet;
- a green ✓ (“Produced”): the kitchen has already produced it.
Hover over the icon to see its meaning.
#Guests in the next 14 days and the sales pipeline
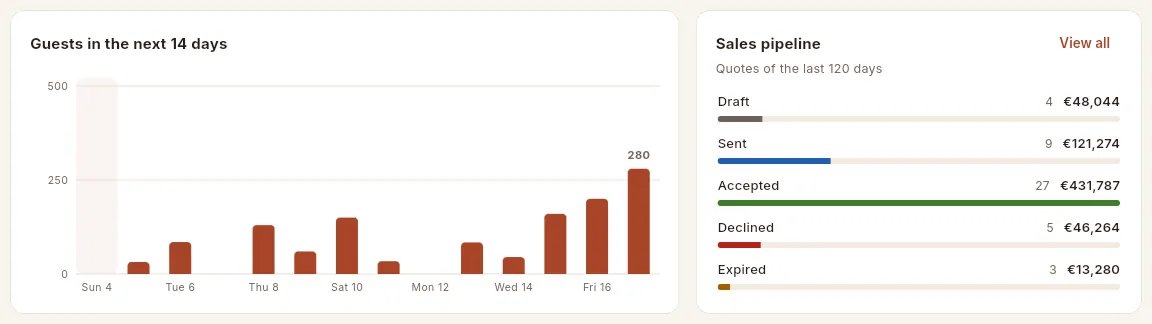 1234
1234
- 1Today, highlighted. Each bar adds up the guests at the confirmed and quoted events of that day.
- 2The busiest day, with its figure written out: the one that needs staff and equipment planned first.
- 3The sales pipeline: the quotes of the last 120 days by status, with their number and value.
- 4View all opens Quotes.
The pipeline shows how many quotes there are in each status (Draft, Sent, Accepted, Rejected, Expired) and their value excl. VAT; the longest bar is that of the status with the highest value. If your profile cannot see selling prices, the bars count quotes instead of euros.
#Price alerts, low stock and deliveries
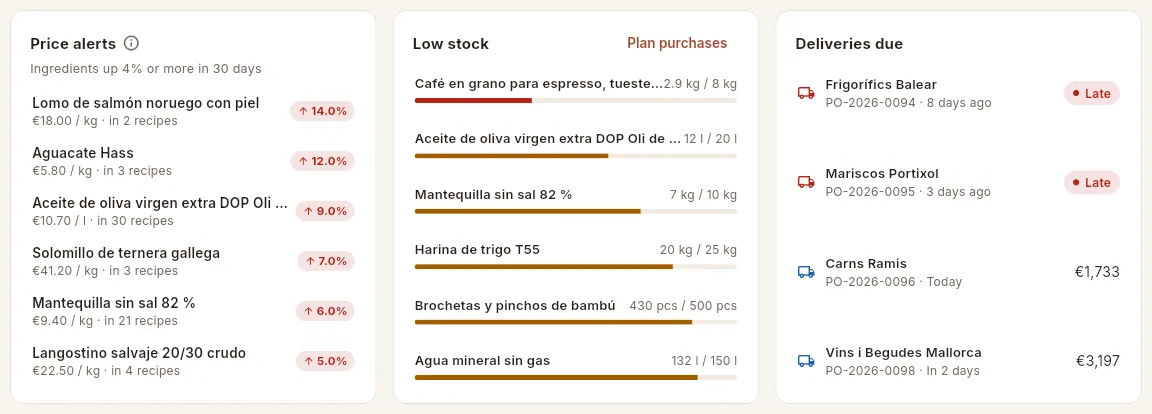 12345
12345
- 1Price alerts: ingredients whose price has risen by 4% or more in 30 days, how many recipes they are in and how much they have risen.
- 2Plan purchases opens the Purchasing planner so you can order what is missing.
- 3Low stock: stock against the minimum; the bar is red below half the minimum.
- 4Deliveries due: orders arriving in the next 3 days; “Late” if their date has already passed.
- 5The order amount (if your profile can see costs).
- Price alerts (up to 6): compares the latest purchase price with the one from 30 days ago. Click an ingredient to see its price history, which dishes are affected and to compare suppliers. The ⓘ explains it.
- Low stock (up to 7): active ingredients with stock below their minimum, from most to least urgent. Click one to open its record.
- Deliveries due (up to 6): orders that are sent or partly received whose delivery is today, in the next 3 days or already past. Click one to open the order and record the delivery.
#Food safety
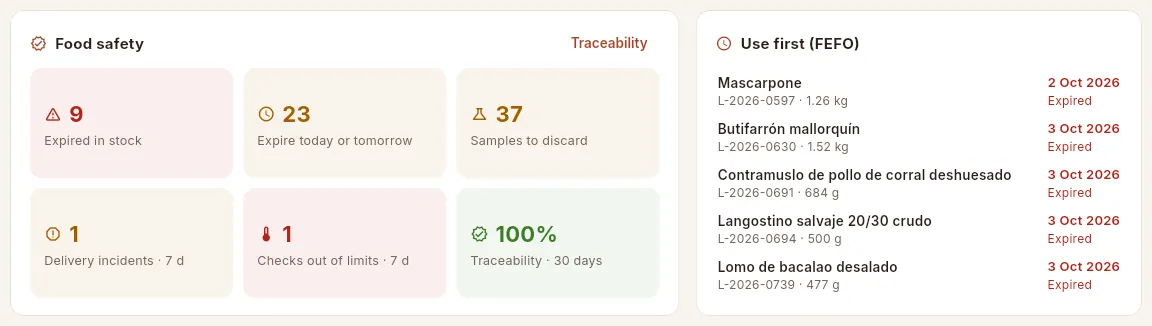 12345678
- 1Expired in stock: batches with stock whose date has passed (red if there are any).
- 2Expire today or tomorrow: batches that need using now.
- 3Samples to discard: witness samples that have already reached their retention period.
- 4Delivery incidents in the last 7 days.
- 5Checks out of limits in the last 7 days.
- 6Traceability · 30 days: what share of what was consumed is linked to a known batch.
- 7Traceability opens the section.
- 8Use first (FEFO): batches that are expired or expire today or tomorrow. Click one to open its record.
Each morning this block summarises the food safety of the storeroom and of production. Each figure is a button that takes you to its list in Traceability:
| Indicator | What it counts | Takes you to |
|---|---|---|
| Expired in stock | Batches that are not rejected, with stock, whose expiry date has passed | Expiring batches |
| Expire today or tomorrow | Batches with stock that expire today or tomorrow | Expiring batches |
| Samples to discard | Witness samples not yet discarded whose retention period has ended | Witness samples (choose the To discard filter) |
| Delivery incidents · 7 d | Deliveries from the last week that were rejected, out of temperature, with a different expiry date from the one ordered or with damaged packaging | Batches with incidents |
| Checks out of limits · 7 d | Dishes produced for events in the last week with some temperature check out of limits | Production batches (Out of limits filter) |
| Traceability · 30 days | Percentage of what was consumed in the last 30 days linked to a received batch | — |
The colour helps you prioritise: red (expired, checks out of limits) calls for action now; amber, check today; green, all in order.
#Cash flow and overdue invoices
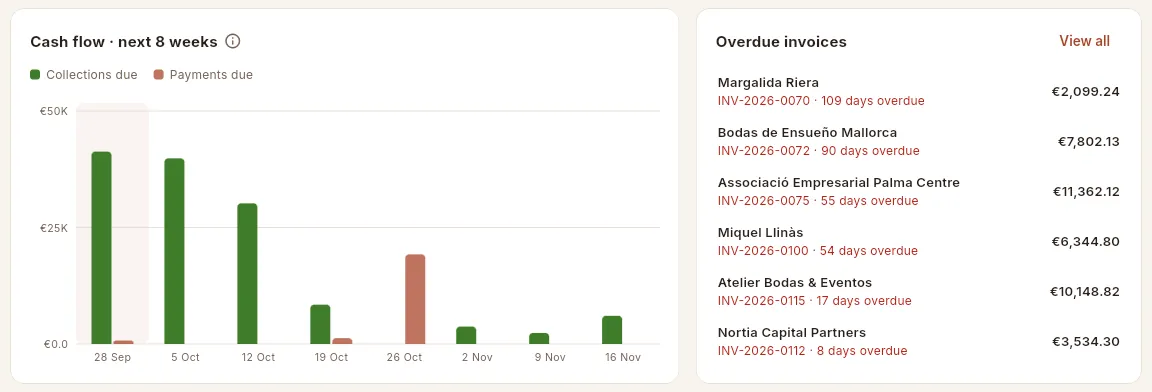 12345
12345
- 1The ⓘ explains the calculation.
- 2Collections due from clients (green) and payments due to suppliers.
- 3The current week: includes everything already overdue.
- 4View all opens Invoices with the Overdue filter.
- 5Each overdue invoice: client, number, days overdue and the amount outstanding. Click it to record the payment received.
Cash flow · next 8 weeks groups what is pending collection (issued invoices) and payment (supplier invoices), VAT included, by the week it falls due; what is already overdue counts in the current week. Weeks in which payments exceed collections may call for chasing outstanding receivables. Overdue invoices lists up to six, from the oldest to the most recent.
#Events by type
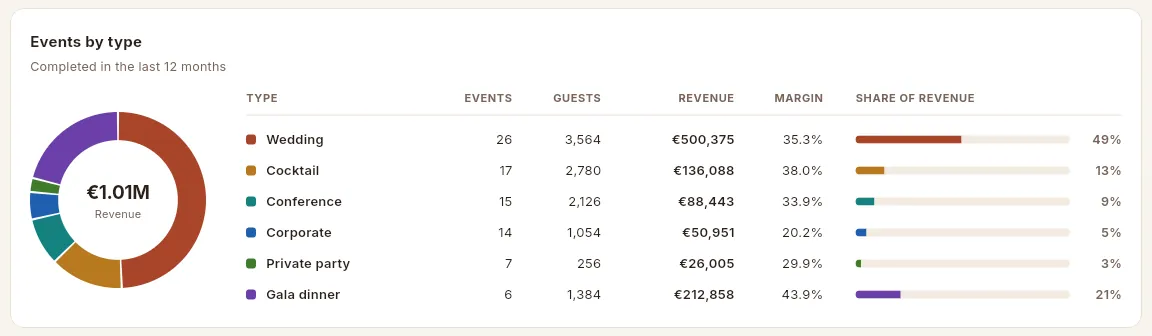 123
123
- 1The ring: how much each type weighs; in the centre, total revenue.
- 2The table: events, guests, revenue and margin for each type.
- 3Share of revenue: what part of the total each type contributes.
Counts the completed and invoiced events of the last 12 months, by type (wedding, cocktail, conference, corporate, private party, gala dinner). The margin is the percentage on the revenue of that type. Without permission to see amounts, the ring and the share are calculated by number of events; without permission to see costs, there is no margin column. On a phone only the ring is shown, with its legend.
#What to do from the Dashboard
- 1Look at the indicatorsWhat is booked, the next events, open quotes, food cost and what you are owed.
- 2Go over the next eventsThose with no staff or still to be produced.
- 3Deal with kitchen and purchasingPrice rises, low stock and today's deliveries.
- 4Check food safetyExpiry dates, witness samples and incidents.
- 5Follow the collectionsOverdue invoices and the cash flow for the coming weeks.
Scroll down to Price alerts.
Click the ingredient (for example “Lomo de salmón noruego con piel”).
In its record, check the price history, the dishes that use it and whether another supplier has it cheaper.
In the Low stock block, click Plan purchases.
Mise takes you to Purchasing › Purchase planning, with what is needed for the events and stock.
Scroll down to Food safety.
If Expired in stock or Expire today or tomorrow are not at zero, click the figure: you will see those batches in Traceability.
Click Samples to discard: in Traceability › Witness samples, the To discard filter shows those that have already reached their retention period.
If there are incidents or checks out of limits, click them to see which delivery or which dish it was.
Click the Receivables indicator or View all under Overdue invoices.
Open the invoice and record the payment when it arrives (Invoices chapter).
#What each profile sees
The Dashboard changes according to the access profile: each block is a permission, and within each block the money figures follow the selling prices and costs permissions.
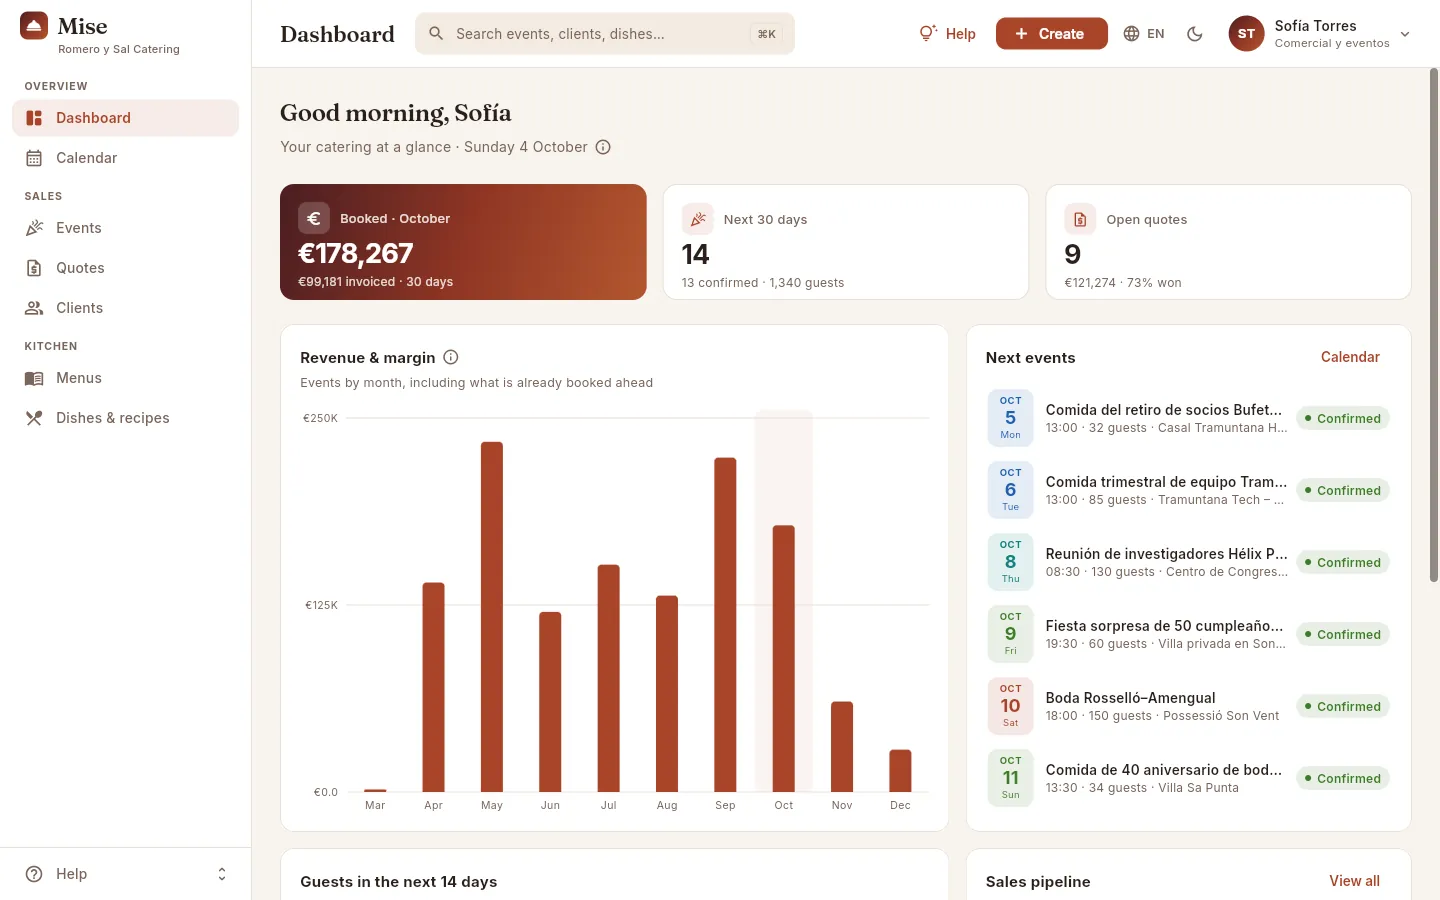 12
12
- 1Three indicators: booked, next 30 days and open quotes. No food cost (she cannot see costs).
- 2Only the revenue series: no cost or margin.
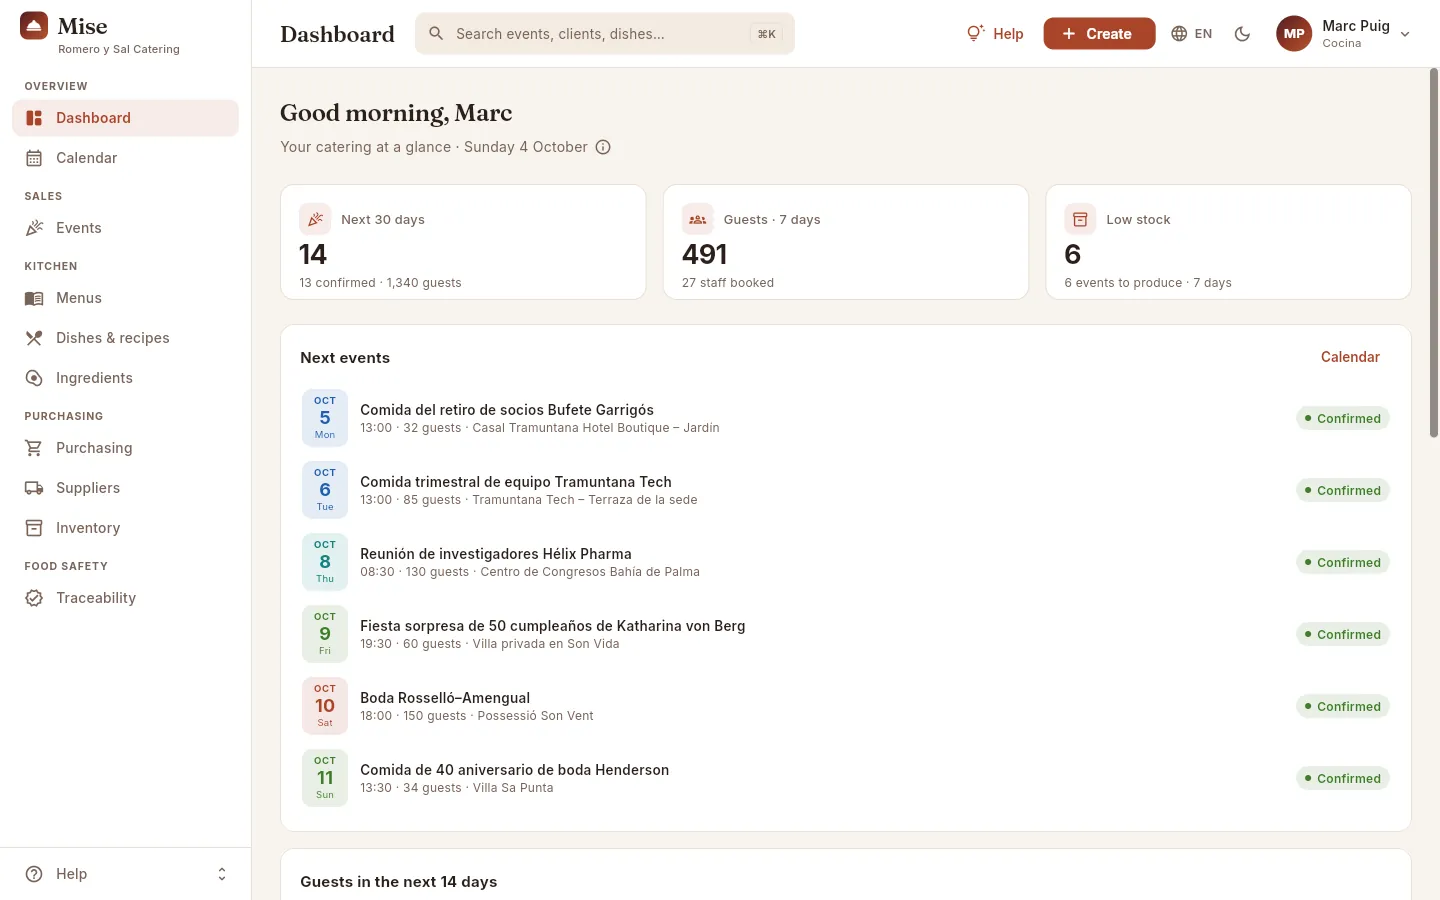 12
12
- 1Operations and kitchen indicators: next 30 days, guests in 7 days and low stock.
- 2Without the sales block, the next events take the full width; further down, the kitchen and food safety blocks.
| Profile (demo person) | Indicators | Blocks |
|---|---|---|
| Management (Laura) | Booked, Next 30 days, Open quotes, Food cost, Receivables | All |
| Sales (Sofía) | Booked, Next 30 days, Open quotes | Revenue (no cost or margin), Next events, Guests 14 days, Pipeline, Events by type (no margin) |
| Kitchen (Marc) | Next 30 days, Guests · 7 days, Low stock | Next events, Guests 14 days, Price alerts, Low stock, Deliveries, Food safety, Use first |
| Administration (David) | Booked, Open quotes, Food cost, Receivables, Payables · 7 days | Revenue & margin, Pipeline, Cash flow, Overdue invoices, Events by type |
| Purchasing (Núria) | Low stock | Price alerts, Low stock, Deliveries, Food safety, Use first |
| Operations (Tomás) | Next 30 days, Guests · 7 days | Next events, Guests 14 days |
Overview
Calendar
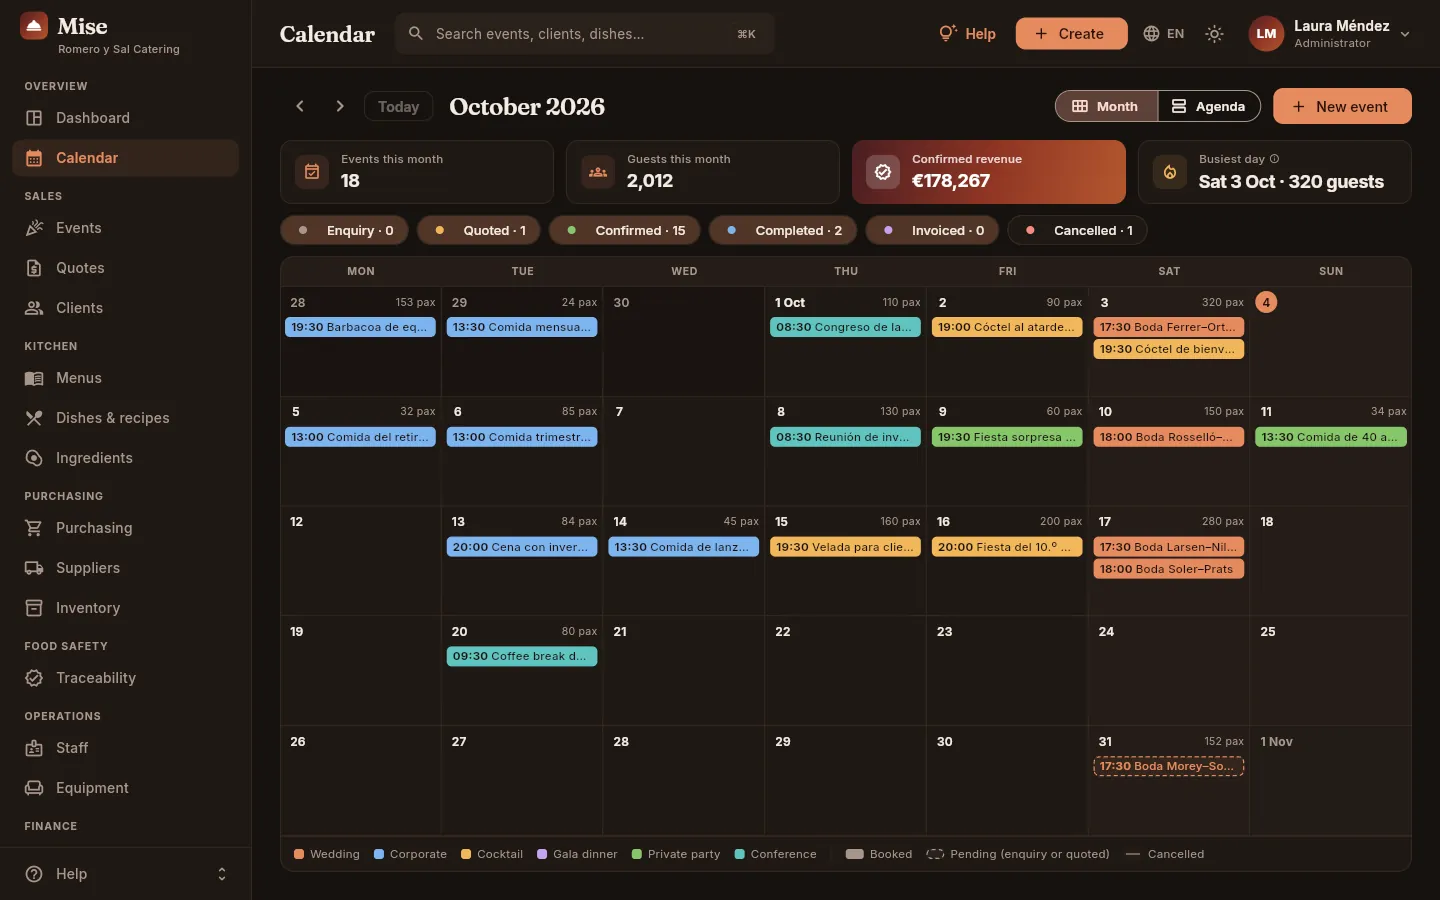
All the month's events in a calendar, with the colour of their type and their status, so you can see at a glance how busy each day is and create an event on a date.
The Calendar shows all the month's events, from Monday to Sunday, coloured by type (wedding, corporate, cocktail, gala dinner, private party, conference) and drawn according to their status (booked, pending or cancelled). It lets you see at a glance which days are busy —and plan staff and equipment in time—, find a gap for a new event and create it by clicking its day. It has two views: Month (the grid, the default on a computer) and Agenda (the list, the default on a phone).
#The month view
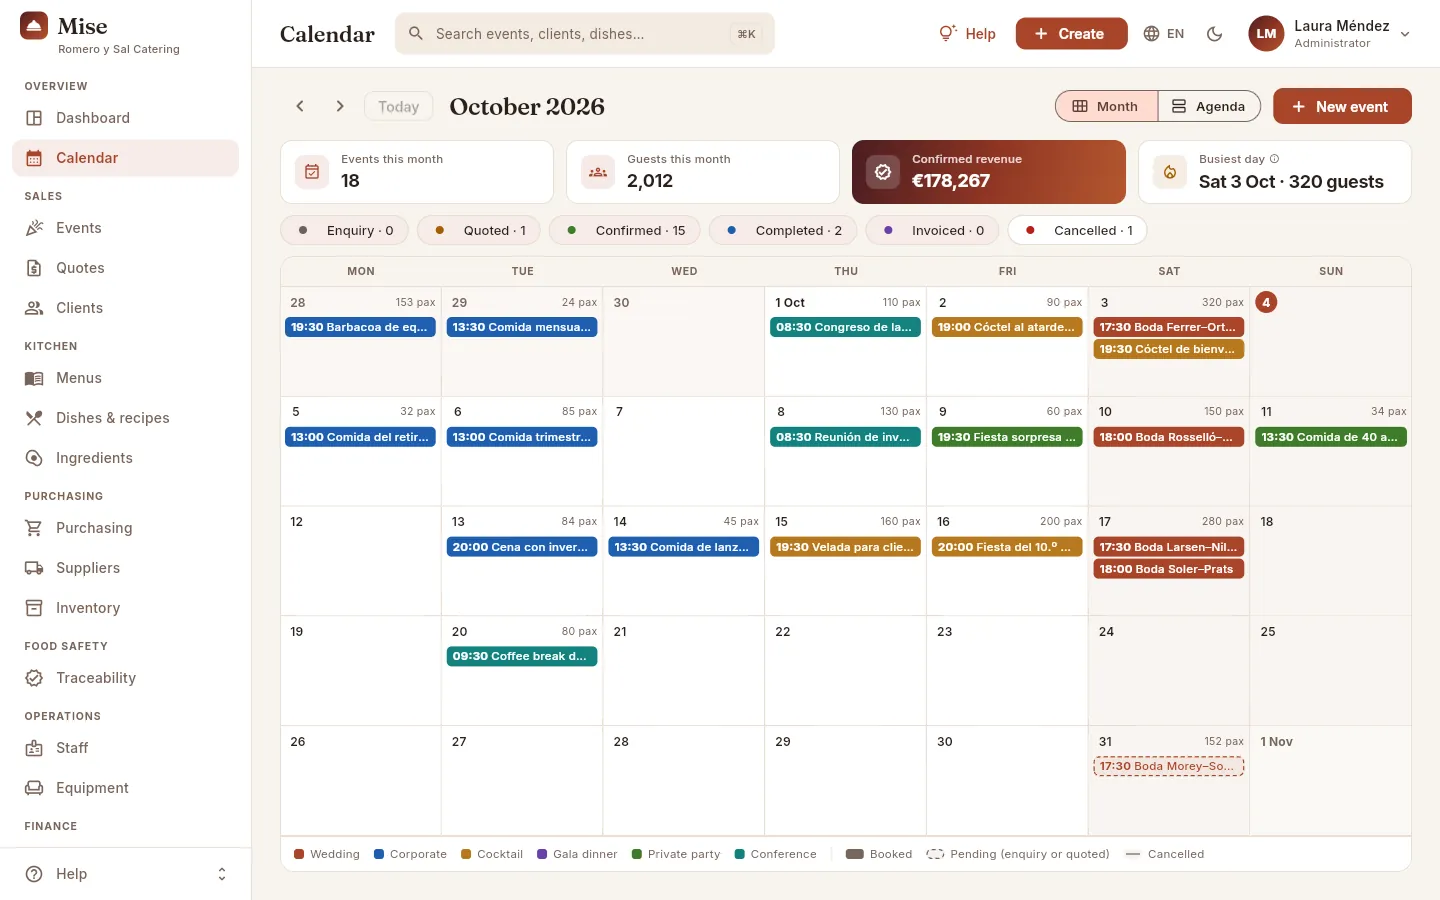 12345678
- 1The arrows go to the previous month or the next; Today returns to the current month.
- 2The month you are viewing.
- 3Switches between the Month view and the Agenda view.
- 4New event opens the form for adding an event.
- 5The month's indicators: events, guests, confirmed revenue and the busiest day.
- 6The status filters, with how many events there are of each in the month. Click one to show or hide those events.
- 7The month grid, Monday to Sunday. Click an event to open its record, or a day to see its list.
- 8The legend: the colour of each event type and how each status is drawn.
#The month's indicators
 1234
1234
- 1Events this month: those that are not cancelled.
- 2Guests this month: the sum of their guests.
- 3Confirmed revenue: the revenue (excl. VAT) from the month's booked events.
- 4Busiest day: the day with the most guests. Click it to see its events; the ⓘ explains it.
#How to read the grid
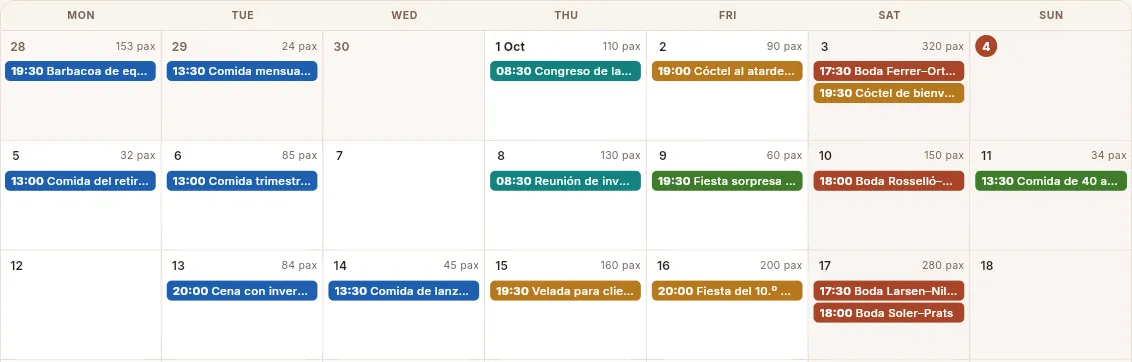 1234567
- 1The days of the week, Monday to Sunday.
- 2Days from the previous or next month that complete the week appear dimmed.
- 3Day 1 carries the month (“1 Oct”). At the top right, the day's guests (pax).
- 4Each event: its time and its name, in the colour of its type. Colour fill = booked. Hover to see the client, the times, the guests and the status; click it to open its record.
- 5Today, with the number in a circle.
- 6The weekend, with a slightly darker background.
- 7An empty day: click it to create an event on that date.
Each event is drawn according to its status:
| How it looks | Status | What it means |
|---|---|---|
| Filled with the type's colour | Booked: confirmed, completed or invoiced | It will be held (or has already been held) |
| Dashed border, light background | Pending: enquiry or quoted | Not yet confirmed: the date is not secured |
| Grey and struck through | Cancelled | It will not be held (hidden unless you switch on its filter) |
Each day has room for up to three events; if there are more, “+N more” appears: click it to see them all. On a narrow screen, instead of the name each event is a dot in the colour of its type (filled, hollow or grey depending on the status).
#The events of a day
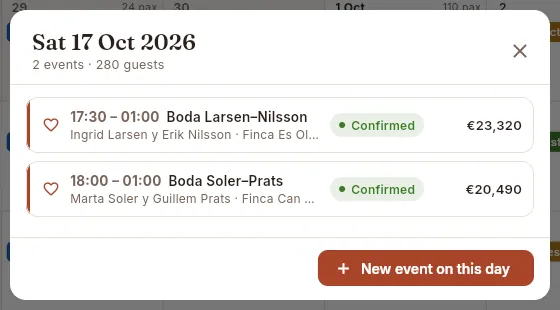 12345
12345
- 1The date and the day's summary: how many events and how many guests.
- 2Each event with its times, its name, the client, the venue and the guests. Click it to open its record.
- 3Its status.
- 4Its revenue (excl. VAT), if your profile can see selling prices.
- 5New event on this day creates an event with this date.
In the month view, click the day, outside the events (for example, on its number or the free space), or “+N more”.
The day's list opens. Click an event to open its record, or New event on this day to create another.
Close it with the ✕ or the Esc key.
#Filtering by status
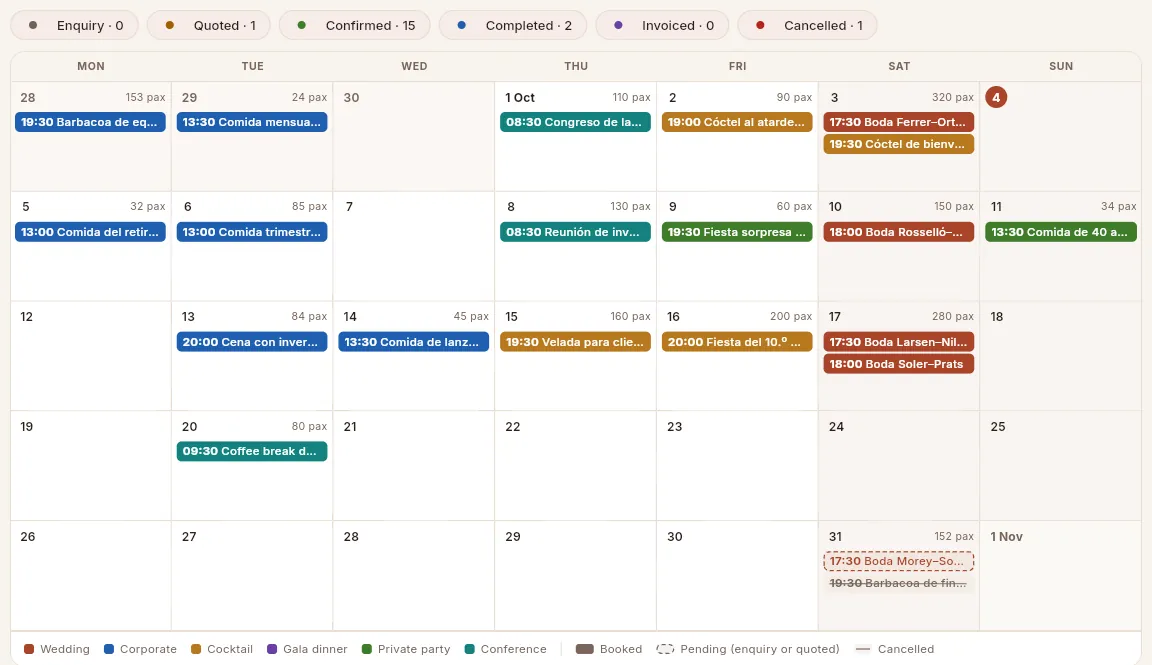 1234
1234
- 1Cancelled events are hidden when you open the page; click their filter and they appear.
- 2An active filter (highlighted) shows its events; click it again to hide them. The number is the month's count.
- 3A pending event (here, quoted): dashed border.
- 4A cancelled event: grey and struck through.
Click Confirmed, Completed and Invoiced to hide the booked events.
What remains in view are the enquiries and the quoted events: the dates that are not yet secured.
Click the filters again to show all the events once more.
#The agenda view
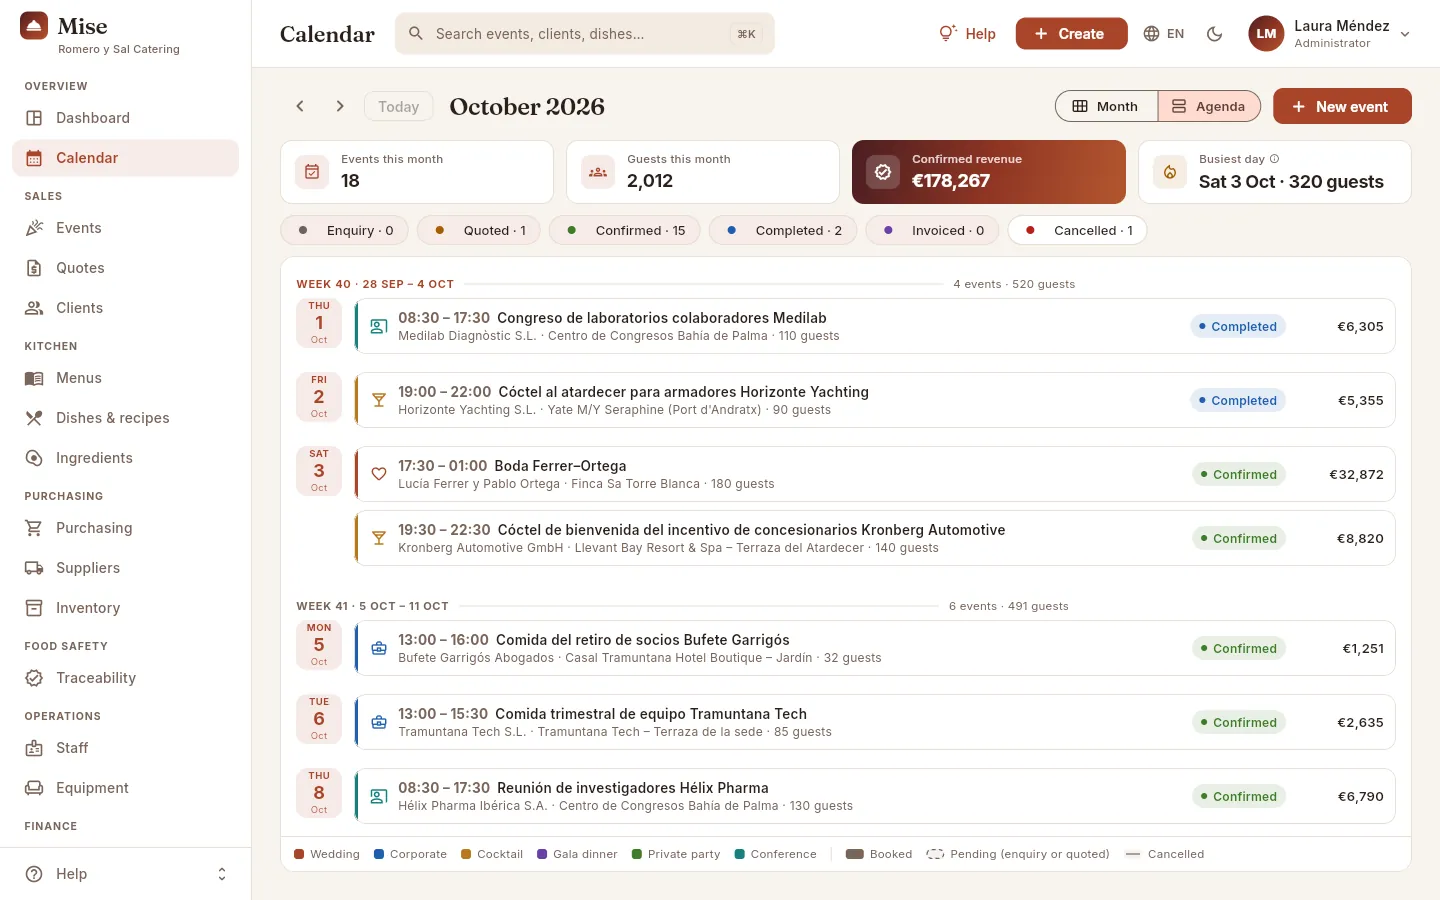 1234
1234
- 1The Agenda view, active.
- 2Each week (with its number): the current week, in colour. On the right, its events and guests.
- 3The day: only days with events appear.
- 4Each event: icon and stripe in the colour of its type, times, name, client, venue, guests, status and revenue. Click it to open its record.
The agenda shows only the month you are viewing and respects the status filters. If a month has no events (or you have
hidden them all with the filters) you will see “No events ·
#Creating an event from the calendar
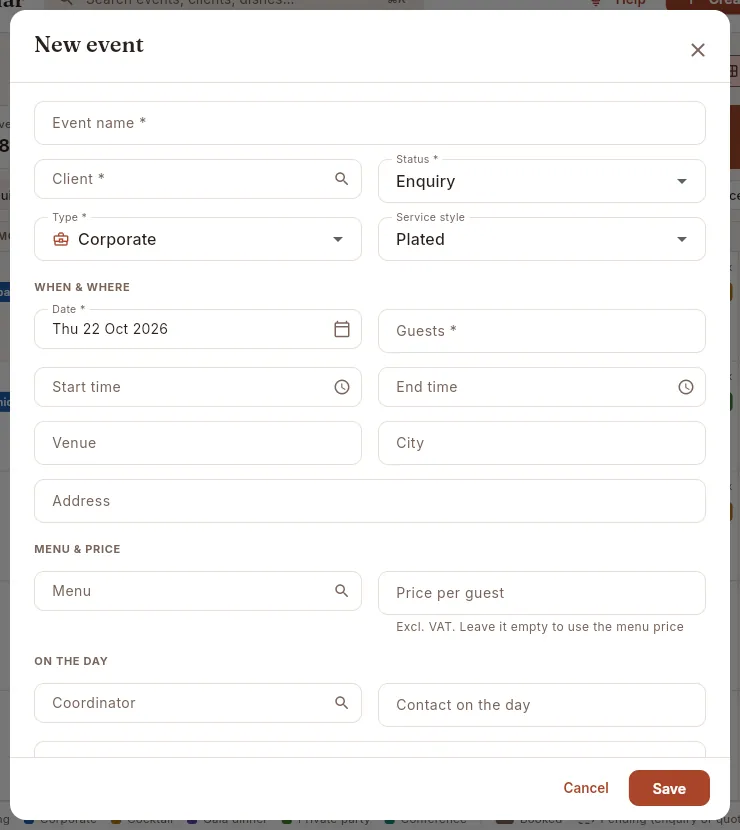 1234567
- 1The event's name, one the whole team will recognise (for example “Boda de Laura y Marc”).
- 2The client: chosen from the list, with a search box.
- 3The status (it starts as an enquiry), the type and the service style.
- 4The date, already filled in with the day you clicked.
- 5The guests, the times and the venue.
- 6The menu and the price per guest (if you leave it empty, the menu's price is used).
- 7Save creates the event and opens its record so you can carry on with the menu, staff and set-up.
Find the day in the month view and click its empty space (when you hover, “New event on …”). If the day already has events, click it and then New event on this day. You can also use the New event button at the top and type the date.
Fill in at least the name, the client, the status, the type, the date and the guests.
If you already know them, add the times, the venue, the menu, the coordinator, the contact for the day and the dietary requirements (allergies and intolerances).
Click Save.
#The calendar on a phone
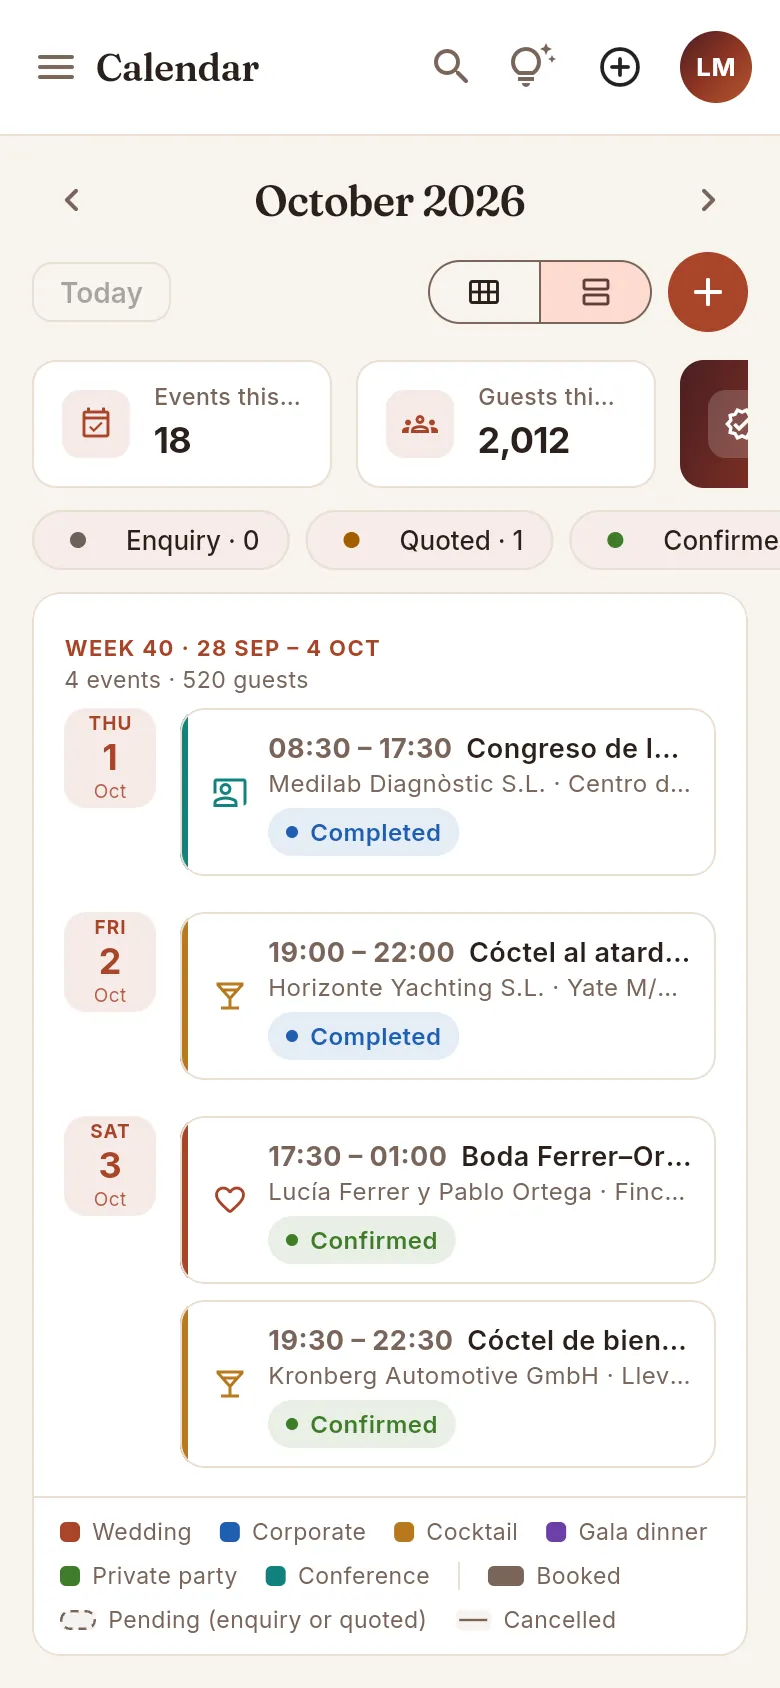 12345
12345
- 1The arrows and, between them, the month.
- 2Today returns to the current month.
- 3Month or agenda (icons only).
- 4New event.
- 5The month's indicators: swipe to see the others.
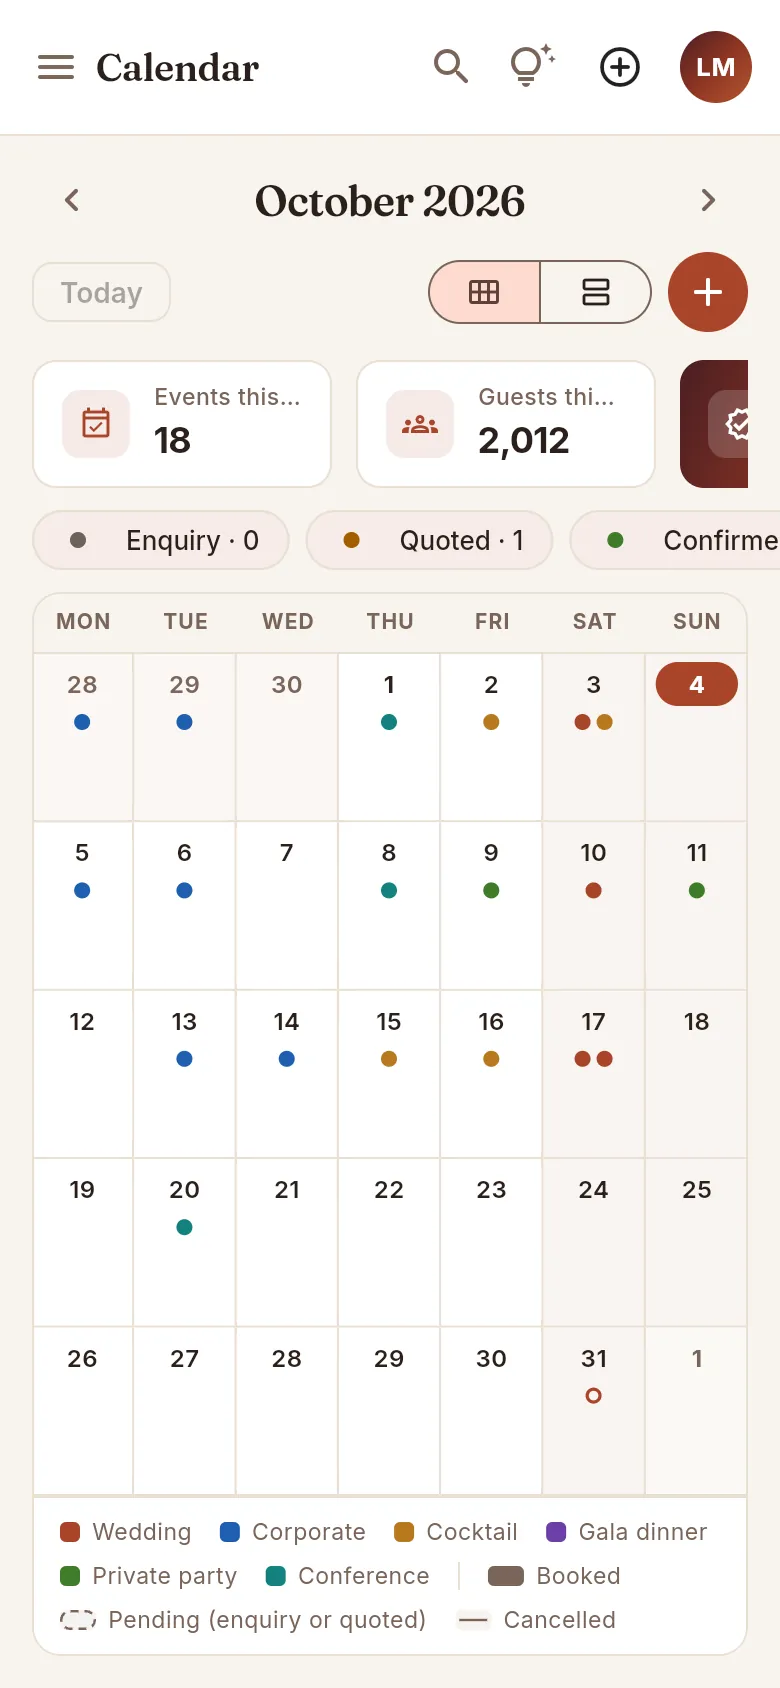 1
1
- 1Each event is a dot in the colour of its type: filled if booked, hollow if pending. Click a day to see its list.
#What each profile sees
 1
1
- 1At the top right only the view selector remains: without permission to edit events, New event does not appear (and events cannot be created by clicking a day).
 1
1
- 1Without the selling prices permission, Confirmed revenue disappears (and each event's revenue in the lists).
Overview
Connect to Claude
Work with Mise from a chat with Claude, Anthropic's artificial intelligence assistant: ask it about events, costs, purchasing or traceability and, if your profile allows it, ask it to make changes. Always with your own permissions and with keys you can revoke.
Claude is Anthropic's artificial intelligence assistant. Mise comes with a connector for Claude: a secure link that lets Claude work with your Mise data from a chat, in claude.ai (in the browser), in the desktop and mobile apps and in Claude Code. Instead of searching screen by screen, you ask in your own words:
- "What events do we have this week, and what is still missing for each one?"
- "Which dishes are over the food cost target, and why?"
- "Which events and clients did the eggs lot that expires tomorrow go to?"
- "Make a quote for Banca Llevant: Cena de Gala menu for 120 guests on 12 December, with a DJ."
- "Receive the Peix Fresc Palma order: the salmon arrived at 1.5 °C, lot 4471, best before Friday."
Claude enters Mise as you: it sees what you see in the app and can only change what you can change.
#What you can ask it
- Look things up: search for anything (like the Mise search box), open the record of an event, quote, client, dish, menu, ingredient, order, supplier, invoice, staff member, equipment item or lot with everything attached to it, pull any list with filters and totals, the Dashboard, the reports, an event's production sheet, what needs buying, who or what is free on a date and the traceability of a lot (which events, diners and clients it reached) or of an event (which lots and suppliers it came from).
- Make changes, if your profile allows it: create, change or delete clients, suppliers, staff, equipment, ingredients, recipes and their costing, menus, quotes, events, orders and invoices; accept or duplicate a quote, invoice an event (deposit or final), generate the purchase orders, receive an order with its lots, use-by dates and temperatures, produce an event, adjust stock, record goods in without an order, quarantine or withdraw a lot and discard witness samples.
Claude fills in the same things as the app: document numbers, quote validity, the client's discount, the menu's price and cost, VAT, the supplier's price list or due dates. A quote, an order, an invoice, a recipe or a menu is created with all its lines at once, and if anything fails nothing is created. You can name things the way you know them ("the Ferrer–Ortega wedding", "the Peix Fresc order") or by their code (EV-…, Q-…, PO-…, INV-…, L-…).
Mise also comes with three ready-made prompts that Claude offers alongside the connector: Resumen del día, Preparar un evento and Revisar el food cost.
#Why it is safe
- Claude enters as you, never with more permissions. The connector has no permissions of its own: every request from Claude carries your identity and the Mise database applies your access profiles to it exactly as in the app: sections, sensitive data (prices, costs, rates, contact details) and actions. What your profile cannot see, Claude cannot see either.
- With a personal key you can revoke. Claude identifies itself with an access key of yours. Mise does not store the key, only a fingerprint to recognise it, so it is shown only once. It is revoked with a button and access is cut on the next request; it is also cut if it expires, if an administrator disables your user or if your profile loses the permission.
- Everything is logged. Every time Claude looks something up or changes something, it goes into the activity: what it did, on what and whether it could be done. You see it in your panel and the administrator in Users. What Claude changes can also be seen in each record, as if you had done it.
- Sensitive matters are not handled from a chat. Users, profiles, permissions and keys cannot be managed from Claude: that is done only in the app.
- Claude asks first. Before deleting, issuing an invoice or producing an event (and before creating or changing anything you did not ask for), Claude asks you to confirm. The invoices it creates stay as drafts unless you ask it to issue them.
- Without the "Export CSV" permission, Claude gets at most 50 rows per query (500 with it).
- Your password is not stored in Claude. When connecting, you type your user and password on a Mise page, not in Claude; Claude only receives a key that you can revoke.
#Where it is in Mise
Everything about the connector is in your user menu, at the top right: Connect to Claude. Everyone has it, whatever their profile.
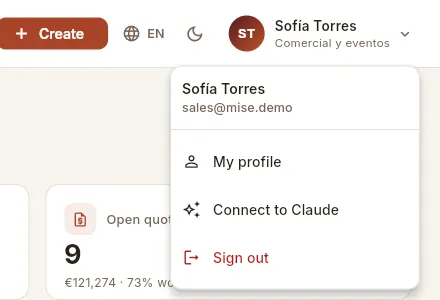 12
12
- 1Click your name to open the menu.
- 2Connect to Claude opens the connector panel.
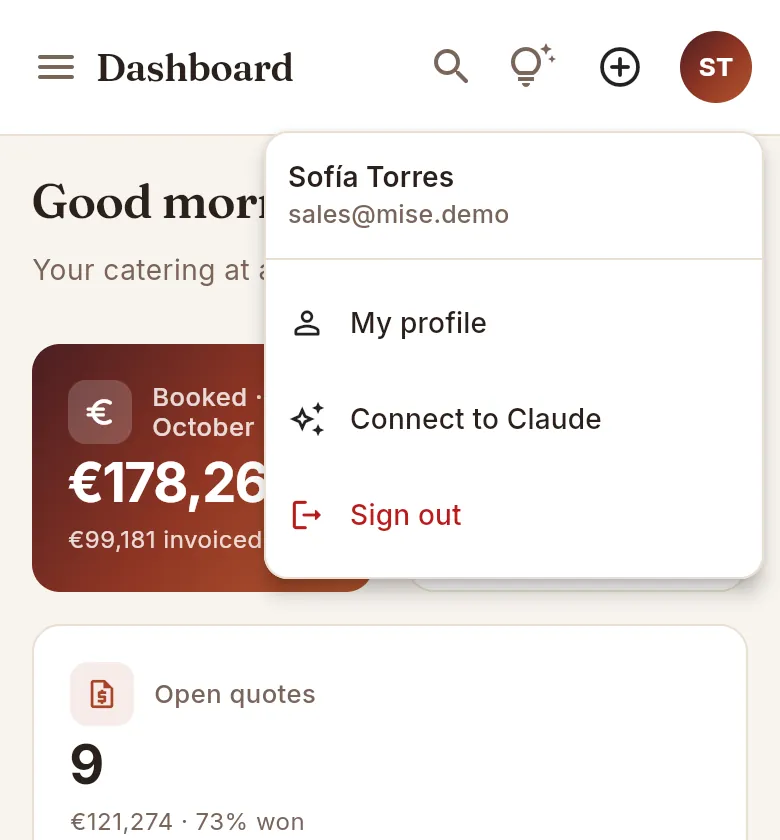 1
1
- 1On a phone too, from your initials at the top right.
A panel opens with four parts: what Claude can do for you, how to connect it, your access keys and the recent activity.
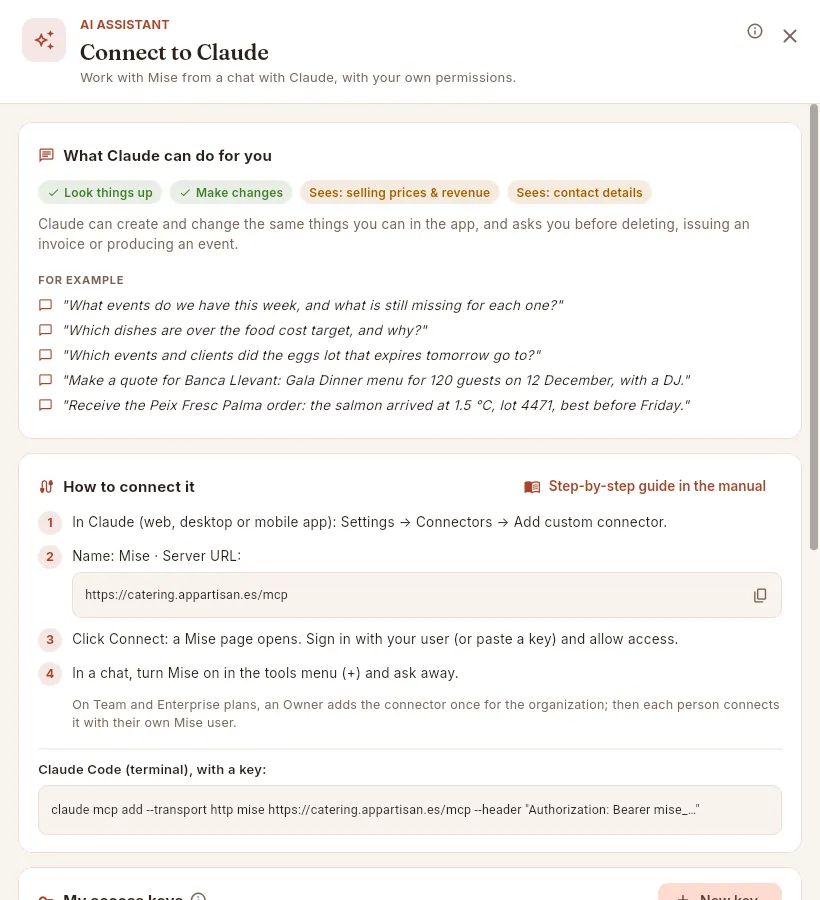 1234567
- 1The ⓘ explains how the connector works and why it is safe.
- 2What your profile lets you do from Claude: Look things up and, if it has it, Make changes (otherwise it shows in grey, with a no-entry sign).
- 3The sensitive data you can see, and so can Claude. Sofía sees selling prices and contact details, but not costs.
- 4Examples of what you can ask. The ones that make changes only appear if your profile can make them.
- 5Opens this chapter of the manual.
- 6The steps to connect it and the connector address, with the copy button: this is what you paste into Claude.
- 7For Claude Code, the command to add it with a key.
#What Claude can do depending on your profile
Two switches of your access profile decide it, in the Assistant (Claude) group: Use from Claude (without it, none of your keys work) and Make changes from Claude (without it, Claude only looks things up, even if you can edit in the app). On top of that, Claude can only touch what the other actions of your profile allow. This is how the profiles come set up:
| Profile | Look things up | Make changes | What you can ask Claude |
|---|---|---|---|
| Administrator (Laura Méndez) | Yes | Yes | Everything she does in the app, except managing users, profiles and keys. |
| Comercial y eventos (Sofía Torres) | Yes | Yes | Clients; quotes (create them with their menu and extras, send them, accept them so the event is created, duplicate them); events (new, extras, run sheet, staff and equipment) and calendar. Sees selling prices, not costs or margins. |
| Cocina (Marc Puig) | Yes | Yes | Recipes and costings, menus, ingredients and their prices, stock, orders and receiving them with lots, traceability, production sheet and producing events. Sees costs and food cost; no reports or invoicing. |
| Compras (Núria Vidal) | Yes | Yes | Orders (planner, generating them, receiving them with lots and temperatures), suppliers and price lists, inventory and adjustments, lots (quarantine, withdraw). |
| Administración (David Ortega) | Yes | Yes | Invoices (issuing an event's deposit or final invoice), collections, payments and supplier invoices; clients and suppliers; reports and profitability. |
| Operaciones (Tomás Bernal) | Yes | Yes | Staff and rotas, equipment and bookings, run sheets and availability; no amounts or costs. |
| Sin datos económicos (add-on) | Yes | Yes | Does not restrict the assistant: it only removes the financial data, in Claude too. |
If a profile should only look things up from Claude, an administrator turns off Make changes from Claude for it (see Profiles and permissions): Claude will still answer, but it will not be able to create or change anything, and your panel will say so.
#Connecting Claude: on the web, desktop and mobile
Claude's custom connectors are available on all its plans: Free (with a single connector), Pro, Max, Team and Enterprise. Connect it once in claude.ai or in the desktop app: whatever you connect also appears in Claude's other apps with the same account, including the mobile one.
In Mise, open your user menu → Connect to Claude and copy the connector address with the copy button. On the public demo it is https://misecatering.app/mcp.
In Claude, go to Settings → Connectors and click Add custom connector.
Type the name Mise and paste the address into Server URL. Leave the advanced settings blank: Mise introduces itself. Click Add.
Click Connect next to Mise. The Connect Claude to Mise page opens (below).
On the With my user tab, type the email and password you use to sign in to Mise (a "Claude" key valid for 90 days is created). Or, on With a key, paste a key you created in Mise.
Click Allow access. You are taken back to Claude with Mise connected.
In a conversation, open the + tools menu (Search and tools) and turn on Mise. Ask whatever you need: the first time Claude uses each Mise tool it will ask for your permission, and you can always allow it.
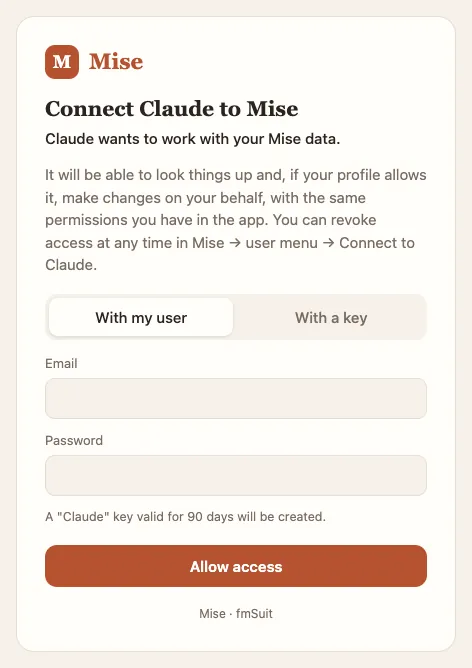 1234
1234
- 1What Claude will be able to do and where to revoke access.
- 2With my user: your Mise email and password, the same as in the app.
- 3Mise creates a "Claude" key valid for 90 days.
- 4Allow access takes you back to Claude with the connector connected.
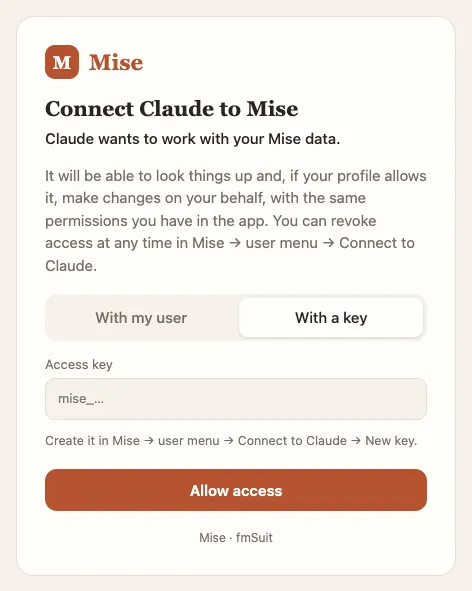 12
12
- 1With a key: if you would rather not type your password here.
- 2Paste the access key you created in Mise (it starts with "mise_").
#Claude Code
Claude Code (Claude in the terminal, for people who write code) connects with a key created in Mise. When you create the key, Mise gives you the command ready to use; it is this one, with your key at the end:
claude mcp add --transport http mise https://misecatering.app/mcp --header "Authorization: Bearer mise_…"
You can also add it without the key (without --header) and, inside Claude Code, type /mcp → Mise → Authenticate:
the same Mise page opens in the browser. Any other program compatible with Claude connectors (the MCP standard) connects
the same way, with the connector address and a key.
#Your access keys
An access key is what Claude uses to enter Mise as you. There are two ways to get one:
- When you connect Claude with your user and password (With my user tab), Mise creates a 90-day "Claude" key. You do not have to do anything else.
- By creating it yourself in Mise, to paste it on the With a key tab or for Claude Code.
Open your user menu → Connect to Claude and scroll down to My access keys.
Click New key.
Type a name that tells you where you will use it ("Claude on my laptop", "Claude Code"…) and choose when it expires: In 30 days, In 90 days, In a year or Never.
Click Create key.
Mise shows you the key only once, with a button to copy it and the Claude Code command ready to use. Copy it and click Done.
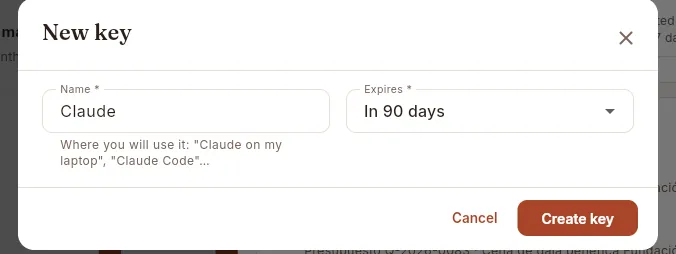 123
123
- 1Name: where you will use it, so you can recognise it later in the list.
- 2Expires: in 30 days, in 90 days (Mise's suggestion), in a year or never.
- 3Create key creates it and shows it to you only once (it has not been clicked in the screenshot).
Further down the panel are your keys and what Claude has done with them:
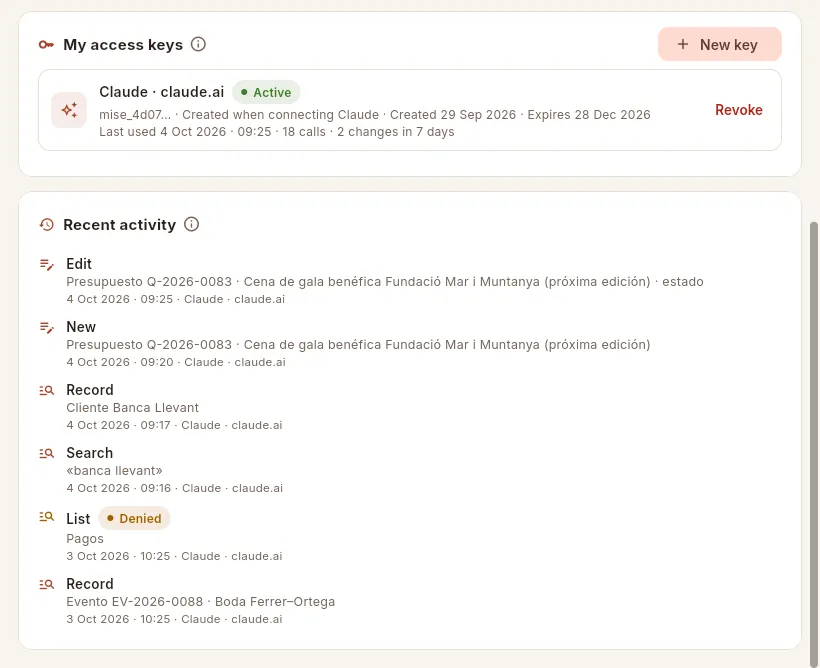 123456
- 1New key creates a key to paste into Claude or for Claude Code.
- 2Each key, with its name and status: Active, Expired or Revoked.
- 3The start of the key (mise_…), how it was created, when it expires, when it was last used, how many calls it has made and how many changes in the last 7 days.
- 4Revoke cuts that key's access on Claude's next request.
- 5The activity: each call from Claude, the most recent at the top. Here, a change to a quote, with when and with which key.
- 6Denied: Claude asked for something the profile does not allow (here, supplier payments) and Mise did not give it.
Each line of the activity is a call from Claude: a query (magnifying glass) or a change (pencil), with what it looked up or changed and when. If it could not be done, it is labelled Denied (your profile does not allow it) or Error. Revoked and expired keys are hidden; Show revoked and expired shows them, with who revoked each one and when.
Open your user menu → Connect to Claude and scroll down to My access keys.
Click Revoke on the key you want to cut off.
Confirm. It cannot be undone: to connect again, you will need a new key.
#Disconnecting Claude
To stop using Mise from Claude, do it on both sides:
- In Claude: Settings → Connectors → Mise → Disconnect, or remove the connector.
- In Mise: revoke the key it used (in Connect to Claude → My access keys).
If you only want Claude not to use Mise in one conversation, turn Mise off in that conversation's + tools menu.
#If something does not work
- Claude says the key is not valid or that it cannot connect. The key has been revoked or has expired: check it under My access keys (it will show as Revoked or Expired). In Claude, disconnect Mise and connect it again with your user, or paste a new key.
- On the Mise page, the email or password is not accepted. They are the same ones you use to sign in to the app. If your user is disabled, you will not be able to connect: talk to an administrator.
- The panel says "Your profile does not allow using Mise from Claude". Your profile does not have Use from Claude: ask an administrator to turn it on. Until then, none of your keys work.
- Claude looks things up but does not make changes. Your profile does not have Make changes from Claude, or it does not have the permission for that action in the app (for example, "Edit quotes").
- Claude says it cannot see a piece of data (a cost, a price, a phone number). Your profile cannot see it, and neither can Claude: that is expected.
- Claude does not use Mise when I ask. Turn Mise on in the conversation's + tools menu and, when Claude asks for permission to use a Mise tool, allow it.
- I cannot add it on Claude's Free plan. That plan allows a single custom connector: remove the one you have or move to another plan.
- On the public demo, what Claude did has disappeared. The demo data goes back to its initial state every day at 12:00. Your keys, however, are kept: you do not need to connect again.
Sales
Events
The heart of Mise: each event brings together its client, menu, guests, staff, set-up, run sheet, costs, kitchen production, traceability and invoices. You prepare it tab by tab and follow it through until it is paid.
An event is each service the catering company carries out: a wedding, a company dinner, a cocktail party, a conference… It starts as an enquiry from the client (or when a quote is accepted) and accompanies all the work through to the final invoice: which menu is served and for how many guests, who works that day, what equipment goes out, the minute-by-minute timing, what is charged on top, what it costs, what the kitchen has produced and with which lots, and what has already been invoiced and collected.
This section has two parts: the event list, with indicators and filters to find any event, and each event's file, which opens on the right and is organised in tabs: Summary, Menu & production, Staff, Set-up, Run sheet, Extras & costs, Traceability and Documents.
#The event list
When you enter Events you see the upcoming events, ordered by date and time. At the top, four indicators; below them, the search box, the filters and the table.
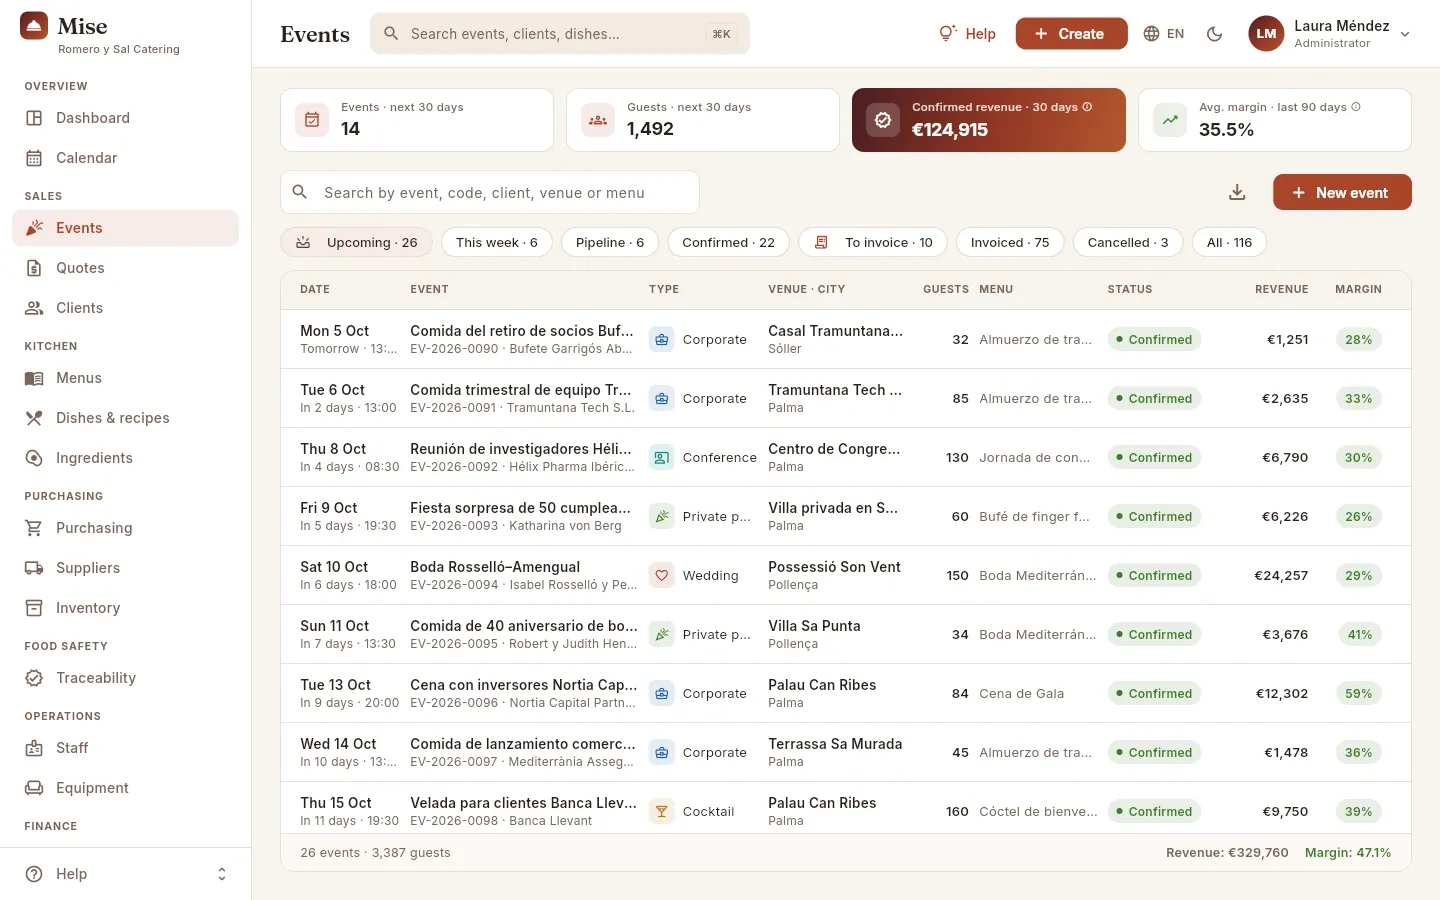 12345678
- 1How many events and how many guests there are in the next 30 days (not counting cancelled ones). It shows the month's workload at a glance.
- 2Confirmed revenue · 30 days: the total, excluding VAT, of the confirmed events in the next 30 days. This is work that is already secured; enquiries and quotes do not count.
- 3Avg. margin · last 90 days of events already completed or invoiced, in green, amber or red. The ⓘ on each indicator explains what it shows, how it is calculated and how to read it.
- 4The search box finds events by name, code, client, venue, city, menu or coordinator. Accents and capital letters do not matter; with several words, it finds the events that contain all of them.
- 5The filters, with how many events are in each. Only one is active at a time; when you enter, it is “Upcoming”.
- 6Export CSV downloads what you see (with the filter and search applied) so you can open it in a spreadsheet.
- 7New event opens the creation form.
- 8Each row is an event: date (with “Tomorrow”, “In 2 days”…), name with its code and client, type, venue, guests, menu, status, revenue and margin. Click a row to open its file; click a header to sort by that column.
The filters:
| Filter | What it shows |
|---|---|
| Upcoming | Events from today onwards that are not cancelled. This is the usual view. |
| This week | Those of this week, Monday to Sunday (including days that have already passed). |
| Pipeline | Enquiries and quoted events: whatever is not yet closed with the client. |
| Confirmed | Confirmed events, of any date. |
| To invoice | Completed events: already held and awaiting the final invoice. The most recent ones first. |
| Invoiced · Cancelled · All | The history, also with the most recent first. |
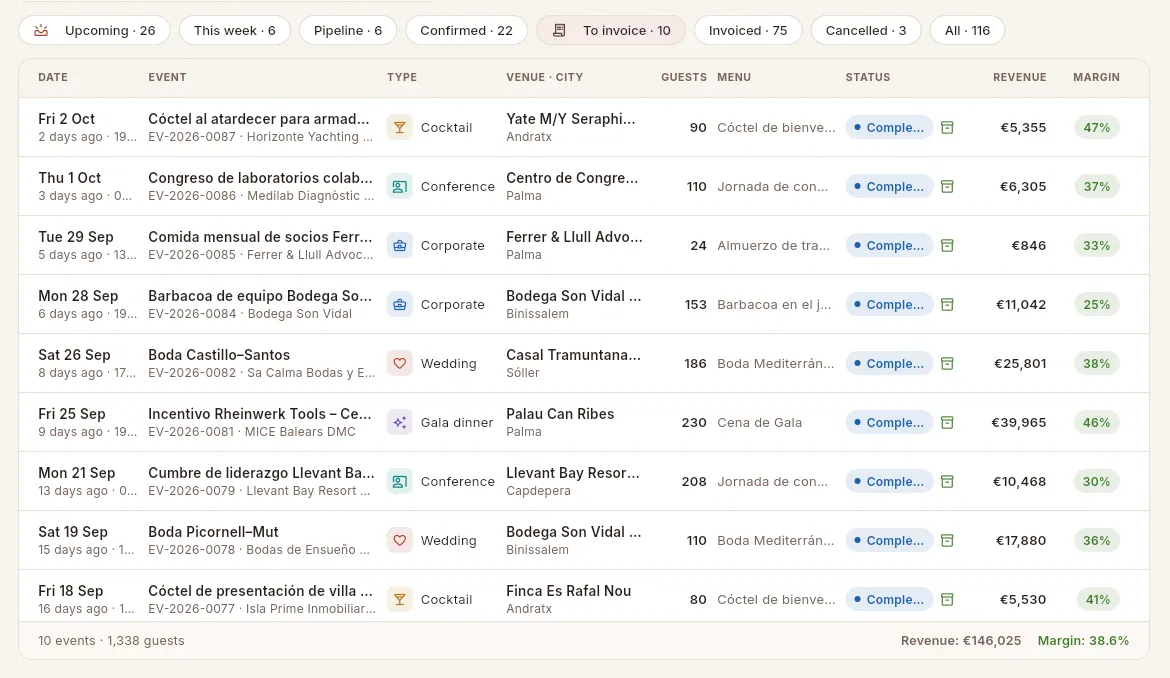 12345
12345
- 1To invoice gathers the completed events: it is the administration team's work list for issuing final invoices.
- 2The box icon shows that the event has already been produced: the kitchen has deducted its stock. If a confirmed event is less than a week away and has no staff assigned, an amber warning with a crossed-out person appears instead.
- 3Each event's margin, in green (20 % or more), amber (between 10 % and 20 %) or red (less than 10 %).
- 4Click a header to sort: once for ascending, again for descending, and the third time returns to the normal order.
- 5The footer adds up what you see: number of events and guests, revenue and average margin.
#Creating or editing an event
You create an event with New event (in the list), from the Create button in the top bar, by clicking a day in the Calendar (it opens with that date filled in) or by accepting a quote, which creates the event already confirmed with its menu, guests, price and extras.
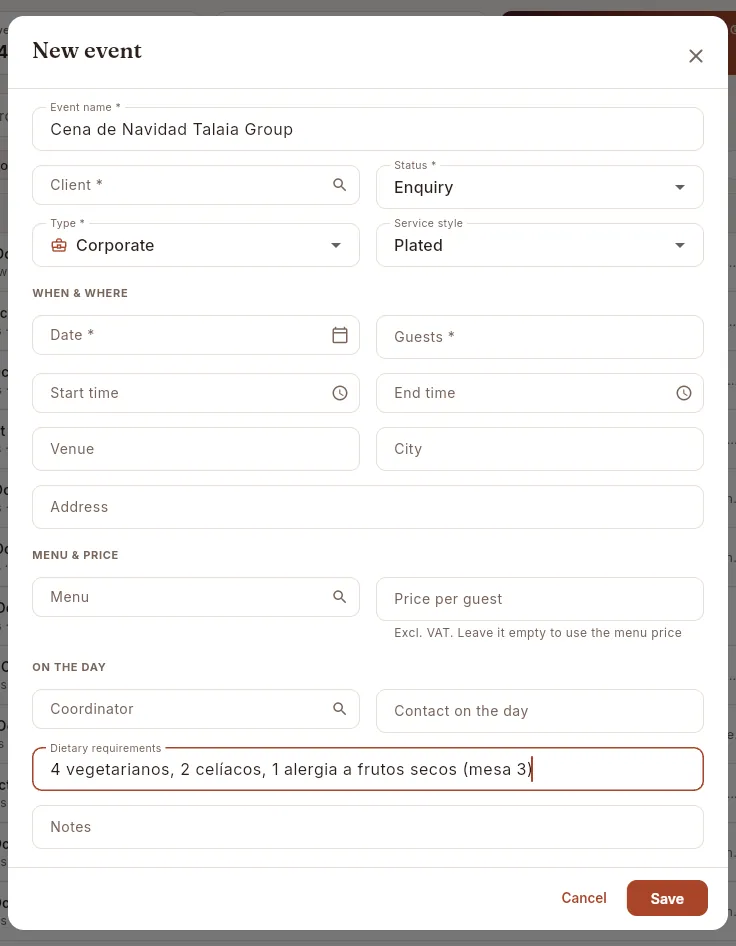 12345678
- 1A name that the whole team will recognise: “Boda de Laura y Marc”, “Cena de Navidad Talaia Group”…
- 2The client, chosen from the list with a search box. The event will then appear in their file.
- 3The status it starts with: normally “Enquiry” (a query with no quote yet).
- 4The event type (wedding, corporate, cocktail, gala dinner, private party, conference) and the service style (plated, buffet, standing cocktail, food stations, family style or drop-off delivery). The service style determines the recommended team, the set-up kit and the standard run sheet.
- 5When and where: date and guests (required), start and end times, venue, city and address.
- 6The menu and the price per guest, excluding VAT. If you leave the price empty, the menu's price is used.
- 7On the day: who coordinates (only staff with the coordinator role) and the client's contact on the day, with name and mobile number.
- 8Guests' dietary requirements: they will be highlighted in the file for the kitchen and service team. Below, the free-text notes.
Click New event.
Type the Event name and choose the Client.
Check the Status, the Type and the Service style.
Under When and where, enter the Date, the Guests, the times and the venue.
If you already know them, choose the Menu and the Price per guest; also the Coordinator, the Contact on the day and the Dietary requirements.
Click Save.
To edit it, open its file and click the pencil Edit event in the header: it is the same form. From there you can also Delete an event, but only if it has not yet been produced, has nothing invoiced and is not completed or invoiced; its staff, equipment, run sheet, extras and costs are deleted with it (quotes and invoices remain, without the link). If it is not going to take place, it is better to cancel it: it stays in the history.
#Event statuses
Each event moves through these statuses, which appear as a coloured label in the list and in the file:
| Status | What it means |
|---|---|
| Enquiry (grey) | A query from the client, awaiting a quote. |
| Quoted (amber) | The quote has been sent and a reply is awaited. |
| Confirmed (green) | The client has accepted. It counts as confirmed revenue, enters purchase planning and the kitchen can produce it. |
| Completed (blue) | It has already been held: it moves to “To invoice”. |
| Invoiced (purple) | The final invoice has been issued. |
| Cancelled (red) | It is not taking place. It stays in the history and frees up that day's staff and equipment. |
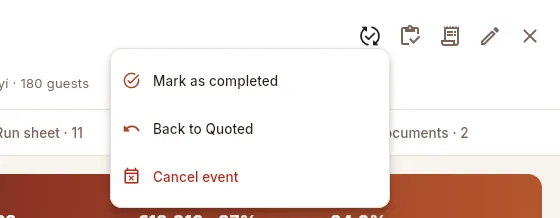 1234
1234
- 1The Change status button in the file header.
- 2The next step: here, Mark as completed (from an enquiry it would be “Mark as quoted” or “Confirm event”).
- 3Back to… undoes the last step if you have made a mistake.
- 4Cancel event, in red. A cancelled event can be reopened later with “Reopen as enquiry”.
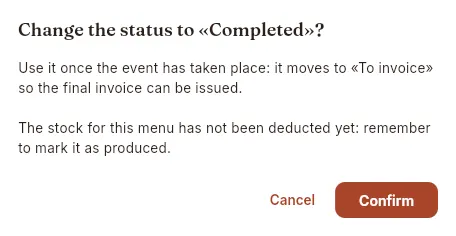 12
12
- 1What the change implies. If the event has a menu and has not yet been produced, it reminds you that its stock still has to be deducted.
- 2Confirm applies the change; Cancel closes without changing anything.
Open the event and click Change status in the header.
Choose the new status: Mark as quoted, Confirm event, Mark as completed, Back to … or Cancel event.
Read the notice and click Confirm (to cancel, the red Cancel event button).
#The event file: Summary
When you click an event, its file opens on the right. The header says what it is, when and where, and gathers the main actions; the tabs organise everything else. The first one, Summary, is the one to check before every event.
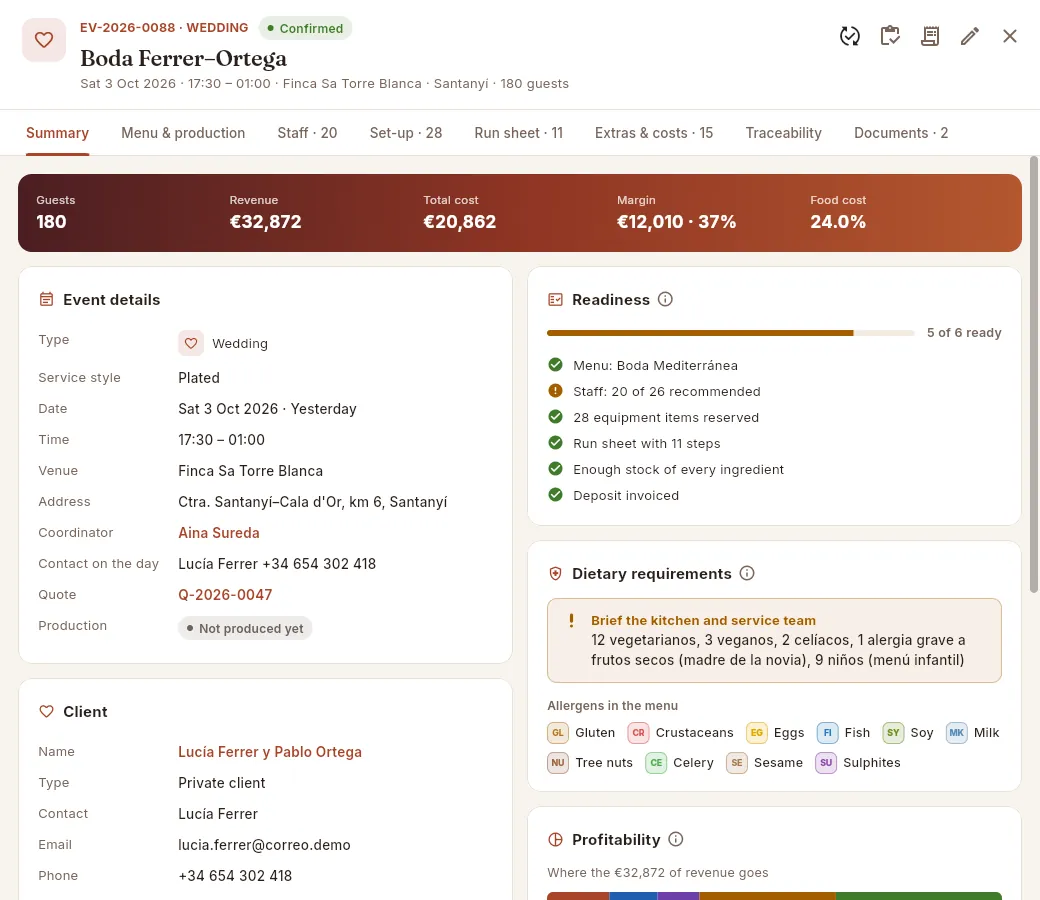 1234567
- 1Event code (EV-…), type and status. Once it has been produced, the green “Produced” label also appears.
- 2The actions: Change status, Mark as produced (deduct stock), Invoice event…, New quote for this event (if it does not have one yet) and Edit event. Each one appears only if your profile can do it and the event allows it.
- 3The tabs; the number shows how many people, items, steps, extras or documents each one has.
- 4The key figures: guests, revenue, total cost, margin and food cost (depending on your profile).
- 5Event details: type, service style, date, times, venue, coordinator, contact on the day, source quote and whether it has already been produced. Names in colour open their file.
- 6Readiness: the list of what is ready and what is missing, with a progress bar (“5 of 6 ready”). Green means done, amber needs attention and red blocks the event.
- 7The event's dietary requirements, highlighted (“Brief the kitchen and service team”) and, below, the menu's allergens: cross-check them to prepare alternatives.
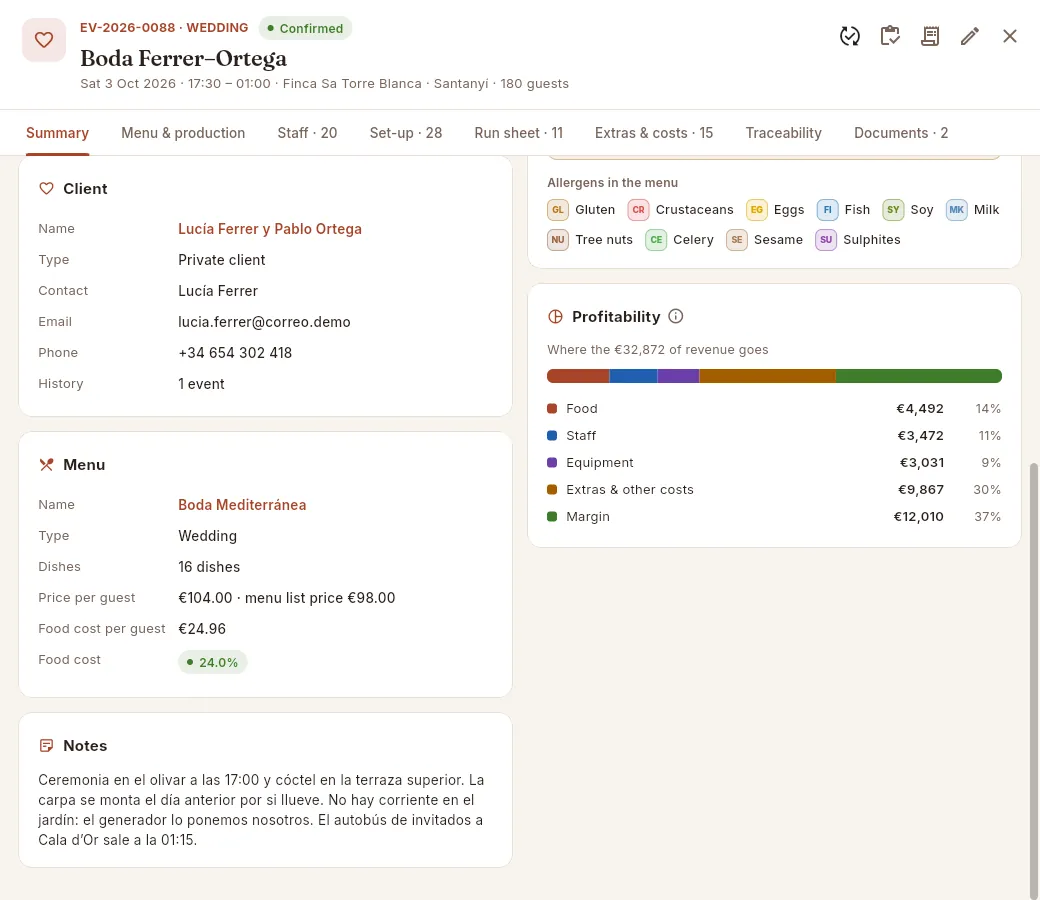 12345
12345
- 1Client: name (opens their file), type, contact details and how many events they have done with you.
- 2This event's price per guest; if it differs from the menu's price, the menu's rate is shown next to it.
- 3Food cost per guest and food cost, in green if it is below the company's target.
- 4Profitability: where each euro of revenue goes (food, staff, equipment, extras and other costs) and what is left as margin, in euros and as a percentage. If the event loses money, a red warning appears.
- 5The event's notes, for the whole team.
#Menu & production
The Menu & production tab is the kitchen's worksheet: which dishes the menu includes, how many portions have to be prepared and how much of each ingredient is needed. If the event does not have a menu yet, you will see “No menu assigned yet” and the Choose a menu button.
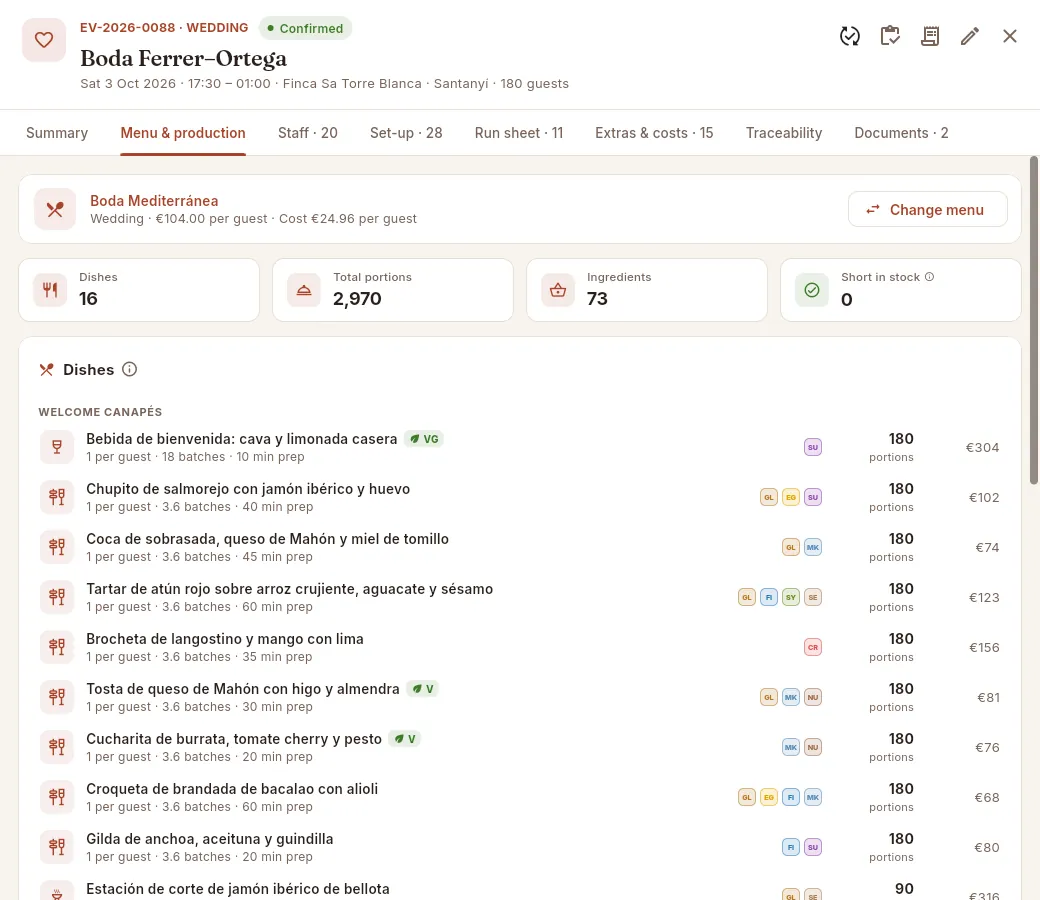 12345678
- 1The event's menu (opens its file), with the price and cost per guest.
- 2Change menu opens the list of active menus with their price and number of dishes.
- 3How many dishes, how many portions in total and how many different ingredients the event requires.
- 4Short in stock: ingredients whose current stock does not cover the event. Green if it is 0.
- 5The dishes, grouped by course: welcome canapés, starters, main course, dessert, beverages, late-night.
- 6Per dish: portions per guest, batches (how many times the recipe has to be made) and preparation time. The coloured icons are its allergens; click the dish to open its recipe and costing sheet.
- 7Portions to be prepared for this event.
- 8Cost of those portions.
Further down is the Production sheet: each recipe is broken down into its ingredients (including those of its sub-recipes, such as stocks or sauces), multiplied by the guests and the waste is added (what is lost when preparing or cooking). The result is the gross quantity that you need to have, compared with the store's stock.
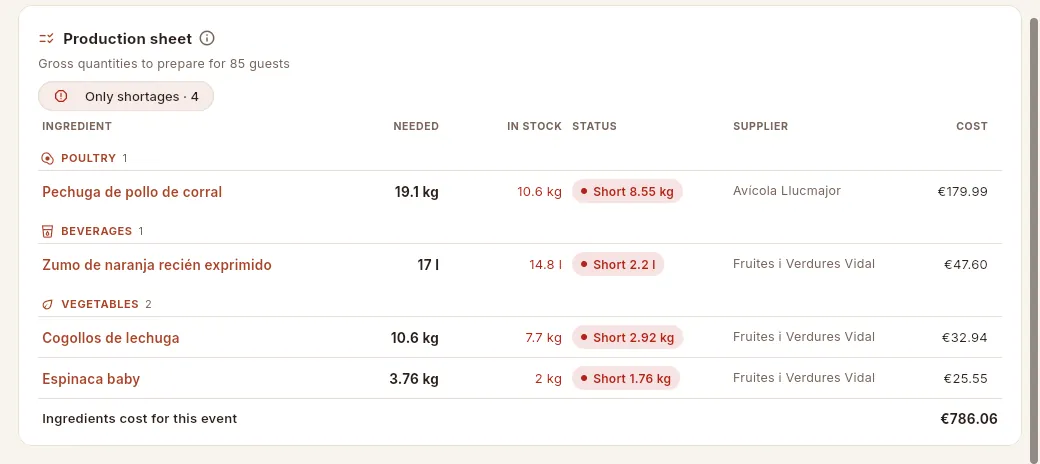 1234567
- 1Only shortages leaves in the list only the ingredients without enough stock (it appears only if there are any).
- 2Ingredients are grouped by category (poultry, vegetables, dairy…), as the store is organised.
- 3The ingredient (opens its file, with prices, suppliers and stock).
- 4Needed (gross quantity for the event) against what is in stock right now.
- 5The status: “In stock” in green or “Short …” in red, with the quantity that is missing.
- 6The usual supplier, so you know who to order it from.
- 7The ingredient cost of the whole event.
In the Menu & production tab, click Change menu (or Choose a menu if it does not have one yet).
Search for the menu and choose it from the list.
#Staff
The Staff tab compares the team the event requires with the team it has assigned, and lets you add people while seeing who is free that day.
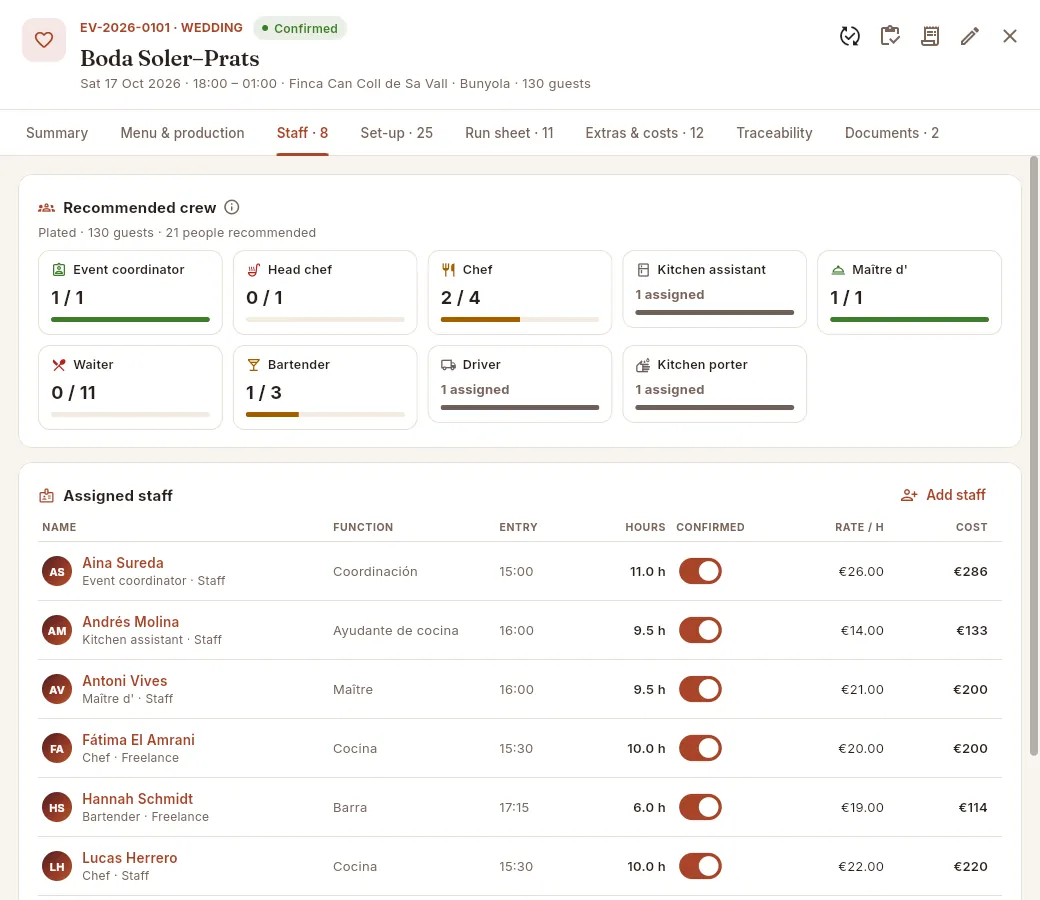 12345678
- 1What the recommended team is calculated from: service style, guests and total number of people.
- 2One card per role with “assigned / recommended”. In green, the role is covered.
- 3In amber, there are people but not enough.
- 4In red, the role has nobody yet.
- 5Roles that are not recommended but have people assigned show only “1 assigned”.
- 6Add staff opens the list of the workforce with their availability that day.
- 7Each person with their role, entry time and hours. The Confirmed switch shows whether the person has confirmed that they are working that day. Click the row to change the role, entry time or hours, or to remove them from the event.
- 8Hourly rate and cost of each person (depending on your profile). At the bottom, the total number of people, confirmed, hours and cost.
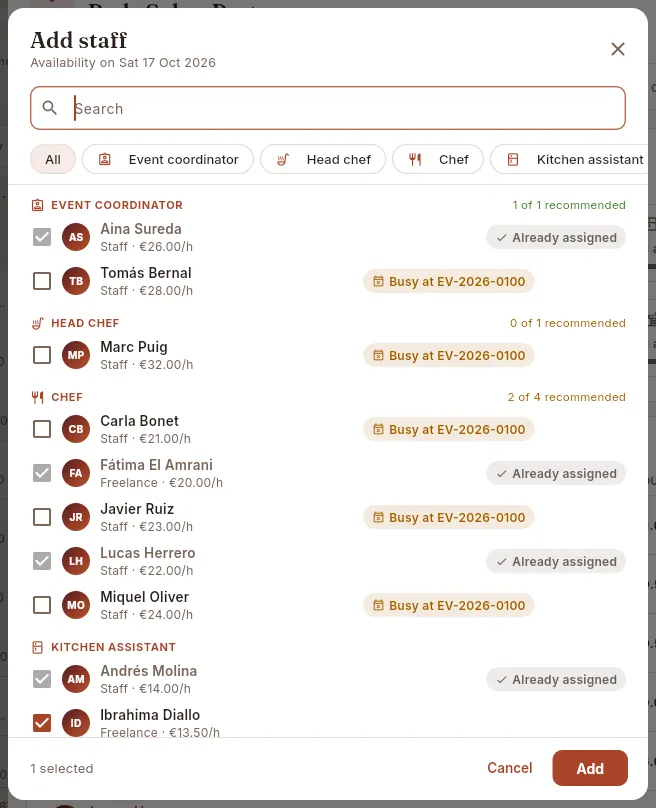 12345678
- 1The date for which availability is checked: the event's.
- 2Search by name…
- 3…or filter by role.
- 4The workforce grouped by role, with how many are assigned out of those recommended (“2 of 4 recommended”).
- 5Already assigned: the person is already in this event.
- 6Busy at EV-…: they work that same day at another event. You can still assign them, but check the schedules.
- 7Tick the box of each person you want to add; under the name, whether they are staff or freelance and their rate.
- 8Add adds them to the event (bottom left, how many you have ticked).
In the Staff tab, click Add staff.
Search or filter by role and tick the people (watch for Busy at …).
Click Add.
Check the entry time and hours that Mise has proposed; to change them, click the row (Edit assignment: Role, Entry time, Hours, Confirmed) and Save.
When each person confirms, turn on their Confirmed switch.
#Set-up
The Set-up tab is the equipment booked for the event —furniture, crockery, glassware, cutlery, table linen, kitchen equipment, decoration…— and it warns you if there are not enough units that day for all the events.
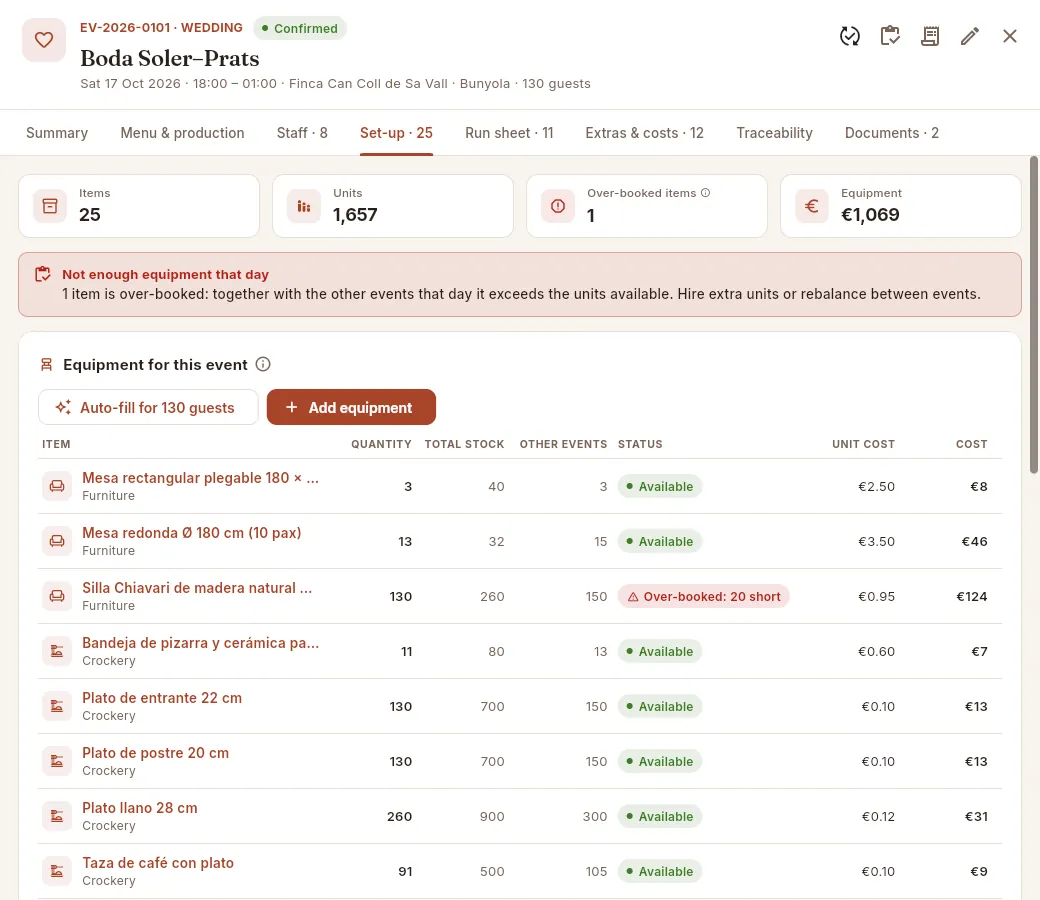 12345678
- 1How many items and units the set-up includes and how many are over-booked.
- 2The event's equipment cost (depending on your profile).
- 3The warning that there is not enough equipment that day for all the events.
- 4Auto-fill for N guests suggests a complete standard set-up based on guests and service.
- 5Add equipment adds an item from the catalogue in the quantity you choose.
- 6Each item with its category (and “Hired” if it is not owned). Click the name to open its record in Equipment; click the row to change the quantity or remove it.
- 7The quantity for this event, the item's total stock and the units that other events on the same day need.
- 8Over-booked: 20 short: across all the events on that day, more units are requested than you have. Hire extra units, switch to another item or share them out between events.
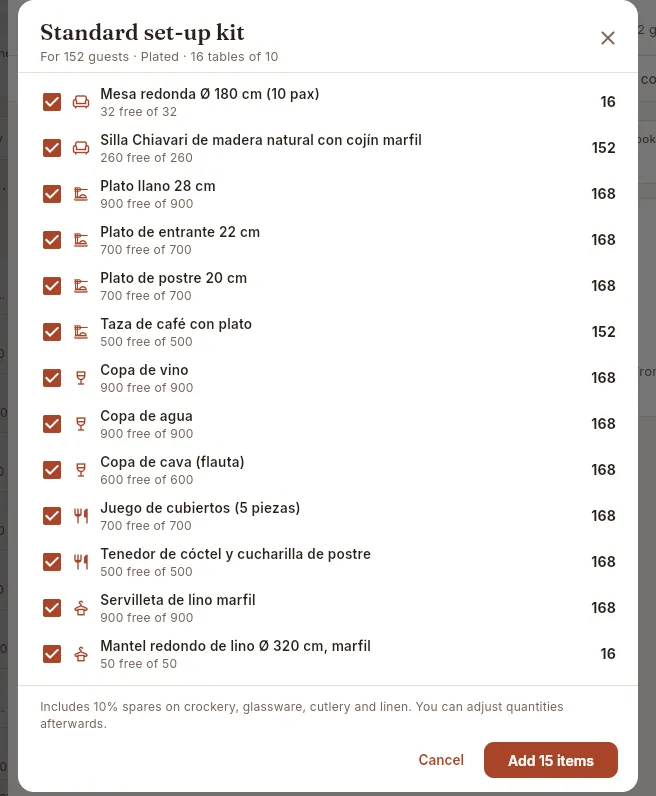 1234567
- 1What it is calculated for: guests, type of service and tables of 10.
- 2Each suggested item from the catalogue. For weddings, galas and private parties, the more elegant chairs are chosen first.
- 3How many units are free that day. If there are not enough, the line turns red with a warning; if the item is already in the set-up, it is shown in grey (“Already in the set-up”).
- 4Untick anything you do not want to add.
- 5The suggested quantity (you can adjust it afterwards).
- 6The kit includes 10% spares on crockery, glassware, cutlery and linen.
- 7Add N items adds them to the set-up.
#Run sheet
The run sheet is the minute-by-minute plan of the day for the whole team: loading, arrival, set-up, briefing, service, bar and breakdown, each step with its time and its person in charge. On the day of the event, you tick off the steps as they are done.
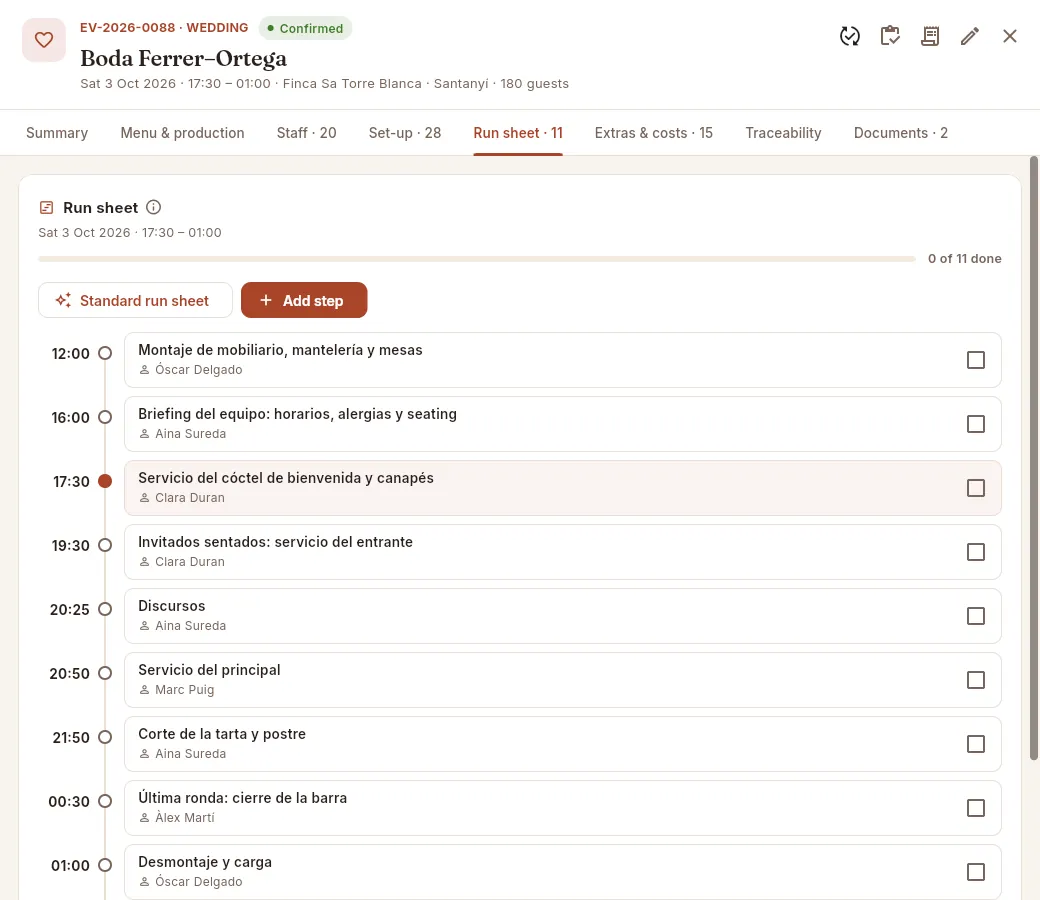 1234567
- 1The event's date and times, and the progress: how many steps have been done.
- 2Standard run sheet adds a template of steps placed according to the event's times.
- 3Add step for the ones that are specific to this event.
- 4The time of each step, on a timeline.
- 5The step that coincides with the start time is highlighted. Click any step to change or delete it.
- 6The manager: a person or a team.
- 7Tick the checkbox when the step is done: it is crossed out and the progress moves on.
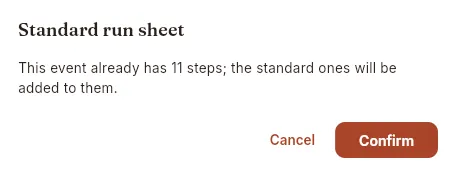 12
12
- 1The template's steps are added to the ones already there.
- 2Confirm adds them.
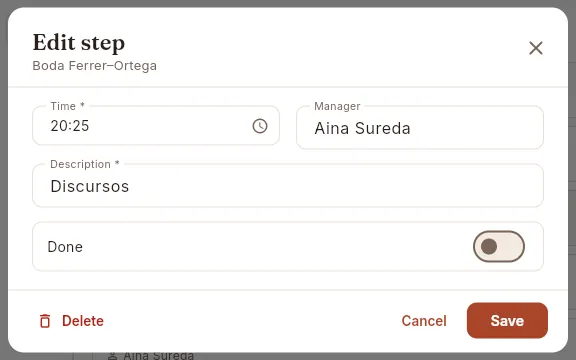 1234
1234
- 1Time of the step.
- 2Manager (name or team) and Description.
- 3Done, the same as the checkbox on the timeline.
- 4Delete removes the step.
The standard run sheet places these steps relative to the event's start and end times, and sets as manager the person assigned to that role (or the name of the role if nobody is assigned yet):
| When | Step | Manager |
|---|---|---|
| 4 h before | Load the van and leave the central kitchen | Driver |
| 3 h before | Arrive at the venue · set up tables, linen and bar | Setup crew |
| 2 h 30 before | Field kitchen set-up and mise en place | Head chef |
| 1 h before | Staff briefing: timings, allergies and VIPs | Event coordinator |
| 30 min before | Final walk-through with the client contact | Event coordinator |
| Start | Guests arrive · welcome drinks and canapés | Maître d' |
| +1 h | Guests seated · starters served (for buffets, “Buffet opens”; for cocktail receptions, “Hot canapés and live stations open”) | Maître d' |
| +1 h 45 | Main course service (for cocktail receptions, “Second round · heartier bites”) | Head chef |
| +2 h 30 | Dessert, cake and coffee | Head chef |
| +2 h 50 | Open bar opens (if there is a bar) | Bartender |
| 30 min before the end | Last orders at the bar (if there is a bar) | Bartender |
| End | Service ends · breakdown begins | Setup crew |
| 1 h 30 after | Load-out and venue handover | Event coordinator |
Steps that do not fit before the end time are left out. For a drop-off delivery only the loading, the hand-over to the client and the departure are added. If the event has no start time, the template assumes 19:00 and tells you so that you can adjust it.
#Extras and costs
In Extras & costs you record what is charged to the client on top of the menu (open bar, DJ, flowers, late-night snack…) and the costs that are neither food, nor staff, nor equipment (transport, hire, agency staff…). Below is the event's P&L.
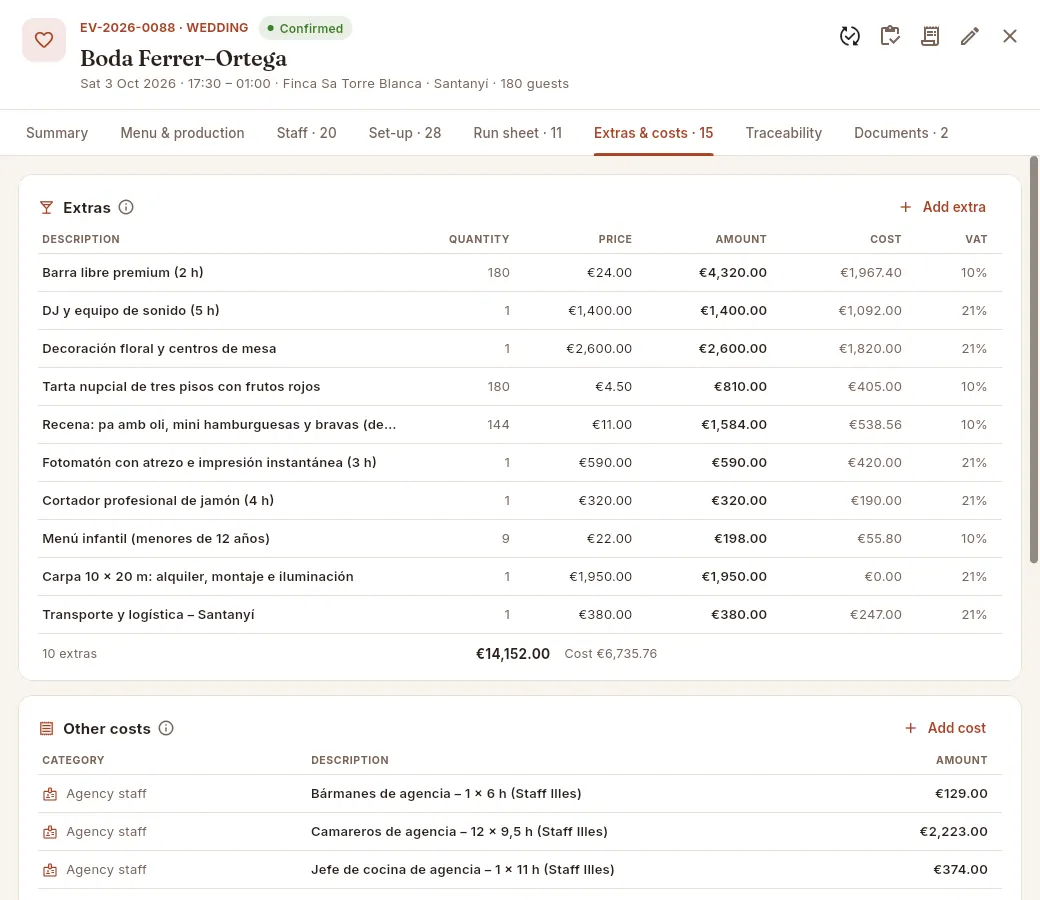 1234567
- 1Add extra: an additional service that is charged for.
- 2Each extra with its quantity (guests if charged per person, 1 if it is a fixed amount). Click the row to change it. A bar among the extras adds bartenders to the recommended team.
- 3Unit price and amount (quantity × price), excluding VAT.
- 4What it costs the business (for example, the bar drinks or the DJ).
- 5The VAT on each line, which is carried over to the invoice.
- 6Total of the extras: amount and cost.
- 7Other costs: transport, hire, decoration, external staff… They are entered by hand and reduce the margin. (Supplier invoices are recorded in Payables.)
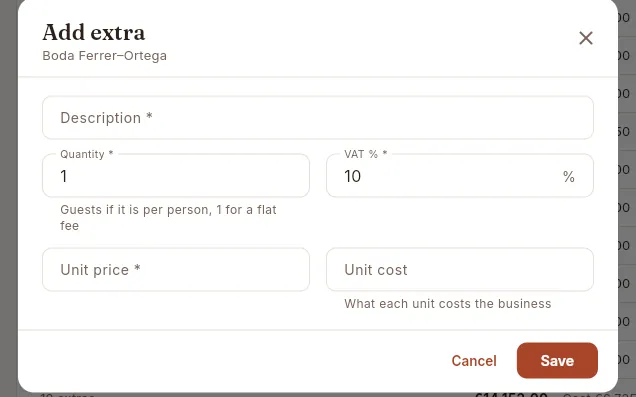 12345
12345
- 1Concept: “Open bar (2 h)”, “DJ”, “Late-night snack”…
- 2Quantity: guests if per person, 1 if it is a fixed amount.
- 3VAT % of the line (by default, the food rate).
- 4Unit price charged, excluding VAT.
- 5Unit cost: what each unit costs the business.
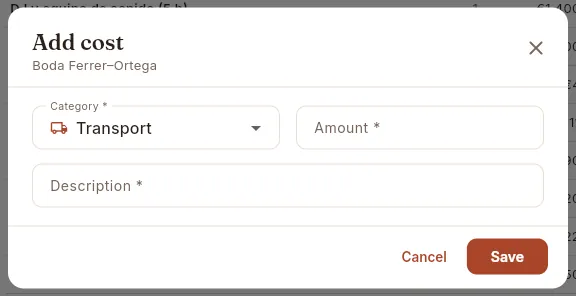 123
123
- 1Category: transport, hire, decoration and flowers, external staff or other.
- 2Amount of the cost.
- 3Concept: “Refrigerated van”, “Marquee hire”…
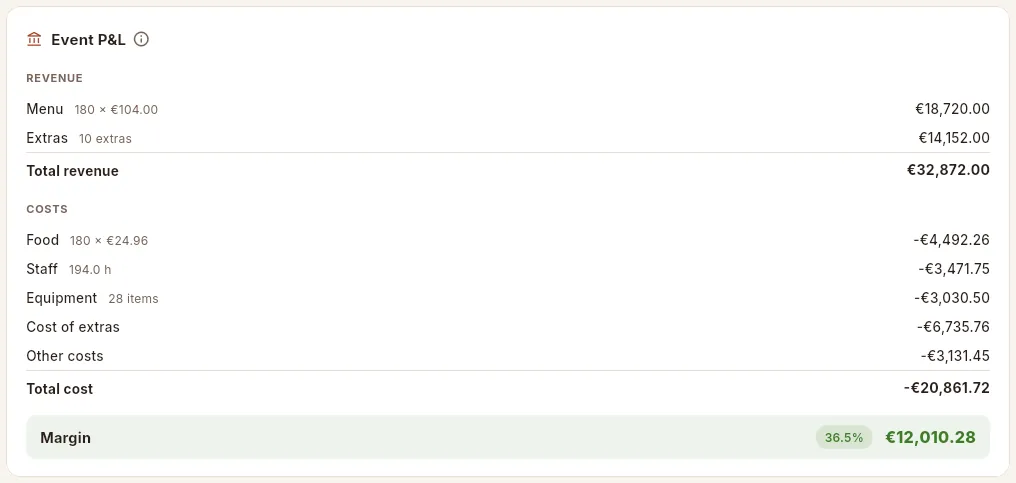 123456
- 1Menu revenue: guests × price per guest.
- 2Extras revenue.
- 3Food: guests × the menu's cost per guest (frozen once it has been produced).
- 4Staff: assigned hours × each person's rate.
- 5Equipment (units × cost per use), cost of extras and other costs.
- 6The margin in euros and as a percentage, with the traffic-light colour.
#Producing the event
When the kitchen has prepared the event, you mark it as produced with the Mark as produced (deduct stock) button in the header (it is visible to whoever can adjust stock, normally the kitchen, and only on confirmed or completed events that have a menu). When you produce it, Mise:
- deducts from stock all the menu's ingredients for the guests, using up first the lots that expire soonest (FEFO, first expired, first out);
- records each dish as a production batch (EL-…) with the lots it used, for traceability;
- creates a witness sample of each dish (except drinks), which must be kept for 7 days;
- freezes the food cost per guest: tomorrow's price changes will no longer move this event's margin.
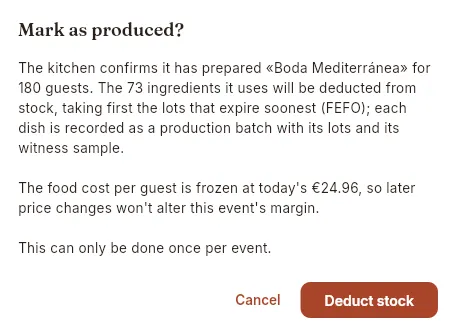 12
12
- 1What is going to happen: menu, guests and number of ingredients deducted by lot (FEFO), and the cost per guest at which it is frozen.
- 2Deduct stock does it. It can only be done once per event.
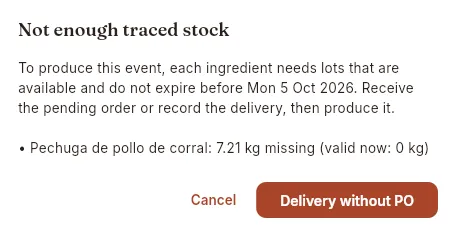 12
12
- 1Which ingredients have no available lots that will arrive in good condition by the event date, how much is missing and how much is valid now.
- 2Delivery without PO records a lot that has arrived without an order (for example, bought at the market). If a pending order is missing, receive it in Purchasing and produce again.
Open the event and check the Menu & production tab.
Click Mark as produced (deduct stock) in the header.
Read the summary and click Deduct stock.
If “Not enough traced stock” appears, receive the pending order in Purchasing or record the Delivery without PO and try again.
#Event traceability
Once produced, the Traceability tab answers the question “what went into this dish?”: for each dish served, the lots it used, from which supplier and with which supplier lot, its temperature checks and its witness sample. Before producing, the tab explains that the information will be recorded when the event is produced.
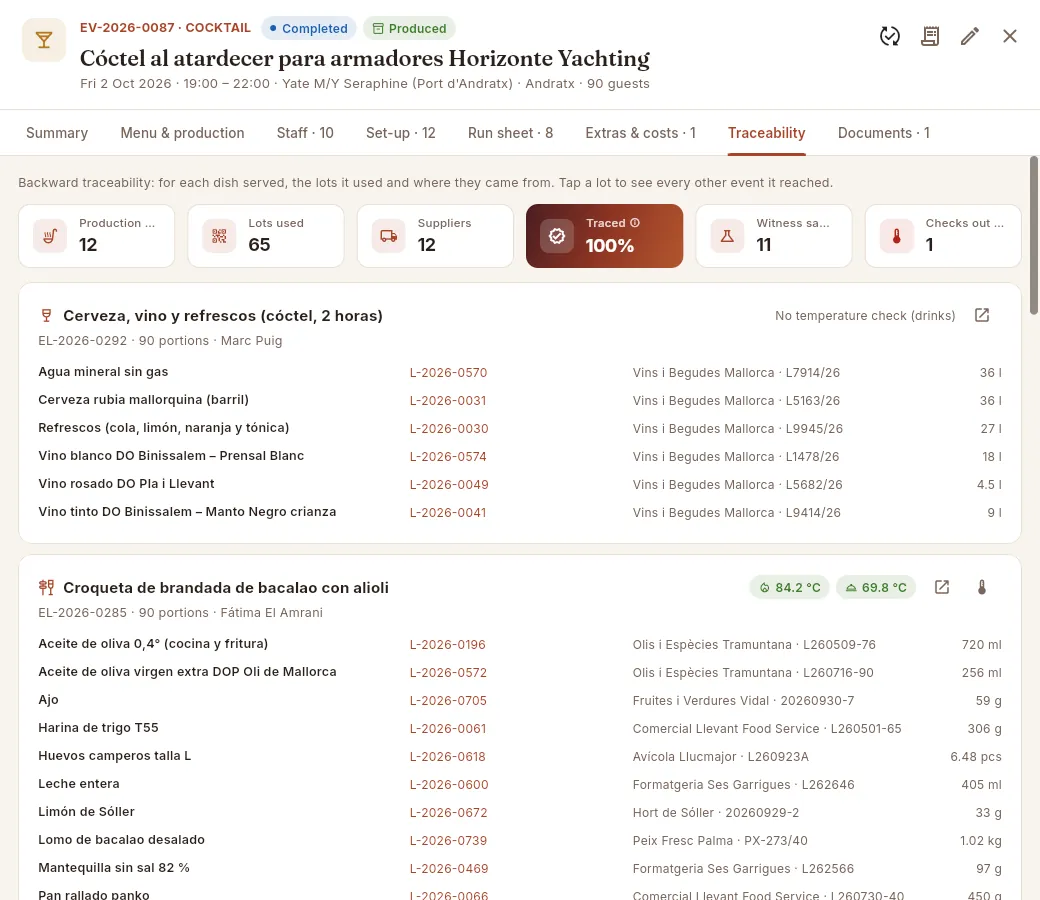 1234567
- 1How many production batches (dishes), lots and suppliers are involved.
- 2Traced: how much of what was used has its lot identified. 100% means that for every dish you know which supplier lot went into it.
- 3Witness samples kept and checks out of limits (in red if there are any).
- 4Each dish is a card: batch code, portions and manager.
- 5The temperature checks recorded, in green if they are within limits (drinks have no check).
- 6The lots that each ingredient used and, on the right, the supplier and its lot. Click a lot to see which other events and clients it reached.
- 7Record checks enters the dish's temperatures; the icon next to it opens the production batch record.
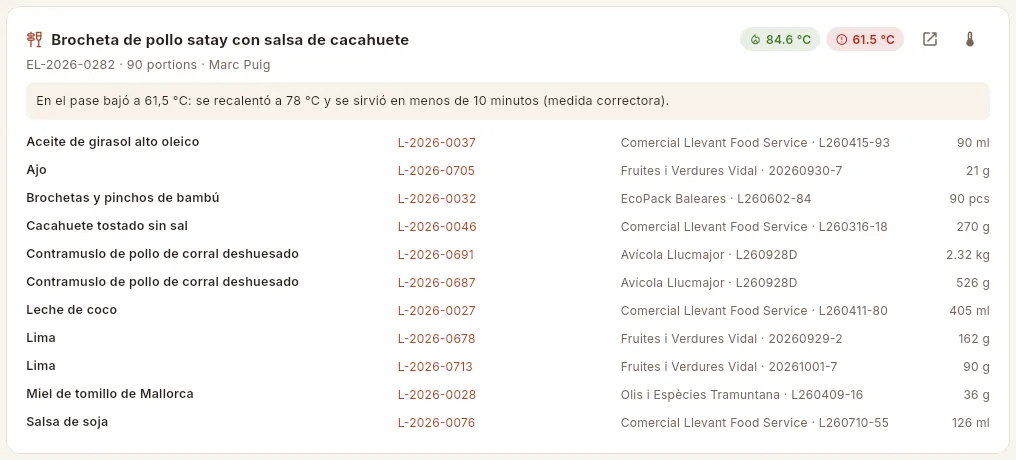 1234
1234
- 1In green, the check within limits (here, the core temperature when cooking).
- 2In red, out of limits: the hot service temperature dropped below 63 °C.
- 3The incidents and corrective actions that the kitchen noted.
- 4Record checks: core temperature (cooking), blast-chilling minutes, service temperature, manager and corrective actions.
#Documents and invoicing
The Documents tab brings together the event's quote and its invoices, and shows how much has been invoiced and collected. It only appears if your profile has access to Quotes or to Invoices.
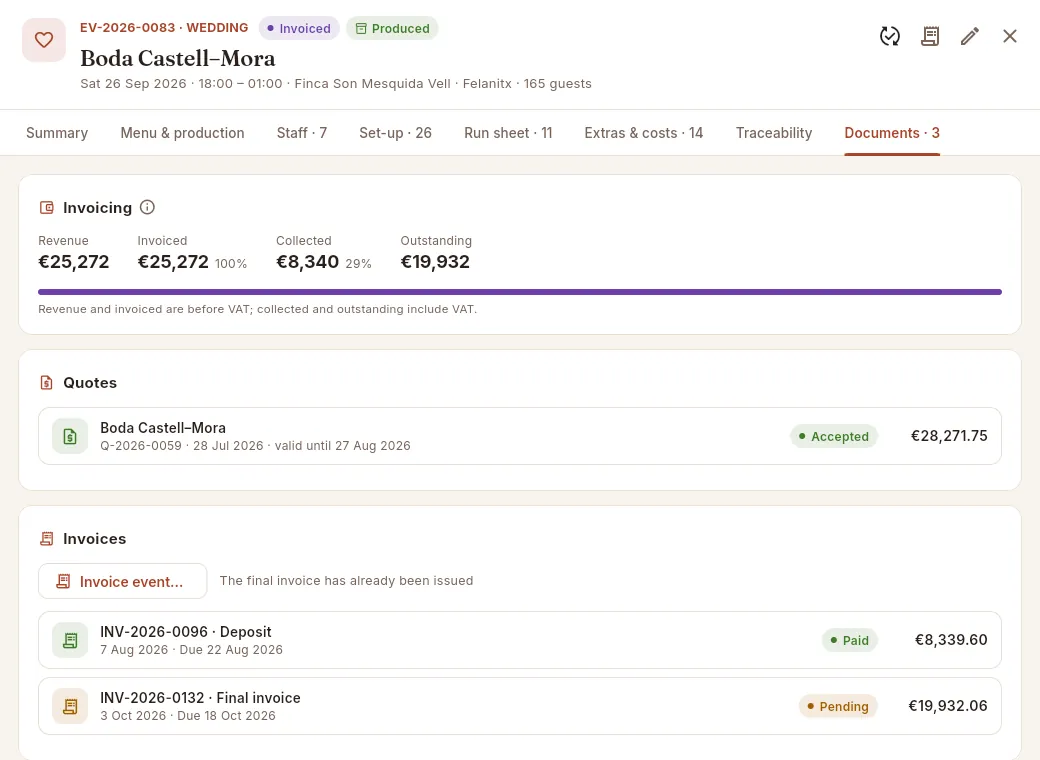 12345
12345
- 1Revenue of the event, invoiced (excluding VAT, and what share of the revenue it is), collected and outstanding (including VAT).
- 2The bar reaches the end when the event is fully invoiced.
- 3The quote the event came from, with its status; click it to open it. If it has none, the New quote for this event button creates one with the menu and extras already in place.
- 4Invoice event… issues a deposit invoice or the final one. Next to it, a notice if the final one has already been issued.
- 5The event's invoices (deposit, final) with their due date, collection status and total. Click one to open it and record collections.
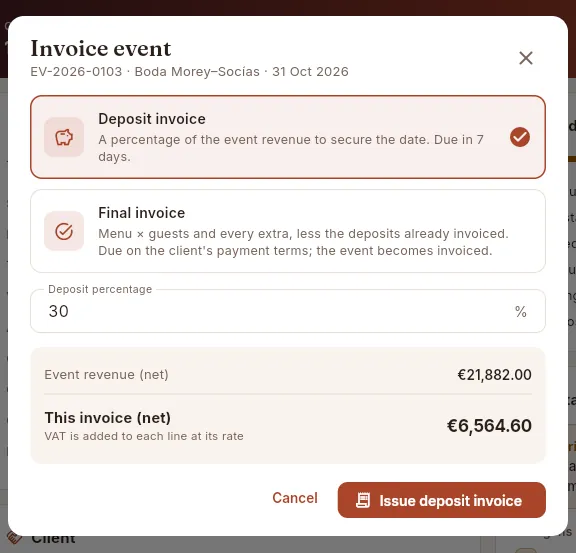 1234
1234
- 1Deposit invoice: a percentage of the revenue to reserve the date. Due in 7 days.
- 2The percentage, by default the one in Settings.
- 3How much this invoice will be, excluding VAT.
- 4Issue deposit invoice creates it and opens it.
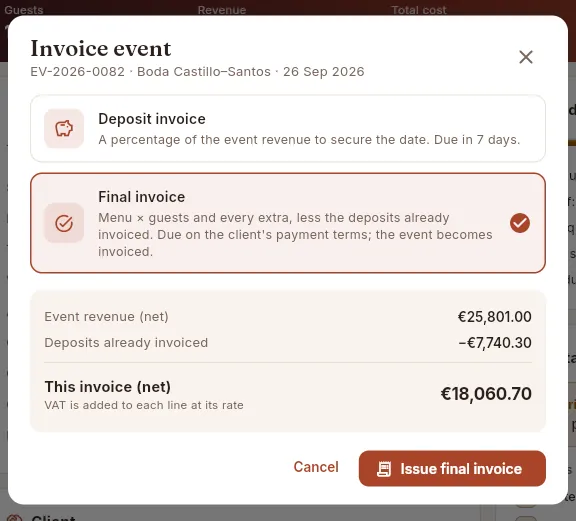 1234
1234
- 1Final invoice: menu × guests and all the extras, minus the deposits. The event becomes invoiced.
- 2Deposits already invoiced are deducted.
- 3The amount of the final invoice, excluding VAT (VAT is added to each line according to its rate).
- 4Issue final invoice.
Open the event and click Invoice event… (in the header or in Documents).
Choose Deposit invoice (and its percentage) or Final invoice.
Check the amount and the warnings (for example, if the event has not yet taken place, check the final number of guests).
Click Issue deposit invoice or Issue final invoice.
#What changes depending on your profile
Each person sees events according to their access profile. Amounts that your profile cannot see appear with a padlock, and the buttons for things you cannot do do not appear. For example, this is how the sales profile sees the Extras & costs tab:
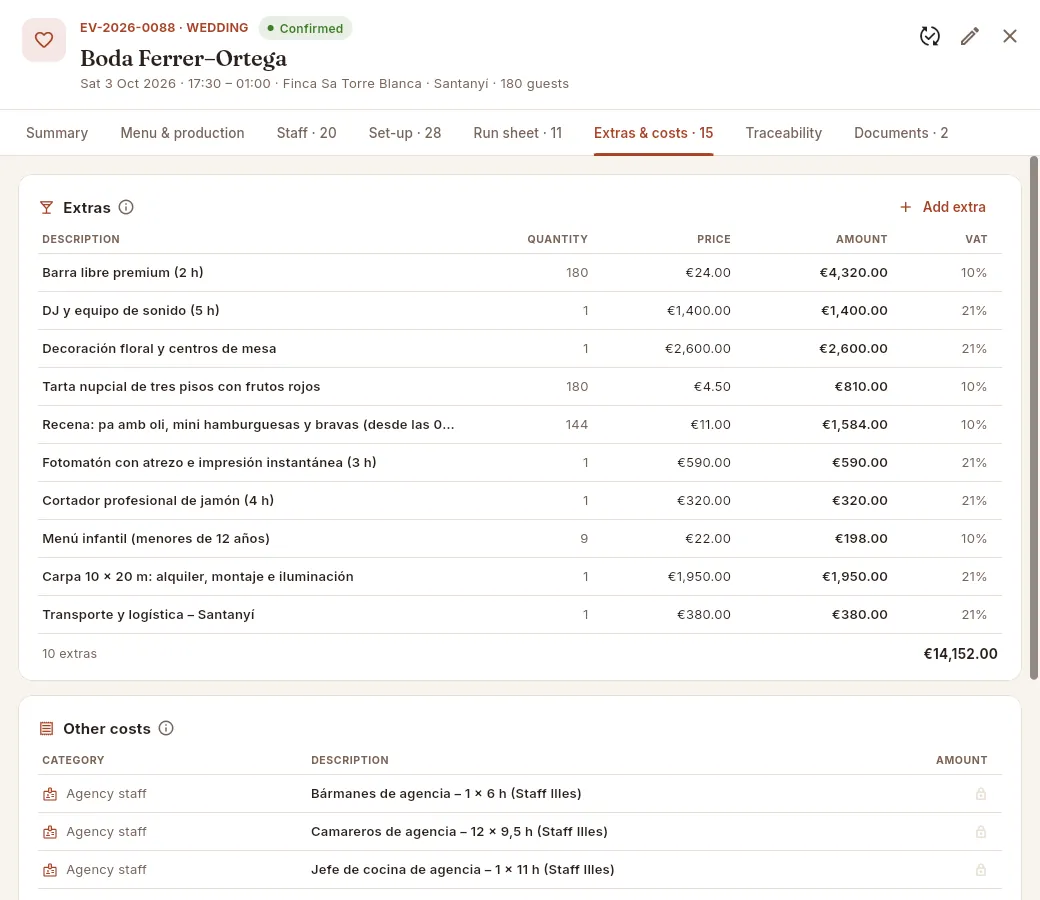 123
123
- 1In the header only Change status and Edit event: it does not produce or invoice.
- 2It sees the extras' prices and amounts, but not the cost column.
- 3The other costs amounts appear with a padlock (“Hidden by your access profile”) and there is no button to add them.
And this is how the kitchen sees it, in the Summary:
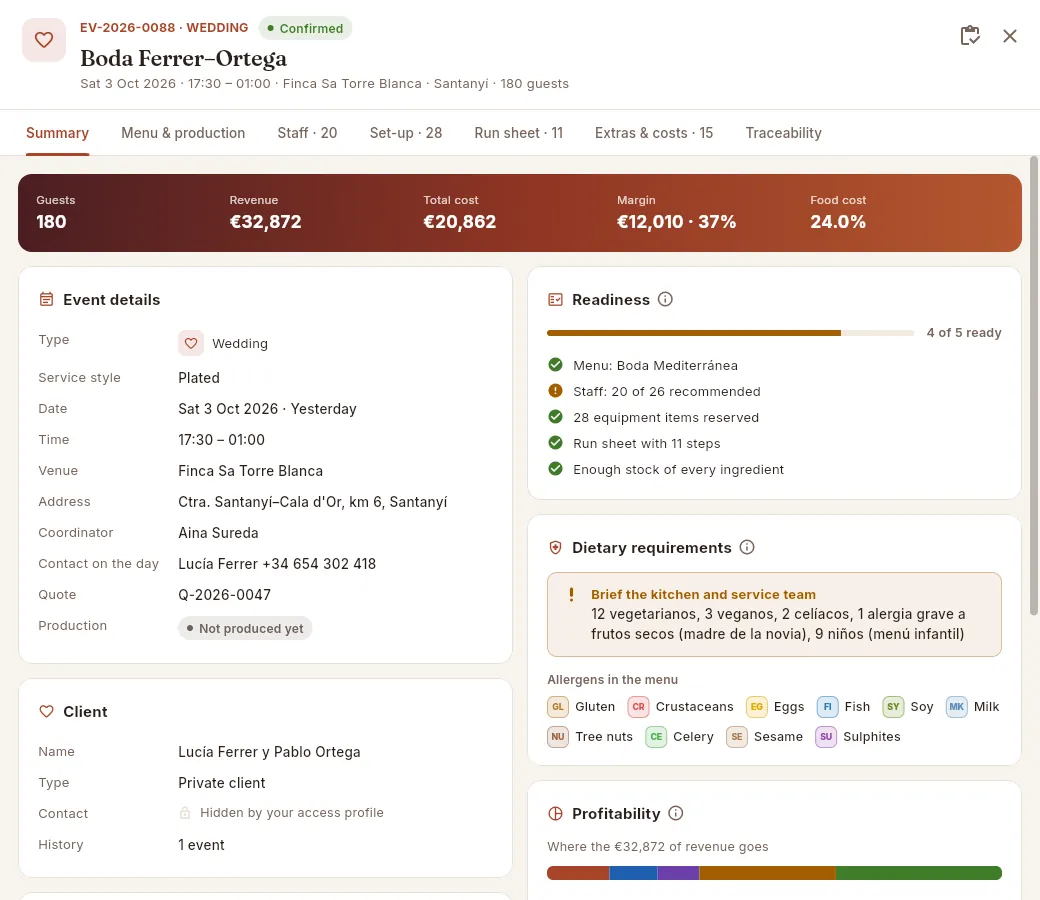 1234
1234
- 1The only action in the header is produce: the kitchen does not edit the event or change its status.
- 2No Documents tab (it has no access to quotes or invoices).
- 3The Readiness card does not include the deposit.
- 4The client's contact details, hidden.
#On your phone
On mobile the list turns into cards and the record fills the whole screen. The header actions are gathered under the More options (⋮) button, and the tables in the tabs turn into cards.
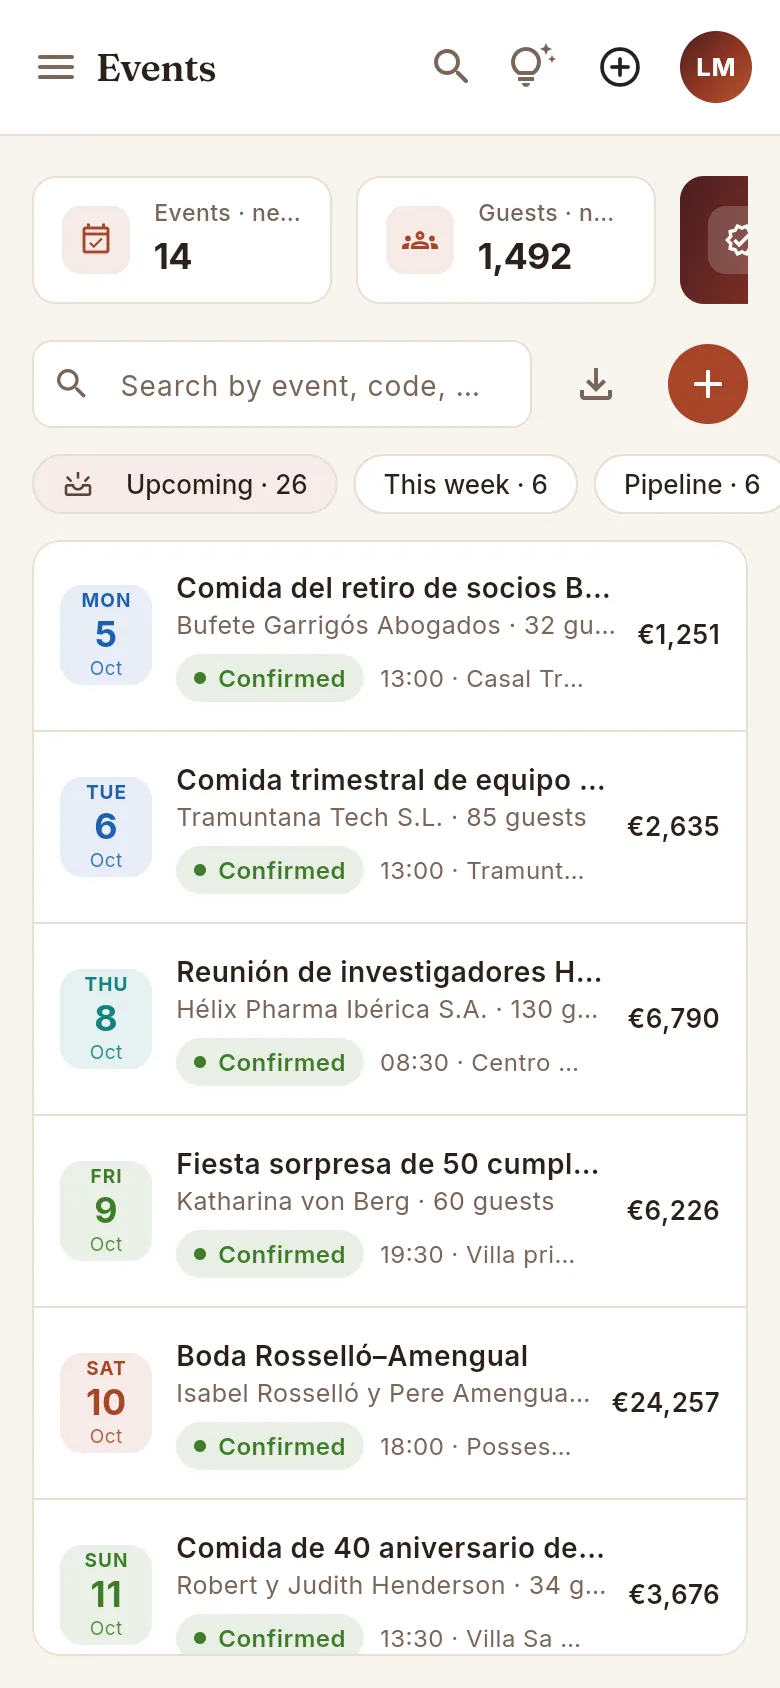 123
123
- 1Search, export and + to create an event.
- 2The filters scroll sideways.
- 3Each event on a card: date in the colour of its type, name, client and guests, status, time, venue and revenue.
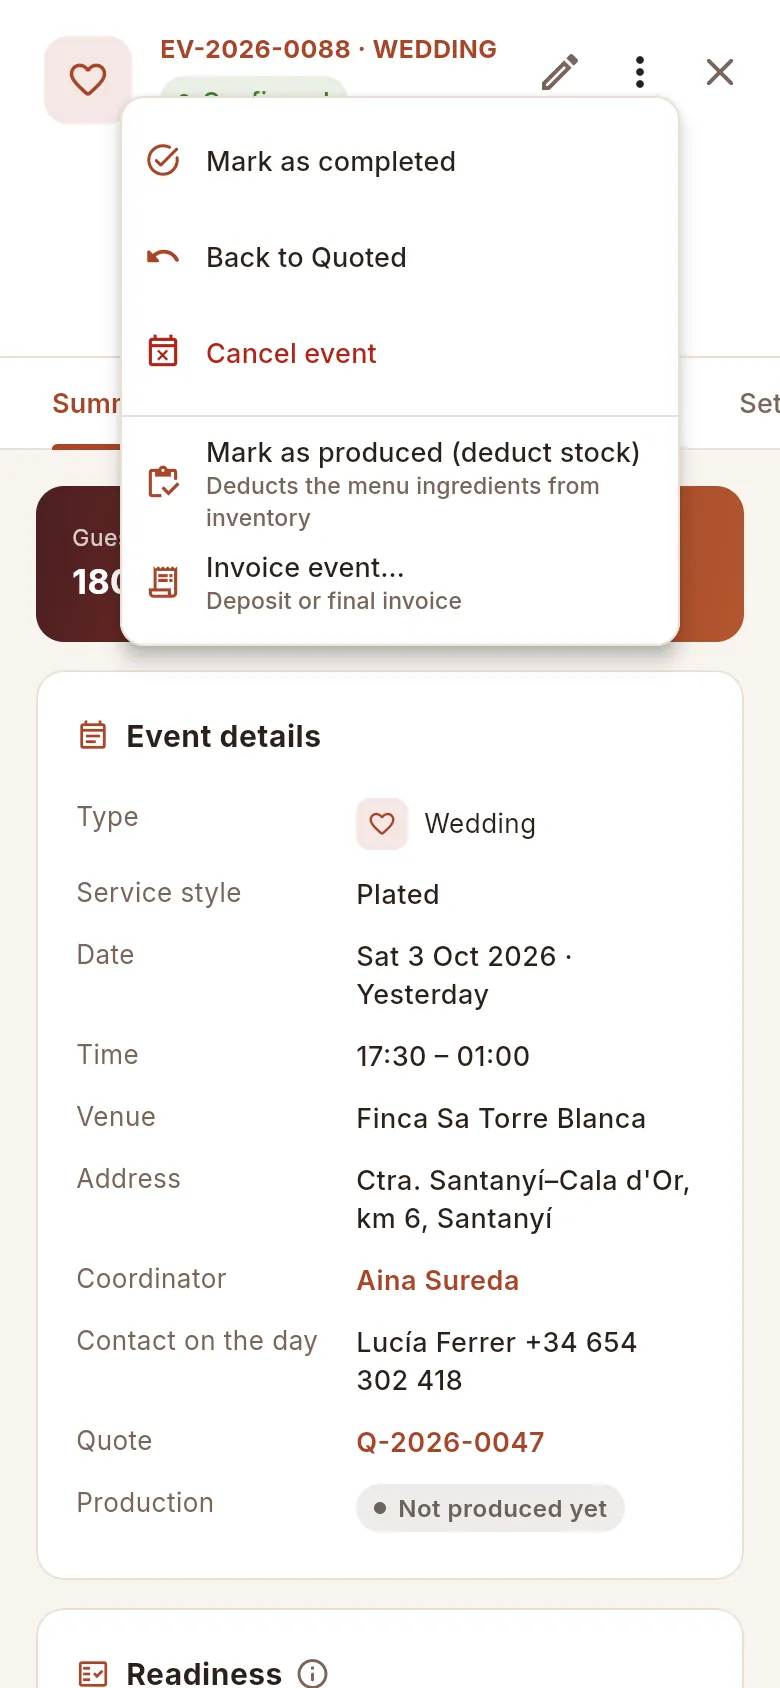 1234
1234
- 1The Edit event pencil stays in view.
- 2More options (⋮) gathers the other header actions:
- 3the status changes…
- 4…and produce, invoice or create the quote, with a line explaining each one.
#Tips
Sales
Quotes
Prepare the proposal for the client with menus and services, check its margin before sending it, produce the PDF and, when the client says yes, turn it into an event with one click.
A quote is the financial proposal you send a client for an event: the menu (price per guest) and the additional services (open bar, DJ, flowers, transport, equipment hire…), with its discount, its VAT and its validity date. Mise instantly works out the total for the client and, for you, the estimated cost and margin, so you know whether the proposal is profitable before you send it.
Each quote goes through a series of statuses:
| Status | What it means |
|---|---|
| Draft | You are preparing it; the client doesn't have it yet. |
| Sent | The client has it and you are waiting for their reply. If the validity date passes with no reply, it is marked Past validity. |
| Accepted | The client has said yes: Mise has created (or confirmed) the event. |
| Declined | The client has said no; the reason is recorded. |
| Expired | It lapsed with no reply and you have written it off. |
Quotes are numbered automatically (Q-year-number) in order of creation.
- 1DraftClient, event details, menu and services; you check the margin.
- 2SentYou send the PDF to the client and mark it as sent.
- 3AcceptedThe client says yes: one click on Accept quote.
- 4Event confirmedWith its menu, guests and extras; from it the service is prepared and the deposit is invoiced.
#The list of quotes
When you open Quotes you see the open quotes (sent and awaiting a reply), with four indicators at the top.
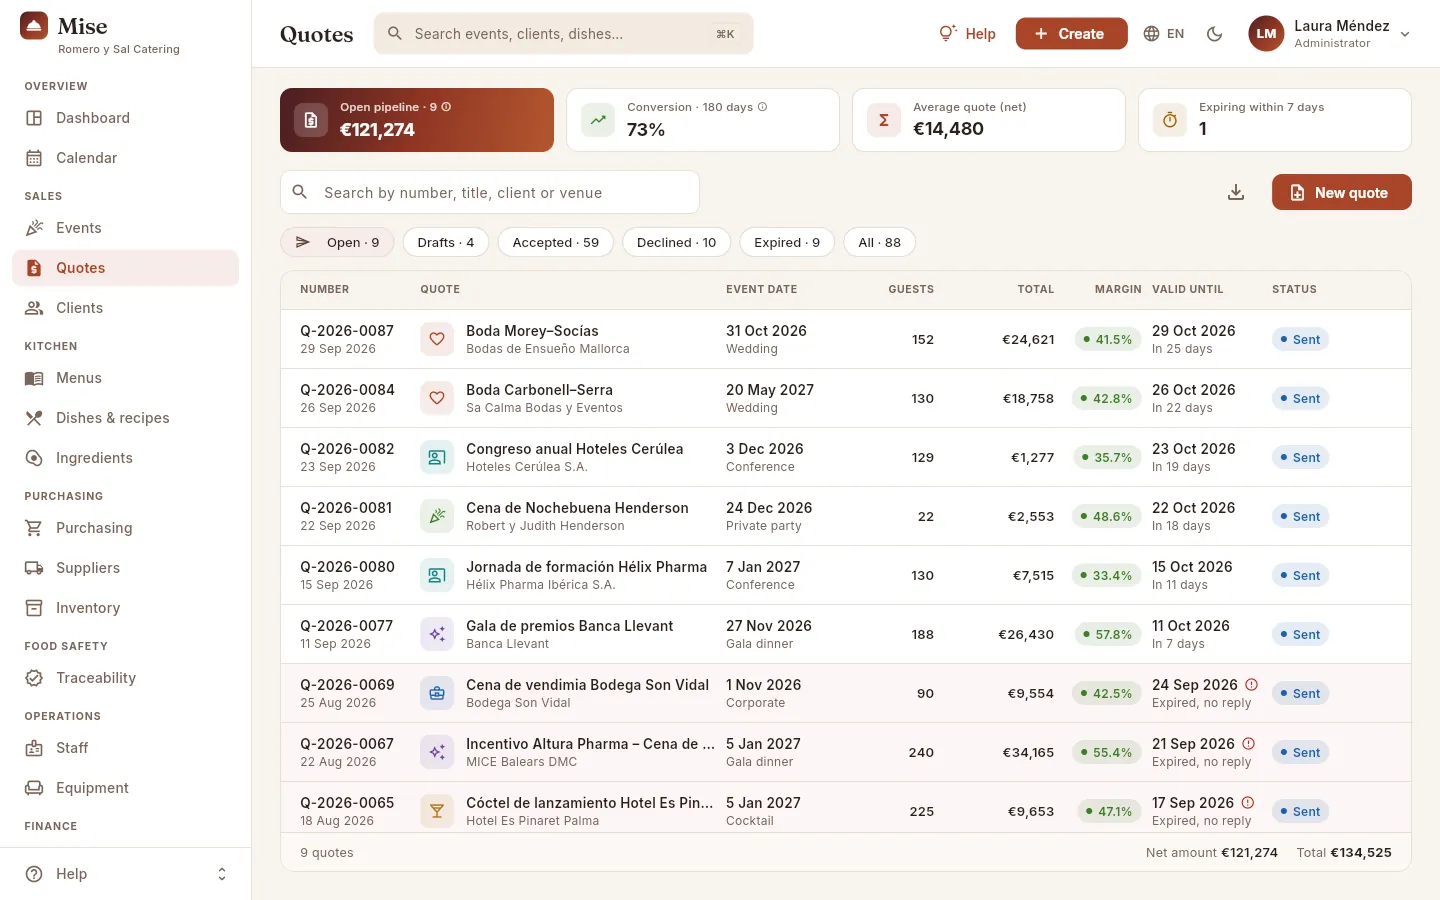 12345678
- 1Open pipeline: what the sent quotes awaiting a reply add up to (net amount, excluding VAT), and how many there are. It is your live sales pipeline.
- 2Conversion · 180 days: of the quotes decided in the last six months, the share the client accepted. The ⓘ button on each indicator explains how it is calculated.
- 3Average quote (net): the average amount excluding VAT of the quotes from the last 180 days that are no longer drafts.
- 4Expiring within 7 days: sent quotes whose validity ends this week; it turns amber if there are any. Call those clients first.
- 5The search box finds by number, title, client, venue or event code. It ignores capitals and accents.
- 6The filters by status, with how many there are in each: Open (sent), Drafts, Accepted, Declined, Expired (including sent quotes that have already lapsed) and All.
- 7Export CSV downloads the rows you are looking at (with the filter and search applied) so you can open them in a spreadsheet.
- 8New quote starts a new one as a draft.
Each row shows the quote's number and date, the title and the client (with the event-type icon), the event date and its type, the guests, the total including VAT, the estimated margin, the validity date and the status. Click a row to open the quote, and click a column header to sort by it (once from lowest to highest, again from highest to lowest and the third time it goes back to the normal order: most recent first).
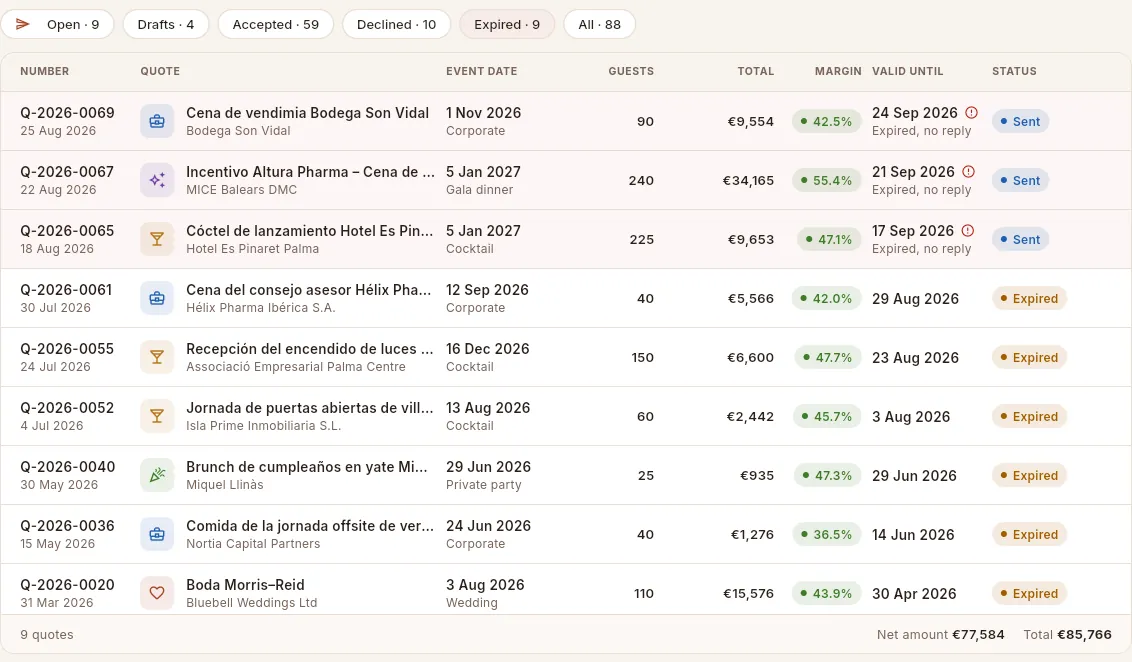 123456
- 1The Expired filter gathers what needs reviewing: sent quotes past validity and expired ones.
- 2The quote's estimated margin: green above 20 %, amber between 10 and 20 % and red below 10 %. Hover for the guide.
- 3On a sent quote, below the validity date you can read how long is left (“In 12 days”). If it has passed, Expired, no reply appears with a red notice, and the row is tinted light red.
- 4Even if it has lapsed, it stays Sent until you decide: extend the validity or mark it as expired.
- 5Expired: you wrote it off. It can be reopened or duplicated.
- 6The footer counts the quotes in the list and adds up their net amount and total.
#Creating a quote
Click New quote (in the list, in the Create button in the top bar or on a client's record). First you fill in the general details; the lines (menus and services) are added afterwards, in the quote itself.
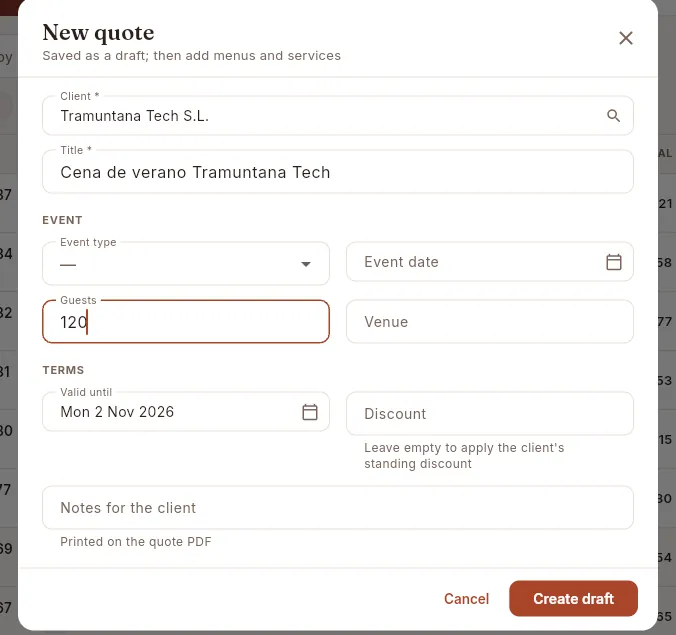 1234567
- 1Client (required): chosen from the list, with a search box. Only active clients appear.
- 2Title (required): the name of the event as the client will see it on the PDF, e.g. “Garden wedding · Son Marroig”.
- 3The event details: type, date, number of guests and venue. The guests are used as the quantity of the per-guest lines.
- 4Valid until: it comes with the company's usual validity (30 days from today; it can be changed in Settings).
- 5Discount in %: if you leave it empty, the client's usual discount is applied.
- 6Notes for the client: printed on the PDF (what is included, special conditions…).
- 7Create draft saves it with the Draft status and today's date and opens the quote so you can add the lines.
Click New quote.
Choose the Client and type the Title.
Fill in the event type, the date, the guests and the venue if you already know them (they can be added later).
Check Valid until and the Discount, and add any notes you want the client to read.
Click Create draft: the quote opens so you can add the menu and the services.
#Inside the quote
When you open a quote it unfolds on the right with everything you need to prepare it and follow it up: the header with its status and the actions, a strip with the key figures, the lines, the totals with profitability, and the client and event details.
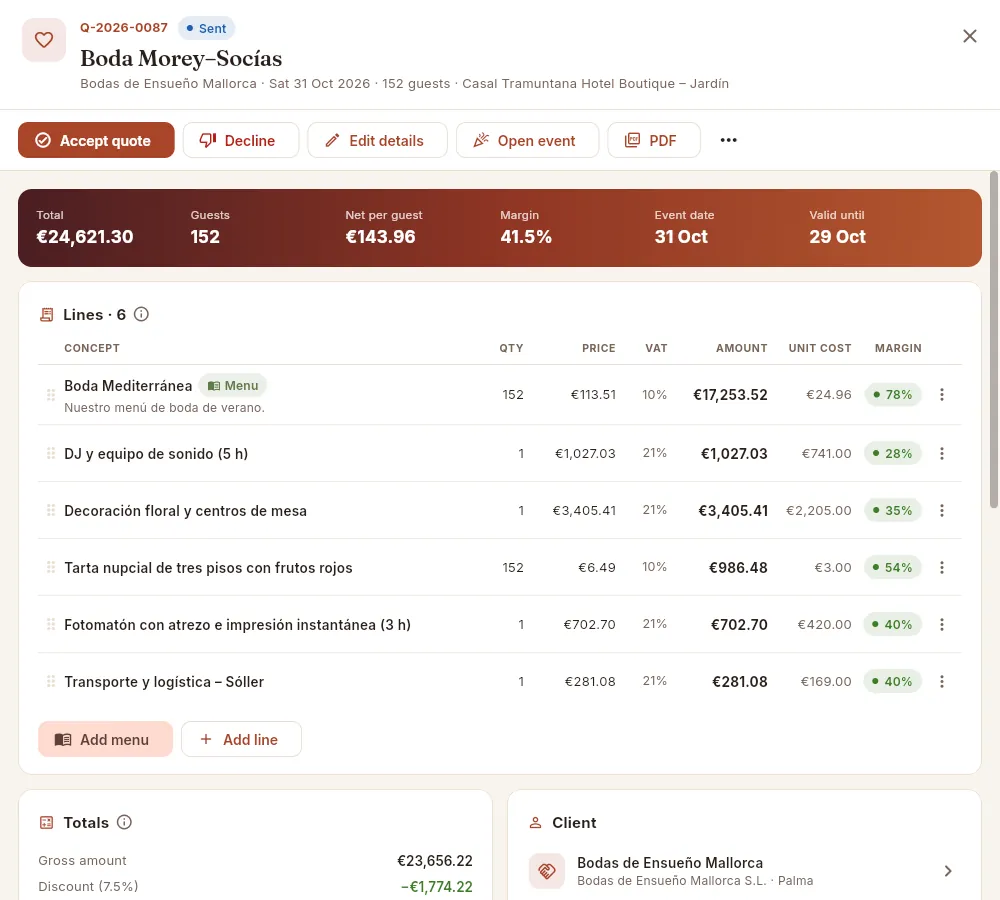 12345678
- 1The quote's number and its status. Below, the title and the summary: client, event date, guests and venue.
- 2Accept quote: the client has said yes; it creates (or confirms) the event.
- 3Decline: records that the client has said no and why.
- 4Edit details: change the client, title, date, guests, venue, validity, discount or notes.
- 5Open event: goes to the linked event's record (only if there is one).
- 6PDF: print or download the quote to send it to the client.
- 7More options (⋯): extend the validity, go back to draft, duplicate… depending on the status.
- 8The strip with the total including VAT, the guests, the net per guest (net amount ÷ guests), the margin, the event date and the validity.
The buttons in the bar change depending on the quote's status:
| Status | Buttons | Under More options (⋯) |
|---|---|---|
| Draft | Mark as sent · Edit details · PDF | Accept quote · Duplicate · Delete draft |
| Sent | Accept quote · Decline · Edit details · PDF | Extend validity · Mark as expired (if it has lapsed) · Back to draft · Duplicate |
| Declined or expired | Reopen · Duplicate as new quote · PDF | — |
| Accepted | Open event · PDF | Duplicate |
Open event appears in any status if the quote has a linked event.
#The lines: menus and services
The lines are what is being quoted. There are two kinds:
- Menu lines: a menu from the catalogue, per guest. Its price comes from the menu and its cost is live: it follows the recipe costing (each dish's cost sheet, ingredient by ingredient), so if the price of an ingredient goes up, the quote's margin updates by itself.
- Service lines: open bar, wine, DJ, decoration, transport, equipment hire, extra staff… with the price and the estimated cost that you enter.
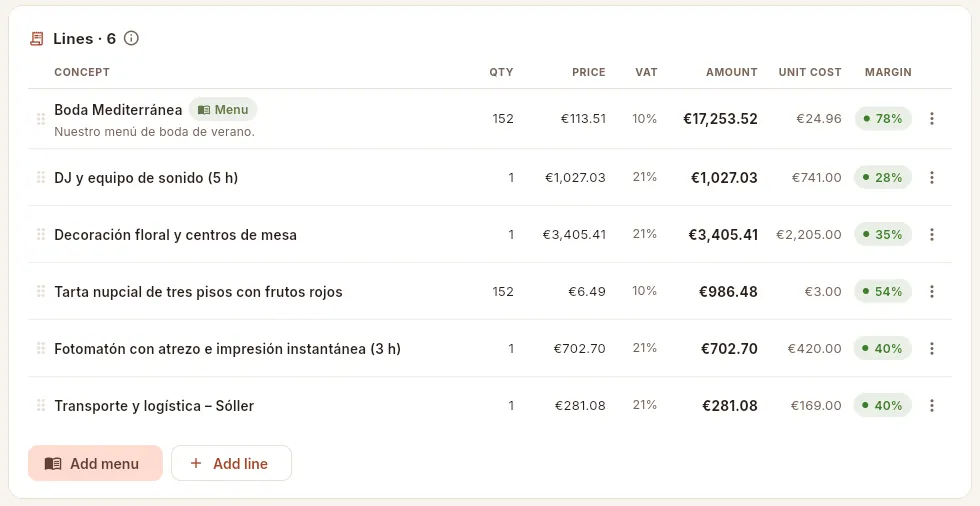 12345678
- 1The Menu tag distinguishes menu lines. Clicking it opens the menu's record with its dishes.
- 2VAT on each line: 10 % for food and drink, 21 % for services such as the DJ, flowers or transport.
- 3Unit cost: on the menu, the live cost per guest from the recipe costing; on services, the estimated cost you entered. The client never sees it.
- 4Margin on each line: (price − cost) ÷ price.
- 5The handle on each line: drag it to change the order (it is the order on the PDF).
- 6The ⋮ menu on each line: Edit, Move up, Move down and Delete. You can also click the line to edit it.
- 7Add menu picks a menu from the catalogue and adds it as a per-guest line.
- 8Add line adds a service from a template or a custom line.
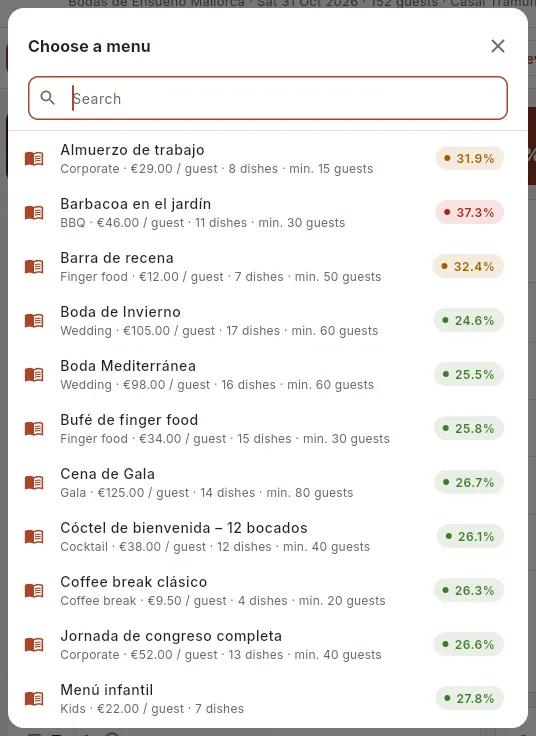 1234
1234
- 1Search for the menu by name.
- 2Each menu with its type, price per guest, number of dishes and minimum guests. When you choose it, the line is added with as many units as the quote has guests.
- 3The menu's food cost (raw-material cost ÷ selling price), in green if it is within the company target.
- 4In amber if it exceeds the target by less than 5 points; in red if it exceeds it by more.
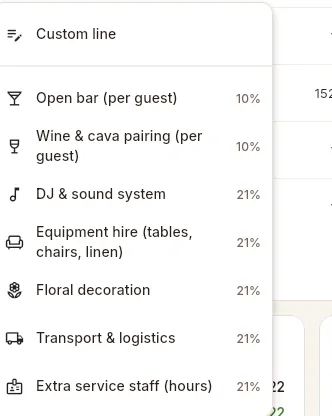 1234
1234
- 1Custom line: any concept, with whatever price, cost and VAT you like.
- 2The per-guest templates (open bar, wine) already set the number of guests as the quantity.
- 3The other templates come with a quantity of 1.
- 4On the right, the VAT the line will carry: 10 % for food and drink, 21 % for the other services.
The same form opens when you add a line and when you edit one:
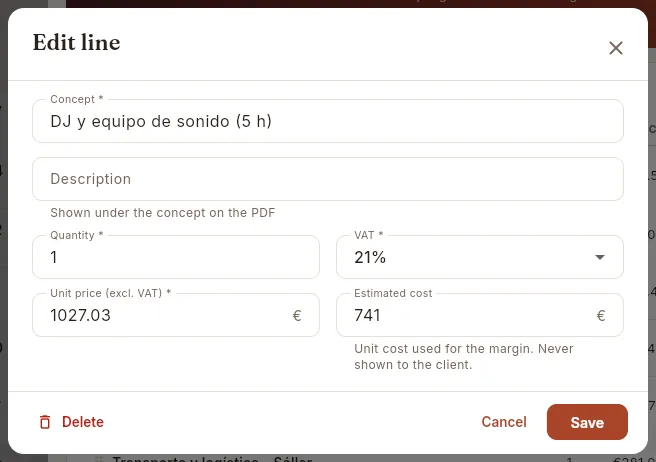 1234567
- 1Concept: what the client will see on the PDF.
- 2Description (optional): appears below the concept on the PDF.
- 3Quantity: guests, hours or units.
- 4VAT on the line: 0 %, 4 %, 10 % (food and beverage service) or 21 % (standard rate: hire, music and other services).
- 5Unit price (excl. VAT) charged to the client.
- 6Estimated cost per unit: what it costs you (supplier, hire…). It is used for the margin and the client never sees it. It doesn't appear on menu lines: their cost is the recipe costing.
- 7Delete removes the line (it asks for confirmation).
Open the quote (as a Draft or Sent: accepted, declined and expired quotes can no longer be changed).
Click Add menu and choose the menu. It is added per guest, with its price and its recipe-costing cost.
Click Add line and choose a template (e.g. DJ & sound system) or Custom line.
Fill in the Unit price (excl. VAT), the Estimated cost and, if needed, adjust the Quantity and the VAT. Click Save.
Put the lines in order by dragging the handle or with Move up and Move down in the ⋮ menu.
#Totals, VAT and margin
Further down, the Totals card breaks down the amount for the client and, in the Profitability block, what it costs you and what you make. Next to it, the client's details (contact, payment terms and usual discount) and the linked event.
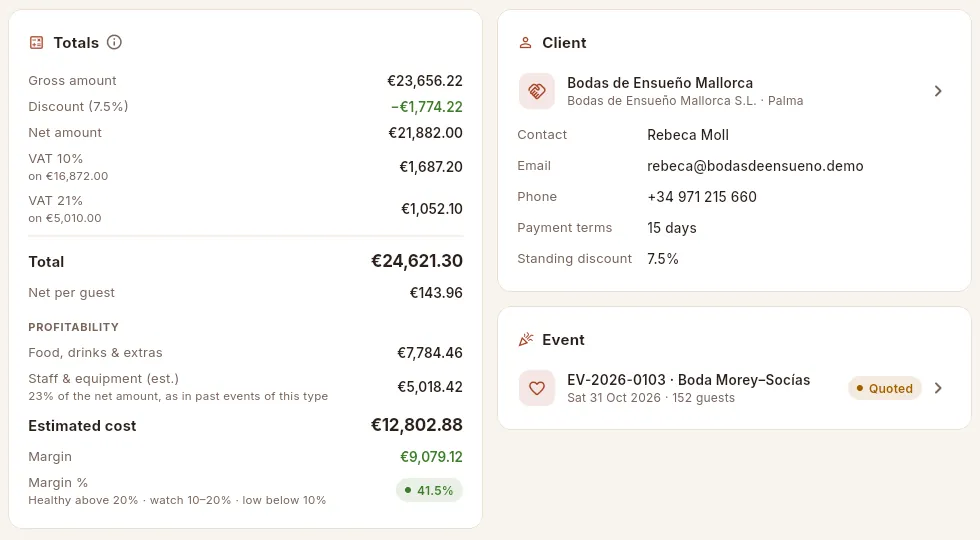 12345678
- 1Gross amount (the sum of the lines) and the quote's discount, which applies to all the lines.
- 2Net amount (gross − discount) and the VAT by rate: one row for each rate, with the amount it is calculated on.
- 3Total for the client (net amount + VAT) and net per guest (net amount ÷ guests).
- 4Food, drinks & extras: the cost of the lines (live menu cost × guests + the estimated cost of each service).
- 5Staff & equipment (est.): what staff and equipment usually cost at events of this type, as a % of the net amount.
- 6Estimated cost, margin in euros and margin %, with its colour (healthy, watch or low).
- 7The client: click to open their record. Below, their contact details, payment terms and usual discount.
- 8The linked event, with its status. If there isn't one yet, it explains that one will be created on acceptance.
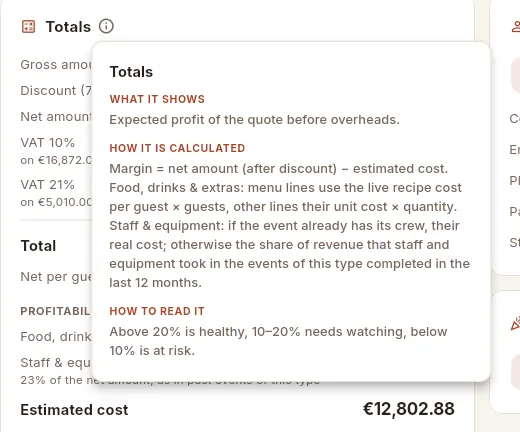 1234
1234
- 1The ⓘ button next to the title of a card or indicator opens its explanation.
- 2What it shows: the expected profit before overheads.
- 3How it is calculated, step by step.
- 4How to read it: which margin is healthy and which is at risk.
#Sending the quote and the PDF
When the draft is ready, produce the PDF with PDF → Download PDF (or Print, which also lets you save it), send it to the client from your usual email and click Mark as sent.
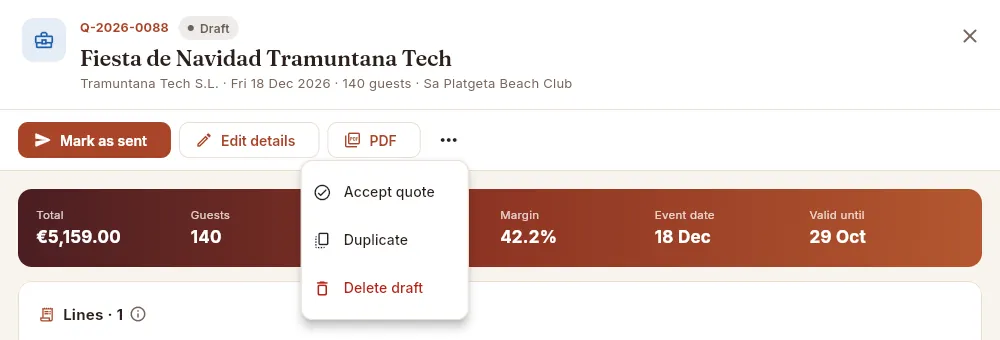 123456
- 1Draft status: the client doesn't have it yet.
- 2Mark as sent: change it to Sent when you have sent it to the client. Mise doesn't send emails: it only records the change.
- 3PDF → Print or Download PDF.
- 4If the client accepts without you having marked it as sent, you can accept it directly from the draft.
- 5Duplicate creates another identical draft (useful for an alternative version).
- 6Delete draft deletes it completely (it asks for confirmation). Only drafts can be deleted.
The quote PDF contains:
- The header with your company's details (name, registered name and tax ID, address, email, phone and website, from Settings), the title QUOTE, the number, the date and the validity date.
- Prepared for: the client with their registered name, tax ID, contact person, address and email.
- Event: type, date, guests and venue; and the quote's title.
- The table of lines (concept and description, quantity, price, VAT and amount), the totals (subtotal and discount if there is one, net amount, VAT by rate, total and net price per guest).
- The notes for the client, the company's terms & conditions and a client acceptance space for name, signature and date (it doesn't appear on declined or expired quotes).
- At the foot, the company's registered name and IBAN.
It never shows costs or margins.
Open the draft and check the lines, the totals and the margin.
Click PDF → Download PDF and send it to the client.
Click Mark as sent.
#Accepting or declining
When the client replies, open the quote and click Accept quote or Decline. Neither takes effect until you confirm it in the dialog.
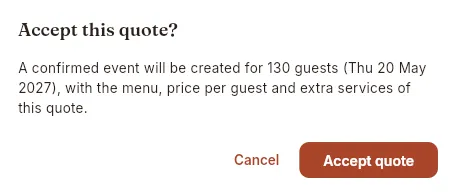 123
123
- 1What will happen: a confirmed event will be created with the quote's date, guests, menu, price per guest and services.
- 2Cancel closes without changing anything.
- 3Accept quote confirms it. Afterwards Mise offers Open event so you can carry on with staff, equipment and the deposit.
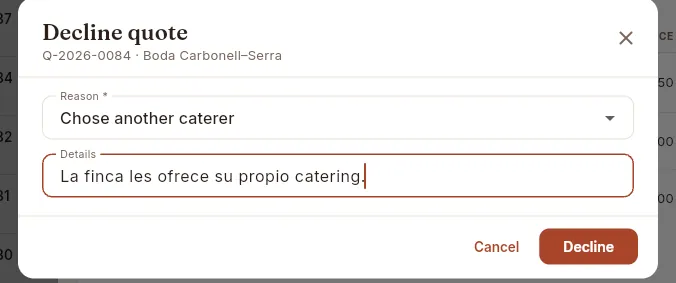 123
123
- 1Reason (required): price, chose another caterer, date not available, event cancelled, no reply from the client or other.
- 2Details: what the client said, in their own words.
- 3Decline saves it: the quote becomes Declined with the reason in view.
#Lapsed, declined and expired quotes
A sent quote whose validity date has passed with no reply is marked Past validity. It doesn't change status by itself: you decide whether to follow up and extend the validity or write it off.
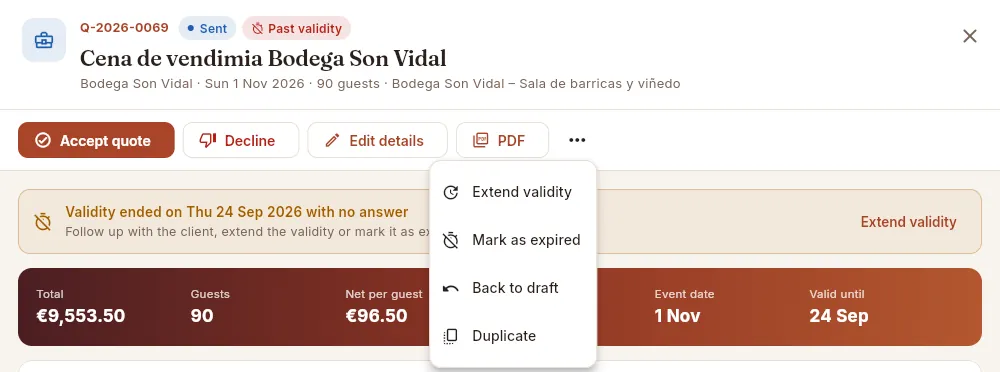 123456
- 1Past validity: it is still sent, but its validity has ended.
- 2The notice reminds you when it ended and what you can do.
- 3Extend validity from the notice: the new date is today + the usual validity (30 days).
- 4Mark as expired: you write it off (it only appears once it has lapsed).
- 5Back to draft: to redo it before sending it again.
- 6Duplicate: a new identical draft, with today's date and a new validity.
 1234
1234
- 1Declined status.
- 2The reason for declining, as it was recorded.
- 3Reopen: if the client reconsiders, it goes back to Sent with a new validity from today (and the reason is deleted).
- 4Duplicate as new quote: a draft with the same lines so you can quote again (another date, another price…).
An expired quote looks the same, with the “Expired quote” notice and the same Reopen and Duplicate as new quote buttons. The lines of declined, expired and accepted quotes can no longer be changed: if necessary, duplicate it.
 12345
12345
- 1Accepted status.
- 2The green notice shows the event that was confirmed, with its name and date.
- 3Open event takes you to the event's record to continue with the preparation.
- 4Under More options only Duplicate is left, in case you want to start from this quote for another.
- 5The lines no longer have a handle or ⋮ menu, or buttons to add: an accepted quote can't be modified.
In the list, look at the Expiring within 7 days indicator and the Expired filter.
Open each lapsed quote and call the client.
If they are still interested, click Extend validity (in the notice or in More options).
If not, click Decline with its reason, or More options → Mark as expired if they didn't reply.
#What each profile sees
What you see of a quote depends on each user's access profile. For example, the Sales & events profile sees the prices but not the costs or margins, and can prepare and send quotes:
 123
123
- 1They can send, accept, decline and edit quotes.
- 2The strip doesn't show the margin.
- 3The lines don't have the Unit cost or Margin columns, and the Totals card doesn't show the Profitability block.
 123
123
- 1Only Open event and PDF: without permission to edit quotes there are no status actions.
- 2They see the total and the margin.
- 3The lines, with cost and margin, are read-only: no handle, no ⋮ menu and no buttons to add.
#Tips
Sales
Clients
The record for each client —company, private client, agency or institution— with their billing and contact details, their terms, and their whole history: events, quotes, invoices and what they owe you.
Clients holds every person or organisation you serve. There are four types: company, private client (wedding couples, families), agency (wedding agencies, event agencies, DMCs) and institution (associations, foundations, public bodies). As well as their details, each client keeps their commercial terms —the payment terms for their invoices and their standing discount, which is proposed on every new quote— and gathers everything you have done with them in their record.
- 1ClientTheir record with tax details, contact, payment terms and discount.
- 2QuoteWith their standing discount already applied.
- 3EventCreated when the quote is accepted.
- 4Invoices and collectionsDeposit and final invoice, which falls due according to their payment terms; what is collected reduces their outstanding balance.
#The client list
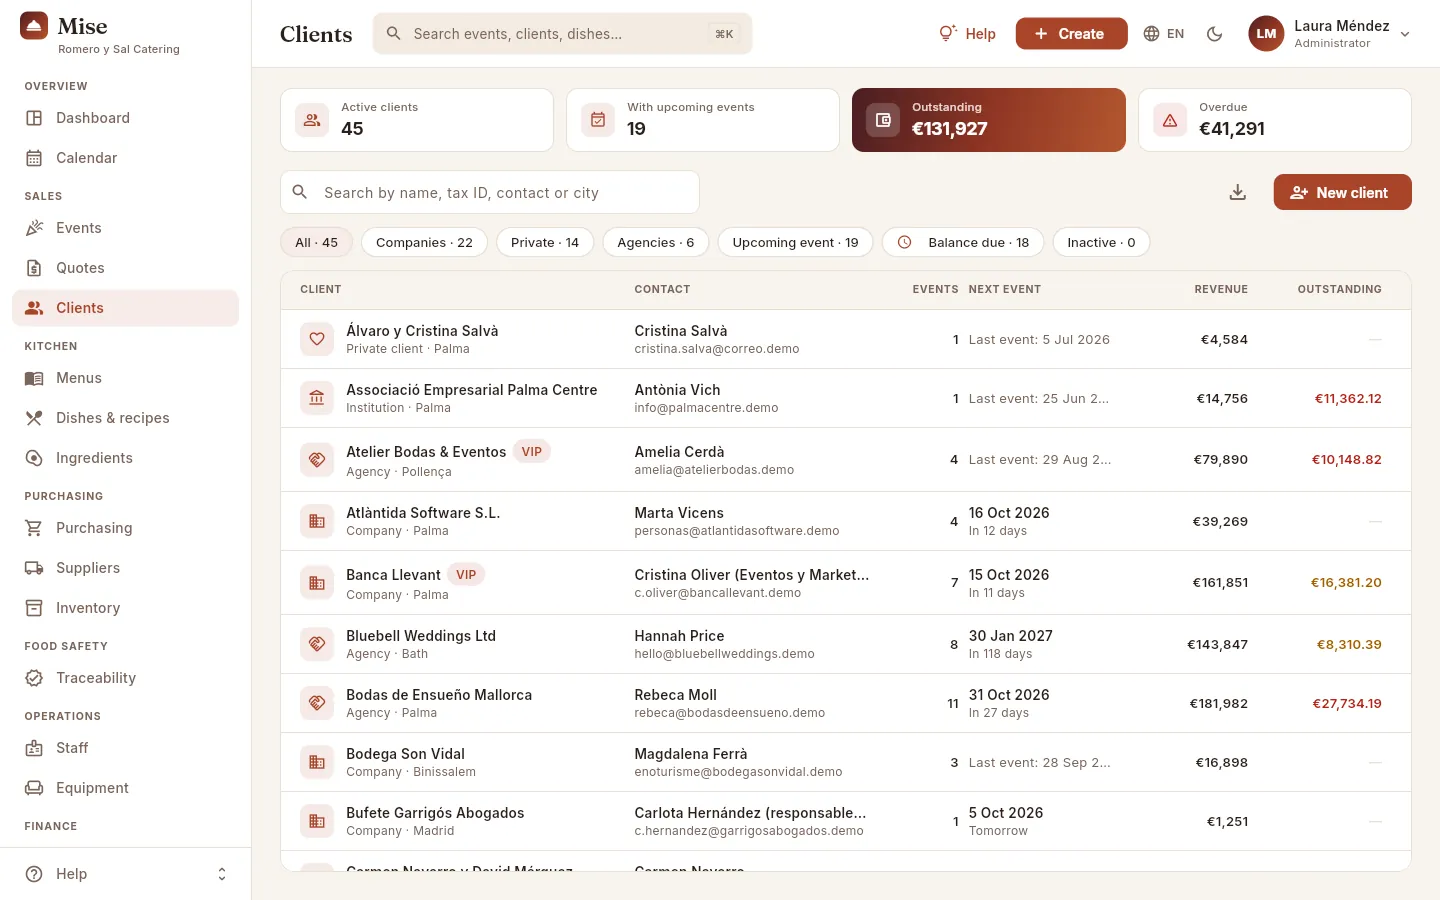 12345678
- 1Active clients and how many have upcoming events (from today, in any status except cancelled).
- 2Outstanding: what all your clients owe you on issued invoices; Overdue: the part whose due date has already passed.
- 3The search box finds by name, legal name, tax ID, contact person or city.
- 4The filters: All (the active ones), by type (Companies, Private, Agencies), Upcoming event, Balance due and Inactive.
- 5Export CSV downloads the list you are looking at.
- 6New client opens the new-client form.
- 7The VIP tag marks the clients who have it on their record.
- 8Outstanding: red if part of the debt is overdue, amber if it is still within terms; a dash if they owe nothing.
For each client the table shows their type and city, the contact person and their email, the number of events (not counting cancelled ones), the next event with the days remaining (or, if there is none, the date of the last one), the revenue from their events and what they have outstanding. Click a column header to sort by it and a row to open the record.
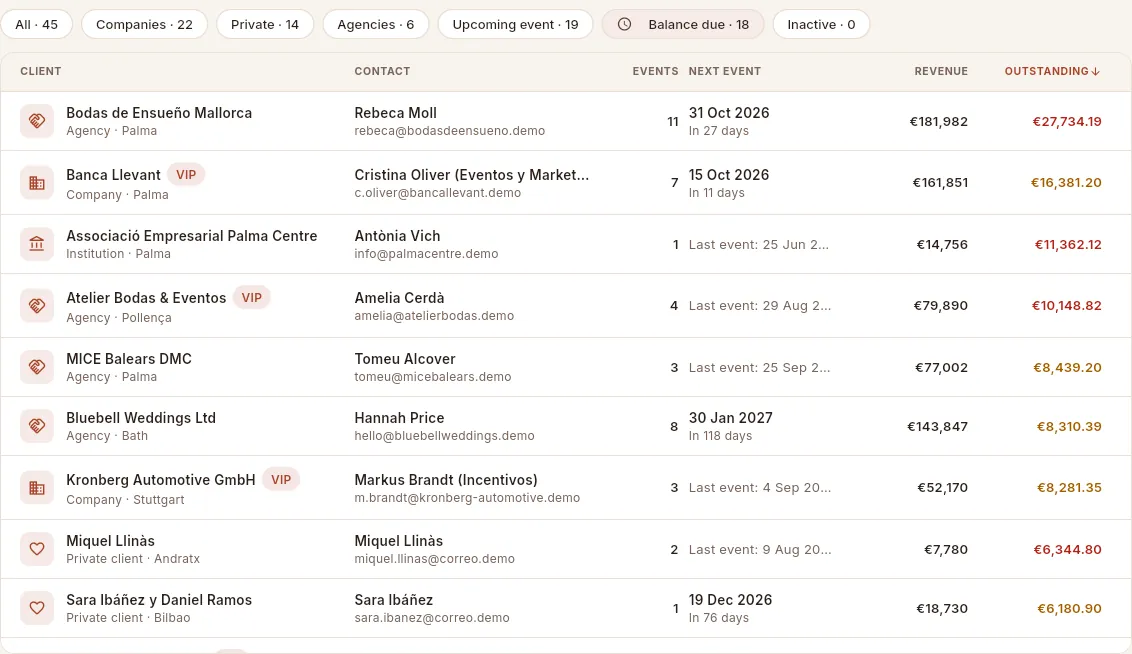 12345
12345
- 1The Balance due filter leaves only those who owe you something.
- 2Click the Outstanding header twice to sort from largest to smallest (the arrow shows the order).
- 3In red: part of what they owe is already overdue. Open the client and look at their invoices.
- 4In amber: they owe money, but still within terms.
- 5Next event: date and how long to go; if there is none, the date of the last completed event.
#Adding a client
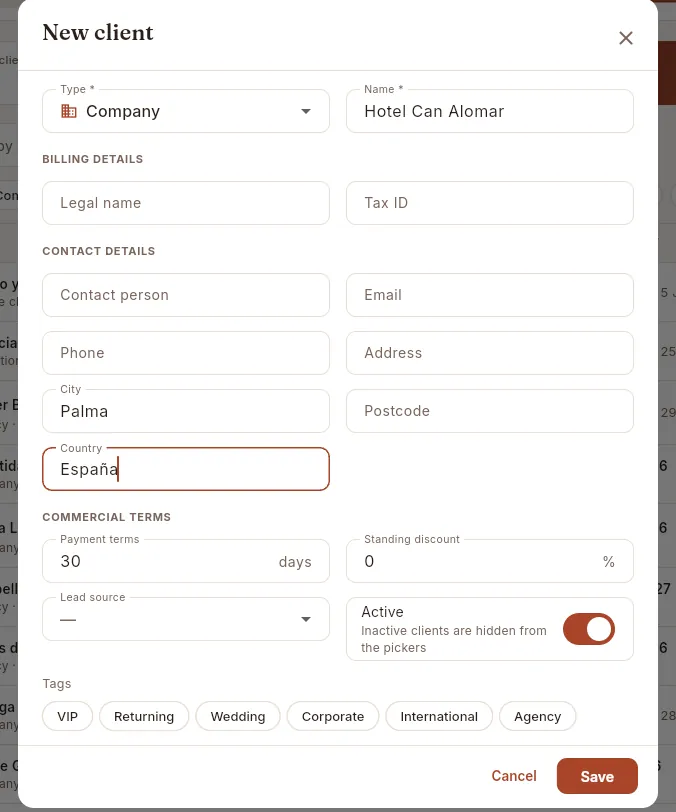 12345678
- 1Type (required): Company, Private client, Agency or Institution.
- 2Name (required): what you call them day to day; it is the one shown in lists and quotes.
- 3Legal name and Tax ID (CIF/NIF), for the PDF of quotes and invoices.
- 4Contact person, email, phone and address; below, city, postcode and country.
- 5Payment terms in days: sets the due date of their final invoices (0 = on receipt).
- 6Standing discount in %: proposed on every new quote for this client.
- 7Lead source: how they found you (website, referral, wedding fair, returning client, agency, social media). Active: inactive clients are not offered when choosing a client.
- 8Tags to classify them: VIP, Returning, Wedding, Corporate, International, Agency. And at the end, internal Notes.
Click New client (or Create → New client in the top bar).
Choose the Type and enter the Name.
Fill in the legal name and the Tax ID (CIF/NIF), and the contact details.
Check the commercial terms: Payment terms (30 days by default) and Standing discount; set the Lead source and the Tags.
Click Save.
#The client record
Click a client to open their record. It has four tabs: Summary, Events, Quotes and Invoices, each with its count.
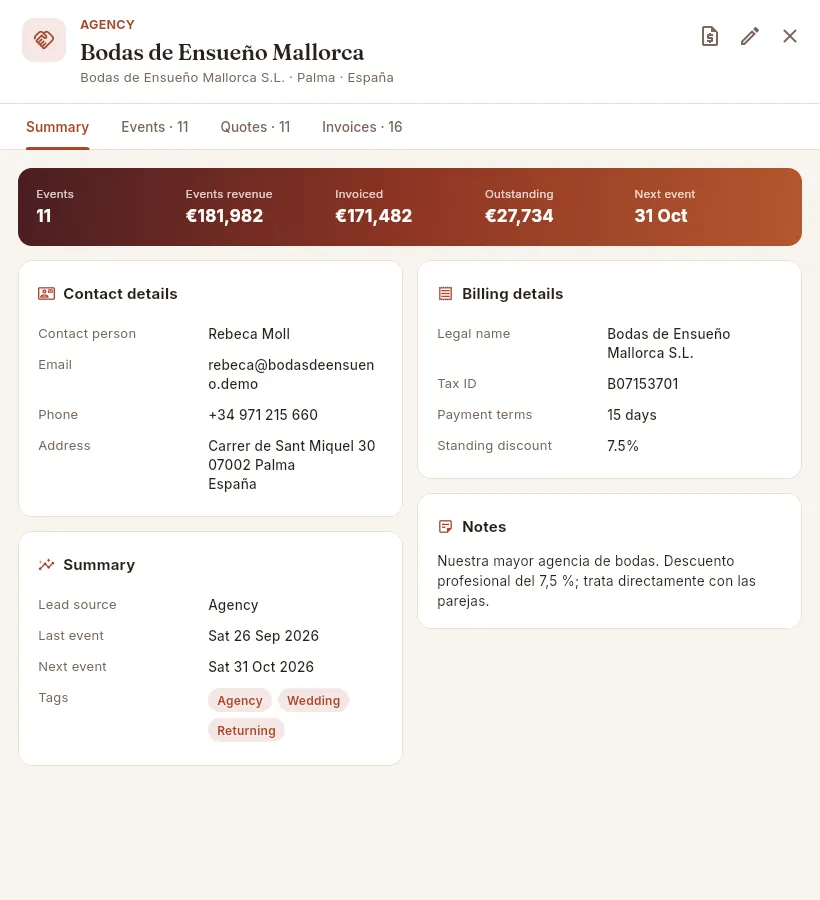 12345678
- 1The client type, the name and, below, the legal name, city and country.
- 2New quote for this client, with their standing discount already filled in.
- 3Edit opens the form with all their details.
- 4The tabs, showing how many events, quotes and invoices they have.
- 5Their figures: events, events revenue (excluding VAT), invoiced (including VAT), outstanding and the date of the next event.
- 6Contact details: person, email, phone and address.
- 7Billing details: legal name, Tax ID (CIF/NIF), payment terms and standing discount.
- 8Summary: lead source, last and next event, and their tags. Beside it, their internal notes.
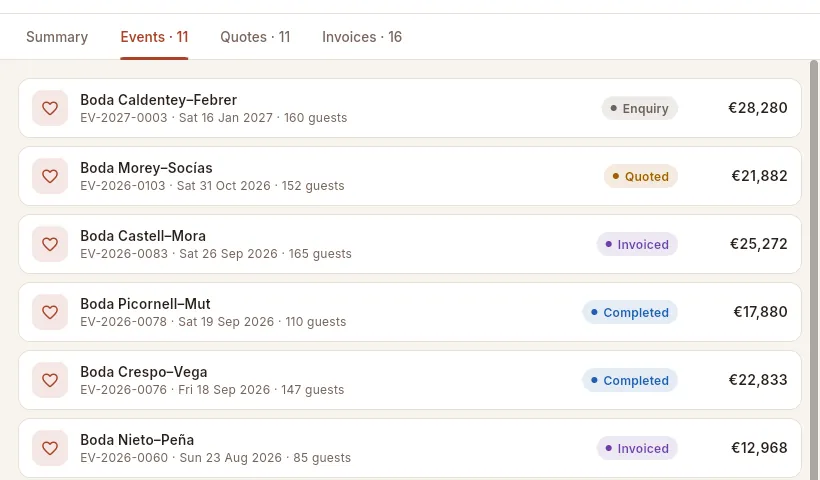 1234
1234
- 1The Events tab.
- 2Each event with its code, date and guests. Click to open its record.
- 3Its status: Enquiry, Quoted, Confirmed, Completed, Invoiced or Cancelled.
- 4The event's revenue (menu + extras, excluding VAT).
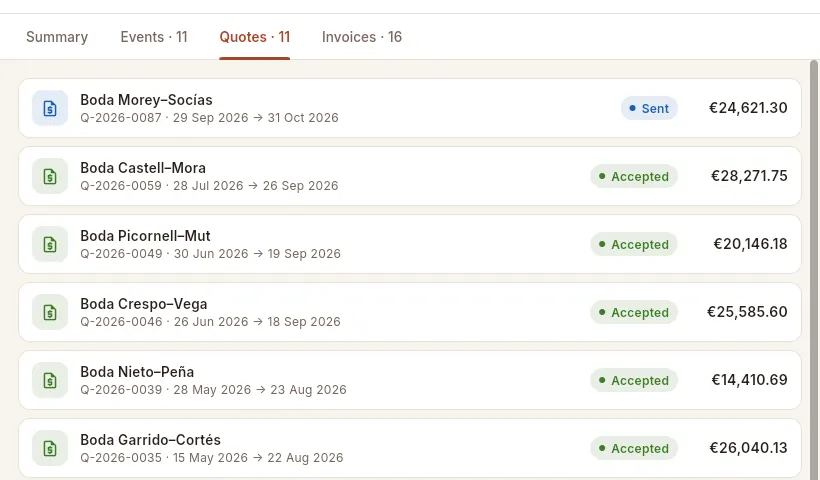 1234
1234
- 1The Quotes tab.
- 2Each quote with its number, its date and, after the arrow, the event date. Click to open it.
- 3Its status: Draft, Sent, Accepted, Declined or Expired.
- 4The quote total, including VAT.
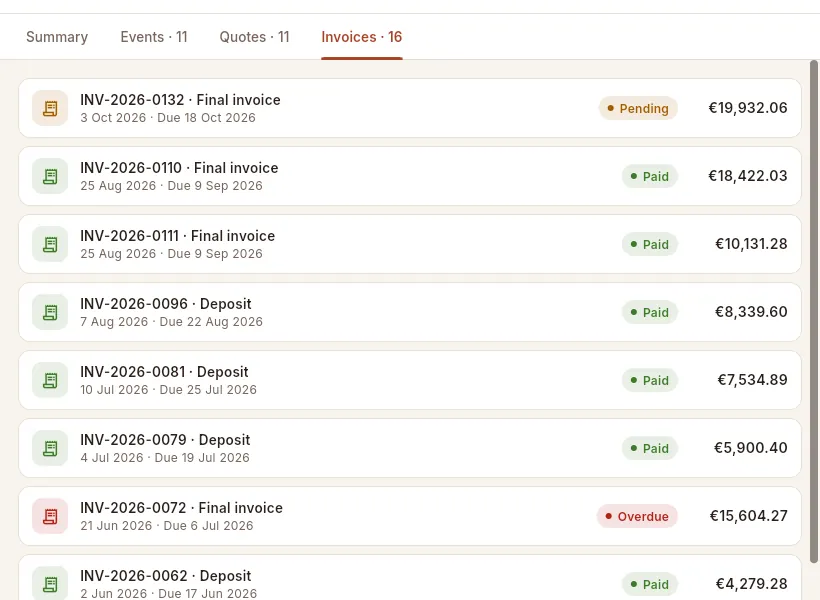 12345
12345
- 1The Invoices tab.
- 2Number and type (deposit or final invoice), issue date and due date.
- 3Pending: issued and still within terms.
- 4Paid: already paid in full.
- 5Overdue: the due date has passed without being collected in full. Open it to record the collection.
In the list, filter by Balance due and sort by Outstanding.
Open the client: the strip shows their outstanding amount.
Go to the Invoices tab: overdue ones carry the Overdue label.
Click the invoice to open it and record the collection (see the Invoices chapter).
#Editing a client, deactivating them and quoting them
With the pencil Edit on the record you change any detail. To stop a client appearing when choosing a client in quotes, events and invoices without losing their history, deactivate them: switch off Active and save. You will find them under the Inactive filter and their record will show the “Inactive” tag.
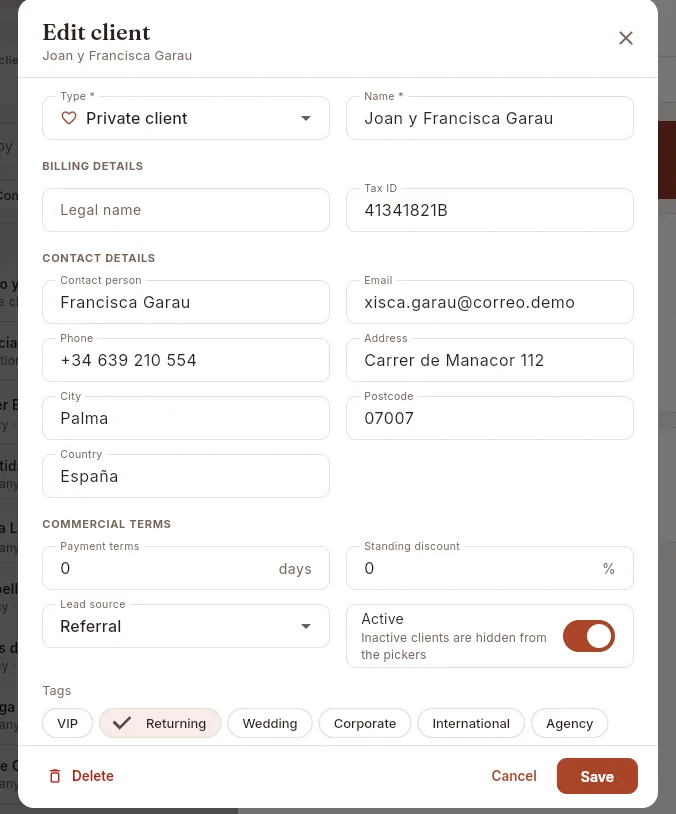 1234
1234
- 1Active: switch it off to deactivate the client.
- 2Tags are ticked and unticked with a click.
- 3Delete only appears if the client has no events, and it does not work if they have quotes or invoices.
- 4Save applies the changes.
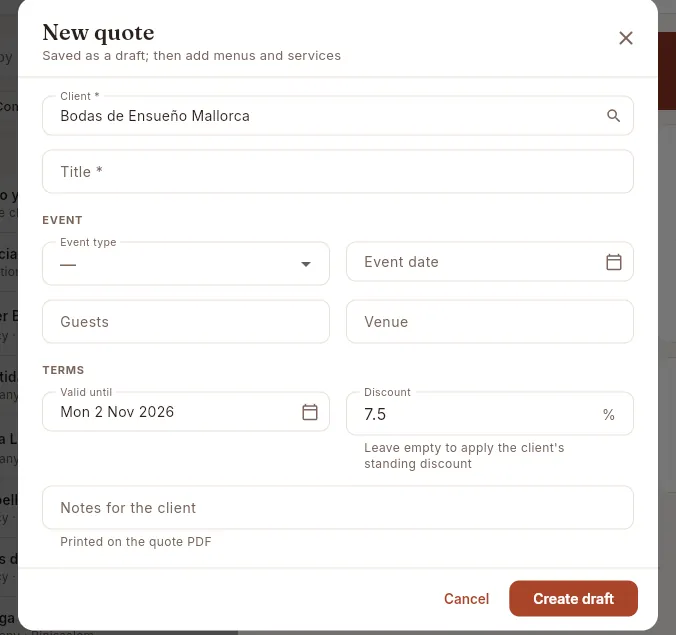 12
12
- 1The client is already chosen.
- 2Their standing discount appears as the quote discount; you can change it.
#What each profile sees
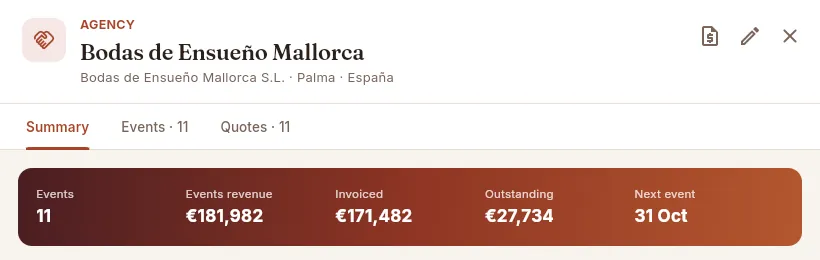 1234
1234
- 1The sales profile does not have the Invoices section, so it does not see that tab.
- 2It does see the amounts: revenue, invoiced and outstanding.
- 3It can create quotes for the client…
- 4…and edit their record.
#Tips
Kitchen
Menus
The menus you offer clients: which dishes each course includes and how many portions per guest, what each guest costs at today's prices, the food cost and margin, the allergen matrix that clients and venues ask for, and the events that have booked it.
A menu is a combination of dishes organised by course (Welcome canapés, Starters, Main course, Dessert, Drinks and Late-night) with a price per guest. It is what you choose in a quote or an event, and where the portions the kitchen has to produce come from.
For each dish in the menu you say how many portions per guest are served: 1 if it is one portion each, 0.5 if it is a dish to share between two, 2 or 3 if they are canapé pieces. From that, Mise calculates live, from the costing sheet of each dish (chapter Dishes & recipes), the menu's cost per guest, food cost and margin per guest, and gathers its allergens.
#The list of menus
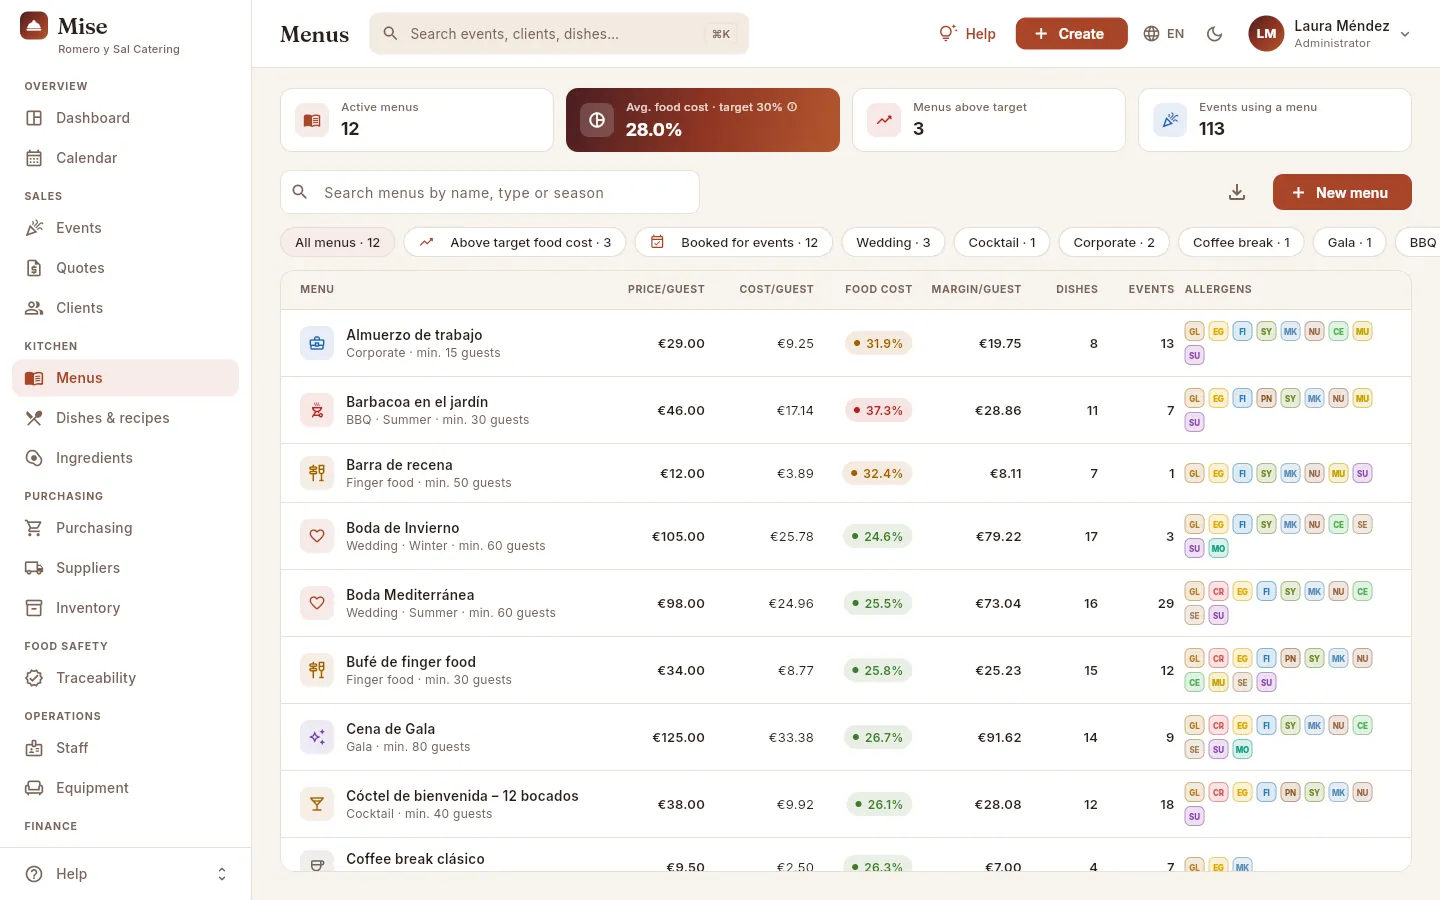 12345678
- 1The indicators: active menus, average food cost against the target (with its ⓘ), menus that exceed the target and events that have a menu.
- 2The search box: by name, type, season or description.
- 3Above target food cost: the menus that leave less margin than planned.
- 4Booked for events: the menus that an event has booked. After that, one filter for each type (Wedding, Cocktail, Corporate, Coffee break, Gala, BBQ, Kids, Finger food) and Inactive.
- 5Export CSV downloads the visible list.
- 6New menu opens the form to add a menu.
- 7The columns: price and cost per guest, food cost, margin per guest, number of dishes, events and allergens. Click a heading to sort.
- 8Each row: type icon, name, type, season and minimum guests. A food cost in red means the price or the dishes need reviewing. Click the row to open the menu.
| Indicator | What it counts |
|---|---|
| Active menus | Menus that are offered in quotes. |
| Avg. food cost · target 30 % | Average food cost of the active menus against the company target (ⓘ shows the calculation). |
| Menus above target | How many active menus exceed the target food cost. |
| Events using a menu | Events (not cancelled) that have a menu assigned. |
#Creating a menu
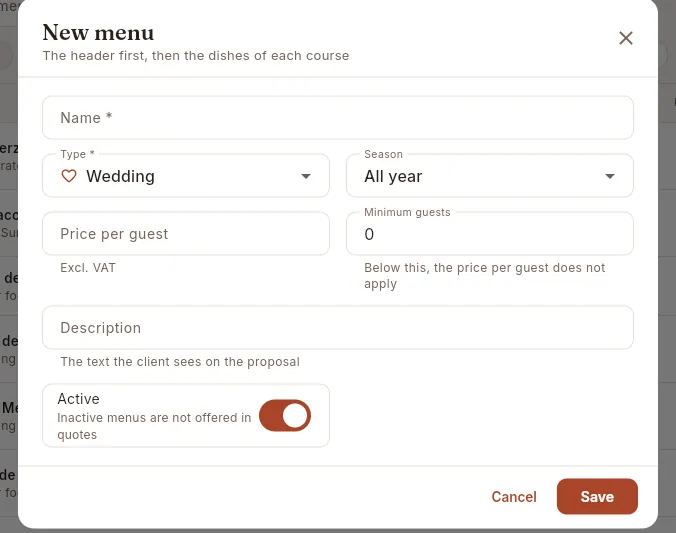 1234567
- 1Name of the menu, as the client will see it.
- 2Type: Wedding, Cocktail, Corporate, Coffee break, Gala, BBQ, Kids or Finger food. It gives the menu its icon and colour.
- 3Season: all year, spring, summer, autumn or winter.
- 4Price per guest, excluding VAT.
- 5Minimum guests that the price applies to. It is used as the starting quantity in quotes and triggers a warning in the quick quote.
- 6Description: the text the client sees in the proposal.
- 7Active: an inactive menu is not offered in quotes.
In Menus, click New menu (or Create › New menu in the top bar).
Write the Name, choose the Type and the Season, and write the Price per guest (excluding VAT) and the Minimum guests.
Write the Description the client will read and click Save.
The menu page opens on Composition: click Add the first dish and choose the dish. Repeat with Add dish or with the ⊕ of each course.
Adjust the portions per guest of each dish (see below) and check the cost per guest and the food cost.
#The menu page: composition
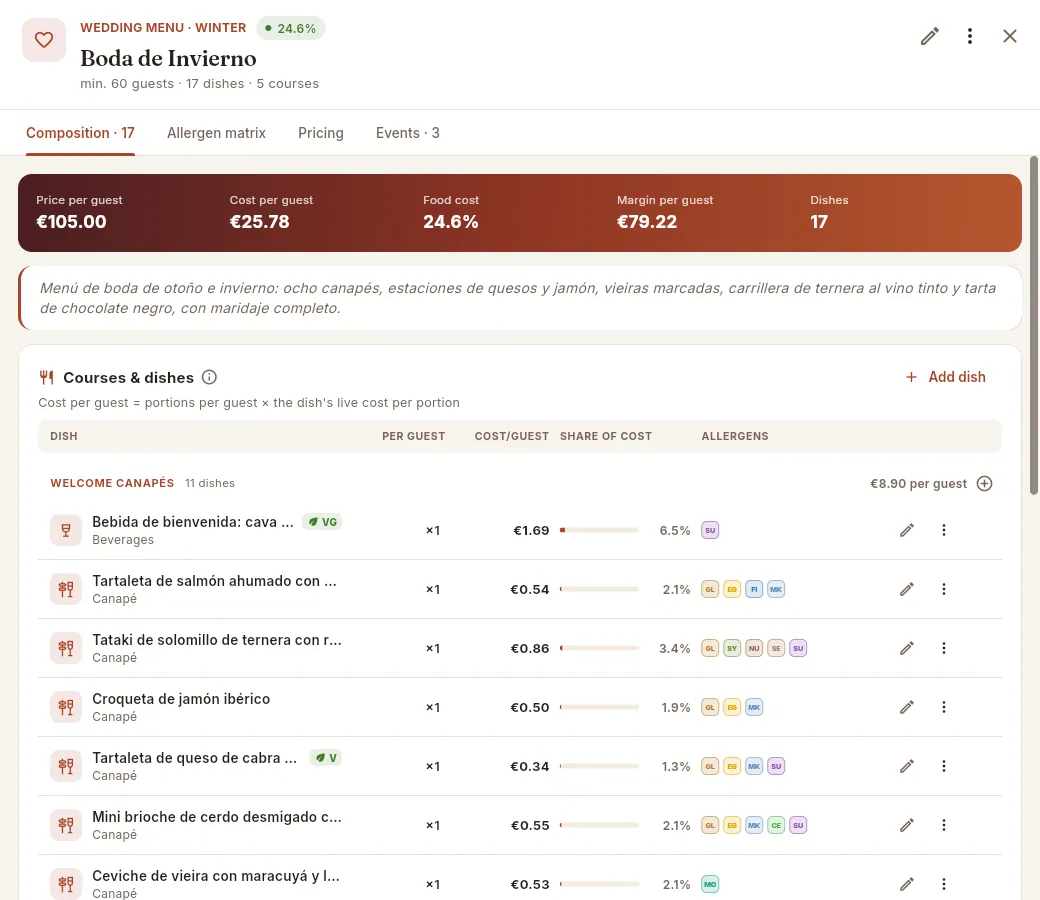 12345678
- 1The header: type and season, the menu's food cost with its colour, the name, the minimum guests and how many dishes and courses it has. On the right, Edit and More options (duplicate or delete).
- 2The tabs: Composition, Allergen matrix, Price and Events (with the number of events).
- 3The key figures: price per guest, cost per guest, food cost, margin per guest and number of dishes.
- 4The description the client sees.
- 5Add dish: choose a dish and Mise places it in its course according to its category.
- 6Each course with its number of dishes and, on the right, what it adds to the cost per guest.
- 7The ⊕ of each course adds a dish directly to that course.
- 8Each dish: portions per guest (×1), cost per guest, share of the menu cost and allergens; on the right, Edit and More options. Click the row to open its costing sheet.
At the end of the composition, a box repeats the whole menu's price per guest, cost per guest and food cost. The portions per guest of each dish are changed by clicking the “×1” figure:
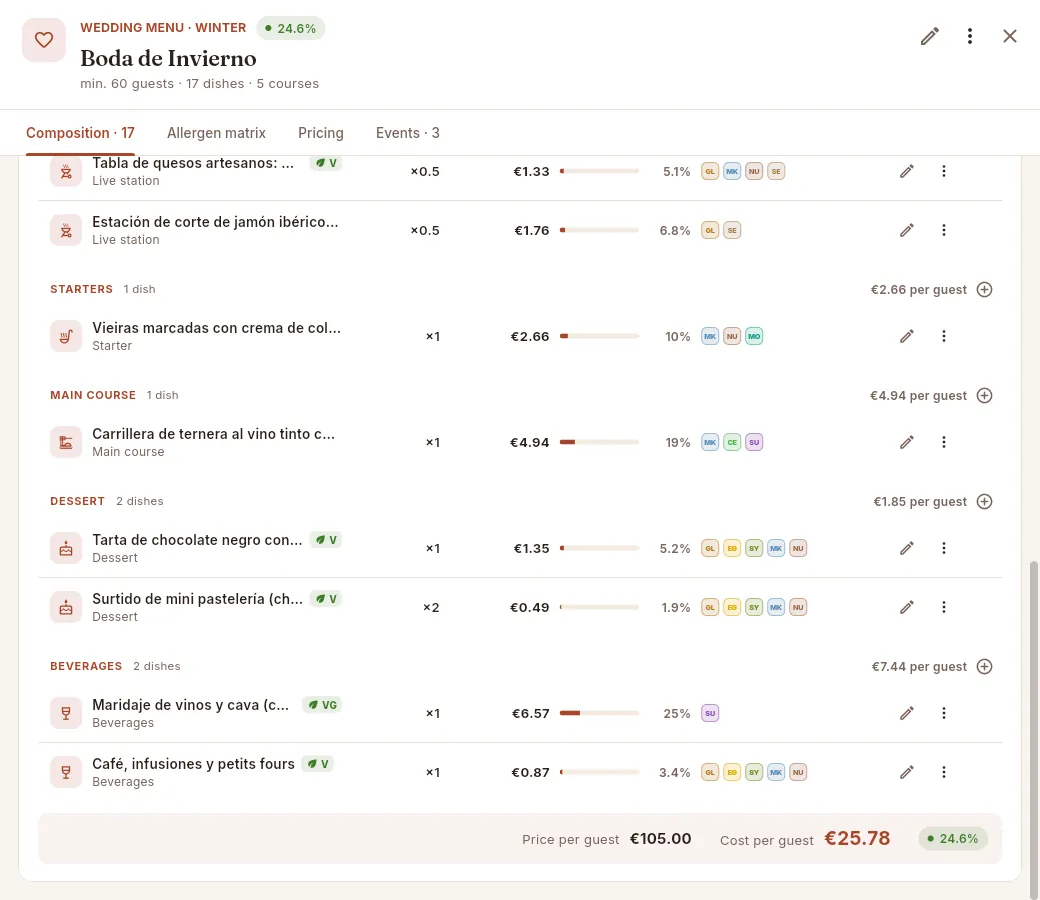 123456
- 1×0.5: one portion to share between two guests (stations, boards). Click the figure to change it.
- 2The Main course, with what it adds to the cost per guest.
- 3×2: two pieces per guest (here, the mini pastries). Its cost per guest is double the cost per portion.
- 4Edit changes the portions per guest or the course of the dish.
- 5More options: move the dish up or down within its course, or remove it from the menu.
- 6The menu total: price per guest, cost per guest and food cost.
 123
123
- 1Portions per guest: 1 = one each · 0.5 = one to share between two · 2 = two pieces (canapés).
- 2Course in which it is served: Welcome canapés, Starters, Main course, Dessert, Drinks or Late-night.
- 3Delete removes the dish from this menu (the dish stays in the recipe book).
 123
123
- 1Search for the dish by name, category or diet.
- 2First come the dishes in the category of the course, each with its category, its cost per portion and whether it is vegetarian or vegan. Those already in the menu do not appear.
- 3Then, the rest of the active dishes.
On the Composition tab, click the dish's portions figure (for example “×1”) or the Edit pencil on its row.
In Portions per guest write 0.5 for a dish to share, 2 or 3 for canapé pieces, or whatever quantity applies.
If you wish, change the Course in which it is served.
Click Save.
On the dish's row, click More options (⋮) › Remove from menu.
Confirm with Remove from menu: “The dish stays in the recipe book; only this menu changes”.
#The allergen matrix
The Allergen matrix tab is the table that clients, venues and maîtres d' ask for: which of the 14 legally declarable allergens each dish in the menu contains. It is inherited from the ingredients of each dish (including those inside base preparations), so it is always up to date with the recipes.
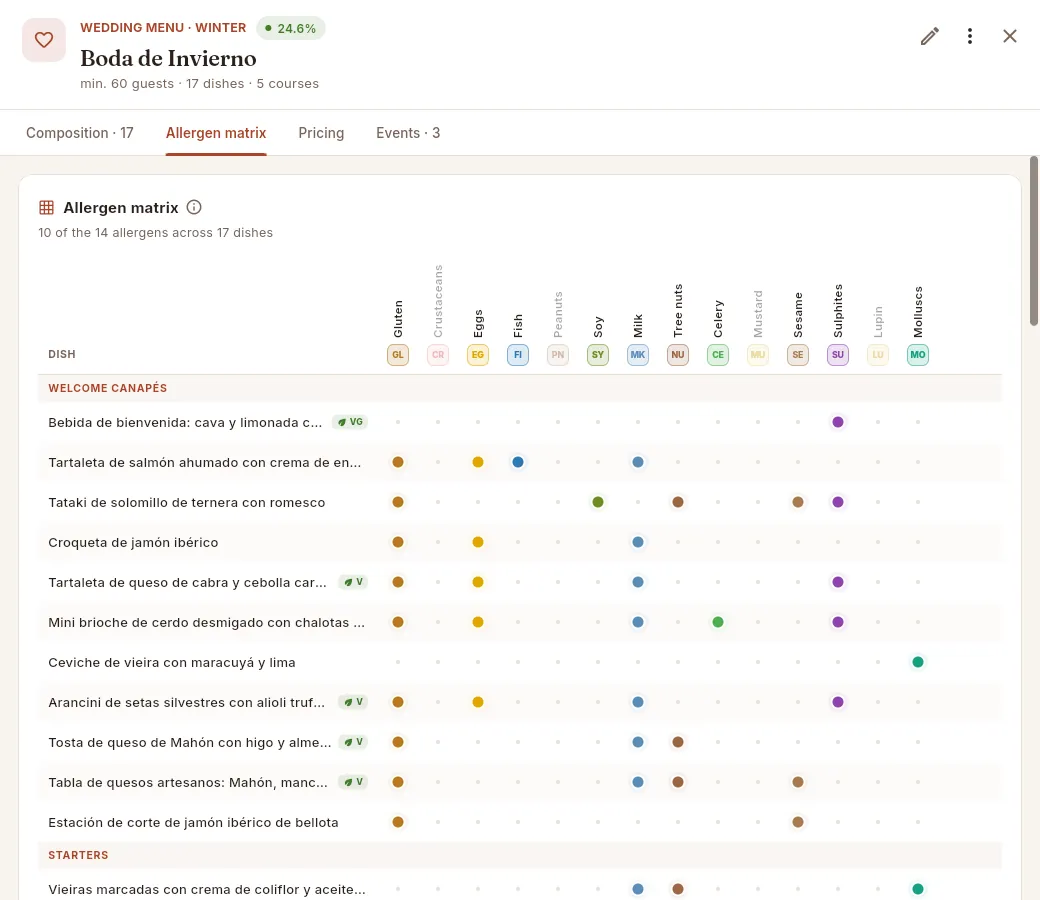 1234
1234
- 1How many of the 14 allergens appear in the menu and in how many dishes. Its ⓘ explains how to read it.
- 2One column per allergen, with its name and icon. The ones for allergens that no dish contains are greyed out.
- 3Dishes are grouped by course.
- 4One row per dish: a coloured dot for each allergen it contains. Hover over a dot to see the dish and the allergen; click the row to open the dish.
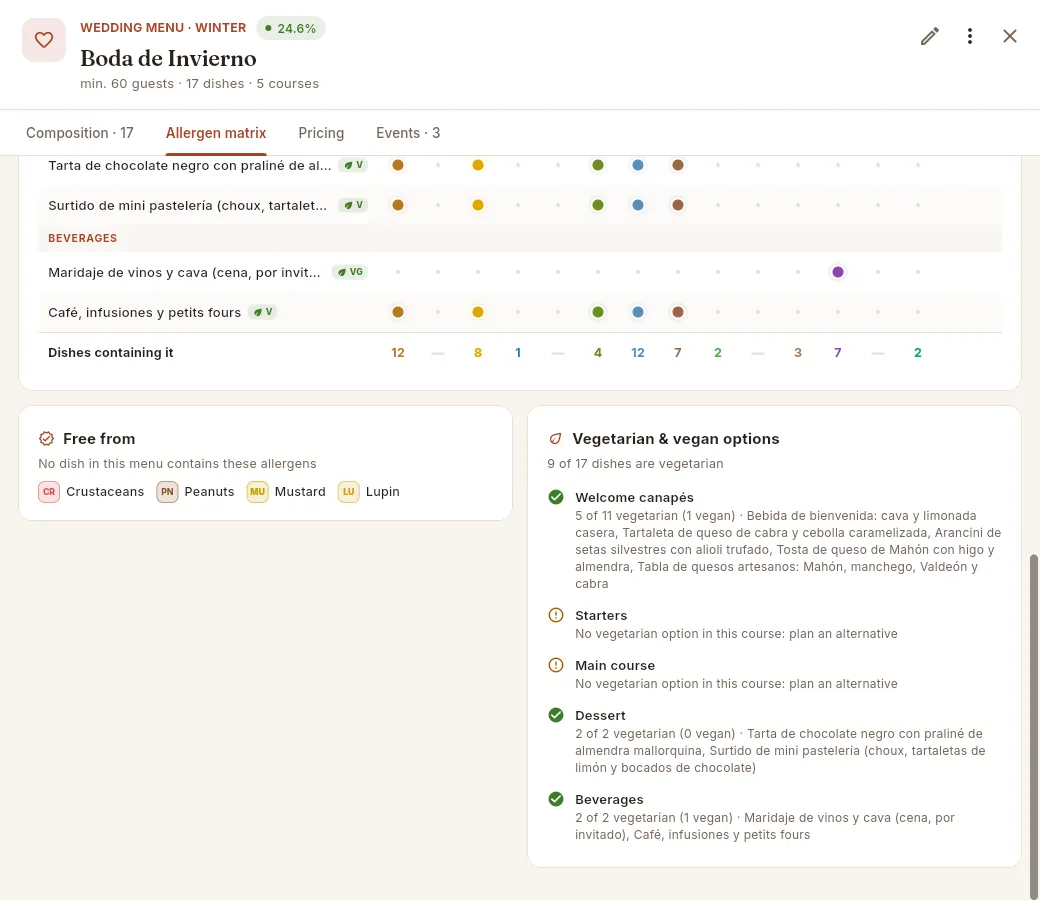 1234
1234
- 1Dishes containing it: how many dishes in the menu contain each allergen. It is what a guest with that allergy has to avoid.
- 2Free from: the allergens that no dish in the menu contains.
- 3Vegetarian & vegan options course by course, with the dishes that qualify.
- 4A course with no vegetarian option shows a warning: plan an alternative before the event.
Open the menu and go to Allergen matrix.
Read the column for the guest's allergy: the dishes with a dot are the ones they must avoid; the last row says how many there are.
Look at Free from to confirm the allergens that appear in no dish, and Vegetarian & vegan options for the courses with no alternative.
Click a dish to see on its page (tab Allergens & diet) which ingredient each allergen comes from, and share it with the client and the maître d' before the event.
#The menu price
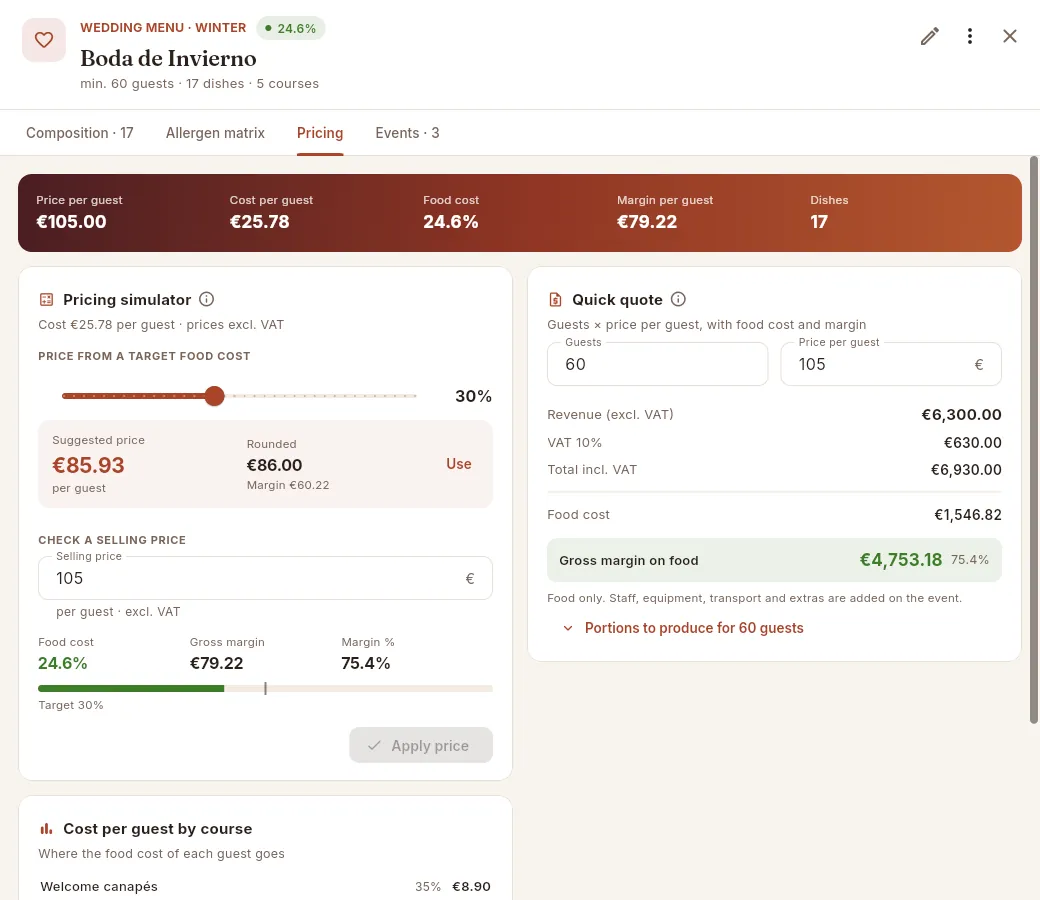 12345678
- 1The menu's key figures, as in Composition.
- 2The pricing simulator, like the one for dishes but per guest: suggested price for a target food cost, a check of a price and Apply price.
- 3Quick quote: write the number of guests…
- 4…and the price per guest (the menu's price appears).
- 5The result: revenue excluding VAT, food VAT, total including VAT and food cost for those guests.
- 6The gross food margin, in euros and as a percentage (green, or red if negative).
- 7Portions to produce: expands to show how many portions of each dish are needed for that number of guests.
- 8Cost per guest by course: where each guest's food cost goes.
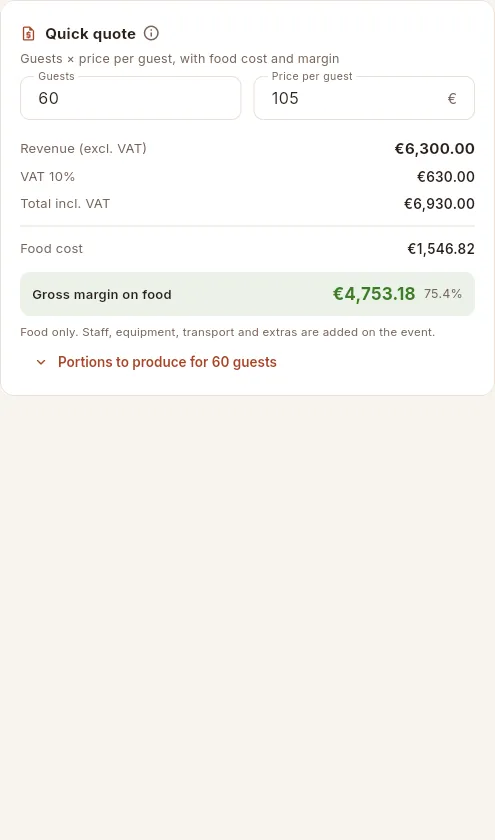 123
123
- 1How many guests you are calculating for (it starts at the menu's minimum). If you write fewer than the minimum, it warns you.
- 2Click to expand or collapse the list.
- 3Each dish with the portions to produce: guests × portions per guest, rounded up.
#The events that use the menu
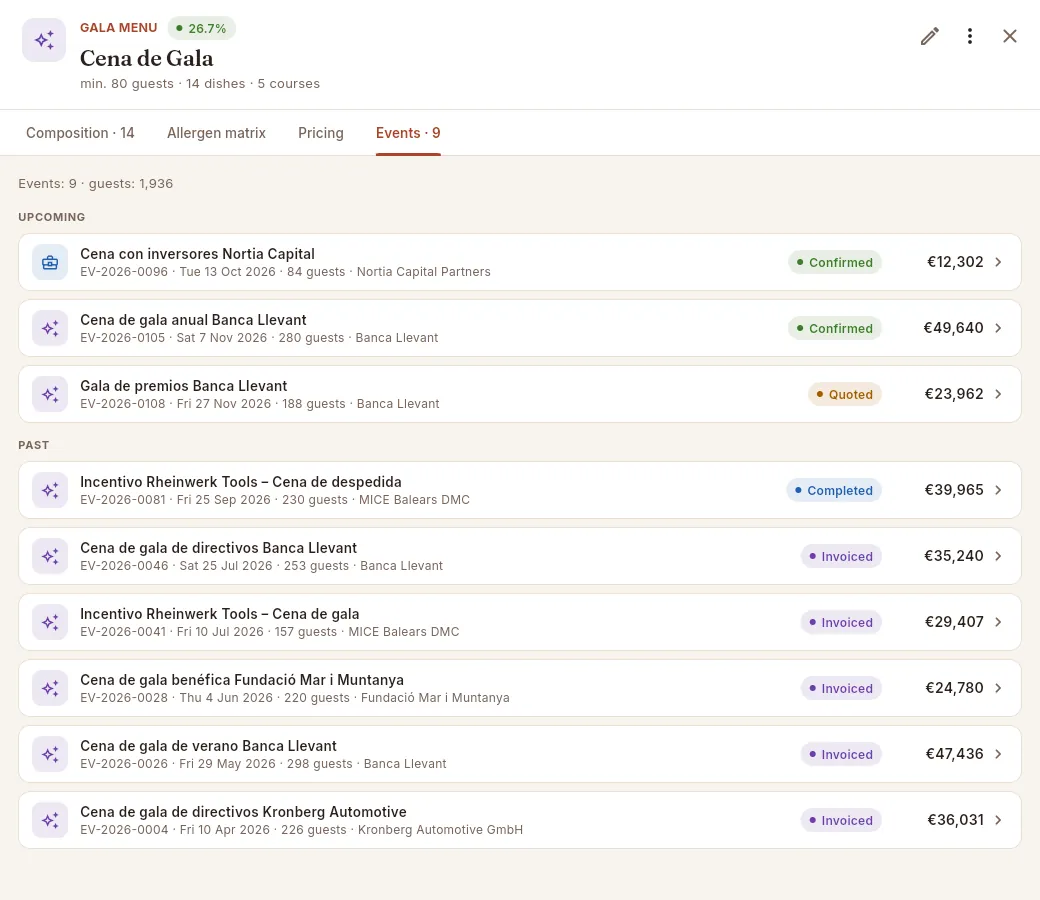 123456
- 1The summary: events with this menu and total guests.
- 2Upcoming: from the nearest to the furthest.
- 3Each event: name, code, date, guests and client. Click the row to open the event.
- 4The event's status (confirmed, quoted, completed, invoiced…).
- 5The event's revenue.
- 6Past: from the most recent to the oldest.
A menu is assigned to an event from the event's page or when a quote is accepted. If a menu has no events, the tab says so: “No events with this menu yet”.
#Duplicating, deactivating and deleting
 12
12
- 1Duplicate creates “Name (copy)” with the same dishes, courses and portions, and opens it.
- 2Delete is disabled if the menu has events: it says so underneath (“Booked for events”).
 12
12
- 1Move up and Move down change the order of the dish within its course.
- 2Remove from menu, with confirmation.
To stop offering a menu without losing its history, deactivate it (Edit › Active): it no longer appears in quotes but stays in the events that already have it. You can find it with the Inactive filter.
#What changes depending on the profile
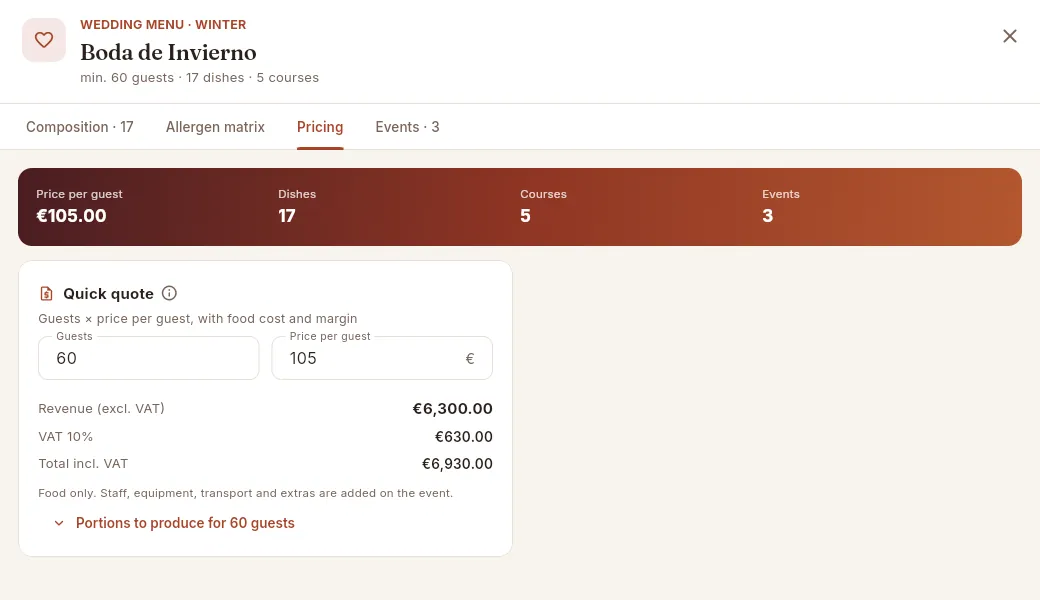 12
12
- 1Without the costs permission, the key figures show the price, dishes, courses and events.
- 2The quick quote calculates the revenue, VAT and total, but not the food cost or the margin. There is no simulator or cost per course.
#Tips
Kitchen
Dishes & recipes
The house recipe book with the costing sheet of every dish and base preparation: what goes in it, what is lost when it is trimmed, what each portion costs at the latest purchase prices, its food cost, margin and allergens, and which menus it is served in.
Dishes & recipes holds everything that comes out of the kitchen, with its costing sheet: the list of ingredients of a recipe with the quantity of each and what it costs. Mise calculates the costing sheet live using the latest purchase price of each ingredient, so you always know what each portion really costs and how much it leaves you. There are two kinds of recipe:
- Dishes: what is served to the guest (a canapé, a starter, a main course, a dessert, a live station, a drink). Their yield is measured in portions and they have a selling price.
- Base preparations: stocks, sauces, doughs, fillings, garnishes… that are made in batches and go into many dishes (the dark veal stock, the aioli, the sablée dough). They are costed only once, with their yield in kilos, litres or units, and each dish that uses them takes their cost per kilo or per litre. A preparation can contain other preparations. Three trade words you will see throughout the chapter:
- Waste: what is lost when peeling, trimming, boning or portioning an ingredient (the skin and bones of fish, the trimmings of meat). It is expressed as a percentage.
- Net and gross quantity: net is what goes into the dish already trimmed; gross is what you have to buy to get it.
- Food cost: the percentage of the selling price that goes on raw materials (cost per portion ÷ selling price, excluding VAT). The company sets a target (in the demo, 30%) and Mise colours each food cost green, amber or red depending on how close it is.
#The list of dishes
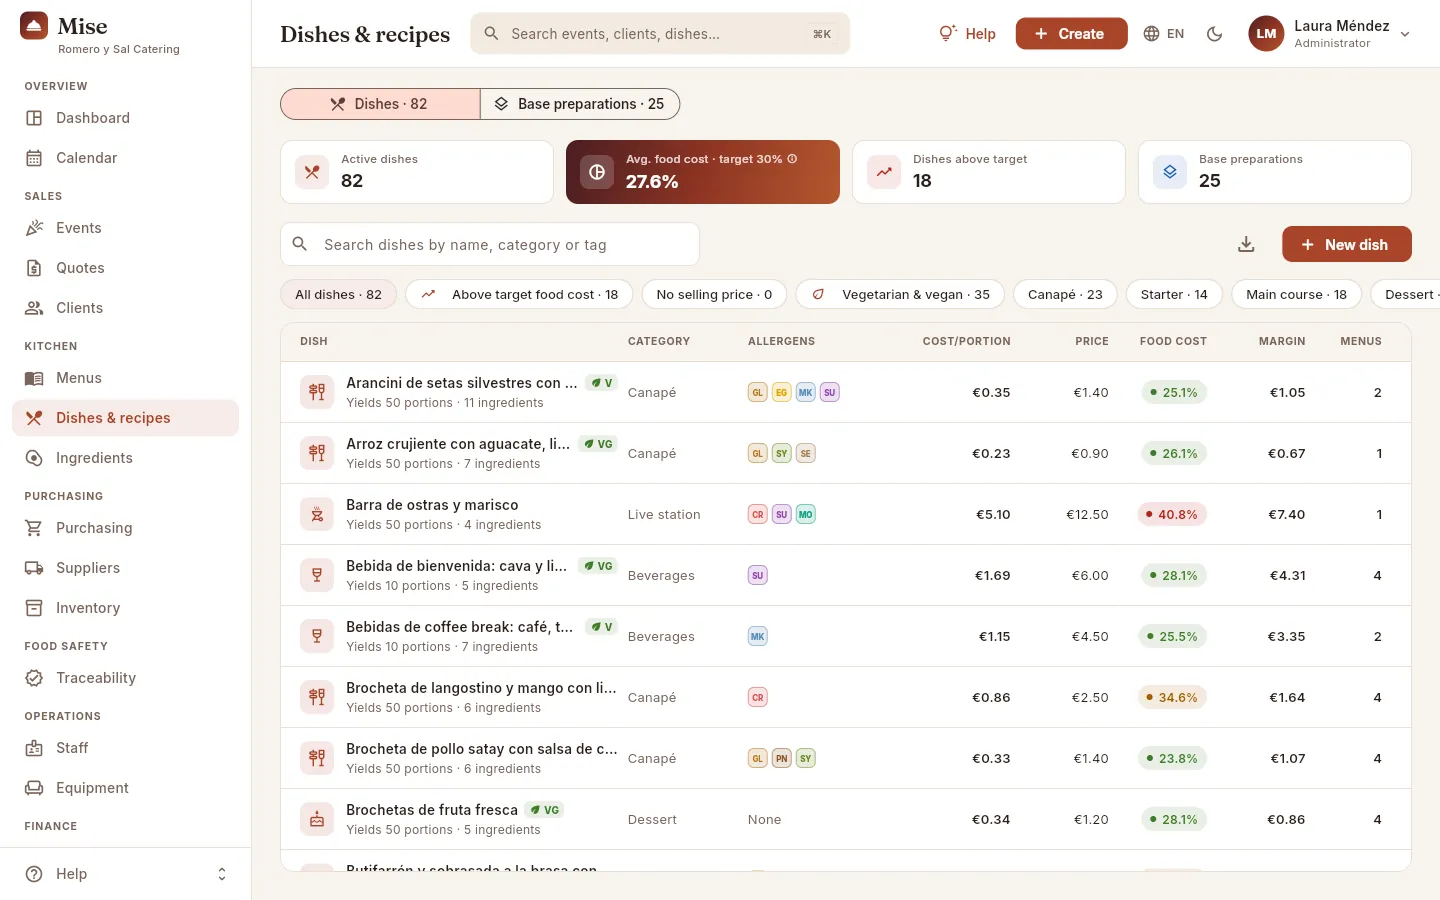 12345678
- 1Switch between Dishes and Base preparations. Each button says how many active recipes there are of each kind.
- 2The recipe book indicators: active dishes, average food cost against the target (with its ⓘ), dishes that exceed the target and number of base preparations.
- 3The search box finds dishes by name, category, description or tag (“Signature”, “Seasonal”…).
- 4The filters, each with its count. “Above target food cost” leaves only the dishes whose price or recipe needs reviewing.
- 5Export CSV downloads the list as you are viewing it (with the filter and search applied) so you can open it in a spreadsheet.
- 6New dish opens the form to add a dish.
- 7The columns are sorted by clicking their heading: cost per portion, selling price, food cost and margin per portion.
- 8Each row is a dish: name, V (vegetarian) or VG (vegan) badge, tags, yield and number of lines; its category, allergens, figures and how many menus it is in. A food cost in red warns that it is well above the target. Click the row to open its page.
Header indicators (always over the active dishes):
| Indicator | What it counts |
|---|---|
| Active dishes | Dishes in use (inactive ones do not appear in menus or quotes). |
| Avg. food cost · target 30 % | Average food cost of the active dishes that have a selling price, against the company target. Click its ⓘ to see how it is calculated. |
| Dishes above target | How many dishes exceed the target food cost (in red if there are any). |
| Base preparations | How many active base preparations there are. |
| Filters for dishes: All dishes, Above target food cost, No selling price (dishes that still | |
| need a price), Vegetarian & vegan, one for each category (Canapé, Starter, Main course, Dessert, Live station, | |
| Drinks, Kids) and Inactive. Filters combine with the search box. |
#Base preparations
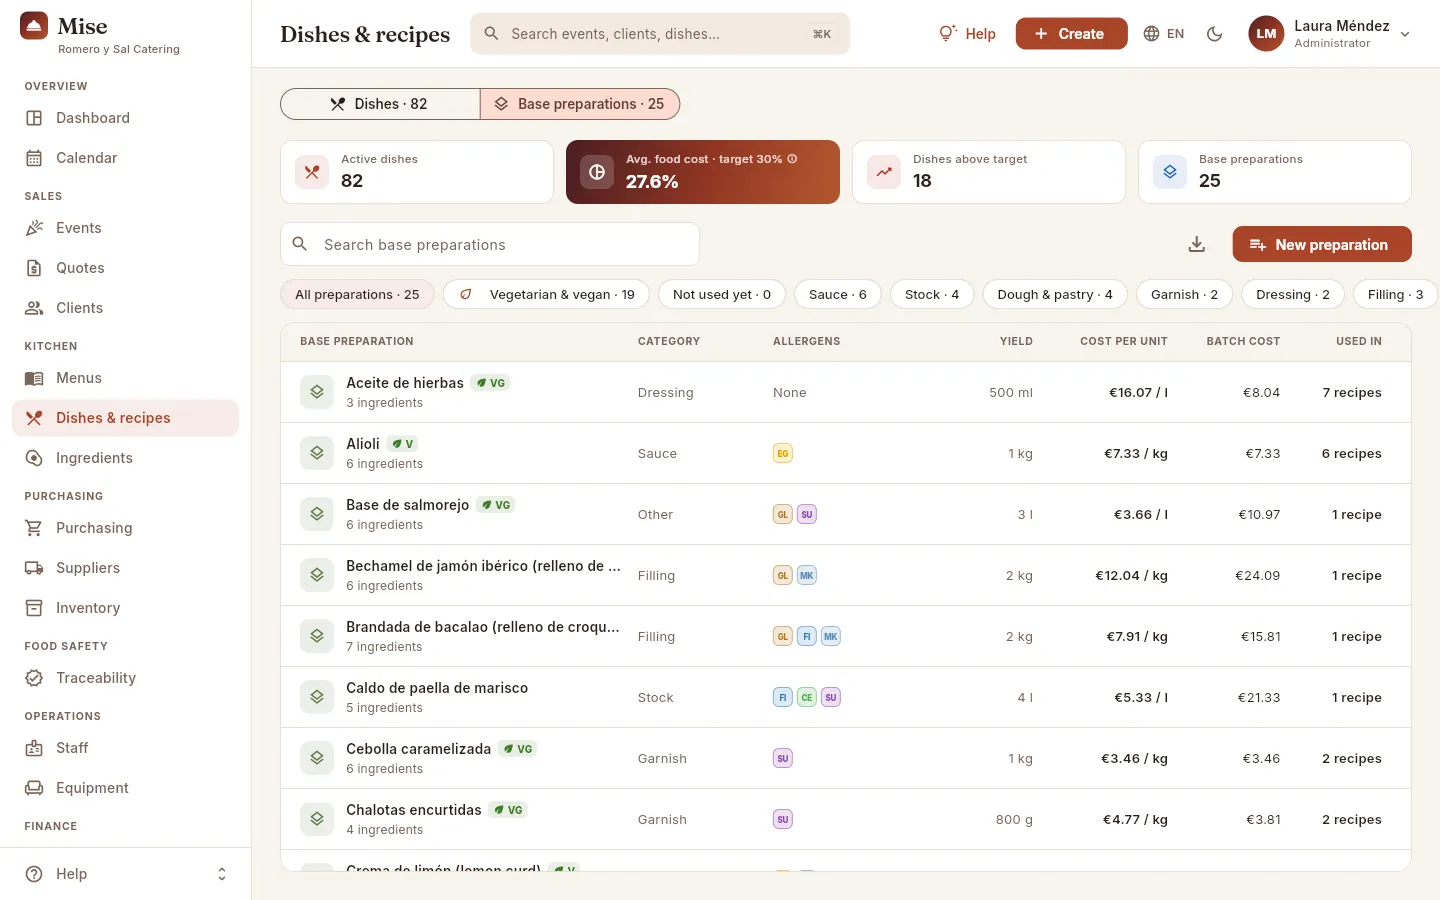 1234567
- 1Click Base preparations to see the sub-recipes instead of the dishes.
- 2Not used yet finds the preparations that no longer go into any recipe. There is also a filter by category (Sauce, Stock, Dough & pastry, Garnish, Dressing, Filling, Pastry base, Other).
- 3Yield: the usable quantity that comes out of a cooked batch (for example, 1.5 l of stock).
- 4Cost per unit: what each kilo, litre or unit of the preparation costs. It is the price at which it goes into dishes.
- 5Batch cost: what it costs to prepare a whole batch.
- 6Used in: how many recipes it goes into. “Unused”, in amber, if no recipe uses it.
- 7New preparation adds a base preparation.
#Adding a dish or a preparation
Adding is done in two steps: first the header (name, category, yield and price) and, when you save, Mise opens the page so you can add the ingredients of the costing sheet. You can also create a dish from the Create button in the top bar, from any screen.
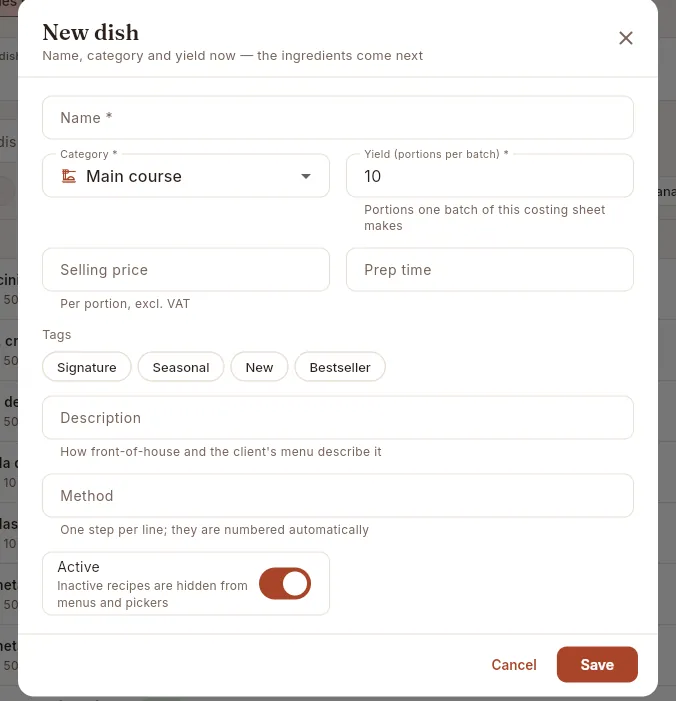 1234567
- 1Name of the dish, as the client will see it in the proposal.
- 2Category (Canapé, Starter, Main course, Dessert, Live station, Drinks, Kids): decides which course it goes into by default in a menu.
- 3Yield: how many portions one batch of the costing sheet makes. The batch cost is divided by this number.
- 4Selling price per portion, excluding VAT. You can leave it for later and calculate it with the pricing simulator.
- 5Tags: Signature, Seasonal, New, Bestseller. They appear in the list and on the page.
- 6Method: the method, one step per line (they are numbered automatically).
- 7Active: an inactive dish is not offered when building menus.
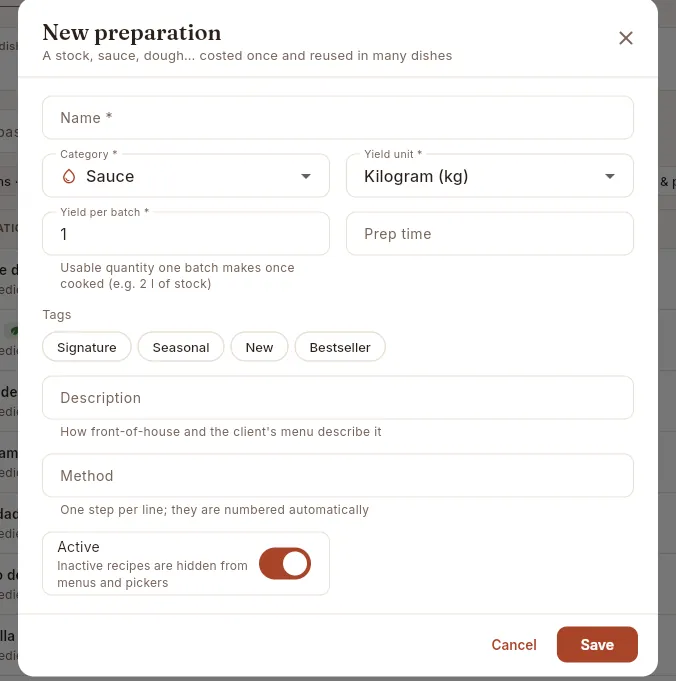 123
123
- 1Category of the preparation: Sauce, Stock, Dough & pastry, Garnish, Dressing, Filling, Pastry base or Other.
- 2Yield unit: kilos, litres or units. It is the unit in which dishes will ask for it.
- 3Yield per batch: the usable quantity that comes out of a cooked batch (for example, 2 l of stock from 5 kg of bones).
In Dishes & recipes, click New dish (or Create › New dish in the top bar).
Write the Name, choose the Category and enter the Yield (portions per batch): if the costing sheet is for 10 portions, enter 10.
If you already know it, write the Selling price per portion, excluding VAT; if not, leave it empty and calculate it later with the simulator.
Tick the relevant Tags and, if you wish, the Description and the Method.
Click Save. The dish page opens on the Costing tab: click Add the first ingredient and carry on with “How to add a line to the costing sheet”.
#The dish page
 1234567
- 1The header: type and category, the food cost with its colour, the diet (V or VG if vegetarian or vegan) and the tags. Below, the name, the yield, the preparation time and the number of lines.
- 2Edit changes the header: name, category, yield, price, tags, description, method and whether it is active.
- 3More options: duplicate the dish or delete it.
- 4The page tabs: Costing, Allergens & diet (with the number of allergens), Method and Where used.
- 5The key figures: cost per portion, selling price, food cost, gross margin per portion and cost of the whole batch.
- 6Each block has its ⓘ: what it shows, how it is calculated and how to read it.
- 7Add ingredient adds a line to the costing sheet: an ingredient or a base preparation.
#The costing sheet, line by line
The costing sheet is a table with one line per ingredient or preparation in one batch of the recipe (in the example, one batch of 10 portions of fillet steak). From left to right, each line says how much goes in, how much is lost, how much has to be bought and what it costs:
 12345678
- 1Ingredient: name and family (Meat, Vegetables, Dairy…). If the ingredient contains allergens, their icons appear next to the name. Click the line to open the ingredient page.
- 2Net: the quantity that goes into the batch already trimmed, in the ingredient's unit (g, kg, ml, l or units).
- 3Waste: the percentage lost when trimming. It comes from the ingredient page; if this recipe uses its own waste figure, it has an asterisk (*).
- 4Gross: what you really have to buy to obtain the net: net ÷ (1 − waste).
- 5Unit cost: the ingredient's latest purchase price per kilo, litre or unit (for preparations, their cost per kilo or litre).
- 6Line cost: gross × unit cost. It is what this line costs in the batch.
- 7Share of cost: what part of the batch cost the line takes. Here, the fillet steak accounts for almost four fifths of the dish's cost.
- 8A base preparation inside the dish (layers icon and “Base preparation” under the name). It has no waste: its cost per litre comes from its own costing sheet. Click the line to open the preparation.
Each line has, on the right, the Edit pencil (changes the quantity, the waste or the notes) and More options (⋮): Move up and Move down to order the lines, and Remove to take it out of the costing sheet (it asks for confirmation).
#A base preparation on the inside
A preparation's page is just like a dish's, with two differences: the key figures are the cost per kilo or per litre, the batch cost and how many recipes it is used in (it has no selling price), and its costing sheet can in turn contain other preparations. In the example, the dark stock contains a roast chicken jus, which has its own costing sheet.
 1234
1234
- 1The header says it is a preparation and its category, and below it how much a batch yields (1.5 l).
- 2Its key figures: cost per litre (the price at which it goes into each dish), batch cost and how many recipes it is used in.
- 3The line that weighs most (the bones, almost half the cost).
- 4A preparation inside another: the dark stock uses half a litre of roast chicken jus, valued with the jus's costing sheet.
#Adding or changing a line of the costing sheet
 123
123
- 1Type a few letters to find what you want to add.
- 2Base preparations come first, with their category and their cost per kilo or litre.
- 3Then the ingredients, with their family, cost and waste.
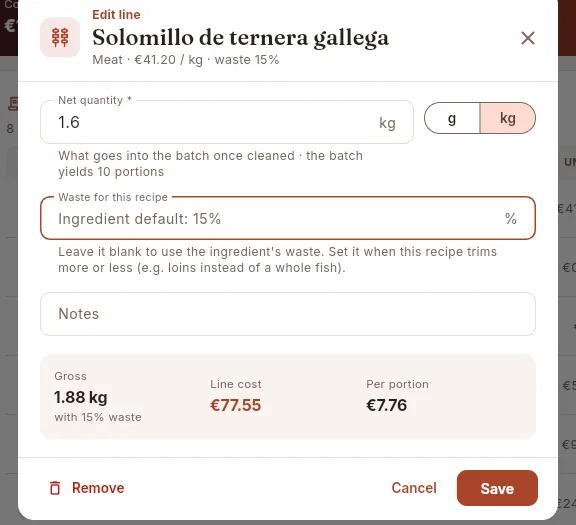 1234567
- 1The ingredient, its family, its current cost and its usual waste.
- 2Net quantity for one batch, already trimmed.
- 3Switch between g and kg (or ml and l) to write the quantity in whichever way is most convenient.
- 4Waste for this recipe: empty, the ingredient's own figure is used (it reminds you inside the field); write it if in this recipe it is trimmed more or less (loins instead of the whole piece).
- 5Notes for the kitchen: “brunoise”, “to garnish”…
- 6The live calculation: gross quantity, cost of the line and what it adds per portion. It changes as you type.
- 7Remove takes the line out of the costing sheet.
Open the page of the dish or preparation, Costing tab, and click Add ingredient.
Type a few letters in Search and choose the ingredient or the preparation (preparations have the layers icon). Mise does not offer you the preparations that would create a loop (a recipe that would end up containing itself).
Write the Net quantity for one batch, already trimmed. Use the g / kg selector (or ml / l) to write it in the unit you prefer.
If in this recipe the ingredient is trimmed differently from usual, write the Waste for this recipe; if not, leave it empty.
Check the live calculation (Gross, Line cost, per portion) and click Add.
#The batch cost and where it goes
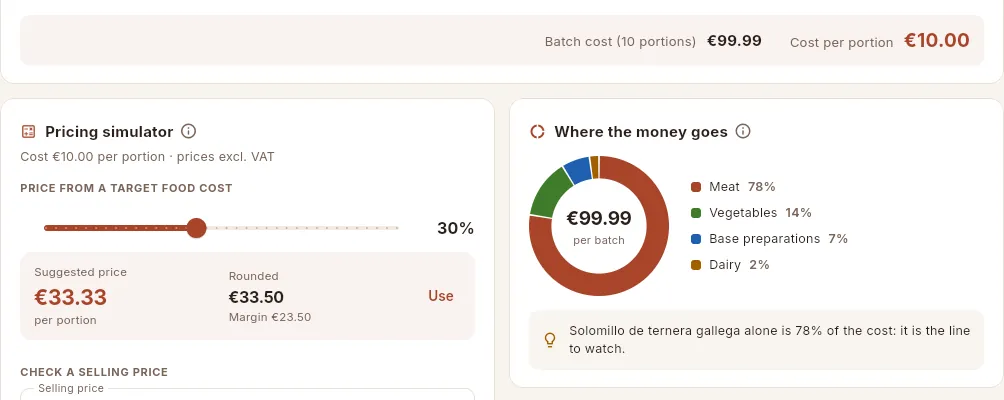 12345
12345
- 1Batch cost: the sum of all the lines, for the stated yield.
- 2Cost per portion: the batch cost divided by the portions it yields.
- 3Where the money goes: the batch cost split by ingredient family (preparations together).
- 4The legend with the percentage of each family; the five largest and the rest as “Other”.
- 5The tip: the line that weighs most in the cost. It is the first one worth negotiating with the supplier, adjusting the portion of or changing the cut.
#The pricing simulator
Below the costing sheet of each dish is the pricing simulator, to set the selling price from the live cost. It has two parts: calculating a price from the food cost you want to achieve, and checking a price you have in mind. Nothing is saved until you click Apply price.
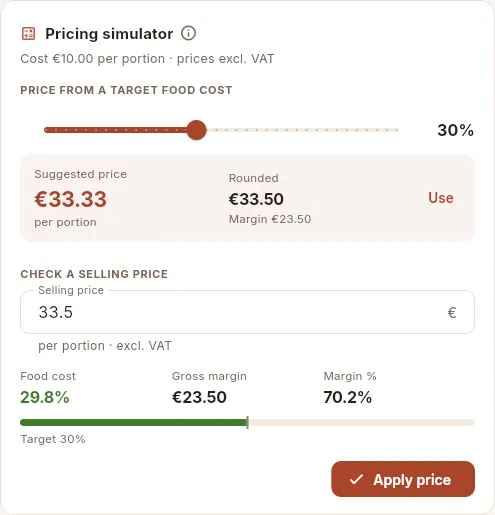 1234567
- 1Move the control to choose the target food cost (from 15% to 50%). It starts at the company target.
- 2Suggested price: the cost per portion divided by the target food cost.
- 3Rounded: the suggested price rounded up to the next half euro, as on a menu, with the margin it leaves.
- 4Use copies the rounded price into the field below so you can check it.
- 5Selling price: write the price you have in mind (per portion, excluding VAT).
- 6The result: food cost (with its colour), gross margin in euros and margin %, and the bar with the target marker.
- 7Apply price saves that price as the dish's new selling price. It is only enabled if the price differs from the current one.
Open the dish and scroll down to the Pricing simulator, on the Costing tab.
Move the PRICE FROM A TARGET FOOD COST control to the food cost you want and look at the Suggested price and the Rounded one.
Click Use to move the rounded price into the Selling price field, or write the price yourself.
Check the Food cost, the Gross margin and the Margin %.
Click Apply price.
#Allergens & diet
Mise inherits automatically the allergens and the diet of each dish from its ingredients, including those inside preparations: nobody has to mark them by hand on the dish. If an ingredient's allergens change, all the dishes and menus that use it are updated.
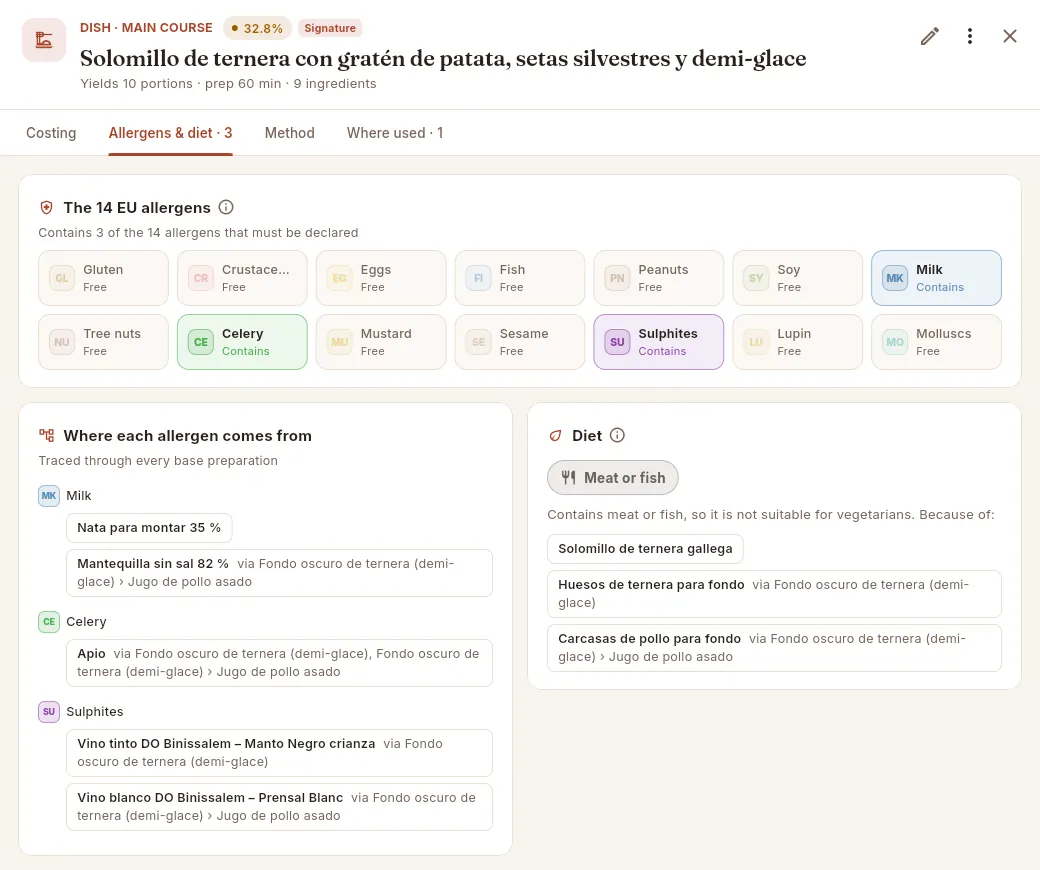 123456
- 1The tab says how many allergens the dish contains.
- 2The 14 EU allergens that must legally be declared (Regulation (EU) 1169/2011): in colour those the dish contains, greyed out those it does not.
- 3Where each allergen comes from: the ingredients that contribute it. This way front of house can answer the guest precisely and the kitchen knows what to substitute.
- 4When it arrives through a preparation, it says so: “via Fondo oscuro de ternera › Jugo de pollo asado” is the exact path, preparation within preparation.
- 5Diet of the dish: Vegan, Vegetarian or Meat or fish.
- 6The ingredients that decide the diet: replace them if you want to open the dish to vegetarian or vegan guests.
The diet is deduced as follows: if any ingredient is of animal origin (meat, fish, gelatine…), the dish is meat or fish; if not, but it contains dairy, egg or honey, it is vegetarian; if all are of plant origin, it is vegan. The allergens and diet of each ingredient are given on its page (chapter Ingredients).
#The method
 1234
1234
- 1The description: how front of house and the client's menu present it.
- 2The method, step by step. Write one step per line and Mise numbers them.
- 3Edit opens the “Edit method” form with the preparation time, the tags, the description and the steps.
- 4Details: yield, preparation time, tags, creation date and last update.
If the dish does not yet have a method, the card says so and offers the Write the method button.
#Where used
The last tab says which menus the dish is in (with its course, the portions per guest, what it adds to that menu's cost per guest and the menu's food cost) and, if it is a preparation, which recipes it goes into. Before changing or withdrawing a recipe, look here to see who it affects.
 1234
1234
- 1The tab shows the number of menus and recipes that use the dish.
- 2Each menu: name, course in which it is served, portions per guest and menu type. Click the row to open the menu.
- 3What this dish adds to that menu's cost per guest.
- 4The whole menu's food cost, with its colour.
 123
123
- 1Preparations do not go directly into menus: they reach them through the dishes that use them.
- 2Each recipe that uses it, with that recipe's quantity per batch. Click the row to open it.
- 3What that quantity costs and its share of that recipe's batch cost.
#Duplicating and deleting
 12
12
- 1Duplicate creates a copy with all its lines, named “(copy)”, and opens it for you to edit.
- 2Delete is disabled while the dish is in a menu or is part of another recipe: it says so underneath.
Open the dish and click More options (⋮) › Duplicate.
Mise creates “Name (copy)” with all its lines and opens it on top (“Copy created — you are now editing the copy”).
Click Edit (the pencil) to change its name and whatever else is needed, and adjust the lines of the costing sheet.
Close the copy with ✕ to go back to the original dish.
#What changes depending on the profile
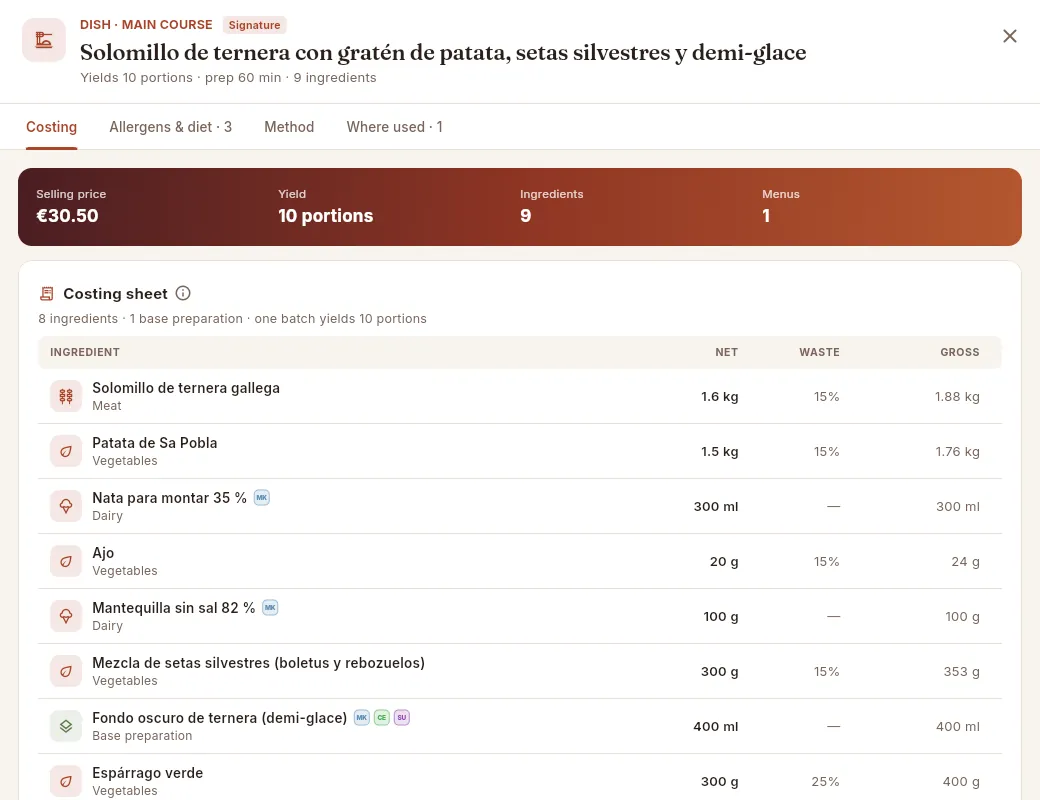 123
123
- 1Without the “Edit recipes & menus” permission there is no Edit or More options: the page is read-only.
- 2The key figures show only the selling price, the yield, the lines and the menus.
- 3The costing sheet shows what goes in and how much (net, waste, gross), but not the costs, nor the pricing simulator, nor the cost breakdown.
#Tips
A price change reaches everywhere. When you receive an order with a new price, or change an ingredient's cost by hand or with a supplier's price, Mise recalculates everything instantly, without you having to touch anything:
- 1PurchasingYou receive an order with a different price (or change the cost by hand or with a supplier price).
- 2IngredientIts cost is updated and goes into the price history.
- 3Costing sheetsThe cost of each preparation and each dish that uses it changes, with its food cost and margin.
- 4MenusThe cost per guest and the food cost of each menu with those dishes change.
- 5QuotesQuote margins are calculated with the new cost.
Kitchen
Ingredients
The raw material of every costing sheet: what each ingredient costs and what it really costs once trimmed, how its price has changed, what each supplier charges, which dishes it goes into and how much a price rise would affect them, its allergens, how it is stored, the stock and the lots.
Each ingredient has a base unit (kilo, litre or unit) in which its recipes, stock and prices are expressed; a cost per unit, which is the latest purchase price (excluding VAT), and a waste figure: the percentage lost when trimming it. That cost and that waste are what every costing sheet uses: if the price of salmon goes up, the cost of every dish, menu and quote that contains it goes up instantly. The cost is updated automatically when you receive an order in Purchasing; you can also change it by hand or take the price from a supplier's price list. Every change goes into the price history.
#The list of ingredients
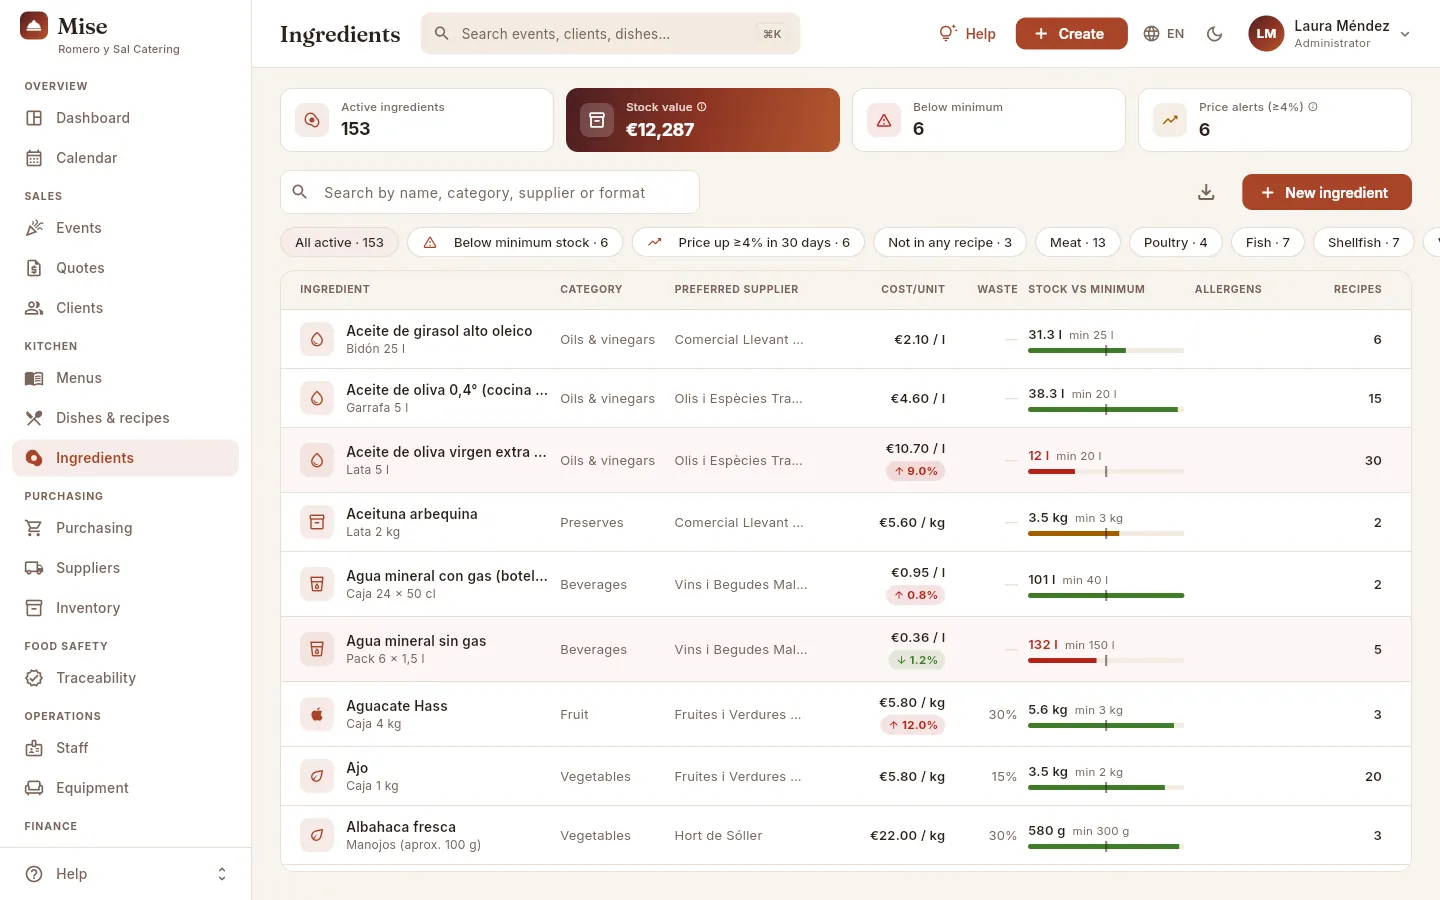 12345678
- 1The indicators: active ingredients, stock value, ingredients below minimum and price alerts (rises of 4% or more in 30 days). Those with ⓘ explain their calculation.
- 2The search box: by name, category, supplier or purchase format.
- 3Below minimum stock and Price up ≥4% in 30 days: the two filters worth checking every week. There are also “Not in any recipe”, one for each category and “Inactive”.
- 4Export CSV downloads the visible list.
- 5New ingredient opens the form to add one.
- 6Cost per unit (latest purchase price) and, below it, the change against 30 days ago: red if it has gone up, green if it has gone down.
- 7Stock against minimum: the figure (in red if below) and a bar whose central mark is the minimum: red below, amber close, green with margin.
- 8Rows below minimum appear with a reddish background. Click a row to open the ingredient.
| Indicator | What it counts |
|---|---|
| Active ingredients | Ingredients in use (inactive ones are not offered when building costing sheets). |
| Stock value | What the contents of the store are worth today: stock × current cost of each active ingredient. |
| Below minimum | Ingredients with less stock than their minimum stock (in red if there are any). |
| Price alerts (≥4%) | Ingredients whose cost has gone up 4% or more compared with the last price recorded at least 30 days ago. |
#Adding or editing an ingredient
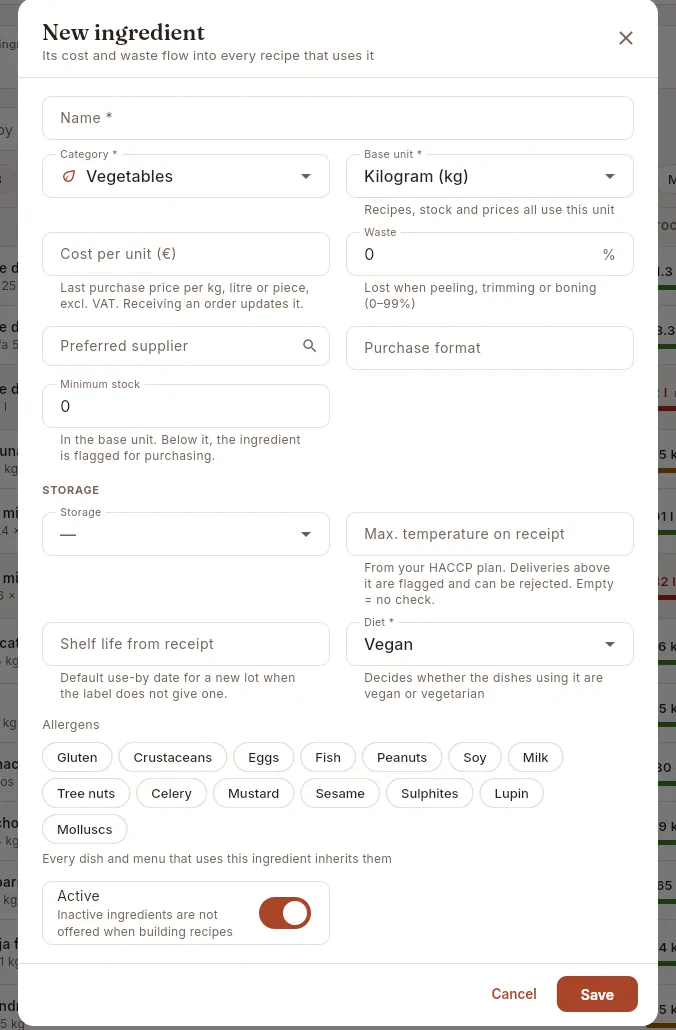 12345678
- 1Base unit: kilogram, litre or unit. Recipes, stock, supplier prices and prices use this unit.
- 2Cost per unit excluding VAT. It updates automatically when an order is received.
- 3Waste: what is lost when peeling, trimming or boning (from 0 to 99%).
- 4Preferred supplier (the one you normally order from) and purchase format (“Case of 5 kg”).
- 5Minimum stock, in the base unit: below it, Mise alerts purchasing.
- 6Storage: ambient, chilled or frozen, and the maximum temperature accepted on receipt (the one in your HACCP plan). Below, the shelf life applied to a new lot when the label shows no expiry date.
- 7Diet of the ingredient (vegan, vegetarian or animal origin): decides whether the dishes that use it are vegan or vegetarian.
- 8Allergens: tick the ones it contains. Every dish and menu that uses the ingredient inherits them.
In Ingredients, click New ingredient (or Create › New ingredient in the top bar).
Write the Name, choose the Category and the Base unit.
Write the Cost per unit (€) (latest purchase price, excluding VAT), the Waste, the Preferred supplier, the Purchase format and the Minimum stock.
Under STORAGE, say how it is stored, the Max. temperature on receipt and the Shelf life from receipt. If you leave it empty, Mise puts in the usual values for the category (for example, chilled fish at 2 °C maximum and 3 days of shelf life).
Choose the Diet and tick the Allergens.
Click Save.
#The page: summary
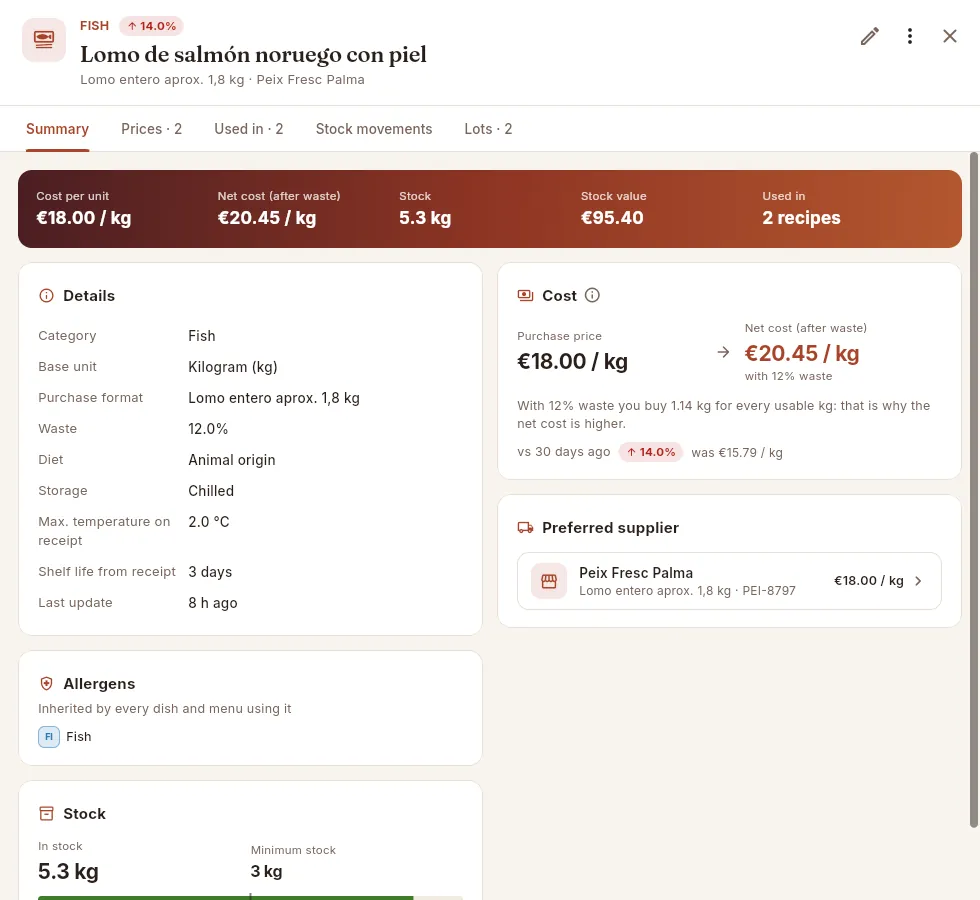 12345678
- 1In the header, the alerts: a price rise of 4% or more in 30 days and, where applicable, “Below minimum”. Under the name, the purchase format and the preferred supplier.
- 2The tabs: Summary, Prices, Used in, Stock movements and Lots.
- 3The key figures: cost per unit, net cost after waste, stock, stock value and how many recipes it goes into.
- 4In the details, the storage: how it is kept, the maximum temperature accepted on receipt and the shelf life from receipt.
- 5The cost: purchase price → net cost of each usable kilo, with the waste.
- 6Why the net cost is higher: how much you have to buy for each useful kilo.
- 7The 30-day change and the price back then: the first warning that the food cost is drifting.
- 8The preferred supplier with its reference and its price. Click to open its page.
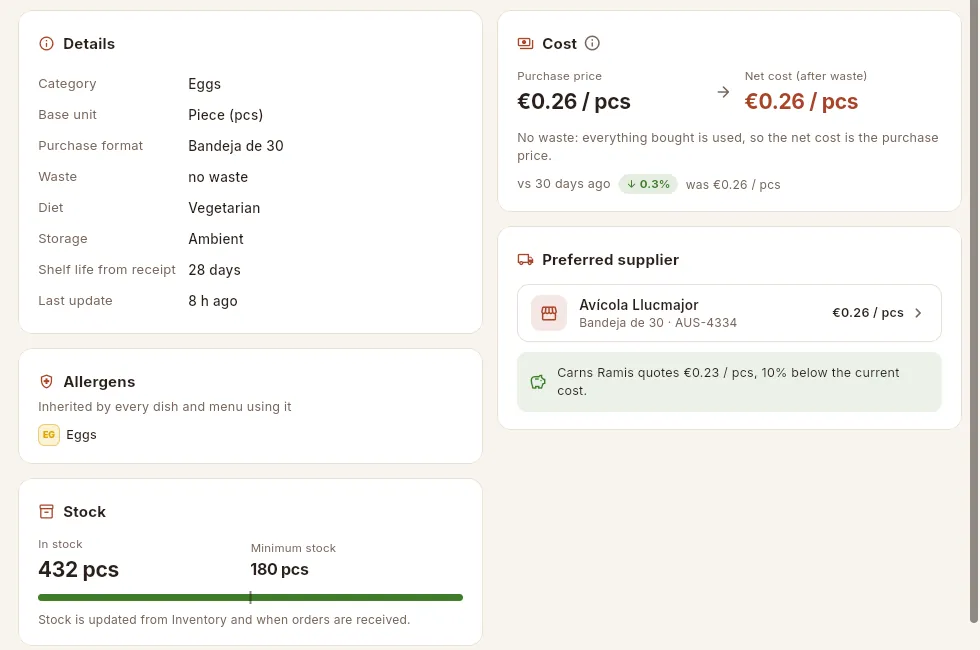 1234
1234
- 1With no waste, the net cost is the same as the purchase cost.
- 2If another supplier has a cheaper price than the current cost, Mise says so and how much you would save.
- 3The ingredient's allergens, which its dishes and menus inherit.
- 4The stock against the minimum, with its bar. It is updated from Inventory and when orders are received.
#Prices: history and supplier prices
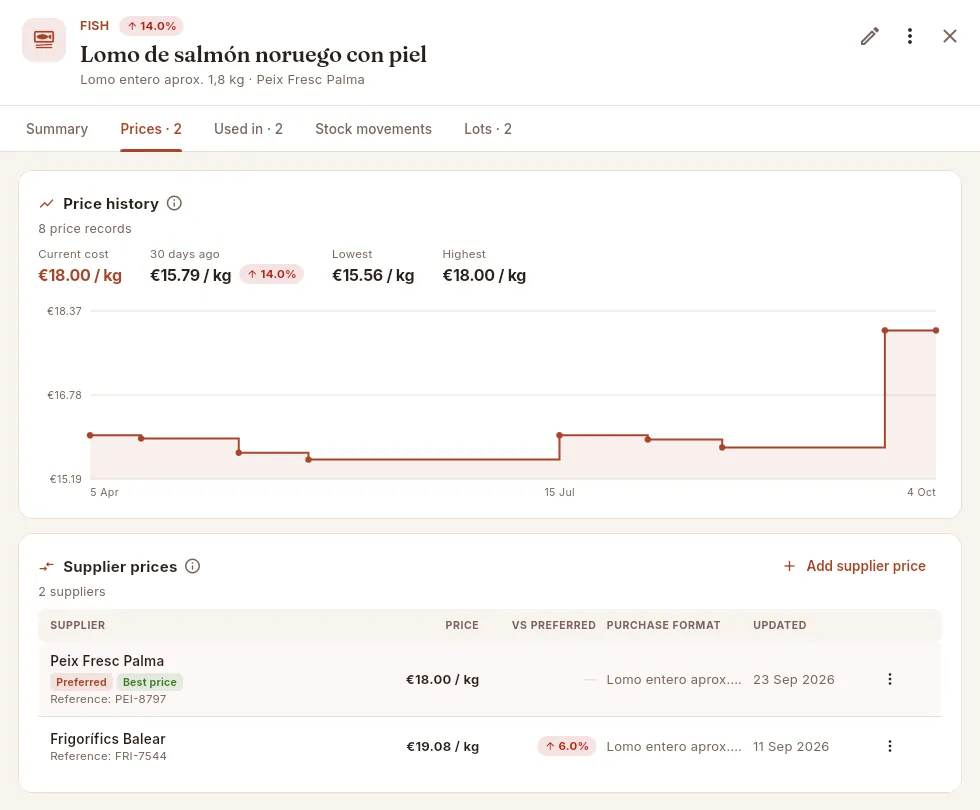 123456
- 1Current cost, price 30 days ago with the change, and the lowest and highest of the period.
- 2The price history: every purchase, manual change or supplier price applied is a point. The last point is today's cost.
- 3Add supplier price records what another supplier charges you for this ingredient.
- 4Preferred marks the usual supplier and Best price, the cheapest price.
- 5vs preferred: how much more expensive (or cheaper) each supplier is than the preferred one.
- 6More options for each supplier price: make that supplier preferred, use its price as the current cost or edit the price.
 123
123
- 1Make preferred supplier: it becomes the usual supplier (the cost does not change).
- 2Use as current cost: its price becomes the ingredient's cost.
- 3Edit the supplier price (price, date, format, reference) or delete it.
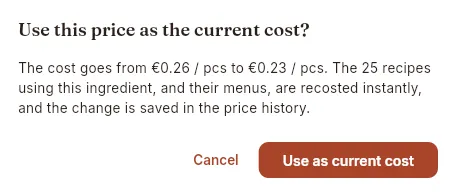 12
12
- 1From what to what the cost changes and how many recipes (and their menus) will be recalculated.
- 2Confirm to apply the new cost; Cancel leaves it as it was.
Before changing the cost, Mise tells you from what to what it changes and how many recipes will be recalculated. When you confirm with Use as current cost, the change goes into the price history and you get the message “Cost updated — recipes recosted”.
 1234
1234
- 1Supplier: only those that do not yet have a price for this ingredient appear.
- 2Price per base unit (kg, l or unit), excluding VAT.
- 3Price date, so you know when it was quoted to you.
- 4Purchase format and the product's reference in the supplier's catalogue.
Open the ingredient and go to the Prices tab.
If a supplier's price is missing, click Add supplier price, choose the Supplier, write the price per unit and the Price date, and click Save.
In the table, the VS PREFERRED column and the Best price label tell you who is cheapest.
To change your usual supplier: More options (⋮) on its row › Make preferred supplier.
For costing sheets to use that price straight away: More options › Use as current cost and confirm.
#Used in and price sensitivity
The Used in tab lists all the recipes that contain the ingredient, including those that have it through a preparation (the oil that goes into the aioli that goes into the patatas bravas), and simulates what would happen to their food cost if the ingredient went up in price.
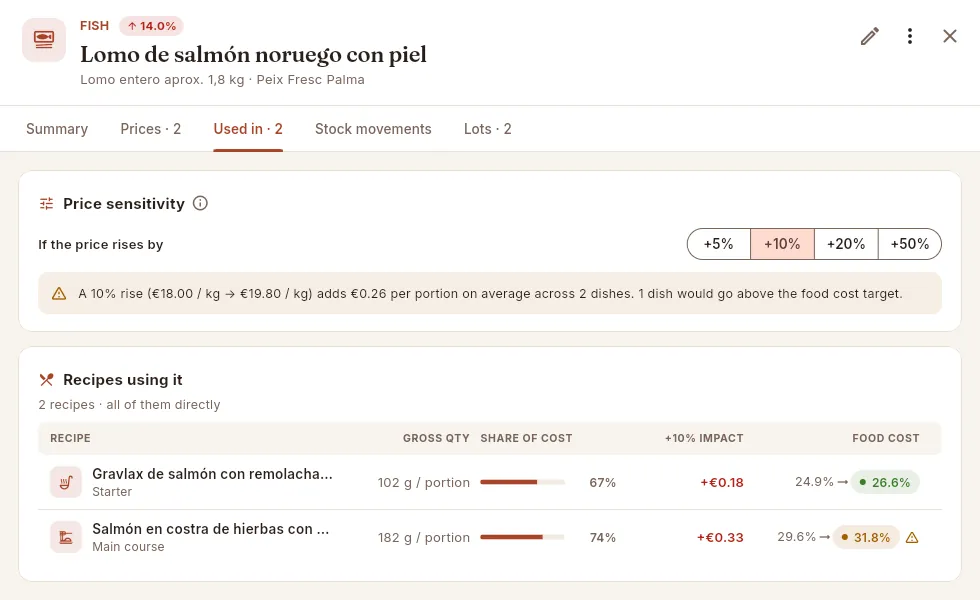 1234567
- 1Choose the rise you want to simulate: +5%, +10%, +20% or +50%.
- 2The summary: the price before and after, how much each portion goes up on average and how many dishes would go above the target food cost.
- 3Each recipe that uses it, with its category. Click to open its costing sheet.
- 4Gross quantity per portion (or per kilo, for preparations).
- 5Share of cost: what part of the recipe's cost this ingredient takes.
- 6Impact: how much the cost of each portion would go up with that rise.
- 7Food cost today → with the rise. The ⚠ warning marks the dishes that meet the target today and would exceed it.
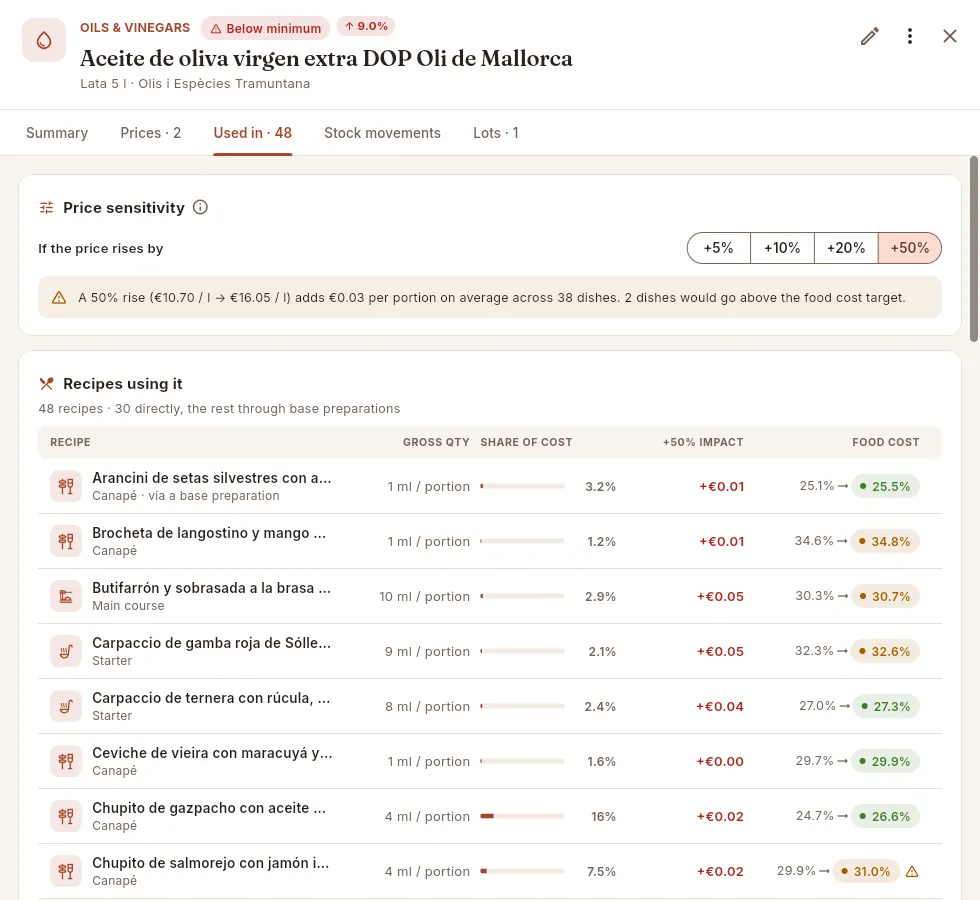 1234
1234
- 1This oil is below minimum and has gone up 9% in 30 days.
- 2How many recipes use it and how many directly; the rest have it inside a preparation.
- 3via a base preparation: the arancini does not have this oil in its own lines, but the aioli that is part of its costing sheet does.
- 4A dish that would exceed the target with that rise (⚠).
#Stock movements
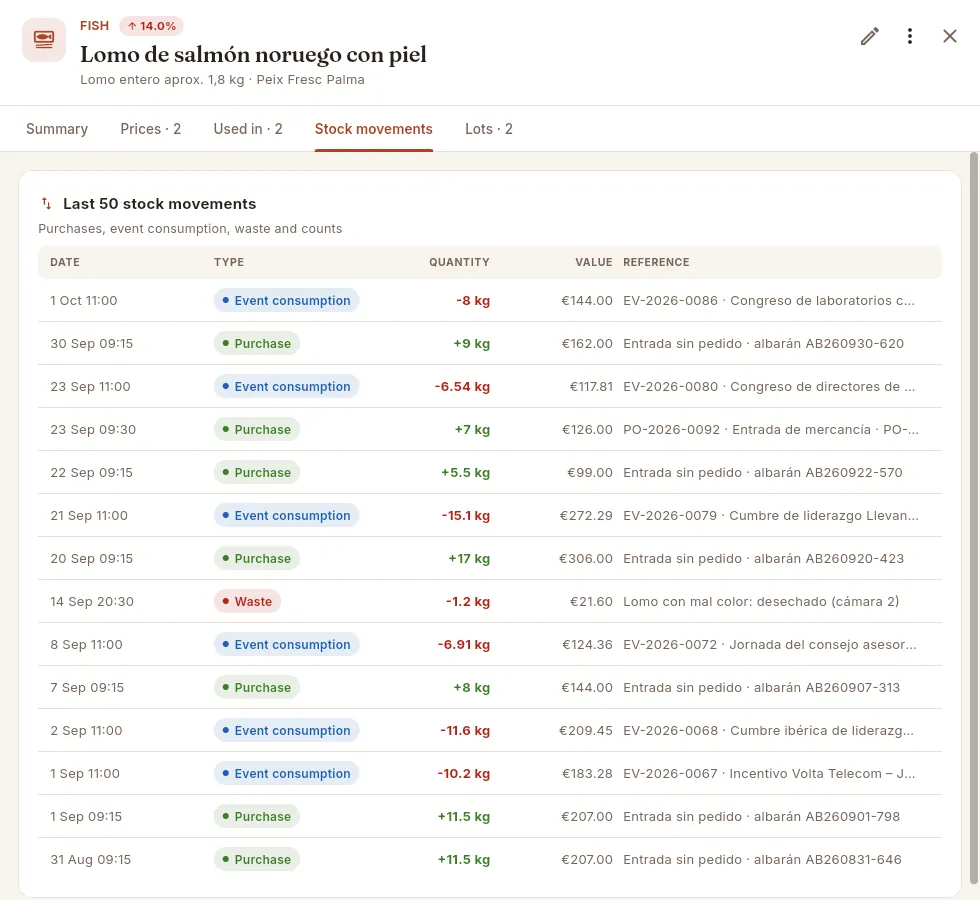 1234567
- 1The last 50 movements: purchases, event consumption, waste and counts.
- 2Date and time of the movement.
- 3Type: Purchase (green), Event consumption (blue), Waste (red), Adjustment (amber) or Stock count.
- 4Quantity: in green what comes in, in red what goes out.
- 5Value of the movement at the cost at that time.
- 6Reference: the order, the event that consumed it or the note (for example, the reason for a write-off).
- 7A waste entry recorded in Inventory: in the reference, the reason that was noted.
Movements are created by other sections: Purchasing when an order is received, Events when an event is produced, Inventory when a write-off, an adjustment or a count is recorded, and Traceability when a delivery without a purchase order is recorded.
#Lots
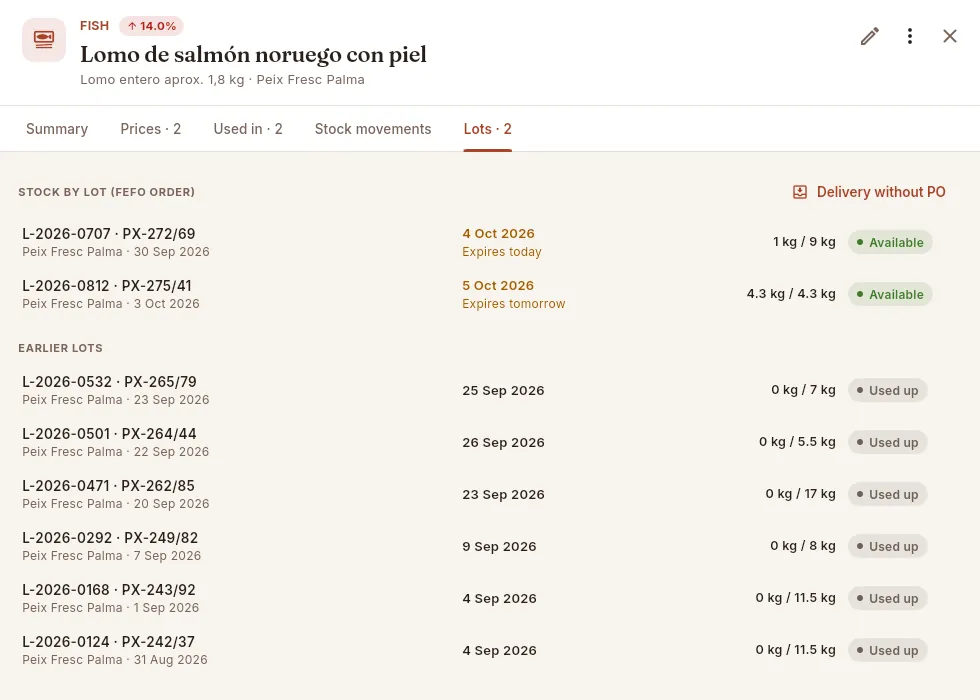 1234567
- 1Stock by lot in FEFO order (first expired, first out): at the top the one that expires first, which is the one that will be used first when producing.
- 2Delivery without PO: records a market purchase or an urgent restock as a new lot.
- 3Each lot: internal code, supplier lot, supplier and date received. Click to open the lot page (Traceability).
- 4Use-by date, with a warning if it expires today or tomorrow (amber) or has already expired (red).
- 5What is left of the lot against what was received.
- 6The status: Available, On hold, Rejected or Used up.
- 7Earlier lots: the used up and rejected ones.
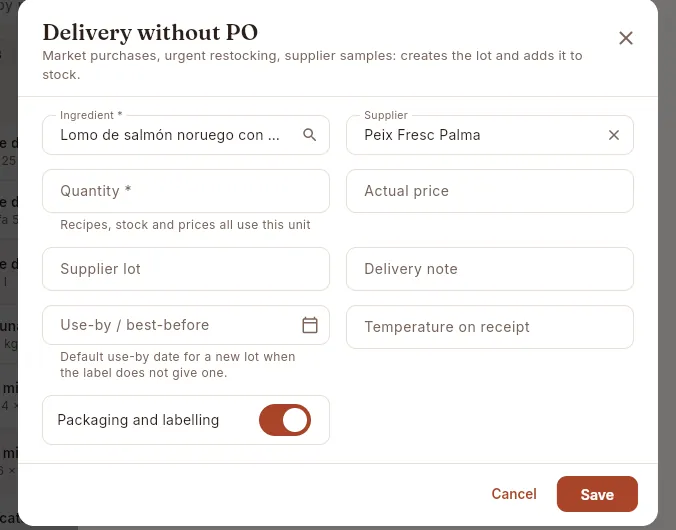 12345
12345
- 1The ingredient and its preferred supplier are already filled in.
- 2Quantity in the base unit and actual price paid.
- 3Supplier lot and delivery note, for traceability.
- 4Use-by date from the label (if it does not show one, it is calculated from the ingredient's shelf life) and temperature on receipt.
- 5Correct packaging and labelling.
The delivery creates the lot, adds it to the stock and records the movement. Everything to do with lots, use-by dates, receipt temperatures and recalls is explained in the Traceability chapter.
#Editing, deactivating and deleting
Edit (the pencil in the header) opens the same form as when adding. If you change the cost per unit, the change is recorded in the price history and reaches all costing sheets instantly. More options (⋮) offers Add supplier price and Delete; delete is disabled if any recipe uses the ingredient (“Used in recipes”), and one that already has movements or lots cannot be deleted either. To retire an ingredient you no longer buy, deactivate it (Active in the form): it is no longer offered when building costing sheets and you can find it in the Inactive filter.
#What changes depending on the profile
#Tips
Purchasing
Purchasing
Orders to suppliers, from draft to receiving the goods by lot, and the planner that turns confirmed events into what needs to be bought.
Purchasing handles everything you order from suppliers: the purchase order from the moment it is a draft until the goods are in the kitchen, and the planner, which works out what you need to buy for the confirmed events of the coming days and prepares the orders for you. When you receive an order, Mise does in one go everything that used to be separate tasks: it raises the stock, updates the price of each ingredient (and with it the cost of recipes, menus and events), records a lot for each product that comes in —with the supplier's lot, the use-by date and the temperature— and logs the supplier invoice in Payables. The section has two views, which you choose at the top left: Purchase orders and Purchase planning.
#The order list
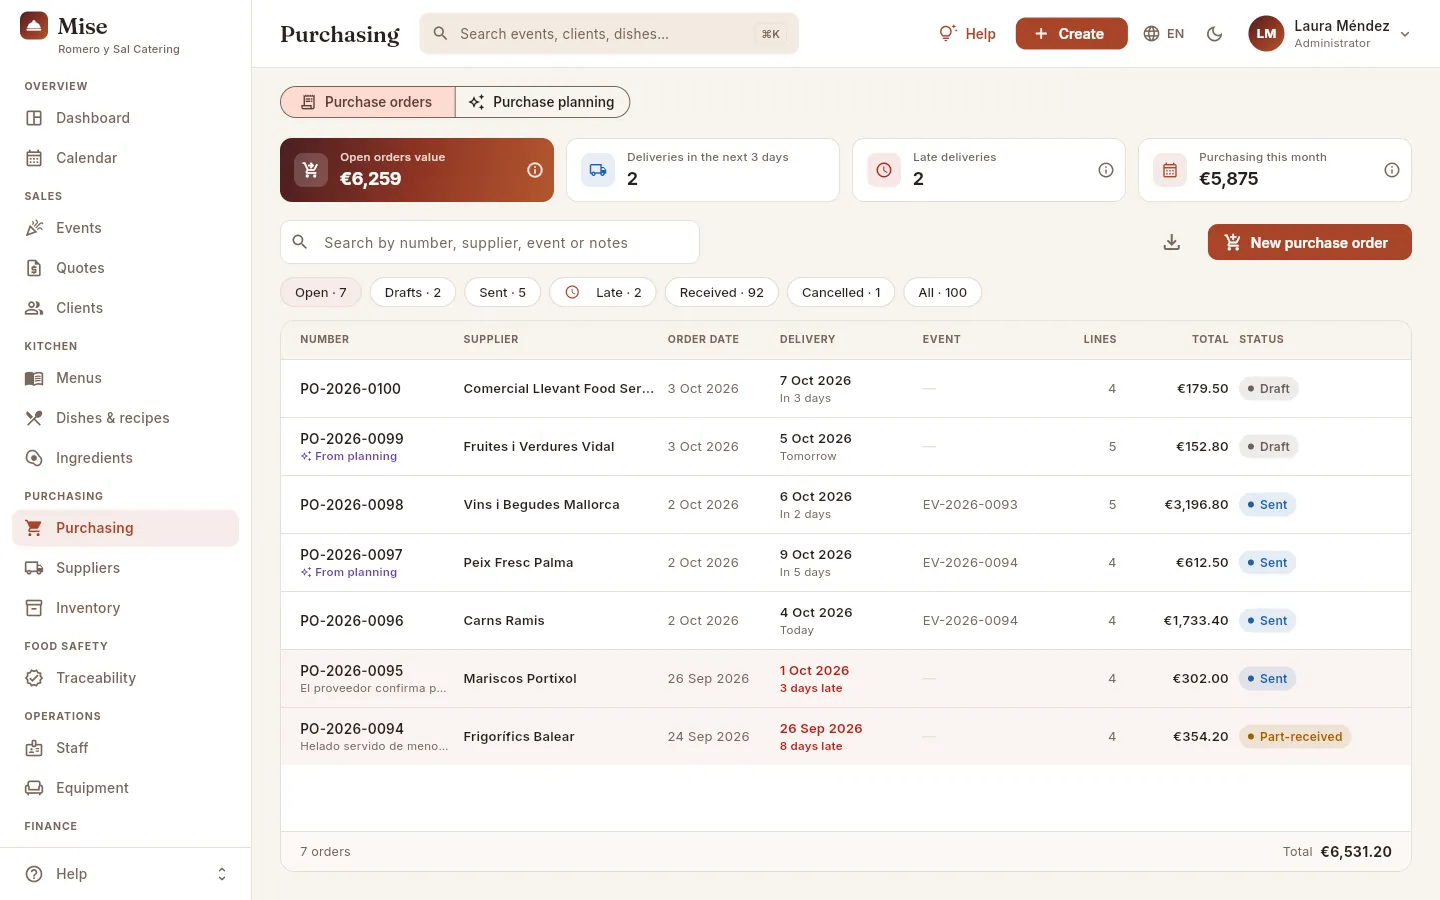 12345678
- 1The section's two views: the list of orders and Purchase planning.
- 2Open orders value: what is still to arrive from drafts, sent and part-received orders, excluding VAT. Click it to filter the open orders.
- 3Deliveries in the next 3 days: sent orders arriving between today and three days from now. Click it for the Sent filter.
- 4Late deliveries: sent orders whose delivery date has passed without being received in full. Red if there are any; click it for the Late filter.
- 5Purchasing this month: total of the orders dated this month (drafts included, cancelled ones excluded), excluding VAT. It matches the Dashboard.
- 6The search box finds an order by number, supplier, event or whatever is written in its notes. On the right, Export CSV downloads the list you see.
- 7The filters, with their counts: open (the default), drafts, sent, late, received, cancelled and all.
- 8New purchase order creates a draft by hand.
The indicators with ⓘ explain when you click them what they show, how they are calculated and how to read them. The list opens with the open orders; the filters work like this:
| Filter | What it shows |
|---|---|
| Open | Drafts, sent and part-received orders: everything still outstanding |
| Drafts | Orders prepared but not yet sent to the supplier |
| Sent | What is on its way: sent and part-received |
| Late | Sent or part-received orders whose delivery date has passed |
| Received · Cancelled · All | The history |
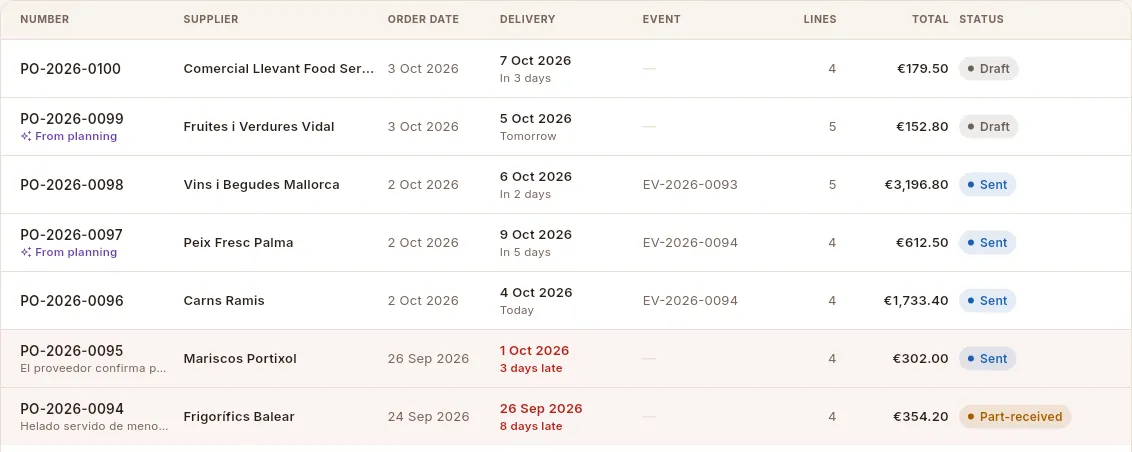 123456
- 1Order number (set by Mise: PO-year-number). Below it, in purple, From planning if the planner generated it; otherwise, the start of its notes.
- 2Delivery: the expected date and how long to go ("Tomorrow", "In 3 days"). If it has passed without being received, N days late in red; if it was received, "Received on …".
- 3Event the order was mainly for (its code; hover for the name).
- 4Order total, excluding VAT. The column headers sort the list when you click them.
- 5Status: Draft (grey), Sent (blue), Part-received (amber), Received (green) or Cancelled (red).
- 6The rows of late orders are shaded red. Click any row to open its file.
Below the list, the footer adds up the number of orders and the total of those you see with the current filter and search.
On a phone the list becomes cards (supplier, number and lines, delivery with its late warning, status and amount), the two views are called Orders and Planning, and the new order button becomes a trolley icon.
#The life of an order
- 1Plan or createThe planner prepares the drafts for confirmed events, or you create one by hand.
- 2DraftLines with quantity, price and accepted use-by date. It already counts as on order.
- 3SentYou copy the text for the supplier and mark it as sent.
- 4Receiving by lotLot, use-by date and temperature for each line; anything that does not comply is rejected.
- 5ReceivedStock goes up and each ingredient's price becomes the one from this purchase.
- 6Invoice in PayablesThe supplier invoice is recorded with its due date.
Each order goes through these statuses, shown in the coloured pill in the list and in the file:
| Status | What it means | What you can do |
|---|---|---|
| Draft | Prepared but not sent. Its quantities already count as "on order" in Purchase planning | Add and change lines, send it, cancel it or delete it |
| Sent | Sent to the supplier; waiting for the goods | Receive it, edit its details or cancel it |
| Part-received | Part of it arrived (or something was rejected): lines are still pending | Receive the rest or close it with what arrived |
| Received | Everything has arrived (or it was closed with what arrived) | View it, open its invoice, duplicate it |
| Cancelled | No longer expected | Duplicate it to order the same again |
| In addition, a sent or part-received order whose delivery date has passed is marked Late (red pill). |
#Creating an order
There are three ways to start an order: with New purchase order in this section (or with the Create button in the top bar), from a supplier's file, or by letting the planner prepare the drafts for all the suppliers at once (further down). From Inventory, the trolley on each ingredient adds it to its usual supplier's open draft or starts a new one.
 123456
- 1Supplier (required). The search box shows only the active ones, with their category, delivery days and lead time.
- 2Order date: today, unless you change it.
- 3Delivery date: if you leave it empty, Mise sets the supplier's first delivery day after its lead time.
- 4Linked event (optional): the event the order is mainly for. It appears on the event and in the reports, and it sets the use-by date that is asked for.
- 5Internal notes on the order (they are also added to the text sent to the supplier).
- 6Create draft saves the order and opens its file so you can add the ingredients.
#The draft order file: lines and accepted use-by date
When you click an order its file opens on the right. At the top, the header with the number, status and supplier; below it, a strip with the key figures, a notice saying where it stands and what to do next, the lines and the cards for delivery, supplier, event and invoices.
 12345678
- 1The order number and its status. If the planner generated it, it also carries the From planning pill.
- 2The strip: number of lines, order total, percentage received and delivery date.
- 3The status notice: for a draft, it reminds you to review and send it. Its quantities already count as on order in Purchase planning.
- 4Add ingredient (or Add on the lines card) adds a line.
- 5Mark as sent prepares the text for the supplier and moves the order to Sent.
- 6Accepted use-by date of each line: "≥ 19 Jun" means the goods must not expire before that date. Hover to read it in full.
- 7Below the supplier's minimum order warning: the total does not reach the minimum they ask for. It does not stop you sending it, but it is best to top it up.
- 8More options (⋮): edit the details, copy the text, open the supplier, duplicate, cancel or delete the draft.
Each line shows the ingredient (its name opens the ingredient's file), the quantity ordered, the accepted use-by date, the unit price —with a coloured arrow if it differs from the last purchase price—, the amount, what has been received and what is in stock. At the bottom, the Total excl. VAT. On a draft, click a line (or its pencil) to change it.
 123
123
- 1Type a few letters to search for the ingredient.
- 2Each ingredient with its category, current stock and this supplier's price.
- 3Usual: this supplier supplies it (it is its usual supplier or has its price list). These come first. If you choose one that is already on the order, its line opens so you can change it.
 1234567
- 1The ingredient's current stock and minimum, to decide how much to order.
- 2Quantity in the ingredient's unit (kg, l or unit).
- 3Suggestion: what is missing to have double the minimum stock. Click it to fill in the quantity.
- 4Unit price: it comes from the supplier's price list; below it, the price list and the last purchase price.
- 5Earliest accepted use-by date: if you leave it on "Automatic when saved", Mise suggests it.
- 6Latest use-by date (optional), for products you do not want too "green" or from lots very far ahead.
- 7Add saves the line in the draft.
 123
123
- 1The use-by date Mise suggested when the line was added. You can change it or clear it with the ✕.
- 2Remove line removes it from the order.
- 3Save applies the changes to quantity, price or use-by date.
#Sending the order to the supplier
 1234
1234
- 1Who it goes to: the supplier's email on its file.
- 2The order text: number, company and supplier, order and delivery dates, and each line with its quantity, reference, price and accepted use-by date; then the notice that anything arriving outside those use-by dates will be returned, the total excluding VAT, the notes and the request for confirmation.
- 3Just mark as sent, if you have already ordered it by phone.
- 4Copy text & mark as sent copies the text to the clipboard so you can paste it into your message and moves the order to Sent.
Open the draft and review the lines: quantities, prices and use-by dates. Deal with the minimum order warning if it appears.
Click Mark as sent.
Click Copy text & mark as sent and paste the text into the email or WhatsApp to the supplier (or Just mark as sent if you have ordered by phone).
The text can also be copied at any time from More options → Copy order text, for example to send it again.
#More options: edit, duplicate, cancel, delete
 123456
- 1Edit order details: supplier (draft only), dates, linked event and notes.
- 2Copy order text to the clipboard.
- 3Open supplier: its file.
- 4Duplicate: a new draft with the same quantities, dated today and with current prices.
- 5Cancel order: it stops counting as on order (only if nothing has been received).
- 6Delete draft: deletes it completely (drafts only).
The options depend on the status: on a part-received order Close with what arrived appears; on received and cancelled ones only copy, open the supplier and duplicate remain. Cancel asks for confirmation and reminds you that letting the supplier know is up to you; delete cannot be undone. A cancelled order shows the "Cancelled order" notice with the Duplicate button, to order the same again.
#Sent orders and late orders
 1234567
- 1Sent status.
- 2The order date and the linked event.
- 3The notice says when it arrives and reminds you that on receiving, stock, costs and the supplier invoice update themselves.
- 4Receive delivery records the delivery (see below).
- 5As the order is for an event, the accepted use-by date is the event date.
- 6Received: empty until it arrives; then, green for what is complete and amber for what arrived in part.
- 7The Delivery card: dates, delivery days, lead time and the supplier's minimum order. Below, the Supplier cards (with its contact and Open) and Event & notes.
 123
123
- 1The Late pill: the delivery date has passed and it has not been received in full.
- 2How many days late it is and the supplier's contact and phone so you can call them.
- 3If it has actually already arrived, record it with Receive delivery.
Delays show in the Late deliveries indicator, in the Late filter, in the red rows of the list, on the supplier's file and in the Deliveries due block of the Dashboard. If the supplier gives you a new date, change it in More options → Edit order details.
#Receiving the goods by lot
When the lorry arrives, open the order and click Receive delivery. In the dialogue, each pending line becomes a lot: you note what really arrives, the lot on the supplier's label, the use-by date and, for chilled and frozen goods, the temperature. Anything that does not comply is rejected with its reason.
 12345678
- 1What happens when you confirm: stock goes up, each ingredient's cost becomes this price and the invoice is kept in Payables.
- 2Received now: it comes with what is pending; type what has really arrived if it is less.
- 3Actual price from the invoice or delivery note, if it differs from the order.
- 4Supplier lot, copied from the label: it is what lets you trace the product to the plate.
- 5Use-by: Mise suggests today plus the ingredient's shelf life; correct it with the one on the label. Below, the accepted one on the order (≥ …).
- 6Temperature on receipt (chilled and frozen goods only). Below, the maximum allowed: here 2 °C.
- 7As 6.5 °C is over the maximum, Reject has ticked itself. You can also tick it by hand for any other reason.
- 8The reason for rejection is already written ("Arrived at 6.5 °C (max. 2 °C): returned to the carrier."). You can change it; it is required.
 1234
1234
- 1The product's use-by date (the suggested one or the one on the label) falls before the accepted one: it shows in red.
- 2The accepted use-by date on the order: the wedding date (≥ 10 Oct).
- 3Outside the accepted use-by date warning. Check the label: if it really expires earlier, enter that date and Mise marks the line for rejection, with its reason.
- 4Reject returns the line. If you decide to accept it anyway, the lot is noted as accepted outside the accepted use-by date and counts as a delivery incident.
 12345678
- 1Only the pending lines appear: what was ordered and what has already been received.
- 2Everything arrived fills in all the pending quantities; Clear sets them to zero so you type only what has arrived.
- 3What arrives now (here, what was missing).
- 4For frozen goods the maximum is negative (−15 °C): anything above it is suggested for rejection.
- 5Delivery note no.: it is stored on each lot of this delivery.
- 6Supplier invoice no. (optional): if you leave it empty, the invoice is recorded with the order number.
- 7Value received: what this delivery adds up to at the actual price, excluding VAT.
- 8Confirm receipt records everything in one go.
Filter by Sent (or open the order from the Dashboard's expected deliveries) and open the order that has arrived.
Click Receive delivery (on a part-received order, Receive the rest).
Adjust Received now and, if the invoice shows another price, the Actual price. Clear sets everything to zero if only part has arrived.
On each line, copy the Supplier lot, check the Use-by date against the label and, for chilled goods, note the temperature.
Review the lines Mise marks in red: if the temperature or the use-by date fall outside the limits, the line is ticked for Reject with the reason written. You can change the reason, or untick the rejection if you decide to accept it.
Enter the Supplier delivery note no. and, if you have it, the Supplier invoice / delivery note no.
Click Confirm receipt. Mise shows the invoice created; Open supplier invoice opens it, or OK to finish.
#What happens on receiving
When you confirm receipt, Mise does all of this at once:
- Stock: adds what was received to each ingredient (you will see the "purchase" movement in Inventory).
- Price: the ingredient's cost becomes the actual price of this purchase; it is stored in its price history and, if the supplier has a price list for that ingredient, the price list is updated (see Ingredients). As costing always uses the latest price, the cost of recipes, menus, quotes and events changes immediately.
- Lots: one per accepted line, with the supplier lot, the delivery note, the use-by date and the temperature (and another, rejected one, for each rejected line).
- Supplier invoice: it is recorded in Payables, due according to the supplier's payment terms.
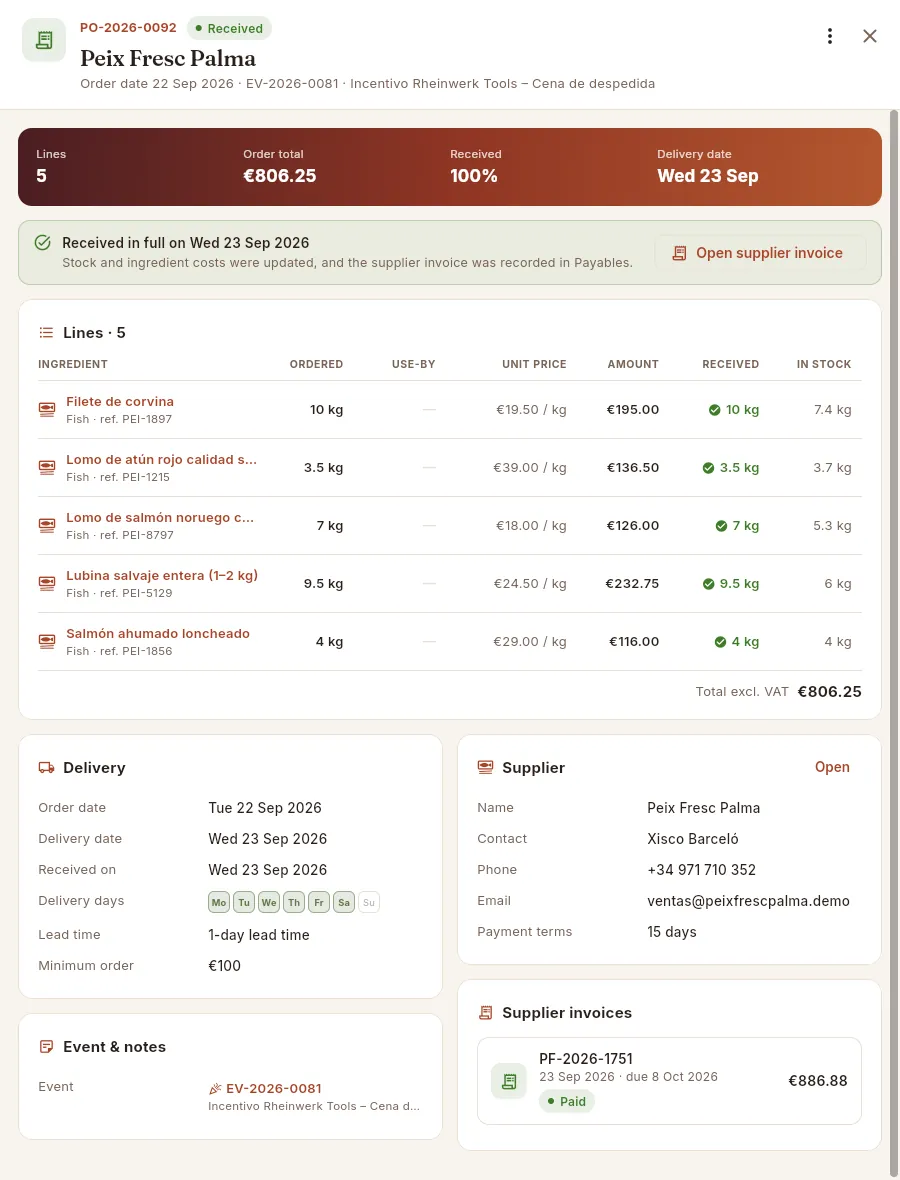 123456
- 1Received status.
- 2When it was received in full and the reminder of what was updated.
- 3Open supplier invoice: the invoice that was recorded in Payables.
- 4Received, in green: every line arrived in full.
- 5Event & notes: the linked event (click its code to open it) and the notes.
- 6Supplier invoices for this order, with their due date and whether they are paid. Click one to open it.
#Part-received orders and closing with what was received
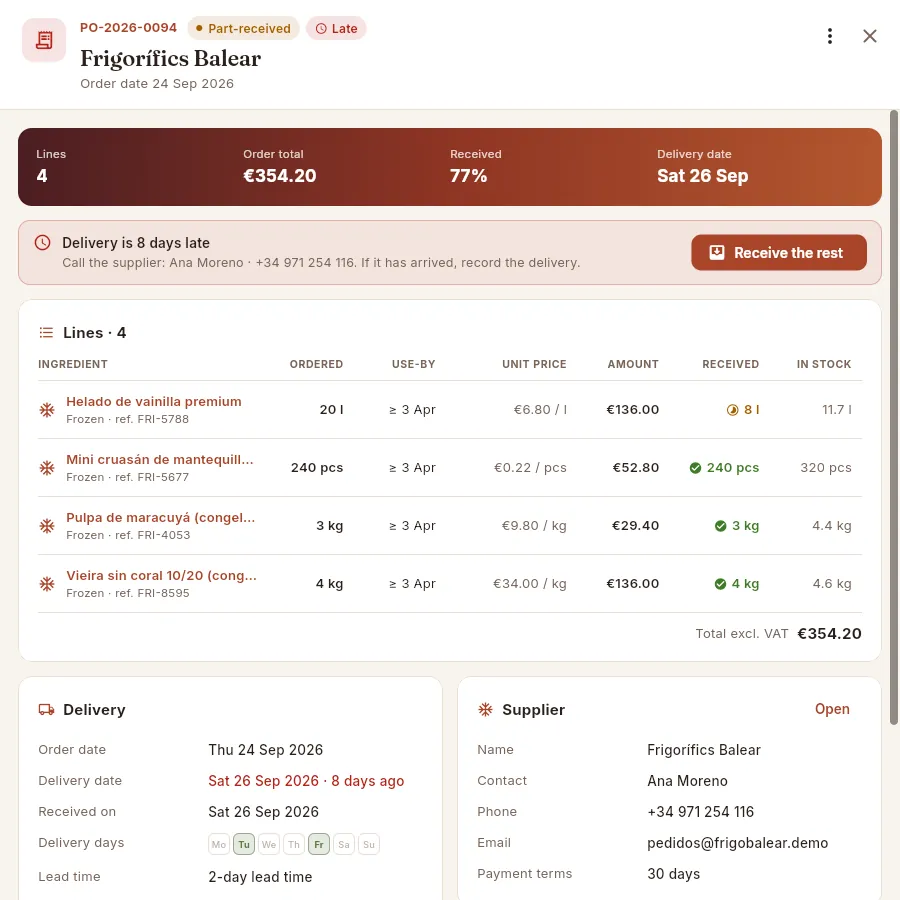 123456
- 1Part-received and, as the delivery date has passed, also Late.
- 2The order's % received, by value.
- 3The notice: days late and who to call. Without a delay it would say "Part-received · N lines still pending" and the date of the last delivery.
- 4Receive the rest opens the receipt with only what is pending.
- 5In amber, what was received of a line that arrived half-way; in green, the complete ones.
- 6If the rest is no longer going to arrive: More options → Close with what arrived.
 12
12
- 1What is missing stops being expected and stops counting as on order in the planner; the stock and invoices already recorded do not change.
- 2Close with what arrived leaves the order as Received.
#Purchase planning
The planner answers "what do I need to buy for the events of these days, from whom and when does it reach me?". It takes the confirmed events (not yet produced) in the period, calculates the ingredients their menus need, deducts what is in stock and what is already on order, and groups what is missing by usual supplier, with their delivery days. With one click it creates a draft per supplier.
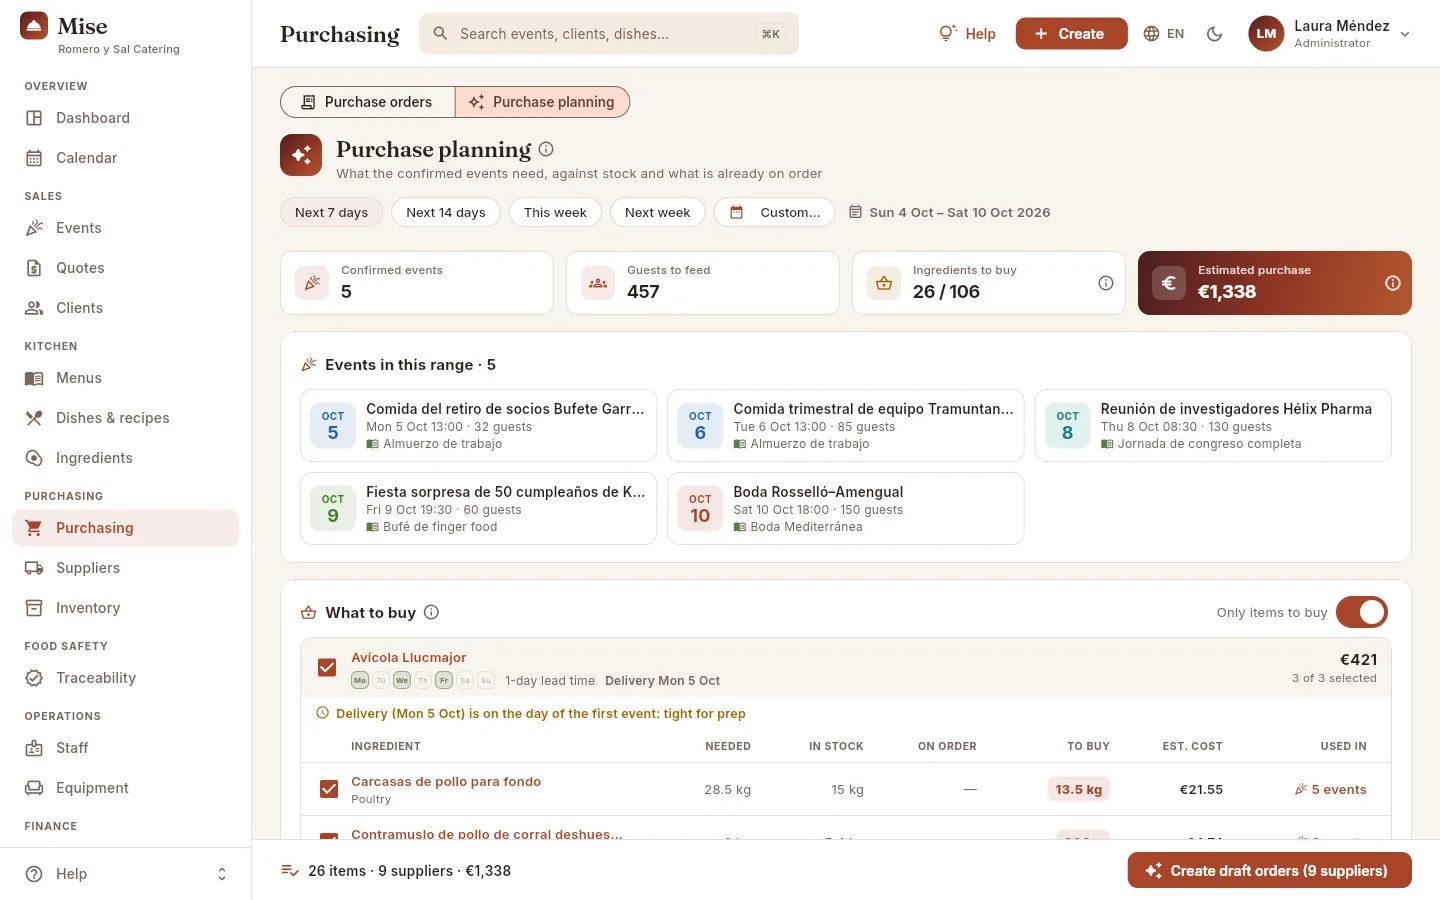 12345678
- 1The period: next 7 or 14 days, this week, next week or Custom… (you choose the dates on a calendar).
- 2The exact dates of the chosen period.
- 3Confirmed events in the period and total guests to feed.
- 4Ingredients to buy: how many of the ingredients these events need are not covered by stock and what is already on order.
- 5Estimated purchase: what the missing items would cost, at each usual supplier's price list, excluding VAT.
- 6The events in the period, with their date, guests and menu. An event without a menu warns "No menu yet · not included". Click one to open it.
- 7Only items to buy: turn it off to see the ingredients that are already covered too.
- 8The bottom bar summarises what you have ticked (items, suppliers and amount) and Create draft orders prepares one draft per supplier.
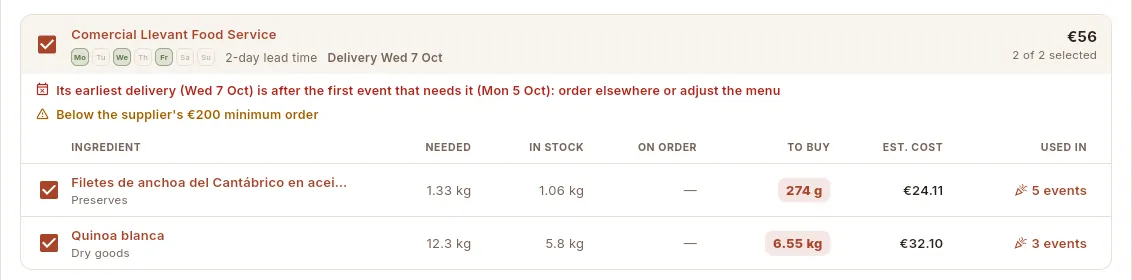 12345678
- 1Tick or untick everything for the supplier. Each ingredient also has its own checkbox.
- 2The usual supplier (click to open its file).
- 3Its delivery days, its lead time and the delivery the order would have: the last delivery day before the period, without going earlier than its lead time allows.
- 4The amount of what is ticked and how many items are ticked.
- 5In red, if the first possible delivery arrives after the first event that needs it: order it from another supplier or adjust the menu. In amber, if it arrives on the same day as the event.
- 6What you have ticked does not reach the supplier's minimum order.
- 7To buy = needed − in stock − already on order. Hover to see the rounded quantity that will be ordered.
- 8Events that need it: click to choose one and open it.
The columns for each ingredient are Needed (what all the events in the period ask for, gross), In stock, On order (what is still to arrive from open orders, drafts included), To buy and Est. cost; if nothing is missing, it says "Covered" instead of the quantity. Ingredients without a usual supplier are grouped at the end under "No usual supplier": they cannot be included in the automatic orders, so assign them a supplier in Ingredients or order them by hand.
 12
12
- 1One draft per supplier with what you have ticked, with the quantities rounded up and valued at its price list. Nothing is sent.
- 2Create drafts creates them and shows the list so you can open them one by one.
In Purchasing, click Purchase planning.
Choose the period: Next 7 days, Next week… Review the events in the period: those that say "No menu yet · not included" do not need anything yet.
Go through What to buy supplier by supplier: deal with the delivery and minimum order warnings, and untick whatever you do not want to order now.
Click Create draft orders and confirm with Create drafts.
In the list that appears, click View drafts (or open each order): review it and send it like any draft.
#What changes depending on your profile
#Tips
Purchasing
Suppliers
The supplier directory: when they deliver, how long they take, what they supply and at what price, their orders, their invoices and what you owe them.
Suppliers holds every company you buy from: food, drinks, equipment hire and services. Each supplier's file brings together what you need to order from them properly —delivery days, lead time, minimum order, contact— and to assess them: what they supply and whether it is the best price, their orders, their invoices and what you still have to pay.
Delivery days and lead time are not just for information: Mise uses them to suggest the delivery date of each order and to warn you in Purchase planning if a supplier cannot deliver in time for an event.
- 1Supplier fileDelivery days, lead time, minimum order, email and payment terms.
- 2Purchase planningGroups what is missing by usual supplier and warns you if it will not arrive in time.
- 3OrderDelivery date on its next delivery day; the order text goes to its email.
- 4ReceivingThe actual price updates its price list and the best price.
- 5Invoice and paymentDue according to its payment terms; paid in Payables.
#The supplier list
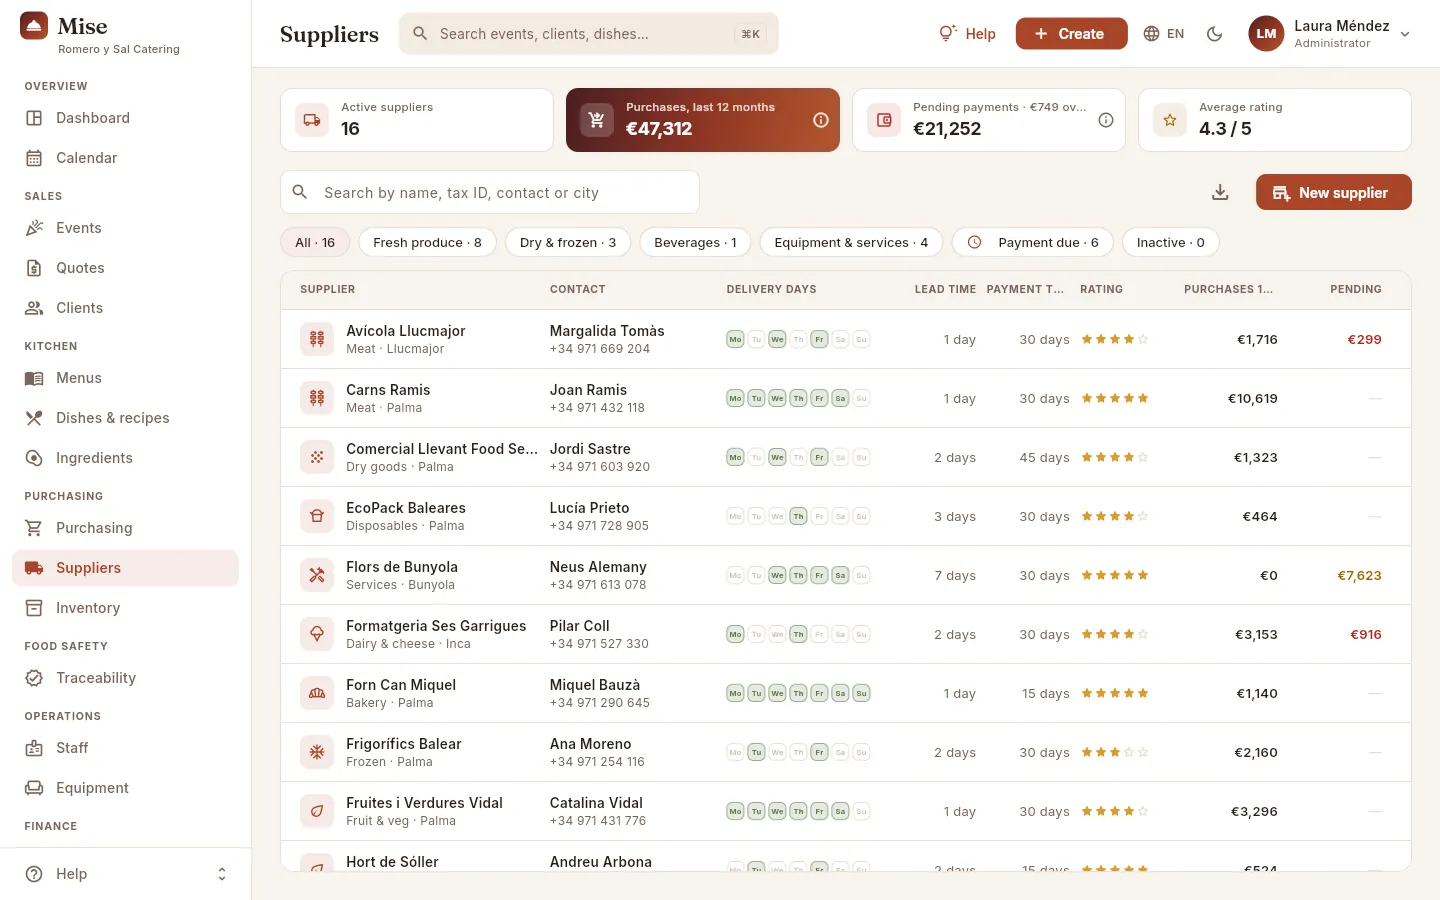 12345678
- 1Active suppliers.
- 2Purchases, last 12 months: what has been received on the orders of the last year, excluding VAT. Useful for negotiating with your main suppliers.
- 3Pending payments: supplier invoices still to pay (VAT included). The title says how much is already overdue, and it turns red.
- 4Average rating of the active suppliers, from 1 to 5 stars.
- 5Search by name, tax ID, contact person, city, email or category. On the right, Export CSV.
- 6The filters: all active, fresh produce, dry and frozen, beverages, equipment and services, with payments due and inactive.
- 7New supplier adds one.
- 8Each supplier's delivery days (highlighted), followed by lead time, payment terms, rating, purchases over 12 months and what is pending (red if anything is overdue).
Click a row to open the supplier's file. On a phone, each supplier appears as a card with its category, contact, phone, rating and what is pending payment. The All filter shows the active ones; those that have been deactivated are in Inactive.
#The supplier file
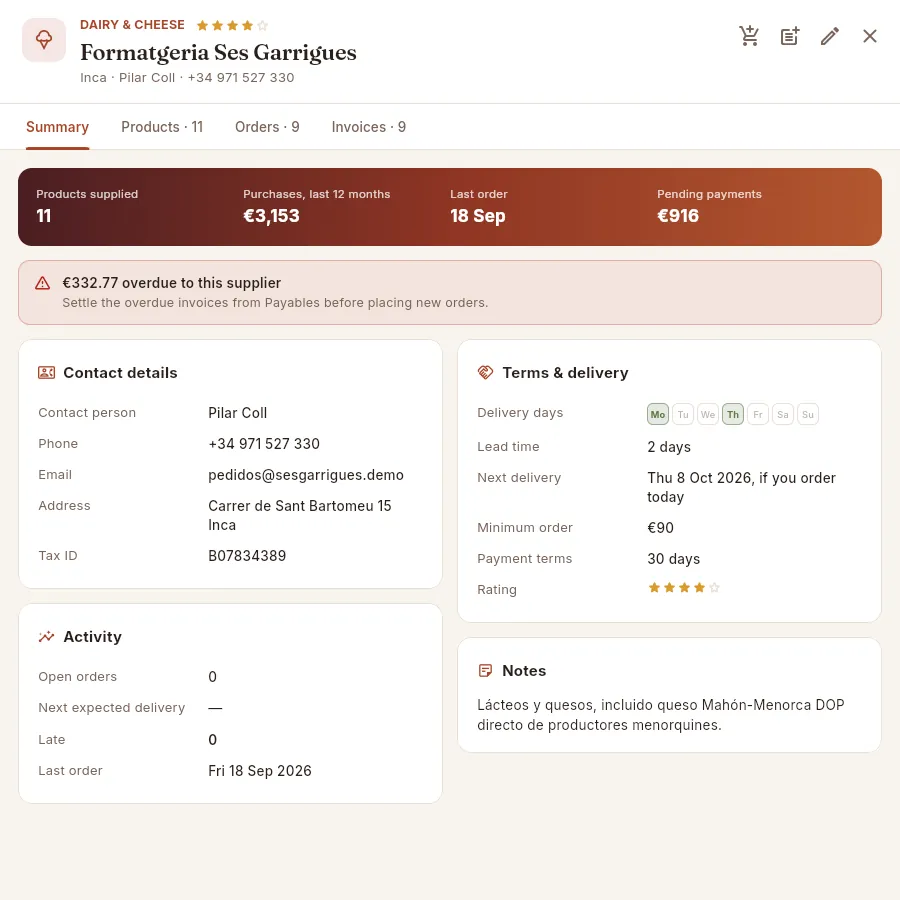 12345678
- 1New purchase order to this supplier, with its next delivery date already filled in.
- 2New supplier invoice: record an invoice that does not come from an order.
- 3Edit the supplier's details.
- 4The tabs: summary, products, orders and invoices, with their counts.
- 5The strip: products supplied, purchases over the last 12 months, last order and pending payments.
- 6If there are overdue invoices, the warning says how much and reminds you to settle them in Payables before placing new orders.
- 7Terms & delivery: delivery days, lead time, the next delivery if you order today, minimum order, payment terms and rating.
- 8Activity: open orders, next expected delivery (red if it is late), late orders and last order.
The Contact details card holds the contact person, phone, email (where orders are addressed when you send them from Purchasing), address and tax ID; if the supplier has notes, they appear on their own card.
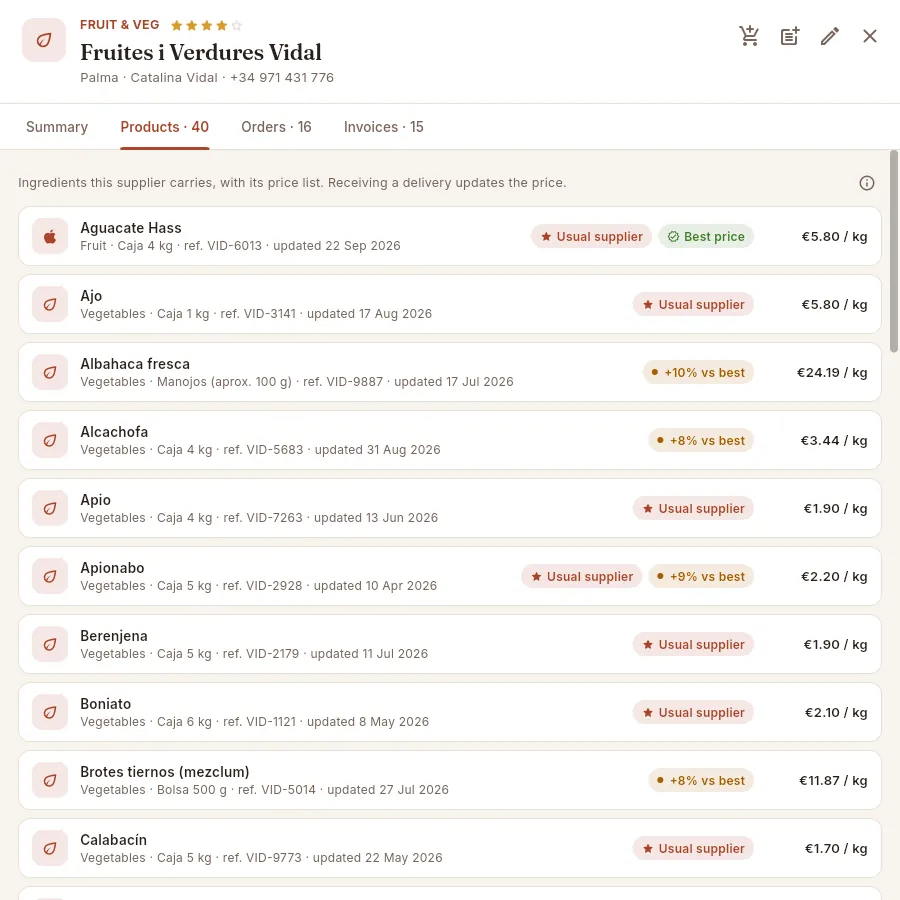 123456
- 1ⓘ How the price compares with the other suppliers of the same ingredient.
- 2Each product: ingredient, category, sales format, supplier reference and when its price was last updated. Click to open the ingredient.
- 3Usual supplier: the supplier assigned to the ingredient (the one the planner uses).
- 4Best price: its price is the lowest of all the suppliers that supply that ingredient.
- 5+10 % vs best: how much more expensive it is than the cheapest. When you hover, the best price and whose it is.
- 6The price on its price list, per unit.
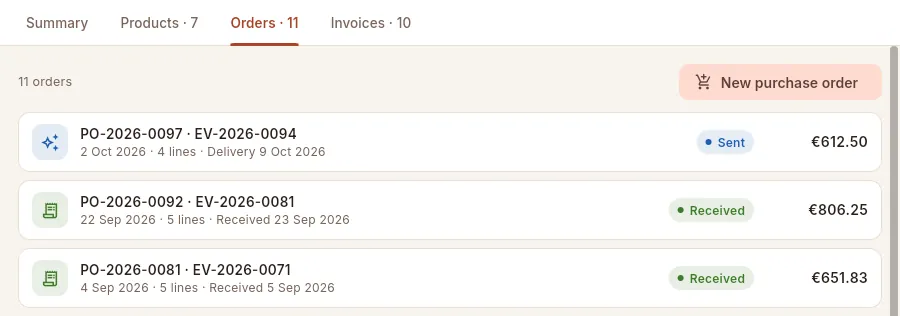 123
123
- 1New purchase order to this supplier.
- 2Each order with its event, date, lines, delivery (or date received), status and total. Those from planning carry the sparkle icon; late ones, the red pill. Click to open it.
- 3An order that has already been received, with the date it arrived.
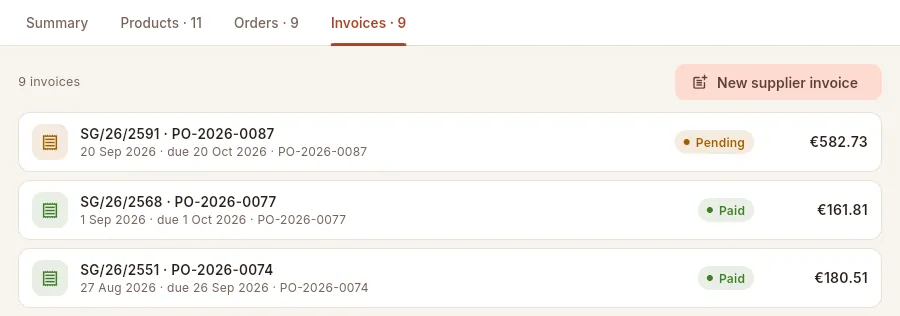 123
123
- 1New supplier invoice for an expense that does not come from an order.
- 2Each invoice: supplier number and the order it comes from, date, due date, payment status and amount. Click to open it in Payables.
- 3An overdue invoice, in red.
Invoices that come from an order are created by Mise when you receive the goods (see Purchasing). Their status can be Pending, Part-paid, Paid or Overdue; payment is recorded in Payables.
#Adding or editing a supplier
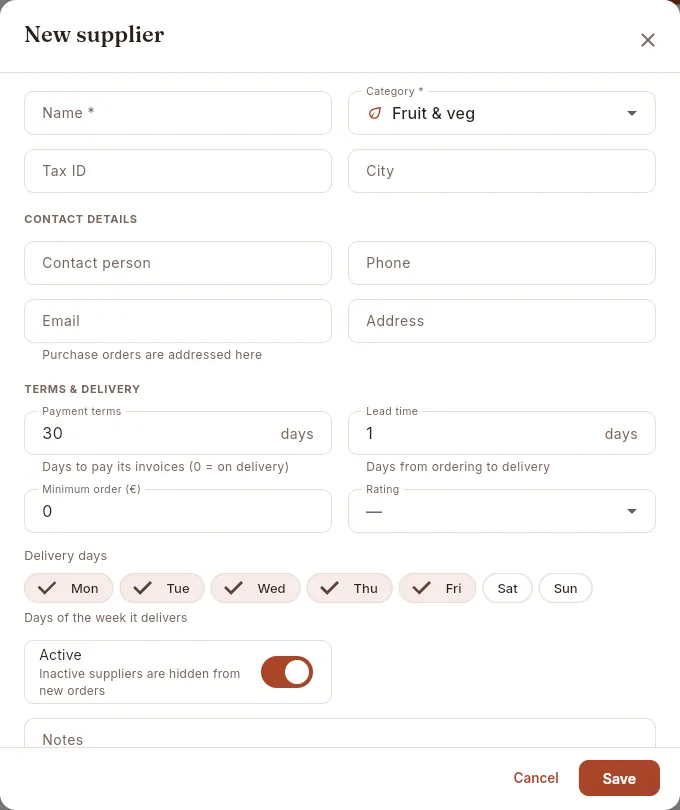 12345678
- 1Name (required), with its tax ID and city below.
- 2Category: meat, fish and seafood, fruit and vegetables, dairy and cheese, bakery, beverages, dry goods, frozen, equipment hire, disposables or services. It decides which filter it appears in.
- 3Email: the address that orders are sent to.
- 4Payment terms in days (0 = on delivery): sets the due date of its invoices.
- 5Lead time: days from when you place the order until they can bring it to you.
- 6Minimum order in euros: Mise warns you if an order falls short.
- 7Rating from 1 (Very poor) to 5 stars (Excellent).
- 8Delivery days: tick every day they deliver. Below, Active: inactive suppliers do not appear when creating orders.
Click New supplier.
Type the Name and choose the Category; if you have them, the tax ID and City.
Under Contact details: contact person, phone, email (where orders will be sent) and address.
Under Terms & delivery: payment terms, lead time, minimum order, rating and delivery days.
Leave Active ticked and click Save.
To change the details, open the file and click the pencil (Edit): the form is the same. To stop using a supplier without losing its history, untick Active. You can only delete a supplier that has no orders or ingredients. A supplier's products and prices are not typed here: they come from the ingredients that have it as their usual supplier or on its price list (the Prices tab of each ingredient, in Ingredients), and they update themselves when you receive deliveries.
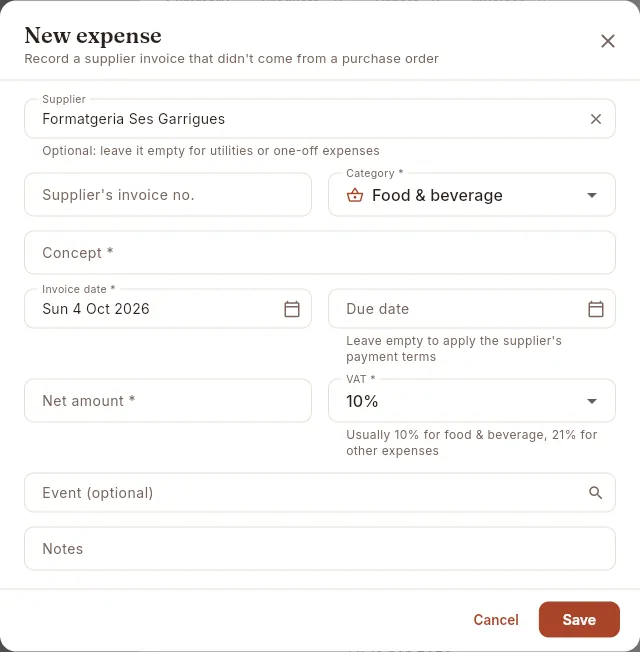 123456
- 1The supplier, already filled in.
- 2The supplier's invoice no.
- 3Expense category: Mise suggests Food & beverage for a food supplier (hire for an equipment one).
- 4Expense description (required).
- 5Due date: if you leave it empty, the supplier's payment terms apply.
- 6Net amount and VAT (normally 10 % on food and drink and 21 % on other expenses).
#What changes depending on your profile
The buttons in the file header depend on what your profile allows. With the example profiles, kitchen can place orders but cannot edit the supplier or record invoices, and administration can edit it and record invoices but cannot place orders (it does not have the Purchasing section).
 1
1
- 1Kitchen only sees New purchase order: it can order, but not edit the supplier or record invoices.
 12
12
- 1Administration sees New supplier invoice…
- 2…and Edit, but not the order: it does not have the Purchasing section.
#Tips
Purchasing
Inventory
The stock of each ingredient against its minimum, what it is worth, waste and adjustments, the physical stock count of the store and every stock movement.
Inventory is the store as seen from Mise: how much there is of each ingredient, whether it is below the minimum stock (the quantity at which you need to order again), how much what you have in the cold rooms and on the shelves is worth, and why each item has gone up or down. Stock almost always moves by itself: it goes up when you receive an order or record a delivery without a purchase order, and it goes down when an event is produced (Mise deducts what each dish uses). Here you record what the application cannot know by itself: waste (what is thrown away or spoils), one-off adjustments and the stock count of what is really there. The section has three views, which you choose at the top left: Stock, Movements and Stock count.
#The Stock view
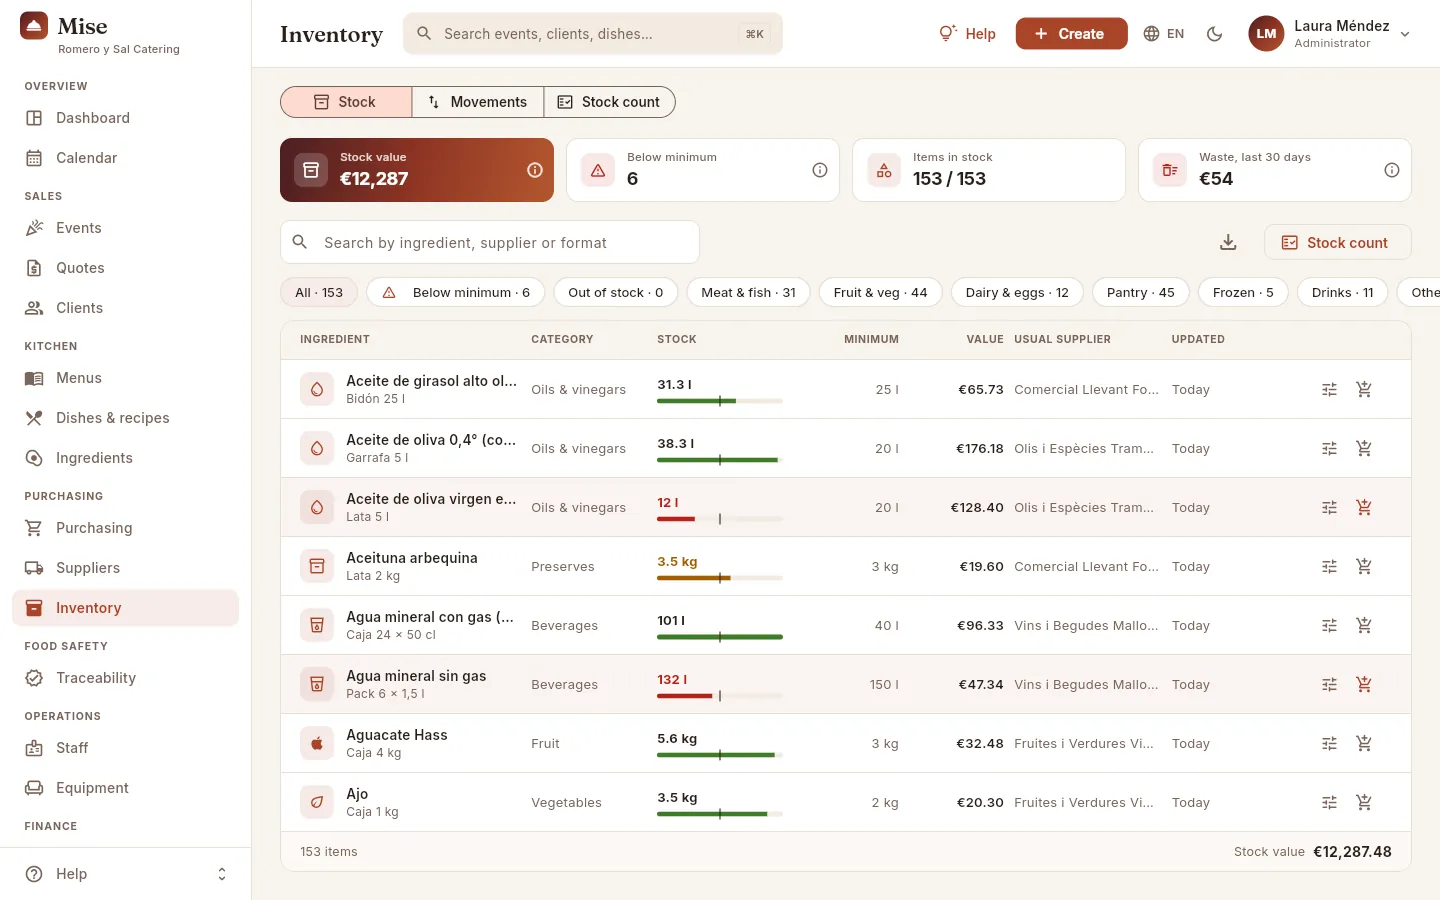 12345678
- 1The section's three views: Stock (what there is now), Movements (why it has changed) and Stock count (the physical count).
- 2Stock value: what the whole store is worth at each ingredient's last purchase price.
- 3Below minimum: how many ingredients are below their minimum stock. Red if there are any; click it to see them.
- 4Items in stock: how many ingredients have stock, out of the total of active ingredients. Click it to see those at zero.
- 5Waste, last 30 days: the value of what has been thrown away. Click it to open those movements.
- 6The search box finds an ingredient by its name, its supplier, its format ("Saco 25 kg") or its category.
- 7Stock count opens the physical count of the store (further down).
- 8The filters: all, below minimum, out of stock and by category (meat and fish, fruit and veg, dairy and eggs, pantry, frozen, drinks…). Each one says how many there are.
Each row is an active ingredient. The columns are the ingredient (with its purchase format below), the category, the stock with a bar comparing it with the minimum, the minimum, the value of that stock, the usual supplier and when it was last updated (the last delivery, usage or adjustment). Click a column header to sort by it; the download icon (Export CSV) downloads the filtered list as a file for Excel.
#What is missing: below minimum and ordering
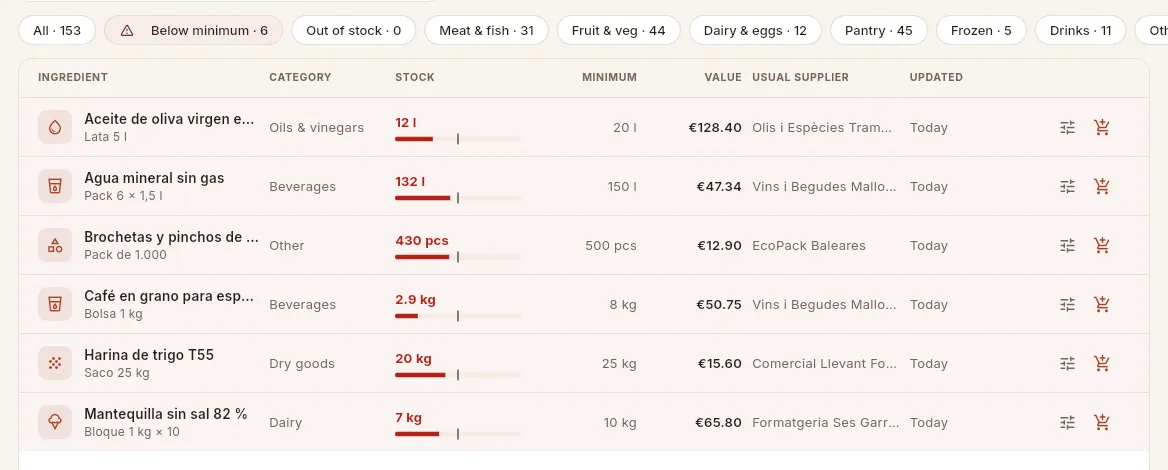 123456
- 1The Below minimum filter leaves only what is below its minimum.
- 2The stock with its bar: the vertical line is the minimum and the full bar, double the minimum. Red if it is below; amber if it is about to get there.
- 3The minimum set in the ingredient's file: the point at which it is worth ordering again.
- 4The usual supplier, which the quick order will go to.
- 5Adjust stock: records waste, an adjustment or the stock count for this item.
- 6Order from… (the trolley, coloured when something is short): adds the ingredient to a draft order with its usual supplier.
Click the Below minimum indicator (or the filter of the same name).
On the ingredient's row, click the trolley Order from….
If the supplier already has a draft order, choose Add to PO-… to add it to that order or New purchase order.
Enter the quantity: Mise suggests just enough to reach double the minimum. Confirm the line.
#Waste, adjustments and stock count for an item
Click a row (or its Adjust stock button) to correct that ingredient's stock. The dialogue has three types of change:
| Type | When | What you enter |
|---|---|---|
| Waste | Something is thrown away or spoils (expired, broken, event leftovers…) | The quantity wasted; it is subtracted from stock |
| Adjustment | Correcting a known discrepancy (a tray miscounted, a breakage while loading) | The difference, positive or negative (e.g. −2) |
| Stock count | You have counted that item on the shelf | What you counted: the stock becomes that figure |
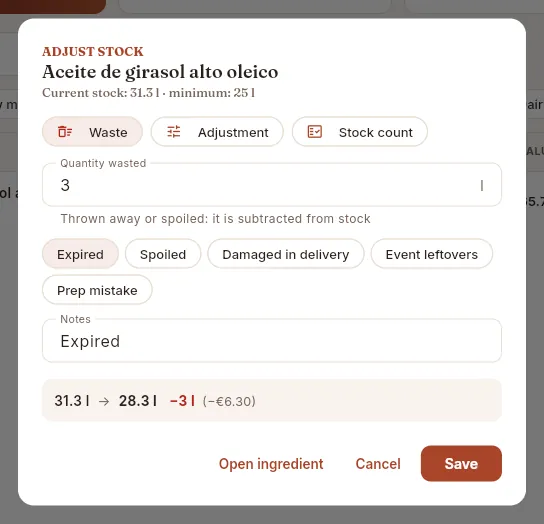 123456
- 1The type of change: waste, adjustment or stock count. Waste is the one selected by default.
- 2The quantity, in the ingredient's unit (litres, kilos or units).
- 3The usual reasons: clicking one writes it into the notes.
- 4The notes stay with the movement: why it was thrown away, where, who saw it.
- 5The result before saving: current stock → new stock, the difference and what it is worth.
- 6Save records the movement. Open ingredient takes you to its file.
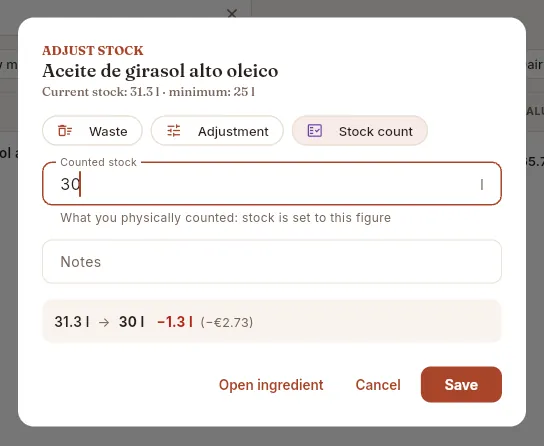 123
123
- 1Stock count: to set this item's stock to what you have counted.
- 2The counted stock is filled in with the system's figure; change it to the real one.
- 3Mise calculates the difference (here 1.3 litres are missing) and records it as a stock count movement.
In Stock, find the ingredient and click its row (or Adjust stock).
Leave Waste selected and enter the Quantity wasted.
Click the reason (Expired, Spoiled, Damaged in delivery, Event leftovers or Prep mistake) and complete the notes if needed.
Check the result in the grey box and click Save.
#Stock movements
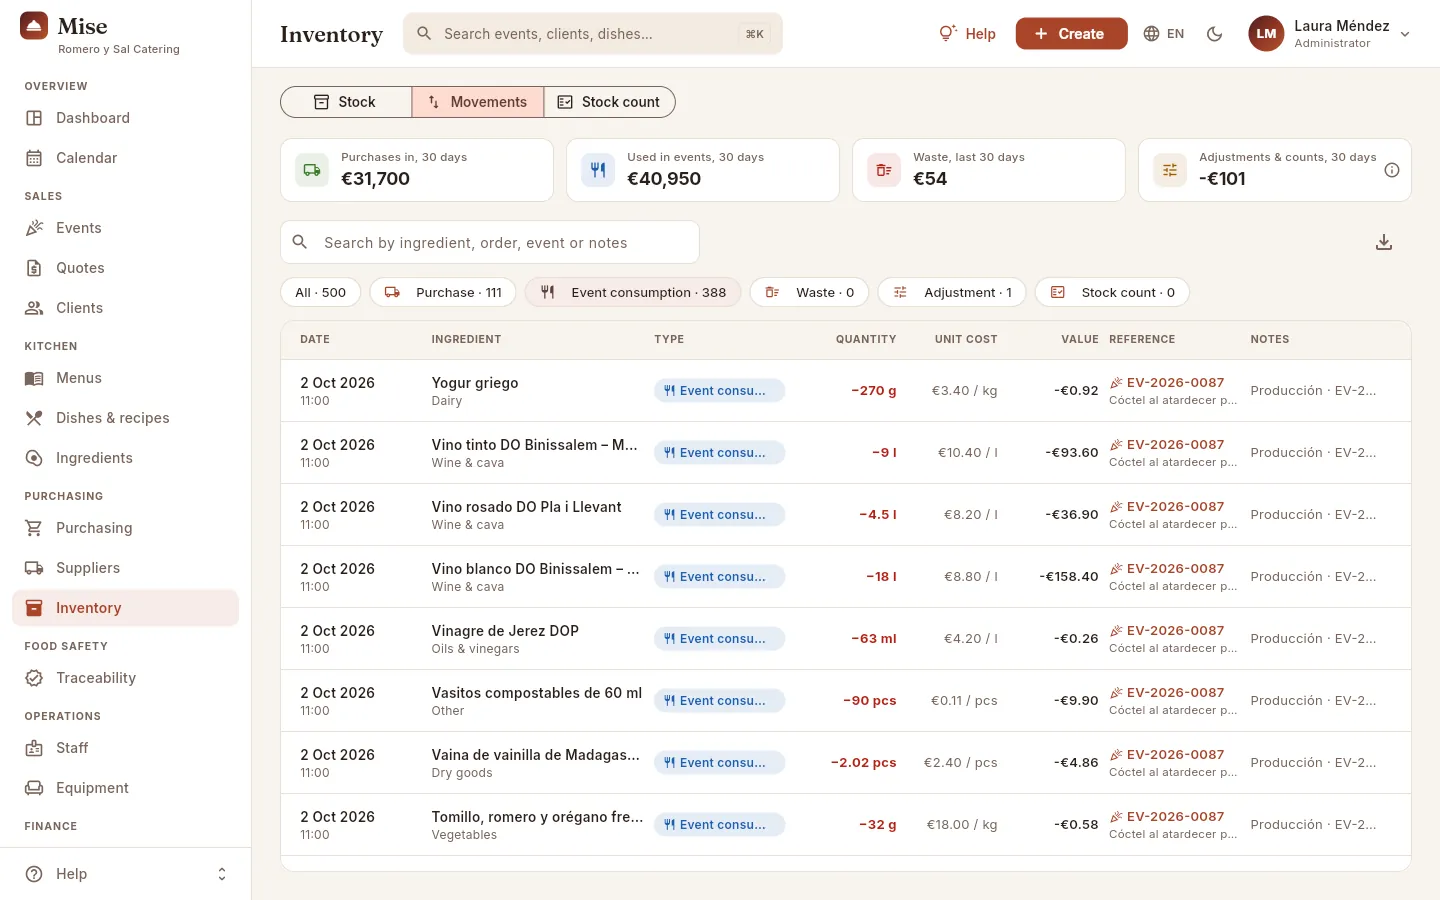 12345678
- 1Purchases in over the last 30 days (orders received and deliveries without a purchase order). Click it to see them.
- 2Used in events: what has been used producing the events of the last 30 days.
- 3Waste: what has been thrown away in 30 days, including lots withdrawn because they expired or because of an alert.
- 4Adjustments & counts: the balance of the corrections. If negative, there was less stock than Mise said.
- 5Filter by type: purchase, event consumption, waste, adjustment or stock count. Here, event consumption.
- 6The type of movement, with its colour.
- 7The quantity with its sign: green for what comes in, red for what goes out.
- 8The reference: the event (or the order) that caused the movement. Click the row to open it.
The types of movement are: Purchase (a received order or a delivery without a purchase order), Event consumption (when an event is marked as produced), Waste, Adjustment and Stock count. Each movement stores the ingredient's cost at that moment, so its value does not change even if the price changes later. The notes explain each waste or adjustment (the reason), each delivery without a purchase order (its delivery note) and each stock count (its date). The search box finds movements by ingredient, order number, event or notes. The list shows the 500 most recent movements; the indicators count all those of the last 30 days.
#The physical stock count
The stock count is the convenient way to count the whole store or one category (for example, all the dairy at the end of the week): you type what you count on each line and Mise adjusts those that do not match in one go.
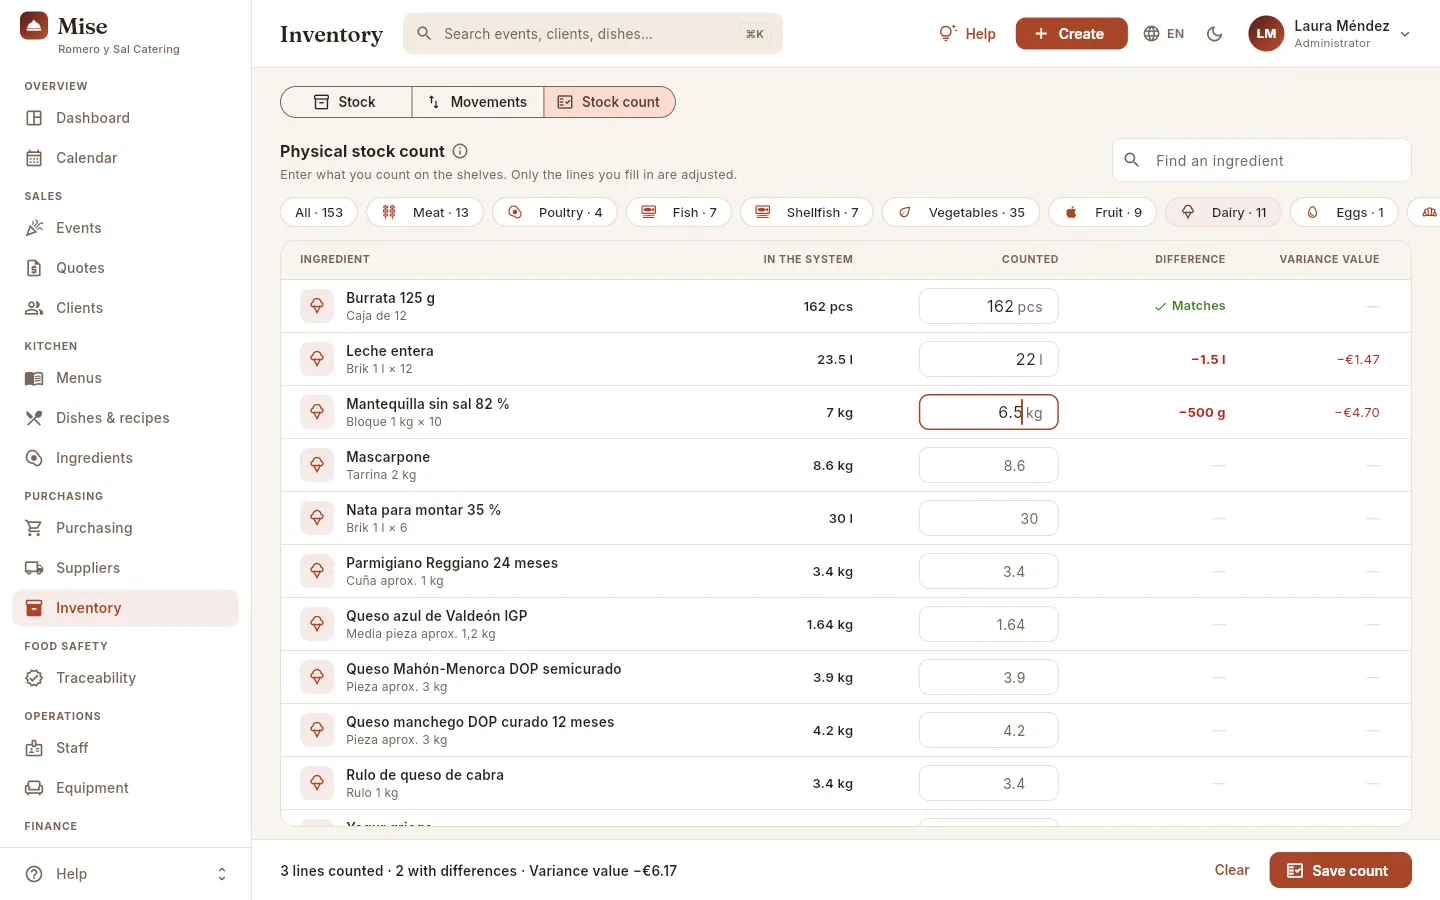 12345678
- 1The physical stock count. Its ⓘ explains how it works.
- 2Search for a specific ingredient if you do not want to go through the list.
- 3The categories, with how many items each has: count by areas of the store.
- 4In the system: what Mise thinks is there.
- 5Counted: type what is really there. In grey, as a hint, the system's figure.
- 6The difference and what it is worth: "Matches" in green, or what is missing (red) or surplus (green).
- 7The summary: lines counted, how many with a difference and the total value of the difference.
- 8Save count applies the differences. Clear deletes what you have typed.
Click Stock count (or the Stock count view).
Choose the category you are going to count (or All) and go along the shelf typing what you find under Counted. Lines you leave blank are not touched.
Check the difference column: what does not add up shows in red (missing) or green (surplus), with its value.
Click Save count and confirm at Apply this stock count?.
 12
12
- 1Before touching anything, Mise summarises how many lines you have counted, how many change and the value of the difference.
- 2Stock is only adjusted when you confirm. With Cancel you go back to the stock count without losing what you typed.
#On your phone
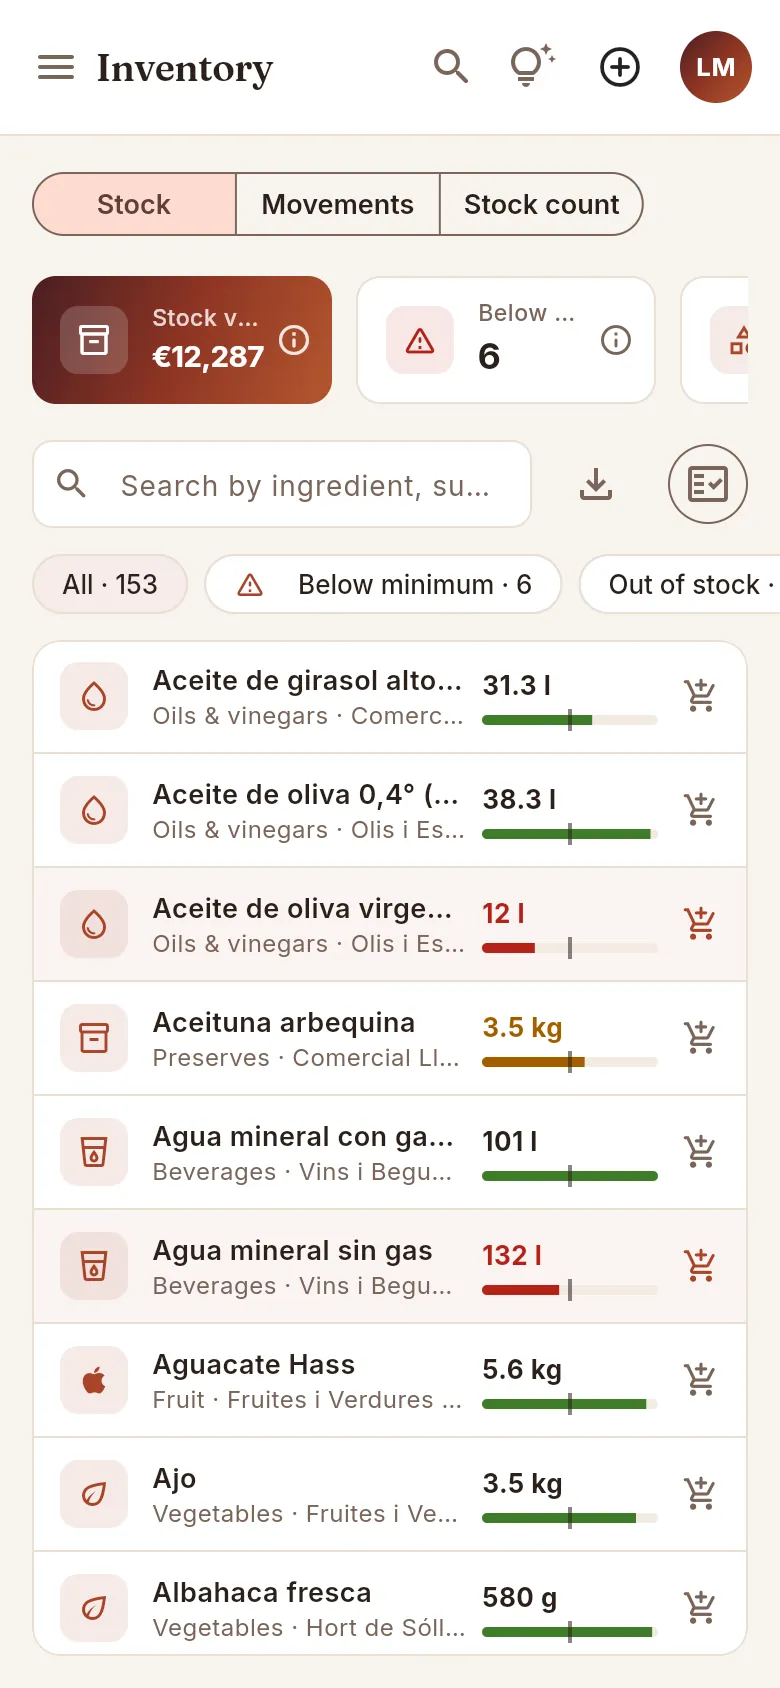 12
12
- 1The stock count, with its icon.
- 2The trolley to order. Tap the card to adjust the stock.
#How it is calculated
Food safety
Traceability
Every lot received with its supplier, use-by date and temperature; every dish produced with its checks and its witness sample; and the route in both directions between the two: from the dish back to the supplier and from the lot forward to the events and clients that received it.
Food traceability means being able to answer two questions in seconds: where did what we served come from? and who did we serve it to? If a supplier or the health authorities warn that a lot of eggs, fish or cheese may be contaminated, you need to know which events and dishes it was used in, how many guests it reached and which clients to warn; and if a client complains about a dish, which supplier and which lot each ingredient came from. Mise records it automatically as you work: every delivery of goods creates a lot; when you produce an event, each dish is recorded as a production batch that knows which lots it used, with its temperature checks and its witness sample. This section brings all of that together in three views —Lots, Production batches and Witness samples— and adds the food alert drill: choose a lot and see straight away where it went.
#How a lot travels: from the supplier to the dish and the client
- 1ReceivingWhen an order is received (or a delivery without a purchase order) each product becomes a lot: supplier lot, delivery note, use-by date, temperature and packaging.
- 2Lot in storageThe lot adds to stock. Mise warns you about what is expiring and lets you put it on hold or withdraw it.
- 3Production (FEFO)When the event is produced, each dish uses the lots that expire soonest. Never one that is expired, on hold or rejected.
- 4Production batchEach dish is recorded as a production batch: lots used, temperature checks and the person in charge.
- 5Witness sampleA portion of each dish, kept refrigerated for at least 7 days, with its “keep until” date.
- 6Event and clientThe dish reaches the event's guests; the client is linked to the lot.
What is recorded at each step, and where you see it:
| Step | What Mise records | Where you see it |
|---|---|---|
| Receiving | Supplier, order, delivery note, supplier lot, use-by date, temperature, packaging condition, who received it; or the rejection with its reason | Lot record, Receipt tab |
| Stock | How much is left of each lot and when it expires | The Lots list and the ingredient's lots tab |
| Production | How much of which lot each dish at each event used | Production batch, Lots used tab |
| Kitchen | Core, blast-chilling and service temperatures; person in charge; incidents and corrective actions | Production batch, Temperature checks tab |
| Witness sample | When it was taken, how long it is kept, where and whether it has been discarded | Witness samples view |
| Service | Event, client, guests and contact | Lot record, Traceability tab (forwards); event, Traceability tab (backwards) |
#The list of lots
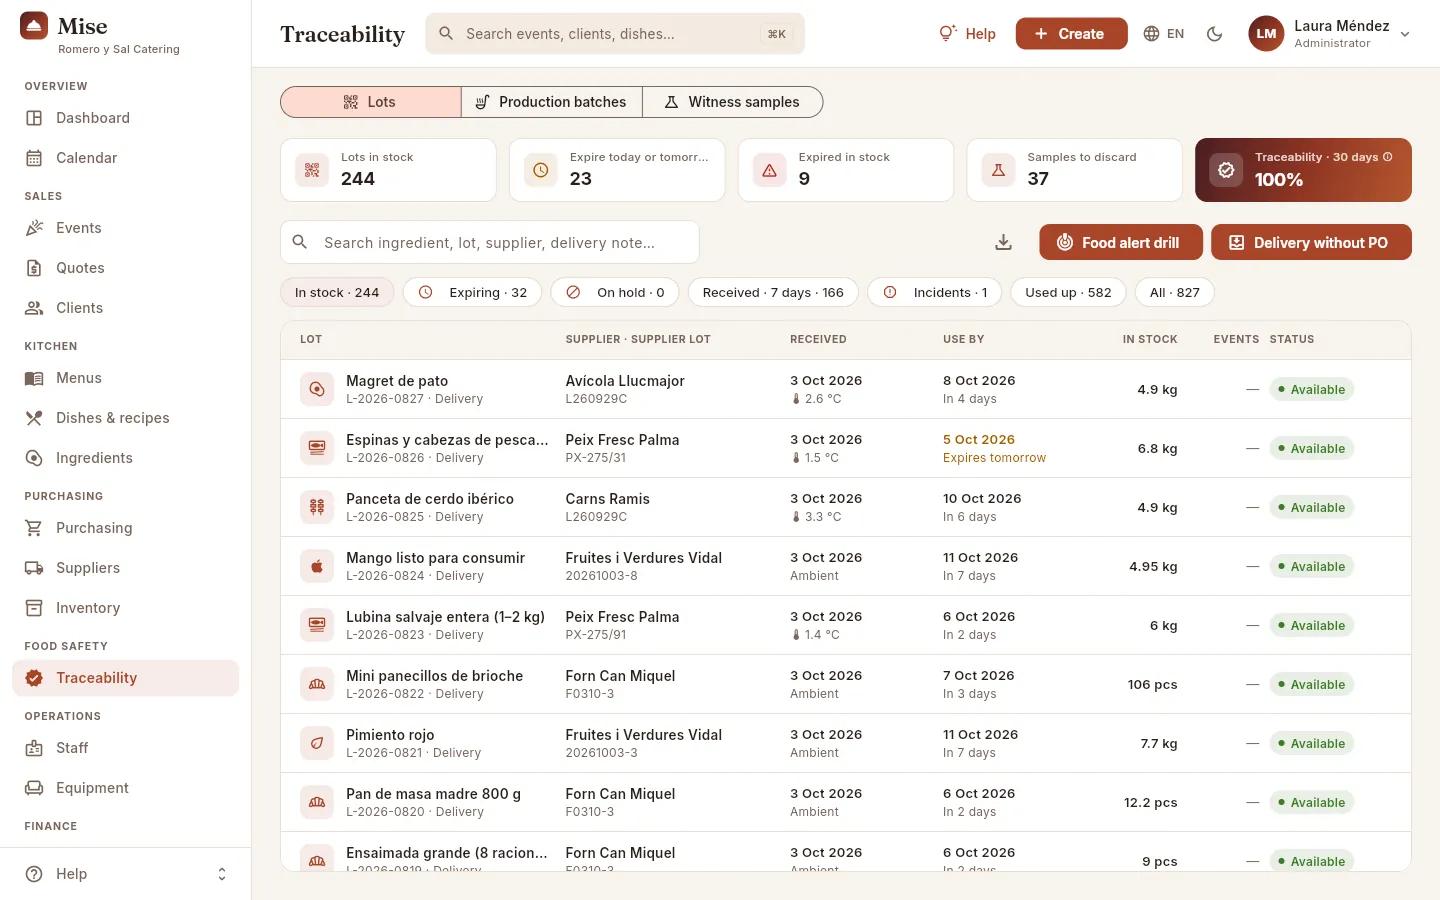 12345678
- 1The three views: Lots (what has been received), Production batches (what has been produced) and Witness samples.
- 2Lots in stock: lots with stock remaining, including those on hold.
- 3Expire today or tomorrow: what needs using now. Click it to see them together with the expired ones.
- 4Expired in stock: lots that have already expired and are still in storage: they must be withdrawn.
- 5Samples to discard: witness samples that have already completed their storage days.
- 6Traceability · 30 days: what share of what the kitchen used this month is linked to a lot. The target is 100 %.
- 7Food alert drill: choose a lot and see which events and clients it reached (further down). Delivery without PO, beside it, records a lot bought without an order.
- 8The filters: in stock, expiring, on hold, received in the last 7 days, receiving incidents, used up and all.
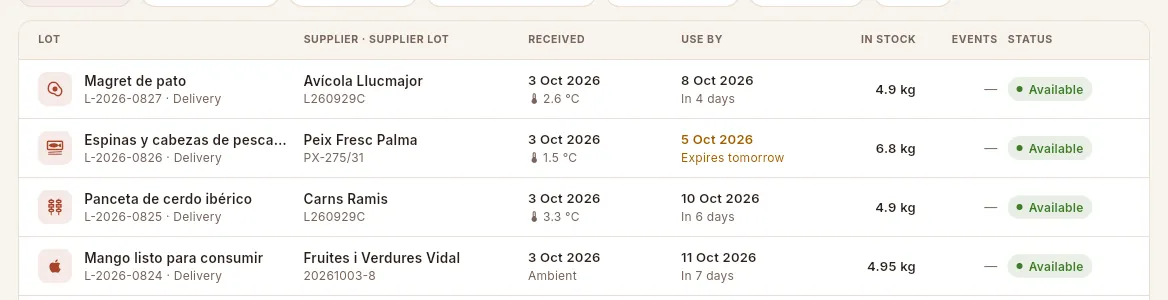 1234567
- 1The ingredient and, below it, the lot's internal code (L-year-number) and its origin: delivery, stock count or adjustment.
- 2The supplier and the supplier lot (the one on its label) or, if it has none, the delivery note.
- 3The date received and the temperature it arrived at (in red if it exceeded the maximum); for products with no temperature control, its storage (ambient).
- 4The use-by or best-before date and how long it has left: amber if it expires today or tomorrow, red if it has already expired.
- 5In stock: how much of that lot is still left.
- 6Events: how many events it has been served at.
- 7The lot's status (see the table below).
The statuses of a lot:
| Status | What it means |
|---|---|
| Available | It can be used when producing. |
| On hold | Blocked because of an alert or a suspicion: it still counts in stock, but it is not used when producing until you release it. |
| Rejected | It was not accepted on receipt (temperature, use-by date, packaging…). It does not enter stock, but a record remains with its reason. |
| Used up | Nothing is left: it was used at events, thrown away as waste or withdrawn. |
| The use-by date is not a status but a warning: an available lot may be expired (date in red and the row highlighted) or about | |
| to expire (amber), and what you do with it is withdraw it or use it first. Click any lot to open its record. The | |
| search box finds lots by ingredient, code, supplier lot, supplier, delivery note or order number. |
#Use-by dates: what expires first goes first (FEFO)
FEFO (first expired, first out) means “what expires first goes first”. It is the rule Mise uses to use up lots: when you produce an event, each ingredient is taken from the lot that expires first; if that is not enough, from the next one; and so on until what the menu requires is covered. A lot that will be expired on the event date, on hold or rejected is never used. Waste and adjustments in Inventory also follow FEFO order (and there the expired ones do go first: they are the first to be thrown away).
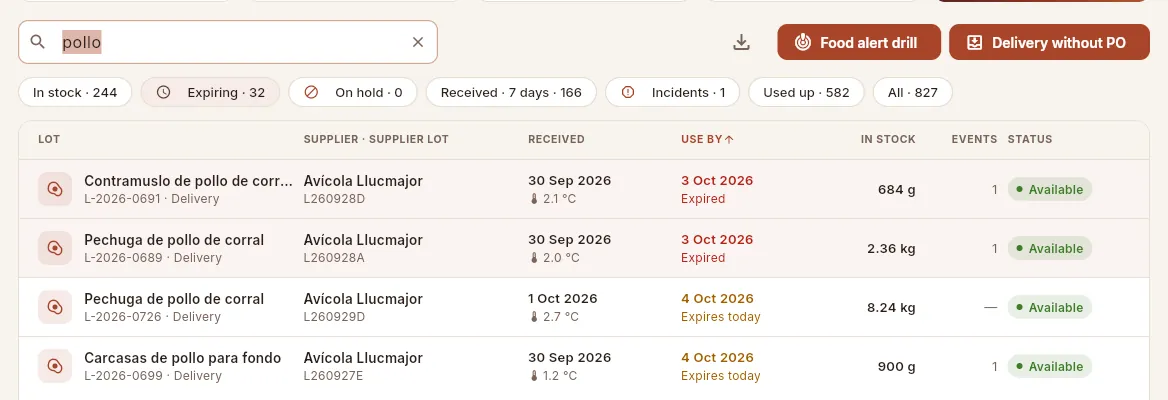 12345
12345
- 1The Expiring filter: lots with stock that are expired or expire today or tomorrow.
- 2Click the Use by header to sort: what expires soonest first.
- 3Expired lots: the date in red and the row highlighted. They must be withdrawn.
- 4Expires today (or tomorrow), in amber: they need to be used first.
- 5What is left of each lot: what would be lost.
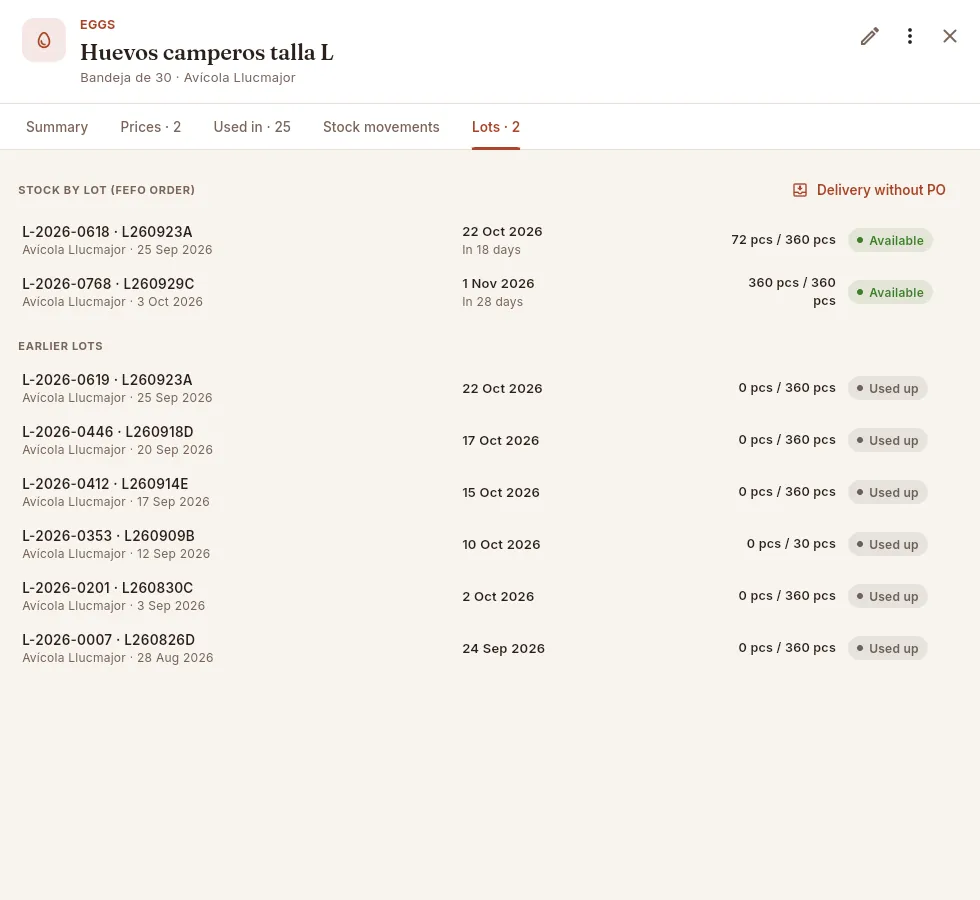 12345
12345
- 1Each ingredient's Lots tab (in Ingredients) tells you how many lots it has in stock.
- 2The stock by lot in FEFO order: at the top, the one that expires soonest, which is the one that will be used first.
- 3Each lot: code, supplier lot, supplier and date received, its use-by date, what is left of the total received and its status.
- 4Delivery without PO records a lot of this ingredient right here.
- 5The earlier lots, already used up: the history of what has been received.
In Lots, click the Expire today or tomorrow indicator (or the Expiring filter).
Anything in amber (expires today or tomorrow): tell the kitchen to use it first. On the Dashboard you have it in the Use first (FEFO) block.
Anything in red (expired): open it and click Withdraw what is left (the bin icon on the record).
Confirm: what was left leaves stock as waste, with the reason “Expired”.
 12
12
- 1Mise tells you how much leaves stock and why: what is left of the lot, as waste.
- 2It is only withdrawn once you confirm. With Cancel nothing is touched.
#The lot record
Click a lot to open its record, with two tabs: Traceability (where it went) and Receipt (how it arrived).
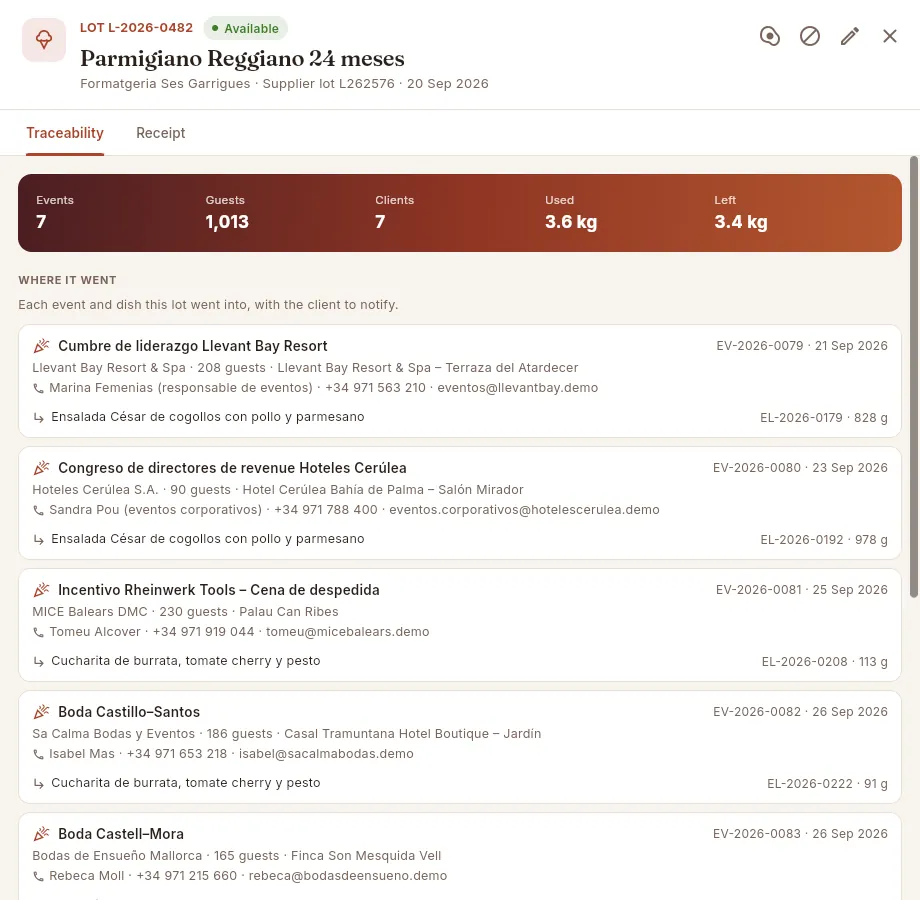 12345
12345
- 1The lot's internal code and its status; below, the ingredient, the supplier, the supplier lot and the date received.
- 2The buttons on the record: open the ingredient, put on hold (or release), edit the lot's details and close. With an expired or on-hold lot, withdraw what is left also appears.
- 3The lot's figures: the events and guests it reached, clients, how much has been used and how much is left.
- 4Where it went: forward traceability, event by event.
- 5Each event: client, guests and venue, the client's contact and the dishes that used this lot, with the quantity. Click it to open the event.
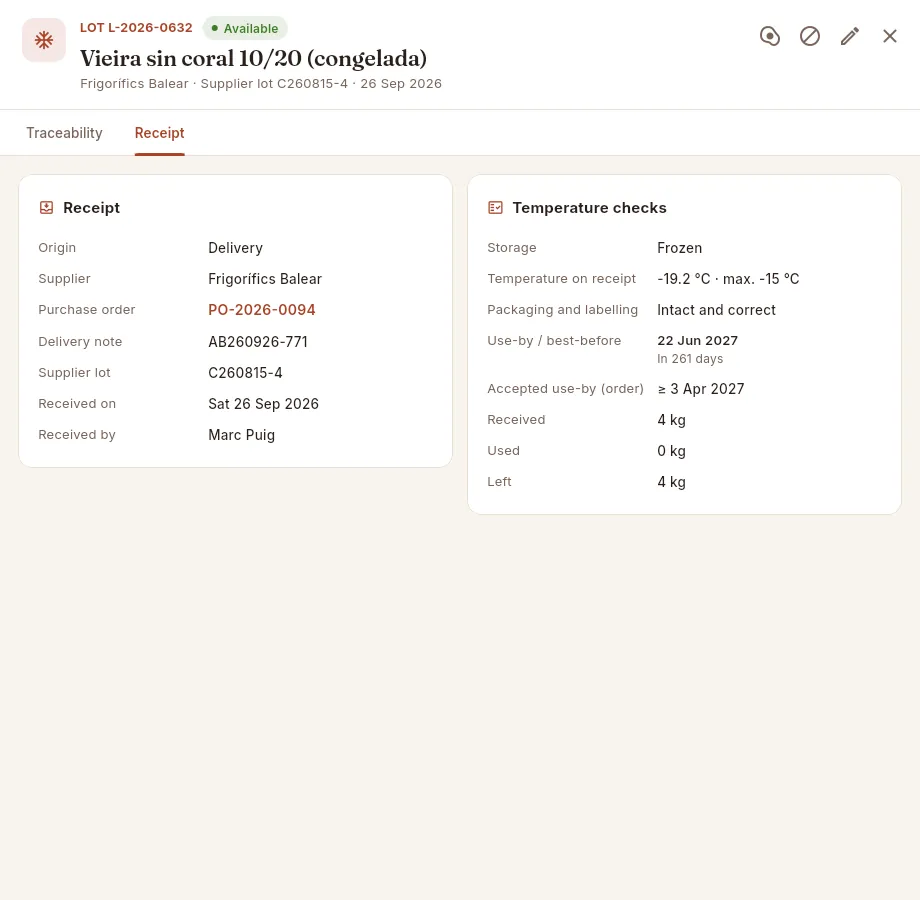 1234567
- 1Where it comes from: origin (delivery of an order, stock count or adjustment) and supplier.
- 2The order it came from: click it to open it.
- 3The delivery note and the supplier lot: the details that any alert will ask for.
- 4Received on and received by: when and who accepted it.
- 5The temperature on receipt against the maximum for that product (in red if it exceeded it). Packaging and labelling, below: whether they arrived intact and correct.
- 6The lot's use-by date and the admitted use-by date on the order (the minimum that was requested from the supplier). If the lot arrived outside it, it shows in red.
- 7The quantities: received, used and what is left.
 1234
1234
- 1Rejected status: it did not enter stock and cannot be used, put on hold or edited (only the buttons to open the ingredient and close remain).
- 2The delivery details are recorded all the same: supplier, delivery note, supplier lot, when and who received it.
- 3The temperature, in red: it exceeded the maximum in the self-inspection plan for fish.
- 4The reason for the rejection, as written by whoever received it: it stands as proof that it was returned.
Rejections are made when you receive the order in Purchasing: if you enter a temperature above the product's maximum or a use-by date outside the one that was requested, Mise suggests rejecting the line and asks for the reason. All rejections, out-of-range temperatures, use-by dates outside what was ordered and damaged packaging appear in the Incidents filter of the list of lots. With the pencil Edit lot data you correct the supplier lot, the delivery note, the use-by date, the temperature, the packaging or the notes of a lot (not of a rejected one).
#Putting a lot on hold and releasing it
Putting a lot on hold means setting it aside without throwing it away: it still counts in stock, but Mise will not use it when producing any event until you release it. It is the first thing to do on receiving an alert from the supplier or the health authorities, or if you suspect a product (a bulging pack, an odd smell) while you check it. It is done with the Put on hold icon on the record (or with the red button in the food alert drill), entering the reason.
 123
123
- 1Mise reminds you what it means: the lot stays in stock but will not be used when producing.
- 2The reason (alert, suspicion…), compulsory: it is kept on the lot's record.
- 3Put on hold blocks it immediately. With Cancel nothing is done.
A lot on hold shows with the On hold status (in purple) and in the On hold filter of the list. From its record you can:
- Release it (Release icon) if the alert is ruled out: it becomes available again.
- Withdraw what is left (bin icon) if it is confirmed: what was left leaves stock as waste, with the reason given when it was put on hold.
#Food alert drill: from the lot to the events and clients
The food alert drill is forward traceability (“one step forward”): you start from a lot and Mise tells you which events it reached, in which dishes, how many guests and which clients need to be warned, with their contact details. It works just as well for a real alert as for practice: it is worth running a drill from time to time and checking that it can be resolved in minutes.
In Lots, click Food alert drill.
In Which lot is affected by the alert?, type what the notice says: the ingredient (“eggs”), the supplier lot or the delivery note number.
Choose the lot. The ones you still have in storage and that have reached the most events come first.
Read the red box: how many events, guests and clients it reached. Below, each event with its client, their contact and the dishes affected.
Click Put on hold so that what is left is not used, and Copy client list to paste the list of who to warn into an email or a message.
If the alert is confirmed, withdraw what is left with Withdraw what is left.
 1234
1234
- 1The drill asks which lot is affected by the alert.
- 2Type the ingredient, the supplier lot or the delivery note given in the notice.
- 3Each lot with its supplier lot and, below, code, supplier, date received, delivery note and how many events it reached. This one, still in storage, reached several events: it is the one we use as an example.
- 4Another lot of the same product that has not been served yet (“0 events”): putting it on hold would be enough.
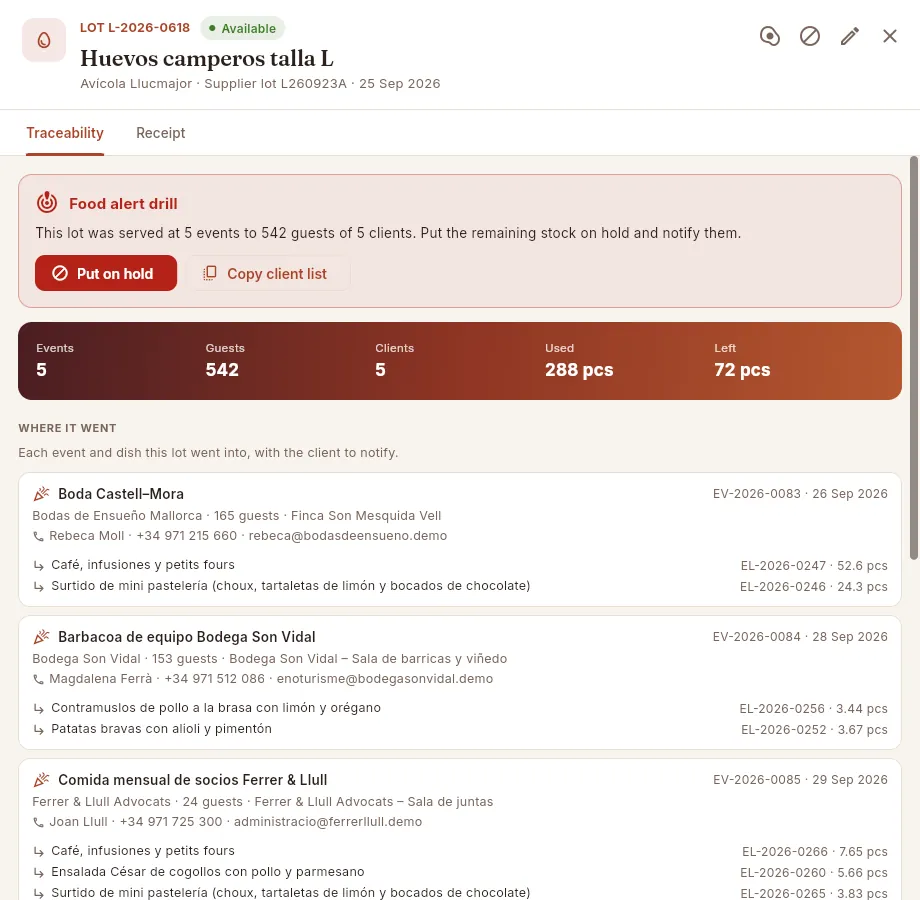 12345
12345
- 1The drill box: how many events, guests and clients the lot reached, and what to do.
- 2Put on hold what is left, so that it is not used at any more events.
- 3Copy client list: copies, ready to paste, each client with their contact details and their events, dates, guests and dishes.
- 4The guests: the total number of guests at all those events.
- 5The first event, with the client, the contact (person, phone and email) and the dishes that used the lot.
The list that Copy client list copies starts with the affected lot and continues with a section for each event, ready to paste into an email or a message:
Food alert · lot L-… (Huevos camperos talla L, supplier lot …) — clients to notify:
• Bodas de Ensueño Mallorca — contact person · phone · email
EV-… Boda Castell–Mora · date · guests · dishes that used the lot If the lot has not yet been served at any event, the box says so (“putting it on hold is enough”) and there is no list to copy.
#Delivery without PO
Anything bought without an order —at the market, an urgent top-up, a sample from a supplier— also has to be traced. Delivery without PO creates the lot, adds it to stock and leaves it ready to be used, just like a delivery against an order.
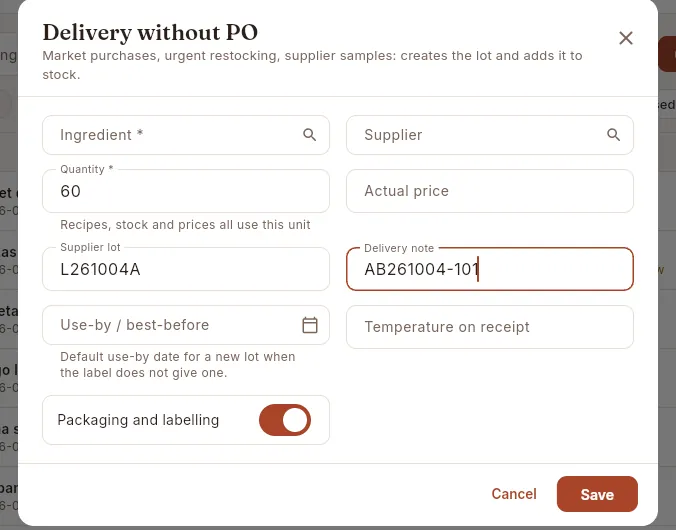 1234567
- 1The ingredient (required) and the supplier.
- 2The quantity, in the ingredient's unit.
- 3The price paid (if your profile can see costs): it updates the ingredient's cost.
- 4The supplier lot and the delivery note, copied from the label and the delivery paperwork.
- 5The use-by date from the label. If you leave it empty, Mise uses the ingredient's usual shelf life.
- 6The product's temperature on arrival (for chilled and frozen items).
- 7Untick it if the packaging or label arrives damaged: it will count as an incident.
In Lots, click Delivery without PO (it is also in the lots tab of each ingredient).
Choose the Ingredient and the Supplier, and enter the Quantity.
Copy the Supplier lot and the Use-by / best-before date from the label; the Delivery note from the delivery paperwork.
For chilled and frozen items, measure and record the Temperature on receipt. Check the packaging and click Save.
#Production batches and temperature checks
When an event is produced (in Events, Mark as produced (deduct stock)), Mise creates a production batch for each dish on the menu: an internal kitchen lot (code EL-year-number) with the portions, the lots it used and the temperature checks that need to be recorded. The Production batches view brings them all together.
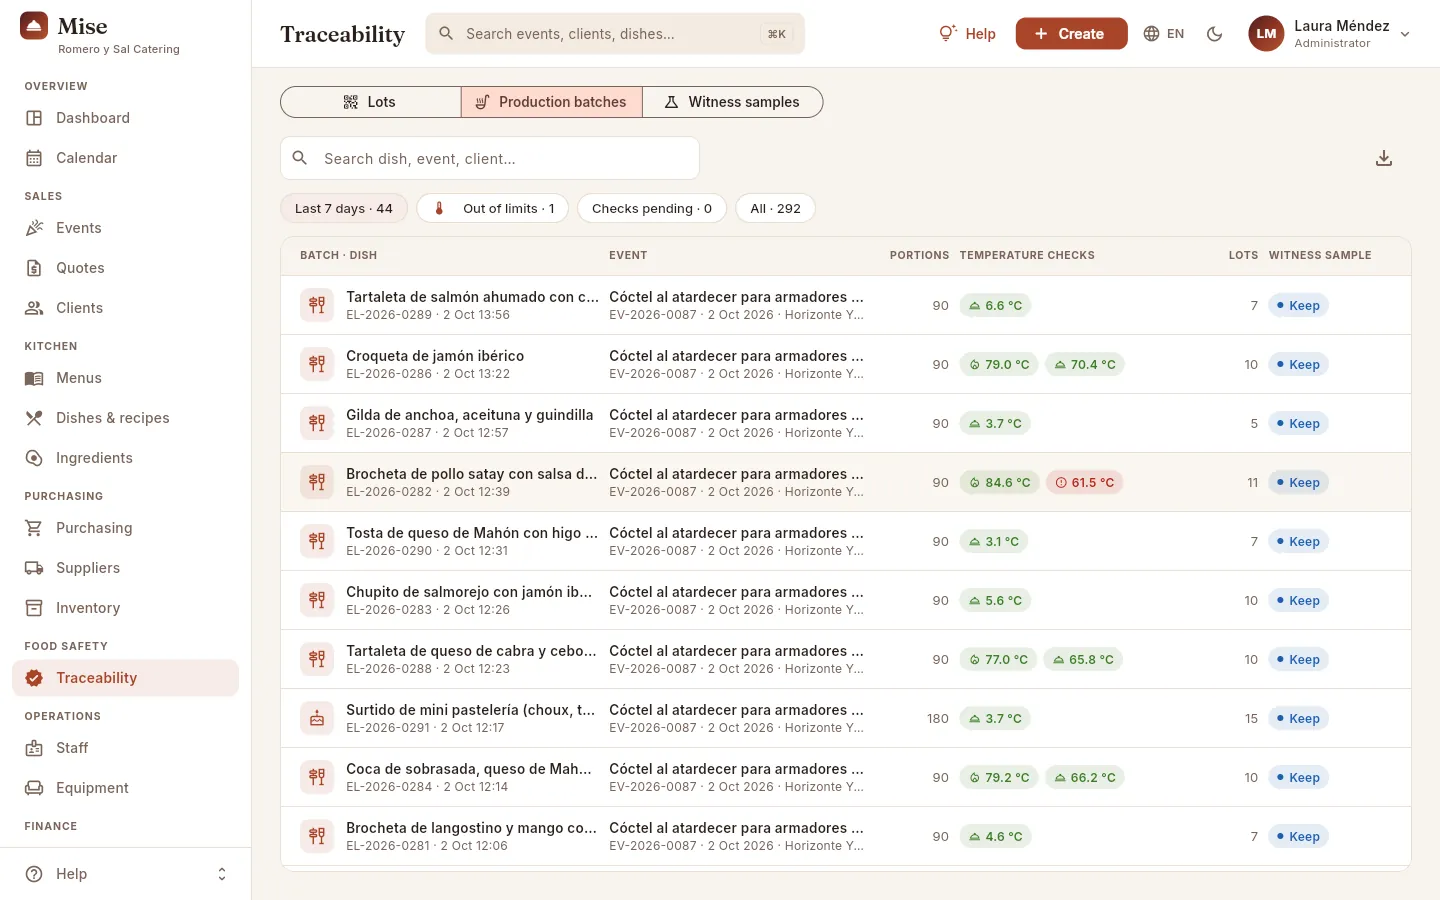 123456
- 1The filters: last 7 days, out of limits (the checks to review), checks pending (not yet recorded) and all.
- 2Search by dish, event or client.
- 3Each production batch: the dish, its code and the time it was produced, and the event with its date and client. Those with a check out of limits are highlighted.
- 4The checks: core temperature (flame), blast chilling (snowflake) and service (cloche). Green if within limits, red if not.
- 5How many lots the dish used.
- 6The status of its witness sample.
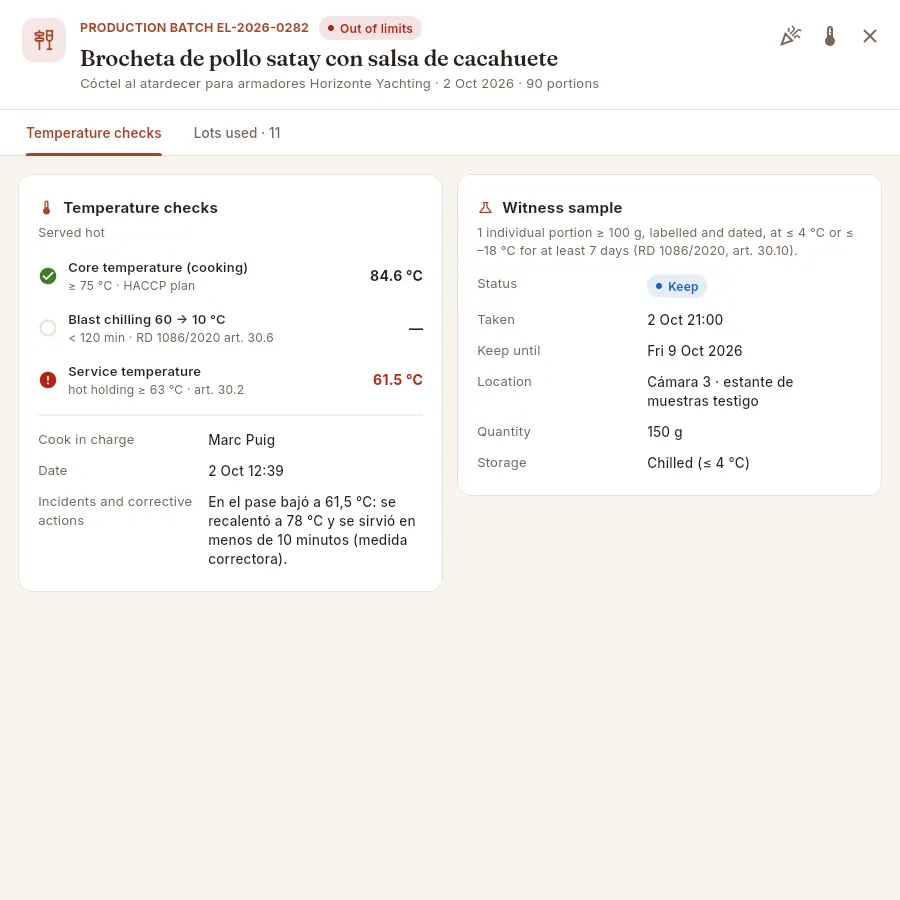 1234567
- 1The record warns you if any check is out of limits.
- 2Open event and Record checks (the thermometer), to enter the temperatures.
- 3The type of service: hot or cold (drinks have no check).
- 4Core temperature at the end of cooking, with the limit from your self-inspection plan (75 °C). The green ✓ means it is fine.
- 5Blast chilling (no data: empty circle; this dish was not chilled) and service temperature: here below 63 °C, in red.
- 6The person in charge, the time of production and the incidents and corrective actions: what was done (it was reheated and served straight away).
- 7The dish's witness sample: status, when it was taken, how long it is kept, where, how much and how.
The limits Mise uses to flag a check as out of limits:
| Check | Dishes | Limit |
|---|---|---|
| Core temperature (cooking) | Hot | 75 °C minimum (criterion of the company's HACCP plan, not of the Royal Decree) |
| Blast chilling from 60 °C to 10 °C | Those chilled to be served later | Less than 120 minutes |
| Service temperature | Hot | 63 °C minimum |
| Service temperature | Cold | 8 °C maximum |
| Mise decides whether a dish is hot or cold from its category (mains, stations and children's menu, hot; the rest, | ||
| cold) and does not ask for checks on drinks. |
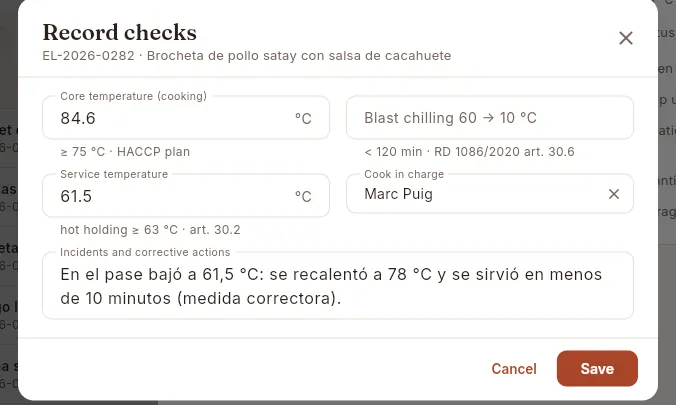 123
123
- 1The temperatures, each with its limit below.
- 2The person in charge: who in the kitchen carried out the check.
- 3If anything is out of range, what was done: reheat, chill, discard…
In Production batches, filter by Checks pending (or search for the event) and open the dish.
Click the thermometer Record checks.
Enter the core temperature at the end of cooking (hot dishes), the blast-chilling minutes if it was chilled, and the service temperature when plating or while holding.
Choose the Cook in charge and, if any value is outside the limit, write what was done in Incidents and corrective actions. Click Save.
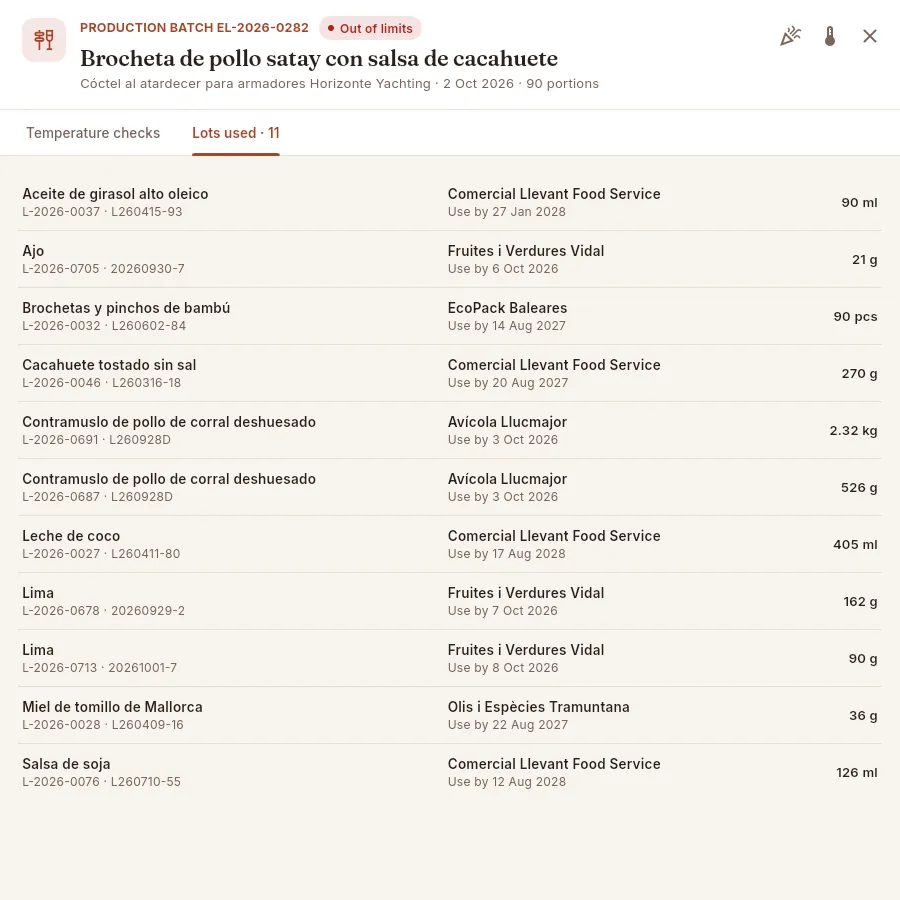 12
12
- 1Lots used: how many different lots the dish used.
- 2Each ingredient with its lot and the supplier lot; the supplier and the use-by date; and the quantity used. Click to open the lot.
An ingredient that was not covered by any valid lot at the time of production would appear in Lots used as No lot (a “traceability gap”). Since Mise does not allow production without valid lots for the event date, it should not appear in day-to-day use.
#Witness samples
The witness sample is a portion of each dish served that is kept refrigerated in case it needs to be analysed later (for example, after a food poisoning incident). Mise creates one per dish when the event is produced (except drinks): 150 g, chilled, taken at the service start time, with its keep until date (the event date plus 7 days).
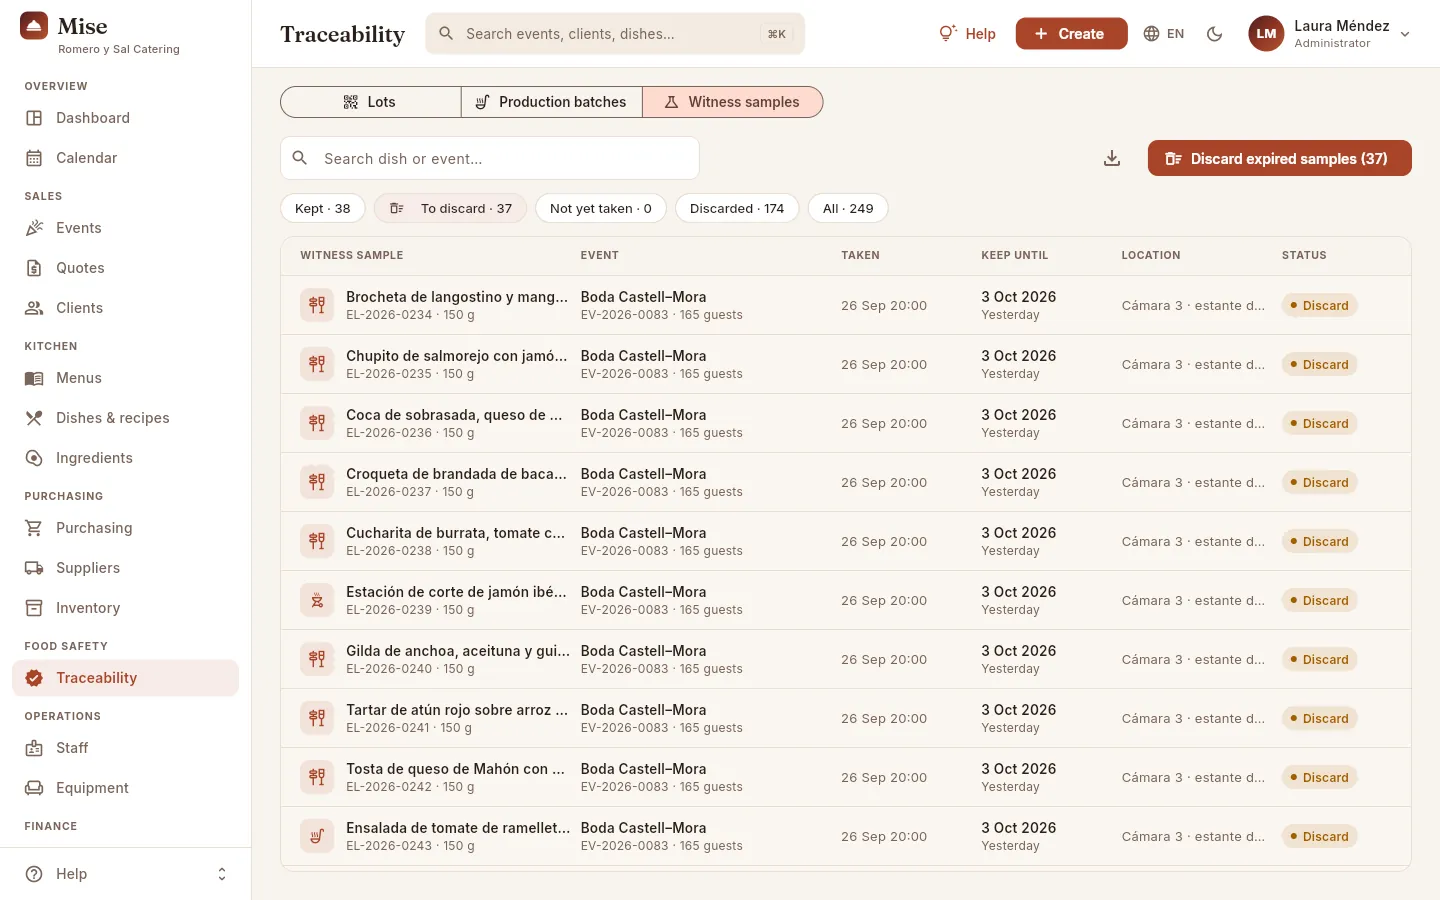 1234567
- 1The filters: kept, to discard, not yet taken (produced events not yet served), discarded and all.
- 2Discard expired samples marks as discarded, in one go, all those that have already reached the end of their period.
- 3The dish, its production batch and the grams kept; beside it, the event and its guests.
- 4When the sample was taken.
- 5How long it has to be kept.
- 6Where it is (cold room and shelf).
- 7Its status: keep (blue), discard (amber), discarded.
The statuses of a sample:
| Status | What it means |
|---|---|
| At service | The event is produced but not yet served: the sample is taken during service. |
| Keep | Taken and within its period: it must not be thrown away. |
| Discard | It has completed its days: it can be thrown away. |
| Discarded | It was marked as thrown away (the date is recorded). |
| Click a sample to open its production batch, with all its details. |
 12
12
- 1Mise tells you how many samples will be marked as discarded.
- 2When you confirm, the date they were discarded is recorded.
#Backwards: from an event to its lots and suppliers
Backward traceability (“one step back”) starts from an event that has already been served: in Events, open the event and its Traceability tab. There you have, dish by dish, which lots it used and which supplier each came from, with its checks and its witness sample. It is what you need if a client complains about a dish or if the health authorities ask about a specific service.
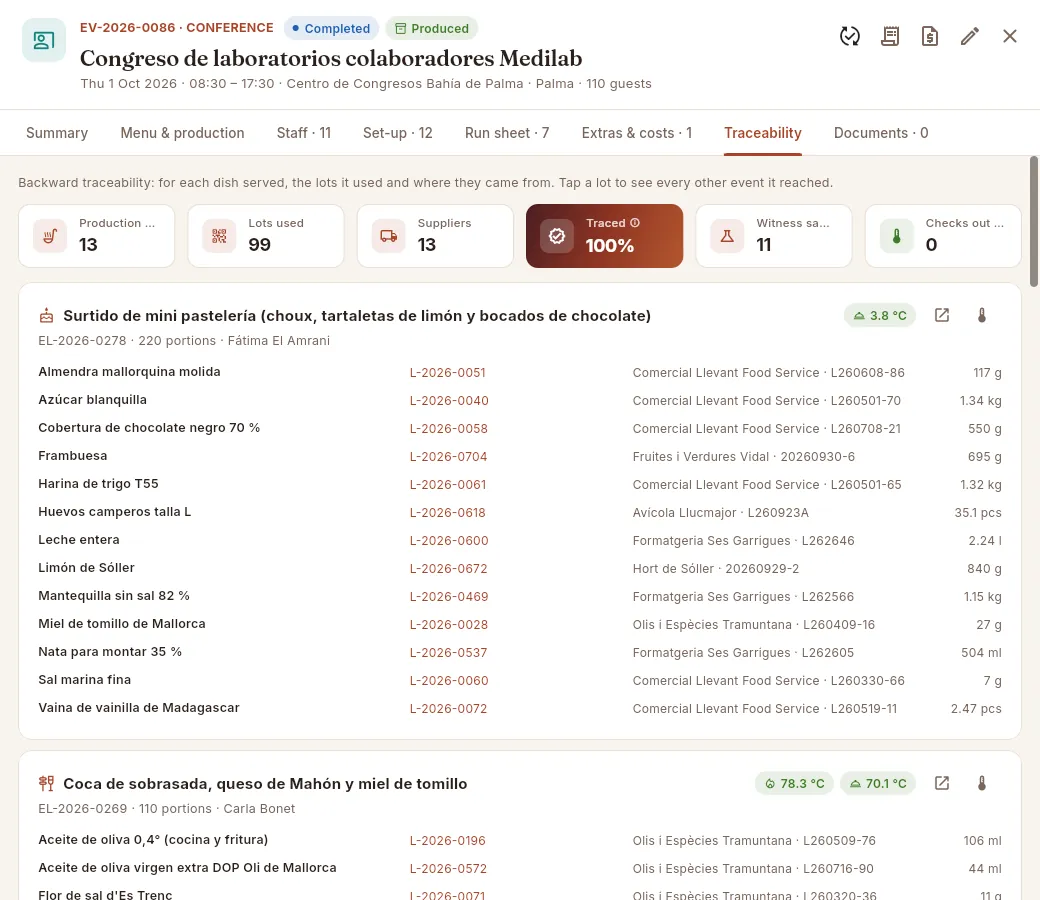 123456
- 1The event's Traceability tab (it fills in as soon as the event is produced).
- 2The summary: different production batches (dishes), lots and suppliers.
- 3Traced: what share of what was used has its lot. 100 % means everything is traced.
- 4The witness samples taken and the event's checks out of limits.
- 5Each dish is a production batch: its code, portions and person in charge; on the right, its temperature checks, the button to open it and the one to record checks.
- 6Line by line, the ingredient, its lot (click to open it and see which other events it reached), the supplier with the supplier lot and the quantity. Here, the same lot of eggs as in the drill.
#Food safety on the Dashboard
Anyone who has the kitchen and purchasing block on their Dashboard also sees, every morning, the food safety summary and the list of what needs to be used first. Each figure leads to its list in this section.
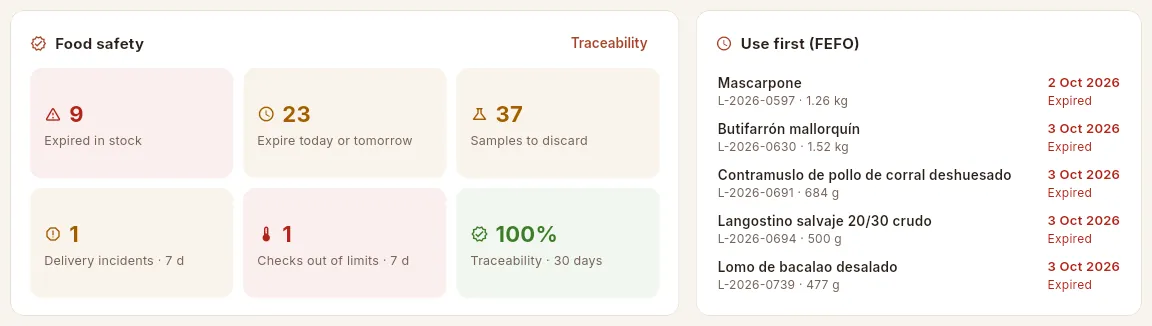 1234567
- 1Traceability opens this section.
- 2Expired in stock and expire today or tomorrow: they lead to the list of expiring lots.
- 3Samples to discard: leads to the witness samples.
- 4Receiving incidents from the last 7 days: rejections, temperatures or use-by dates outside what is accepted, and damaged packaging.
- 5Checks out of limits on dishes in the last 7 days.
- 6The traceability coverage for the last month.
- 7Use first (FEFO): lots that are expired or expire today or tomorrow, the one expiring soonest at the top. Click one to open it.
#What each profile sees
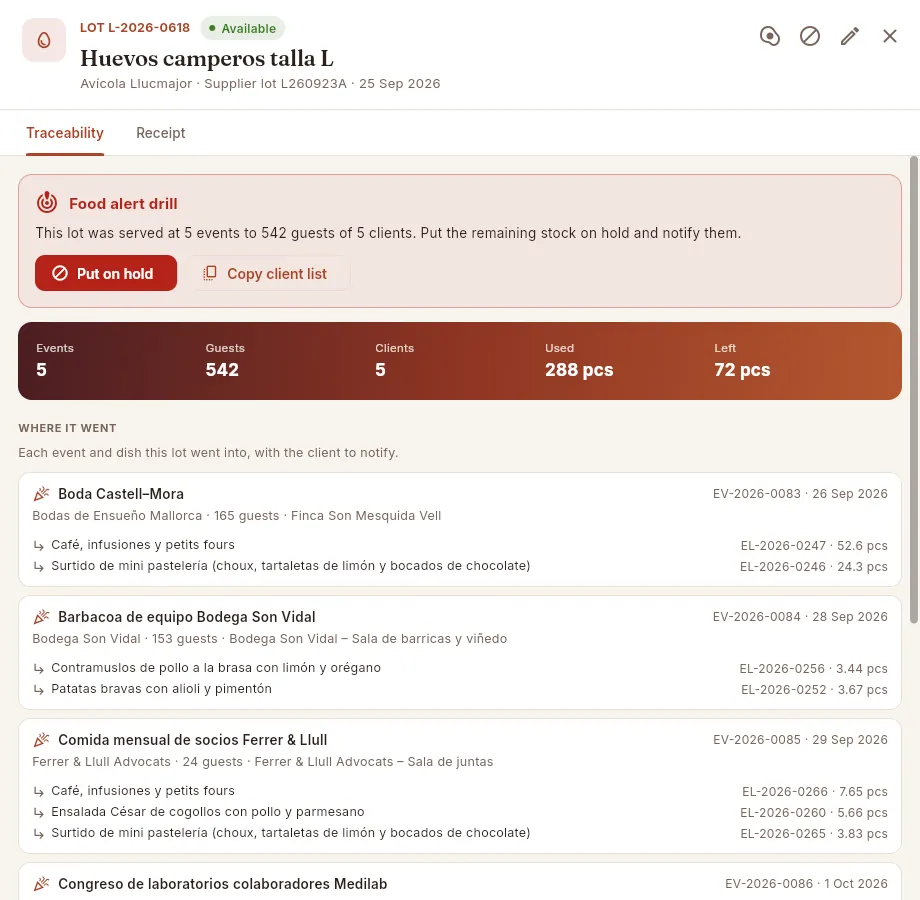 12
12
- 1Kitchen can put on hold (it has “Record food safety checks”).
- 2Without Contact details, each event shows without the client's contact person, phone or email (nor in the copied list).
#How it is calculated
Operations
Staff
The team that works at your events —employees and freelancers in the kitchen, front of house and logistics— with their rates, skills and languages, everyone's hours and the weekly rota of who is working where.
Staff holds the whole team that works at your events: employees (on the payroll) and freelancers (hired per event), in the kitchen, front of house and logistics. For each person you record their role, their hourly cost, their skills (wine service, cocktails, allergen training, C licence…) and the languages they speak, and Mise automatically adds up the hours they have worked and the events they have coming up. The section has two views: Team, the list of people, and Rota, the week from Monday to Sunday showing who is working at which event. People are not assigned here but from each event (the Staff tab of the event record); here you see the result of all those assignments together.
#The team
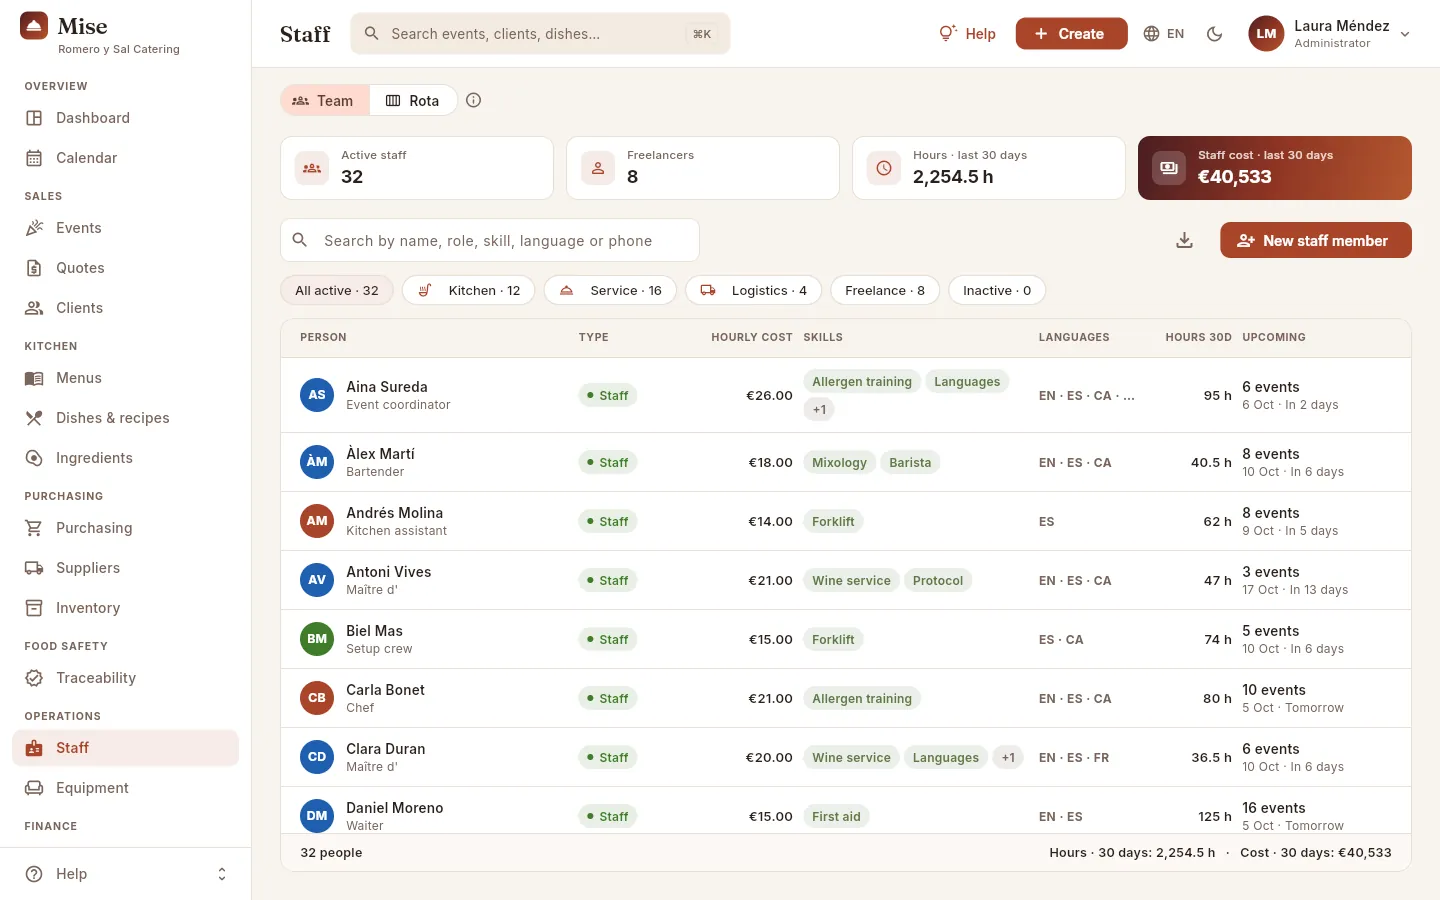 12345678
- 1Team and Rota: switch between the list of people and the weekly rota. The ⓘ next to them explains each view.
- 2The indicators: active staff, how many are freelancers, the hours worked in the last 30 days and what they cost (the last one only if you can see rates).
- 3The search box searches by name, role, skill, language or phone number: type “German”, “grill” or “licence” and you will see who has it.
- 4Export CSV downloads what you are looking at (with the filter and search applied) as a file that opens in Excel.
- 5New staff member opens the form for adding someone.
- 6The filters: all active people, by area (kitchen, service, logistics), freelancers only, or inactive. Each one shows its count.
- 7Hourly cost: what each hour of that person costs the company (salary and social security). Click a header to sort by that column.
- 8Upcoming: how many events they have ahead and the date of the next one (“6 Oct · In 2 days”).
Each row shows the person with a circle in the colour of their area (terracotta for kitchen, blue for service and green for logistics), whether they are staff or freelance, their hourly cost, their skills (the first two; hover over “+1” to see the rest), the languages they speak (EN, ES, CA…), their hours over the last 30 days and their upcoming events. At the bottom, the total number of people you are looking at with their hours and cost. Click a person to open their record.
In the search box, type the skill or the language, for example “German” or “cocktails”.
If you only want to see those who are hired per event, click the Freelance filter.
Sort by HOURS 30D to see who has worked least recently and spread the workload more evenly.
#A person's record
Clicking a person opens their record on the right, with two tabs: Profile (their details and hours) and Assignments (all the events they have worked at or will work at).
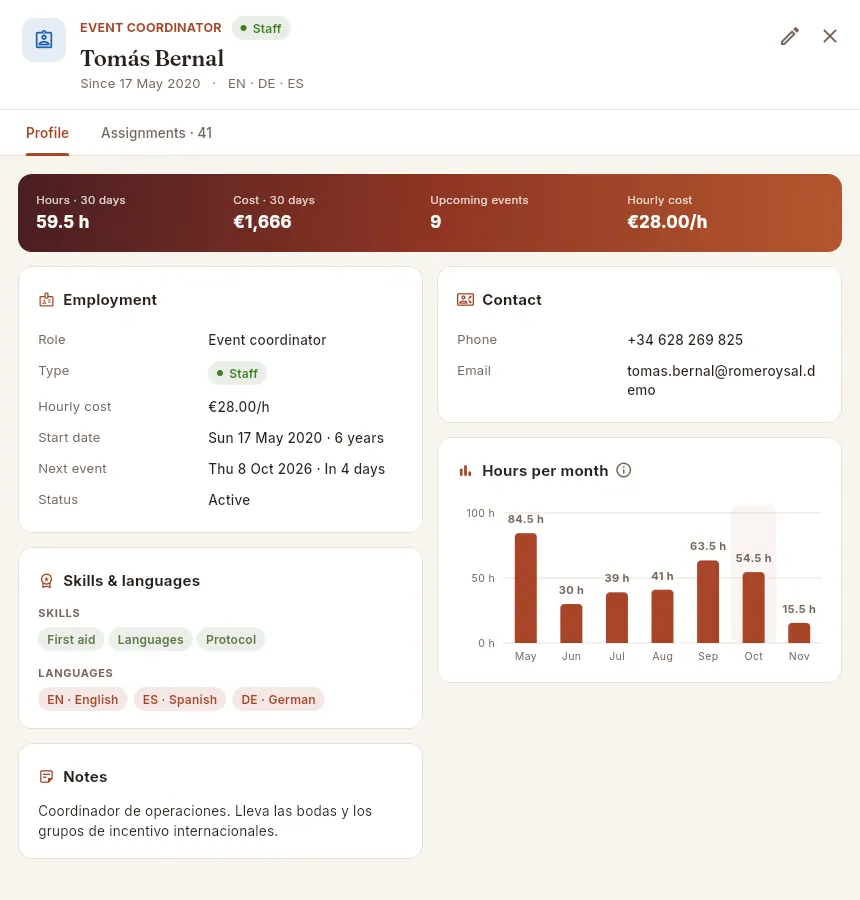 12345678
- 1Their role (at the top, in capitals) and whether they are staff or freelance. Below, since when they have worked with you and their languages.
- 2The Edit pencil opens the form to change their details or deactivate them.
- 3Their figures: hours and cost for the last 30 days, how many events they have ahead and their hourly cost.
- 4Employment: role, type, hourly cost, start date with length of service, next event and whether they are active.
- 5Contact: phone and email, so you can let them know about a change of schedule.
- 6Skills and languages: what they can do and in which languages they can look after guests.
- 7Hours per month: the previous five months, the current one (highlighted) and the next, with what is already scheduled. It helps you spread the team's workload.
- 8The Assignments tab, with the total number of events for this person.
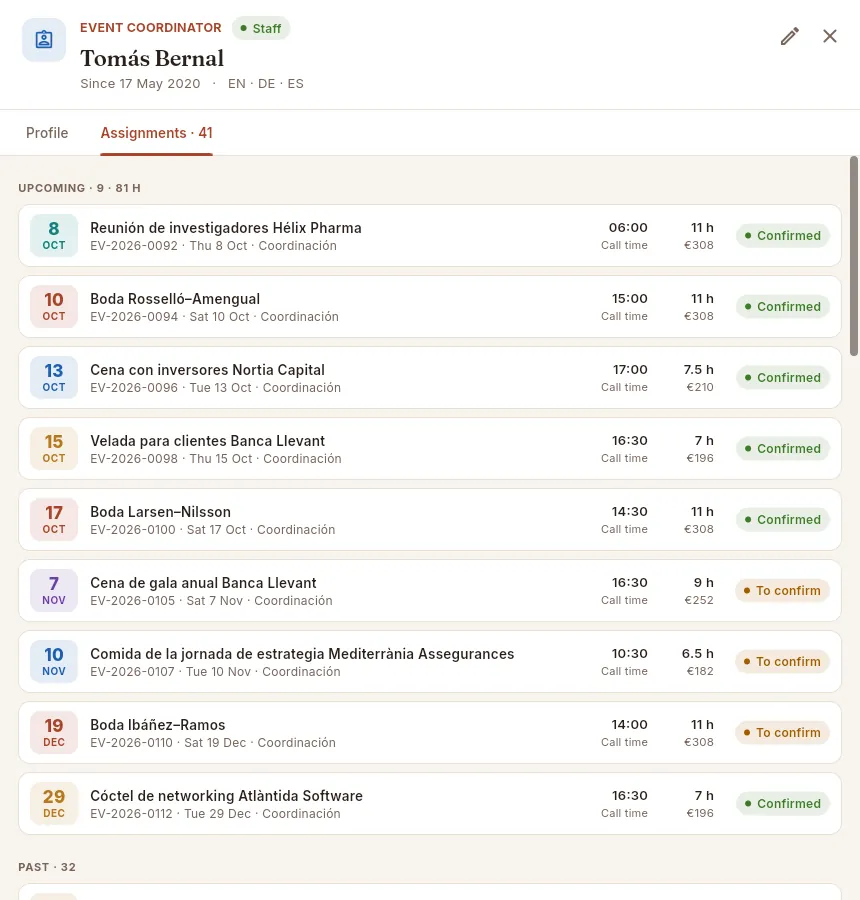 123456
- 1Upcoming: how many assignments they have ahead and how many hours they add up to, from the nearest to the furthest.
- 2The event's date, in the colour of its type (wedding, corporate, conference…). Beside it, the name, the code, the day and the role they play at that event.
- 3Call time: the time they have to be at the event.
- 4The hours of that assignment and what they cost.
- 5Confirmed or To confirm: whether the person has already said they will work that day. It is set on the event, when editing the assignment.
- 6Past: the events they have already worked at. Click any row to open that event's record.
#Adding or editing a person
Click New staff member (or, from any screen, Create → New staff member).
Type the name and choose their role and whether they are staff or freelance.
Enter their hourly cost: the cost to the company, not their take-home pay (salary plus social security).
Add their phone and email, and tick their skills and the languages they speak.
Click Save.
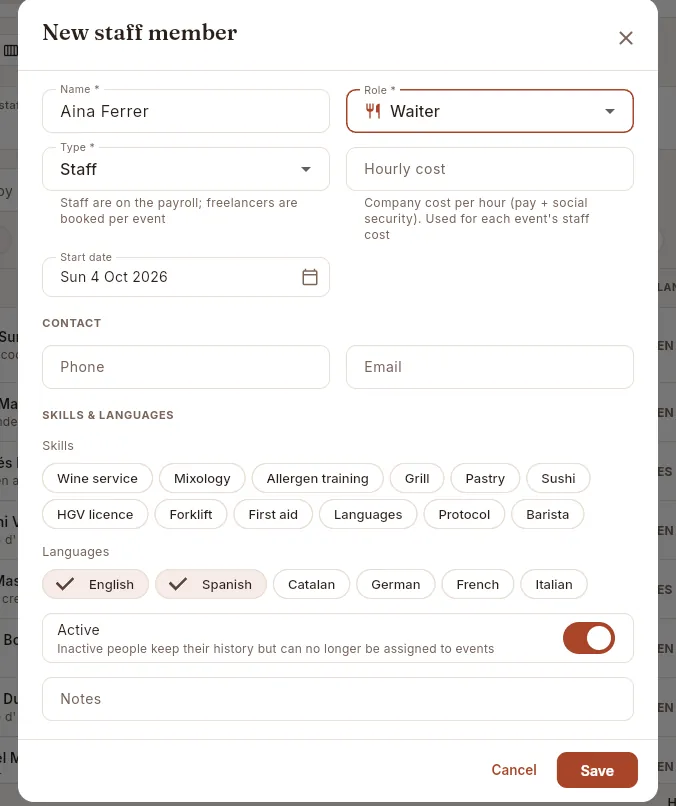 1234567
- 1Name and Role (kitchen, waiter/waitress, maître d', barman, set-up, transport…). Fields marked with an asterisk are required.
- 2Type: staff (on the payroll) or freelance (hired per event).
- 3Hourly cost: this is the one used to calculate the staff cost of each event.
- 4Start date: since when they have worked with you; the record calculates their length of service.
- 5Contact: phone and email.
- 6Skills and languages: click each one to select it (it shows a ✓). English and Spanish are selected by default.
- 7Active: switch it off when someone stops working with you. Their history is kept, but they can no longer be assigned to events.
To change someone's details, open their record and click the pencil Edit: the same form opens with their details. At the very bottom there is a Notes field for anything worth knowing (languages they are most comfortable in, availability, shift preferences…), which is then shown on their record.
#The weekly rota
The Rota brings the week from Monday to Sunday together on a single screen: at the top, each day's events; below, a row for each person called in that week, grouped by role, with the shift they have each day. It is the tool for preparing shifts, notifying the team and spotting anyone who is in two places at once.
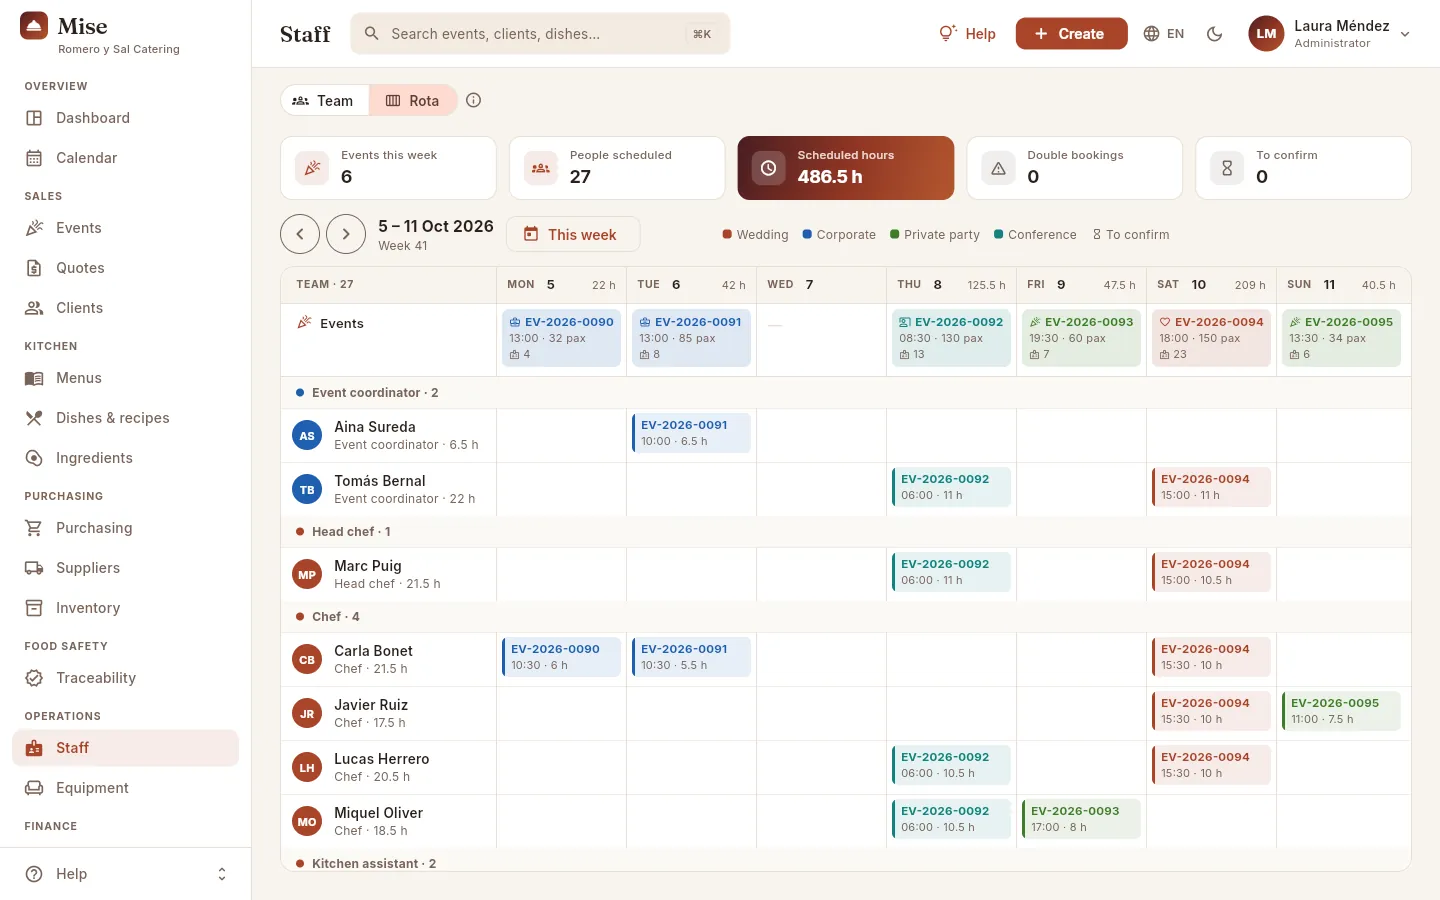 12345678
- 1The week's indicators: events, people called in, scheduled hours, double bookings (red if there are any) and assignments to confirm.
- 2The arrows move to the previous or next week. Beside them, the dates and the week number.
- 3This week takes you back to the current week (it only appears when you are on another one).
- 4The legend: the colour of each type of event that week and the hourglass ⧗ for anything still to be confirmed.
- 5The Events row: each event of the day with its code, start time, guests and how many people are assigned. Click one to open its record.
- 6People are grouped by role: coordination, head chef, kitchen, service, bar, transport, set-up…
- 7Each person with their role and the hours they add up that week. Click the name to open their record.
- 8Their shift: the event code, the call time and the hours, in the colour of the event type. Click the shift to open the event and change its team.
Today's column is highlighted and, in each day's header, the hours the whole team adds up. Hover over an event in the top row to see its name, client, venue, status, guests and how many people it has; or over a shift to see that person's role at the event.
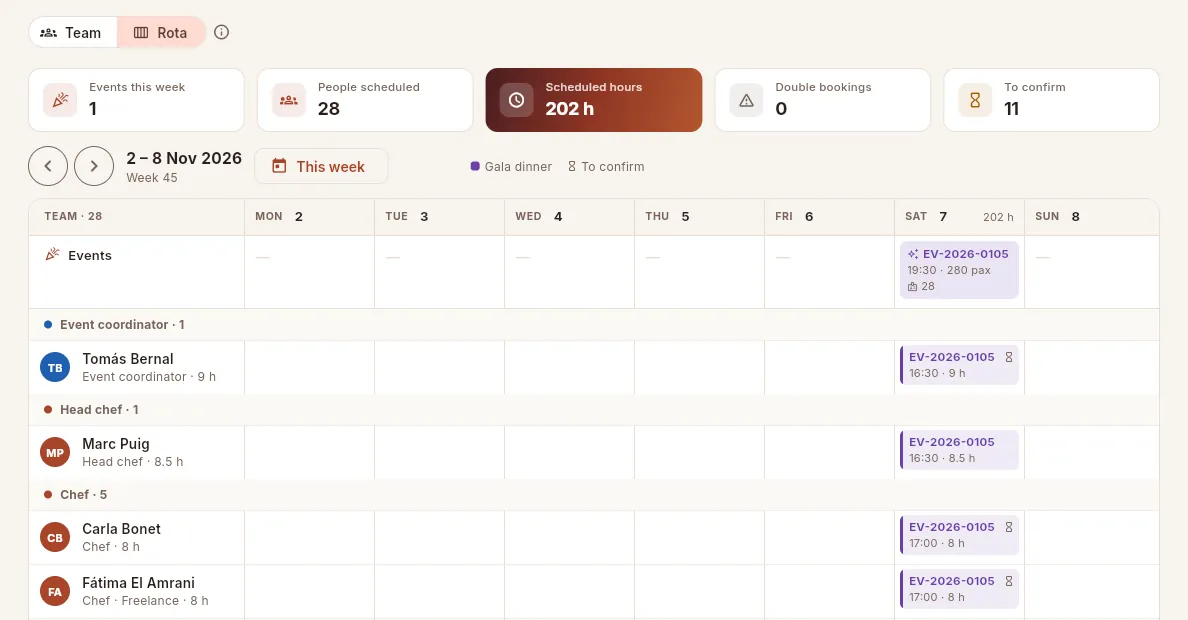 123
123
- 1To confirm: how many of the week's assignments the person has not yet confirmed.
- 2The hourglass ⧗ on the shift: that person has not confirmed yet. Once they do, tick it in the event's Staff tab.
- 3Freelancers show “Freelance” next to their role, so you can see at a glance who you need to call.
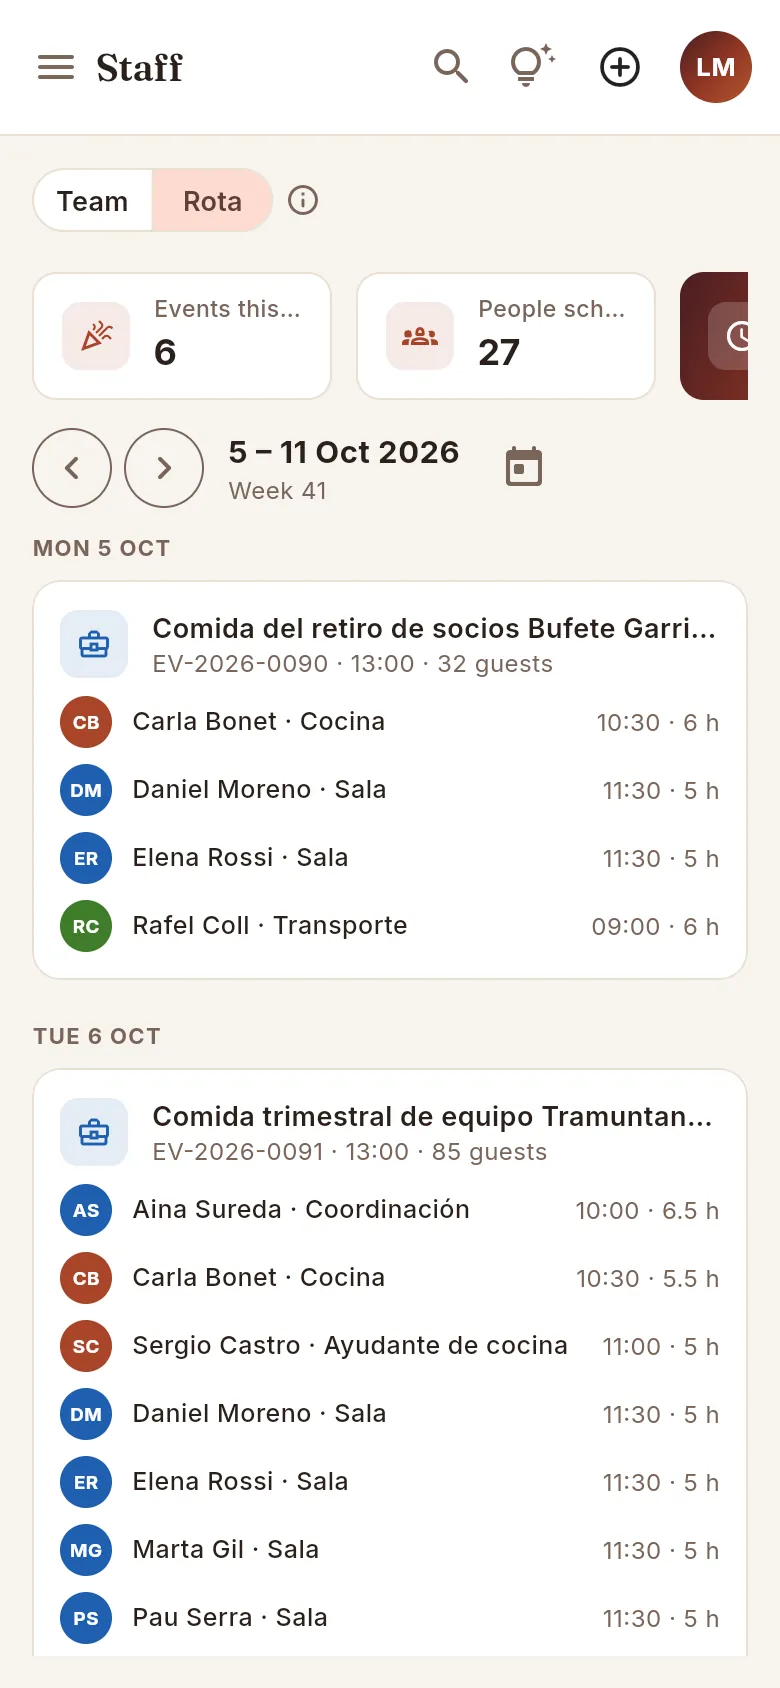 123
123
- 1The same arrows to change week; the calendar icon takes you back to the current one.
- 2Each day with its events.
- 3Each event with its team: name, role, call time and hours. A double booking shows in red with ⚠.
On a phone the rota becomes an agenda: each day with its events and, within each event, who is going, in what role, what time they start and how many hours they work. It is the most convenient way to check it from the event itself. If an event has nobody assigned yet, you will see it with an amber No staff assigned warning. The same goes for the Team list: on a phone each person appears as a card with their hours and the date of their next event.
#Availability when assigning staff to an event
People are assigned from the event: in its Staff tab, the Add staff button opens the list of the whole active team with their availability for that day. That way you do not have to look at the rota to see who is free.
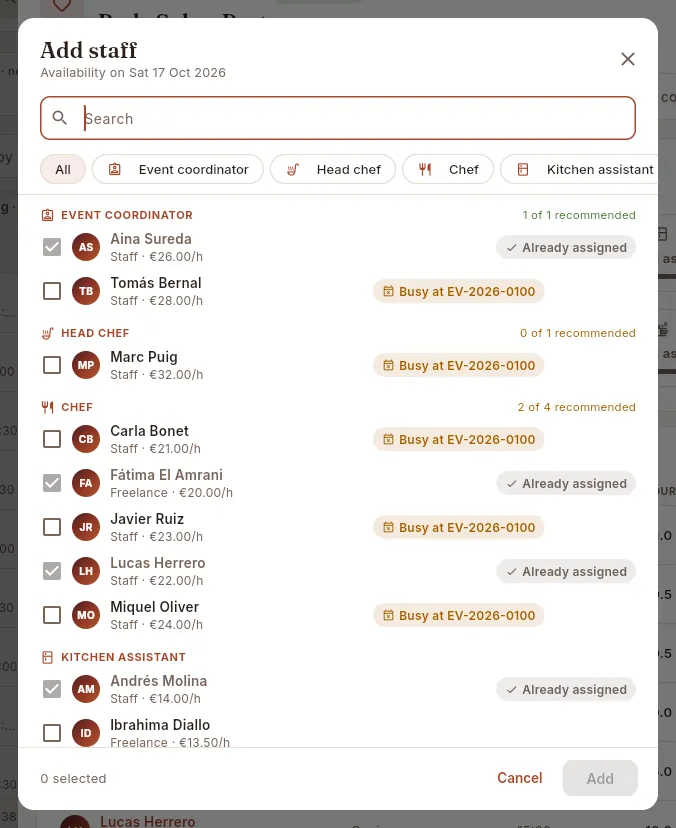 123456
- 1Search by name or filter by role with the buttons below.
- 2Each role with how many people the event has compared with the number recommended for its guests and type of service.
- 3Already assigned: already part of this event's team.
- 4Busy at EV-…: that day they are already working at another event. You can still add them, but it will be a double booking.
- 5No warning: free that day. Below, whether they are staff or freelance and their hourly cost.
- 6Tick the people you want and click Add: they join the event as “to confirm”, with a call time and hours based on their role, which you can adjust.
#What changes depending on your profile
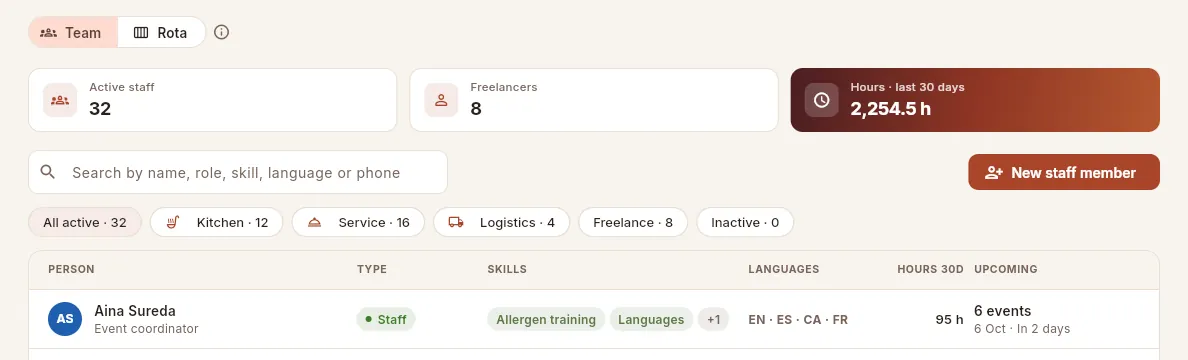 123
123
- 1Without Staff rates there is no cost indicator: the highlighted one becomes hours.
- 2With Edit staff it can add and edit people; the export icon does not appear because this profile does not have Export CSV.
- 3The Hourly cost column is no longer there: after Type come the skills directly.
#Tips
- Keep skills and languages up to date. They are what lets you find in seconds who can serve wine or speaks German for an international wedding.
- Hourly cost is the cost to the company. If you enter the net salary, the staff cost of your events (and their margin) will come out lower than it really is.
- Look at freelancers' hours per month before hiring another one: you will see who you depend on most and who it makes sense to offer more shifts.
- Deactivate, don't delete. Someone who leaves keeps their history and the figures for past events do not change.
Operations
Equipment
Set-up equipment —furniture, crockery, glassware, linen, tents, kitchen equipment…—, owned or hired, with its cost per use, its upcoming bookings and a warning when there are not enough units on a given day for all the events.
Equipment is the inventory of everything that goes out to an event: chairs and tables, crockery, glasses, cutlery, linen, kitchen equipment (ovens, fridges, hobs), decoration, tents and platforms, sound systems… For each item you record how many units there are, whether it is owned or hired (and from whom) and how much it costs each time it is used at an event.
Equipment is booked from each event, in its Set-up tab. This section brings all those bookings together: it tells you which items are committed to upcoming events and, above all, which days more units are requested than you have (an over-booking), so you can hire in time or change the set-up.
#The equipment list
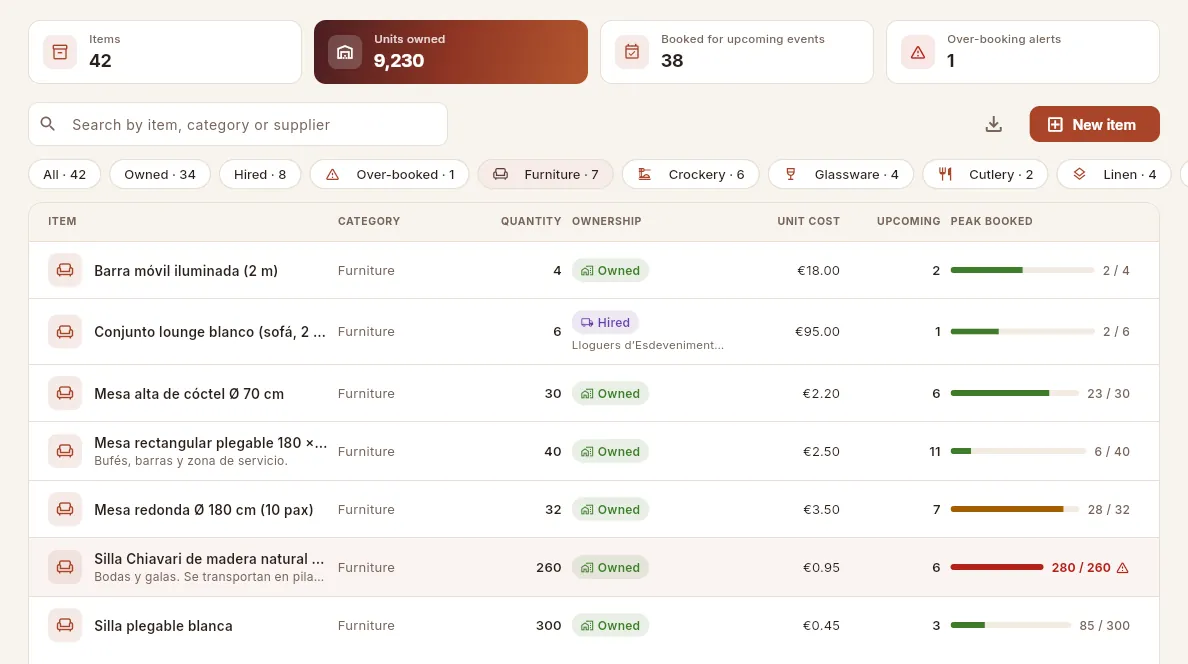 12345678
- 1The indicators: active items, owned units (the total of everything that belongs to you) and how many items are booked for upcoming events.
- 2Over-booking alerts: how many items have a future day with more units requested than are available. Red if there are any.
- 3The search box: by name, category, supplier or notes.
- 4New item adds an item. To its left, Export CSV downloads the list for Excel.
- 5The filters: all, owned, hired, over-booked, one for each category (furniture, crockery, glassware…) and inactive. Swipe the row to see the rest.
- 6Ownership: “Owned” in green or “Hired” in purple, with the supplier it is hired from.
- 7Unit cost: what each unit costs every time it goes to an event (the hire charge, or washing and wear and tear if it is owned). Upcoming: how many future events it is booked for.
- 8Peak booked: the units requested on the busiest day compared with the units you have. Green if there are spare units, amber from 85 %, red with ⚠ if there are not enough; the whole row is highlighted.
#An item's record
Click an item to open its record. The Summary tab tells you how busy it will be over the next month and the Bookings tab shows which events request it and how many units each one needs.
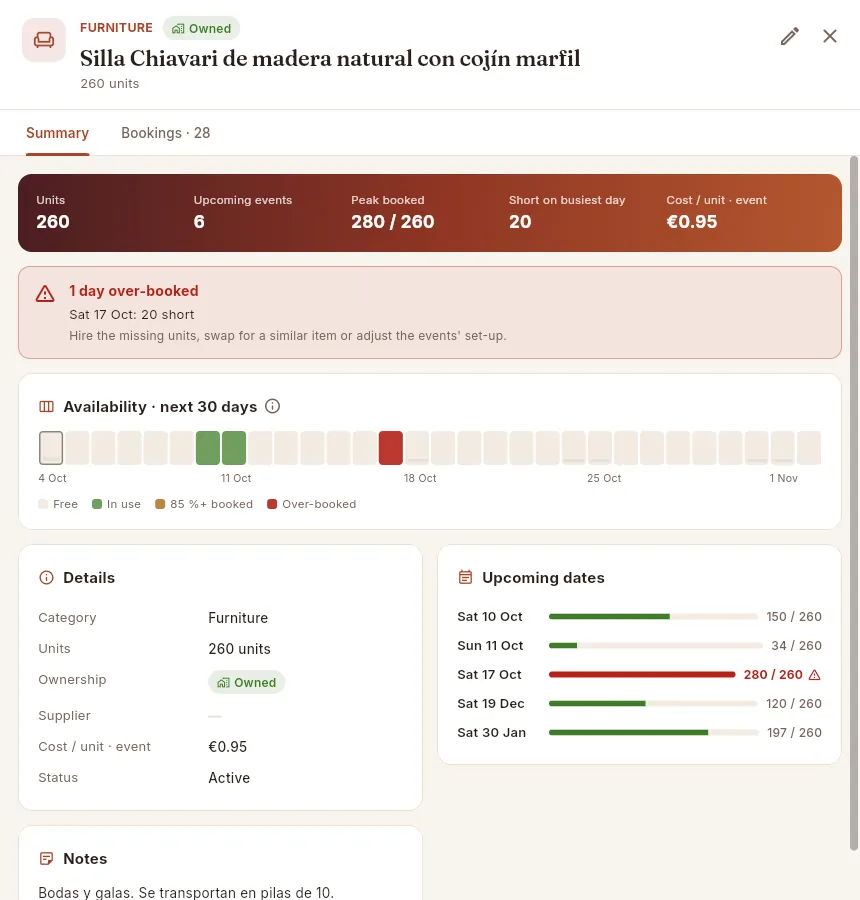 12345678
- 1The category and whether it is owned or hired. Below, the units and, if it is hired, the supplier.
- 2Edit opens the item's form.
- 3The figures: units, upcoming events, peak booked, how many are short (or still free) on the busiest day and the cost per unit and event.
- 4The over-booking warning: which days are short of units and by how many, with what you can do about it.
- 5Availability · next 30 days: each square is a day starting from today (outlined). Grey: nothing booked; green: spare capacity; amber: 85 % or more in use; red: not enough units. Hover over a day to see which events book it.
- 6The day in red: the Saturday of the two weddings, when more chairs are requested than there are.
- 7Details: category, units, ownership, supplier, cost and status.
- 8Upcoming dates: the next days on which it is used, with their occupancy bar. If there are more than six, the See all N dates link takes you to the Bookings tab.
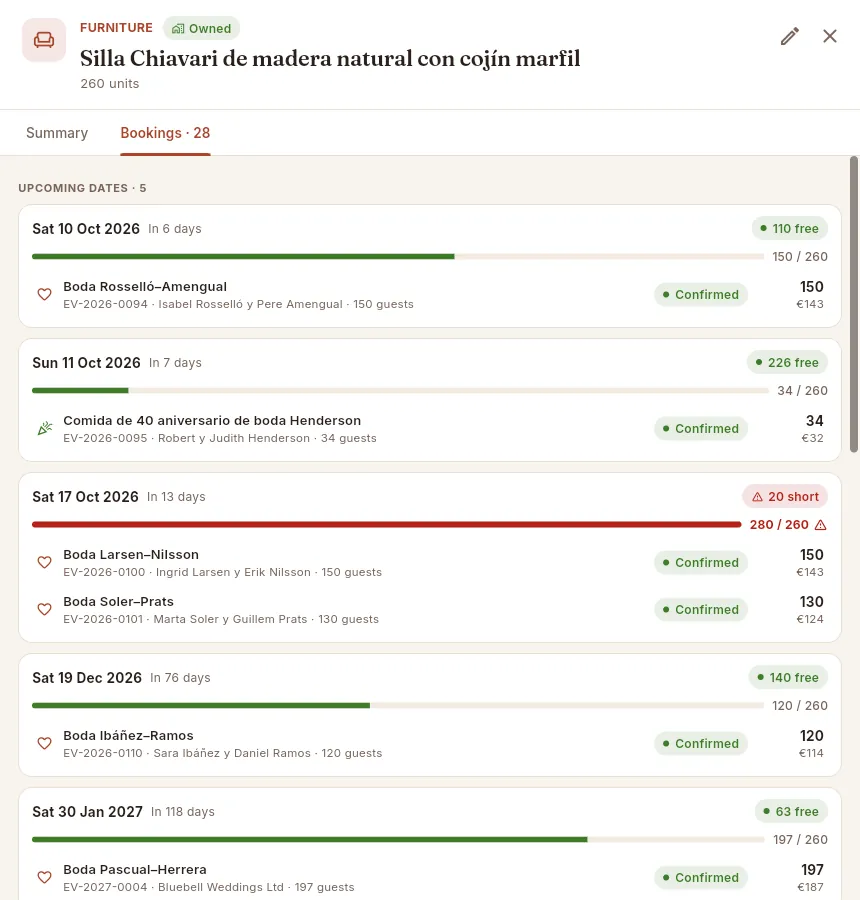 123456
- 1The Bookings tab, with the number of events (past and future) that have used the item.
- 2Upcoming dates: one card for each future day on which it is used.
- 3The free units that day (green, or amber if there is little margin)…
- 4…or the ones that are short, in red: that day the events request more than you have.
- 5Each event that books it that day, with its code, client, guests and status. Click it to open it and change its set-up.
- 6The units that event books and what they cost it.
Further down, Past events lists the events already held that used the item, with their date. If an item has never been booked, the tab says so and reminds you that equipment is booked from each event's Set-up tab.
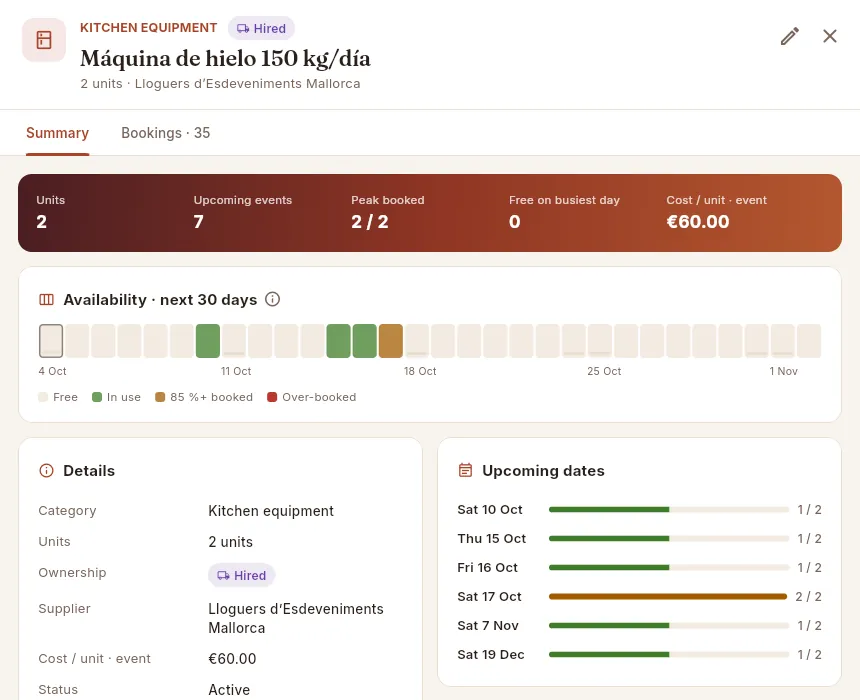 1234
1234
- 1Hired: you pay the supplier each time it is used. Below, the units it can supply and who hires it out.
- 2Peak booked 2 / 2: on the busiest day all the units are booked. None are short, but there is no margin left.
- 3That day, in amber: 85 % or more of the units booked.
- 4Unit cost / event: the hire price of each unit for one event.
#Adding or editing an item
Click New item (or Create → New item from any screen).
Type the name and choose the category.
Enter the units: the ones you have or, if it is hired, the ones the supplier can provide.
If it is hired, switch off Owned by the company and choose the supplier.
Enter the cost per unit and event: the hire price or, if it is owned, what it costs to wash it plus its wear and tear.
Click Save.
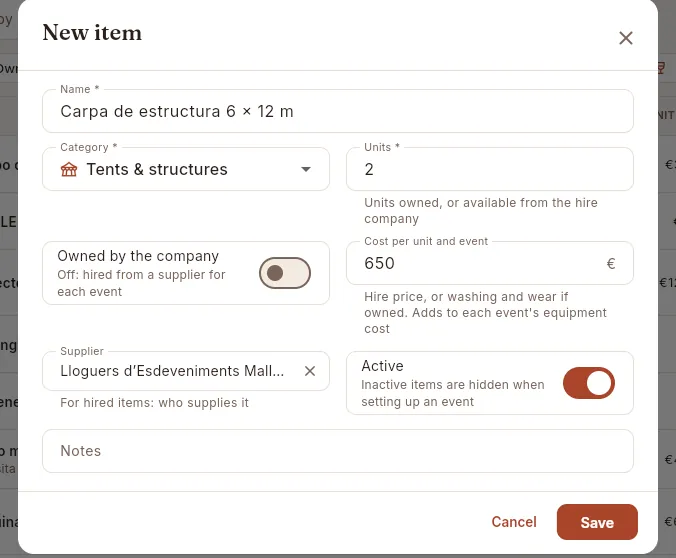 1234567
- 1The item's name, as the set-up crew know it.
- 2Category: furniture, crockery, glassware, cutlery, linen, kitchen equipment, decor, tents and structures or audio-visual.
- 3Units: the ones you own or the ones the supplier can hire out to you.
- 4Owned by the company: switched off, the item is hired from a supplier for each event.
- 5Cost per unit and event: added to the equipment cost of every event that uses it.
- 6Supplier: who hires it out. Clicking the field opens the list of suppliers with a search box, with equipment-hire suppliers first.
- 7Active: inactive items do not appear when you prepare an event's set-up.
To change an item, open its record and click the pencil Edit. The Delete button in the form only appears if the item has never been booked for any event; if it has already been used, switch off Active so that it does not appear in new set-ups and its history is kept.
#Over-bookings: how to spot and resolve them
An over-booking is a day on which, adding up all the events, more units of an item are requested than you have. Mise does not stop you booking (sometimes the answer is to hire more), but it warns you in three places: the Over-booking alerts indicator and the Over-booked filter in this section, the item's record, and the Set-up tab of each affected event.
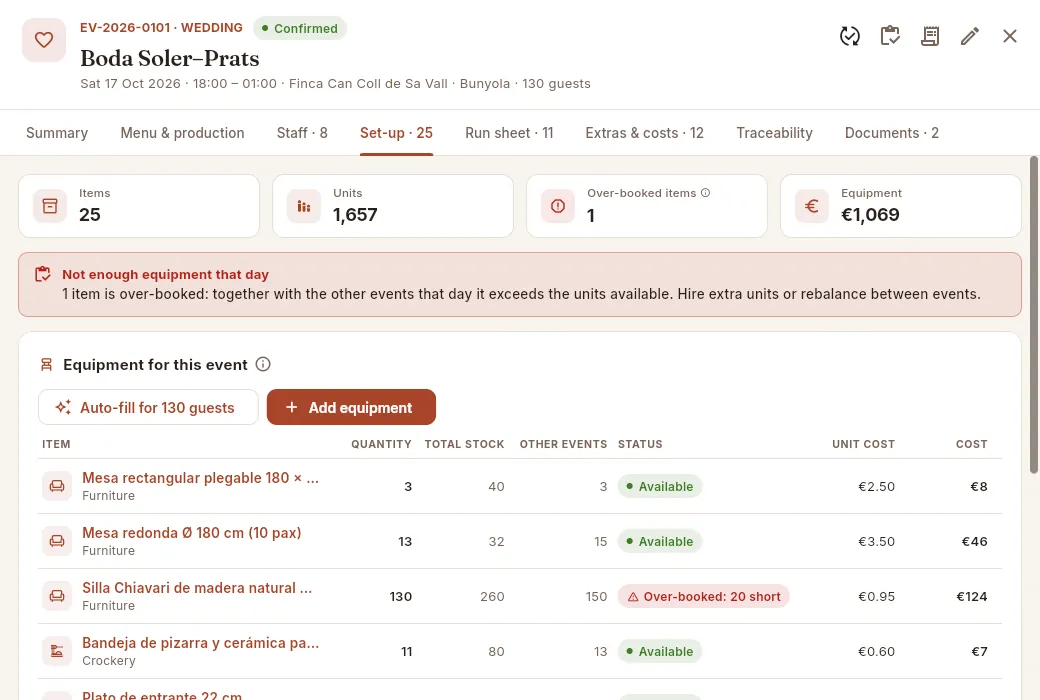 12345
12345
- 1The event's Set-up tab: this is where equipment is booked.
- 2Over-booked items at this event.
- 3The warning: together with the other events that day, an item exceeds the units available.
- 4The affected item, with how many units are short. The neighbouring columns show how many you have and how many the other events that day request.
- 5Add equipment books another item; Auto-fill for N guests suggests the complete set-up in one go, based on the number of guests and the type of service.
Click the Over-booked filter (or the Over-booking alerts indicator) and open the item.
In the warning on its record you will see which days are short of units and by how many; in the Bookings tab, which events coincide that day.
Decide: hire the missing units (add the hired item with its supplier and book it for one of the events), swap to a similar item (for example, folding chairs instead of Chiavari) or reduce the units for one event.
Open the event from the booking and, in its Set-up tab, change the quantity or the item.
#What changes depending on your profile
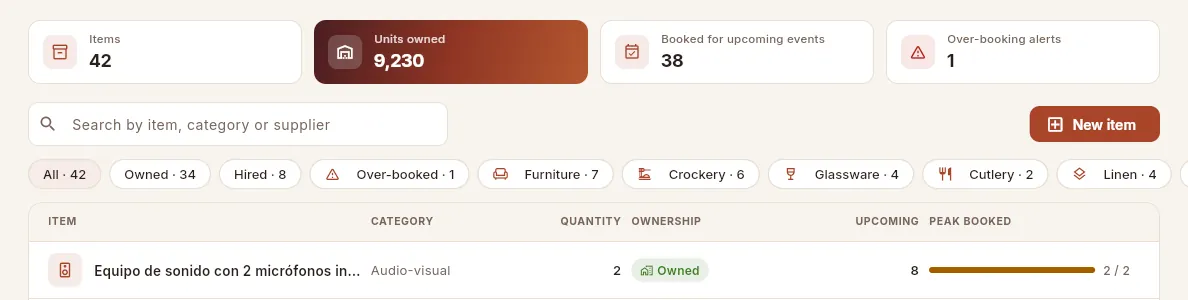 12
12
- 1It can add and edit equipment (Edit equipment), but not export.
- 2Without Costs & margins there is no cost column: after Ownership come Upcoming and Peak booked.
#Tips
- Add hired items too. Even if they are not yours, that way their cost is included in each event and you know how much you have spent on hire with each supplier.
- The cost of owned items is not zero. Washing linen, replacing broken glasses and transporting tables all cost money: enter it as the cost per unit and event and your events' profitability will be realistic.
- Use the notes for practical details: “transported in stacks of 10”, “needs a 32 A three-phase socket”… They show in the list and in the record.
Finance
Invoices
The invoices to your clients: deposit and final invoices that come from the event, manual invoices, payments received, overdue debt and the PDF of each invoice.
Invoices brings together everything you invoice to your clients and what they owe you. The usual way in catering is to invoice each event in two stages: a deposit to reserve the date and, once the event has taken place, the final invoice, which charges for the menu, the guests and the extras less the deposits you have already invoiced. Mise prepares both from the event, with no need to type in lines. For anything that isn't an event (a tasting, a delivery, a penalty…) there is the manual invoice. From here you also keep track of payments received: you record each payment you receive and Mise works out what is outstanding, what is overdue and how long each debt has been waiting.
- 1Quote acceptedThe client accepts and the event is confirmed.
- 2DepositA percentage of the event's revenue to reserve the date. Due in 7 days.
- 3Deposit paymentYou record the payment when it reaches the bank.
- 4Event heldWith the final number of guests and the extras served.
- 5Final invoiceMenu, guests and extras, less the deposit. The event becomes invoiced.
- 6Payment and follow-upYou register the payment; if it is late, it shows up under Overdue and in the age of the debt.
#The list of invoices
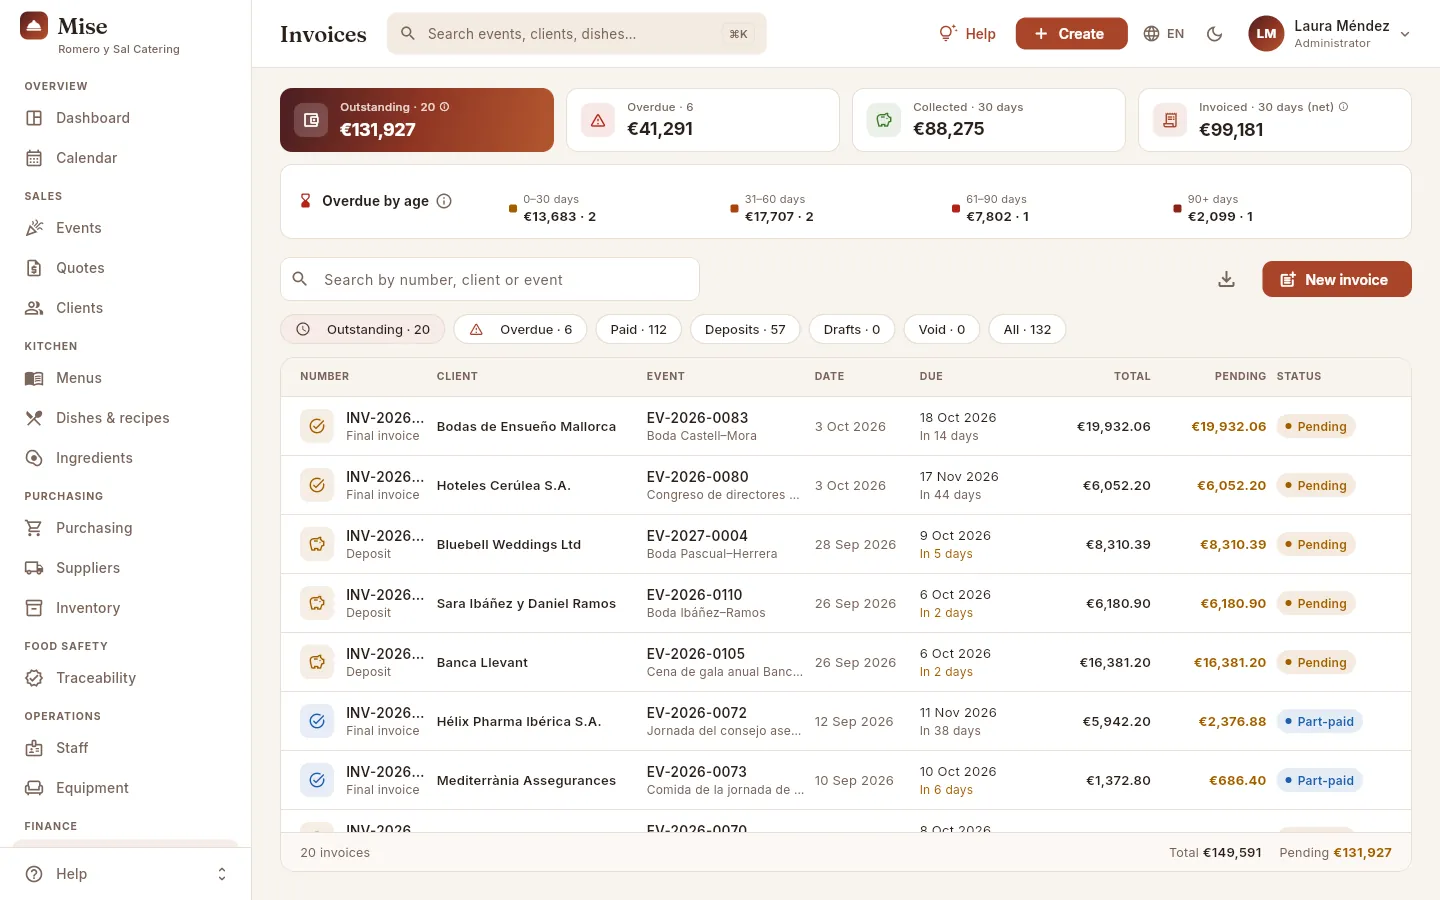 12345678
- 1Outstanding: what your clients still owe you on issued invoices (including VAT) and, after the dot, how many invoices that is. It doesn't count drafts or void invoices.
- 2Overdue: the part of the outstanding amount whose due date has passed, and the number of overdue invoices. It is the first thing to chase.
- 3Collected · 30 days: the sum of the payments you have registered in the last 30 days.
- 4Invoiced · 30 days (net): what was invoiced excluding VAT in the last 30 days, deposits included (the final invoice subtracts the deposits, so nothing is counted twice). The ⓘ icon explains it.
- 5Overdue by age: the overdue debt split by how many days it has been waiting (explained below).
- 6The search box finds an invoice by its number, the client, or the event's code or name.
- 7Export CSV downloads the invoices you are looking at (with the filter and search applied) so you can open them in a spreadsheet.
- 8New invoice: invoice an event (deposit or final) or create a manual invoice.
When you open the section you see the invoices that are outstanding, from the most recent to the oldest. Click any row to open its record on the right. The indicators at the top are always calculated from all the invoices, not only the ones you are looking at; the footer of the list, on the other hand, adds up the total and the outstanding amount of those on screen.
 12345
12345
- 10–30 days: recently overdue. A friendly reminder is usually enough.
- 231–60 days: the amount and number of invoices that have been overdue for between one and two months.
- 361–90 days: worth a phone call to the client.
- 490+ days: from here on the risk of non-payment grows quickly.
- 5The ⓘ help explains what the card shows, how it is calculated and how to read it.
The coloured bar on the card splits the total overdue amount between the four bands: the wider the dark red part, the older your debt. To see which invoices are behind it, use the Overdue filter.
#Filters, columns and statuses
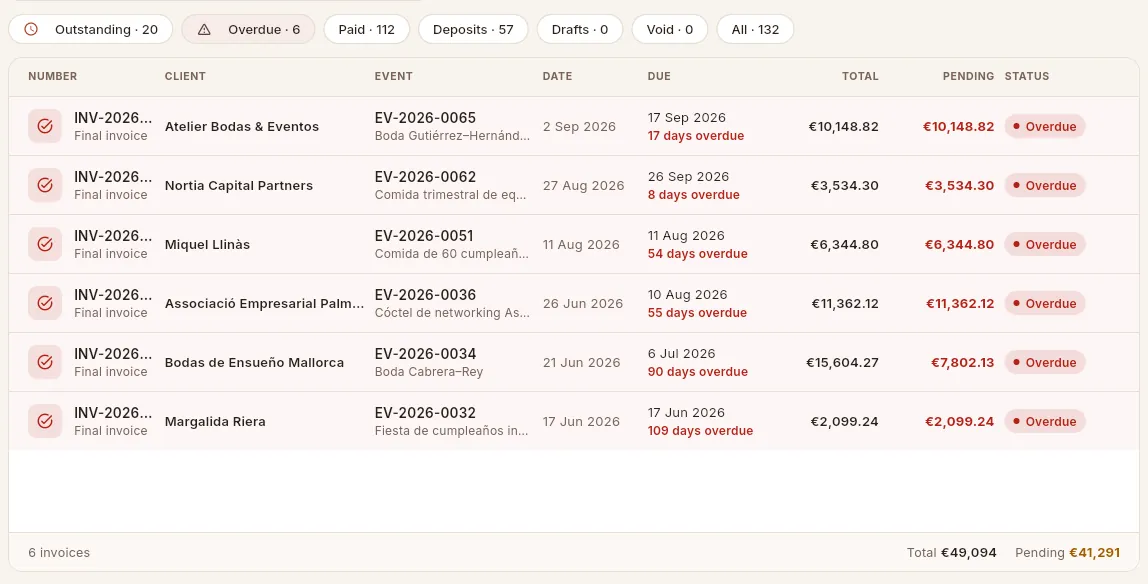 123456
- 1The quick filters show their count: Outstanding (to be collected, overdue or not), Overdue, Paid, Deposits, Drafts, Void and All.
- 2Each row: number and invoice type (Invoice, Deposit, Final invoice), client, event and issue date. Click to open the record.
- 3Due: the due date and, if it is still to be collected, how long is left (“In 6 days”, amber if a week or less remains) or how long ago it fell due (“Overdue by 55 days”, in red).
- 4Pending: what is still to be collected on each invoice (total including VAT minus payments). In red if it is overdue.
- 5The payment status of each invoice (see the table below). Click any column title to sort by it; click again to reverse the order.
- 6The footer counts the invoices you see and adds up their total and outstanding amount.
| Status | What it means |
|---|---|
| Draft | A manual invoice not yet issued: it can be edited and doesn't count as outstanding. |
| Pending | Issued and unpaid, still within terms. |
| Part-paid | Issued, within terms and with a payment that doesn't settle it. |
| Overdue | The due date has passed and something is still to be collected (even if there are part-payments). |
| Paid | Paid in full. |
| Void | Voided: kept on record, but it doesn't count as invoicing or as debt. |
#Creating an invoice
The New invoice button asks what you want to do. Invoice an event lets you choose the event (confirmed, completed or already invoiced) and opens the deposit or final invoice dialog explained in the next section. Manual invoice creates an empty draft for you to complete line by line.
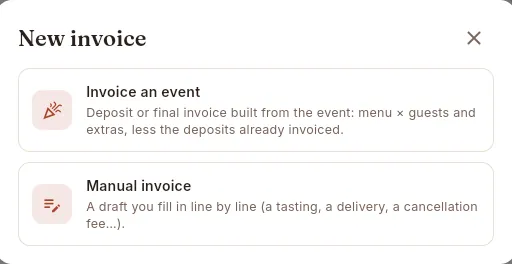 12
12
- 1Invoice an event: a deposit or final invoice calculated from the event.
- 2Manual invoice: a draft that you complete yourself, line by line.
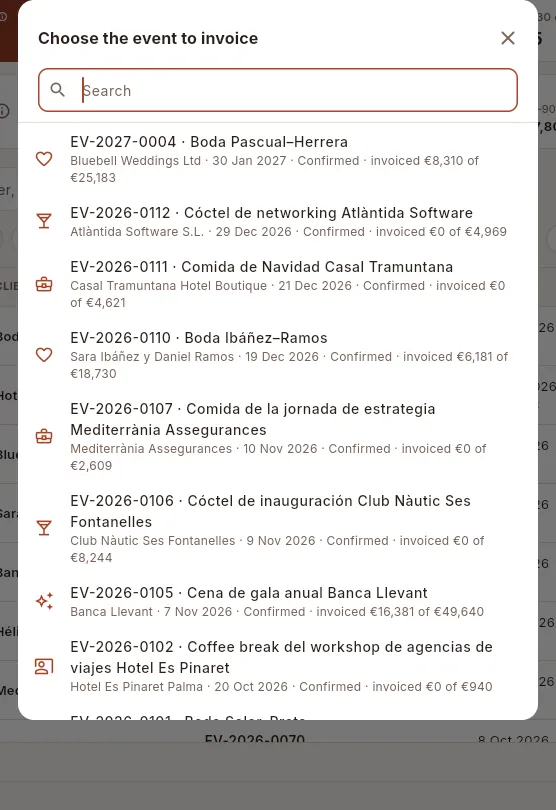 12
12
- 1Type part of the code, the name or the client to find the event.
- 2Each event shows client, date, status and how much has already been invoiced of its revenue.
#Invoicing an event: deposit and final invoice
The easiest way is to invoice from the event itself: on its record you have the Invoice event… button at the top right and also in the Documents tab, next to the invoices it already has.
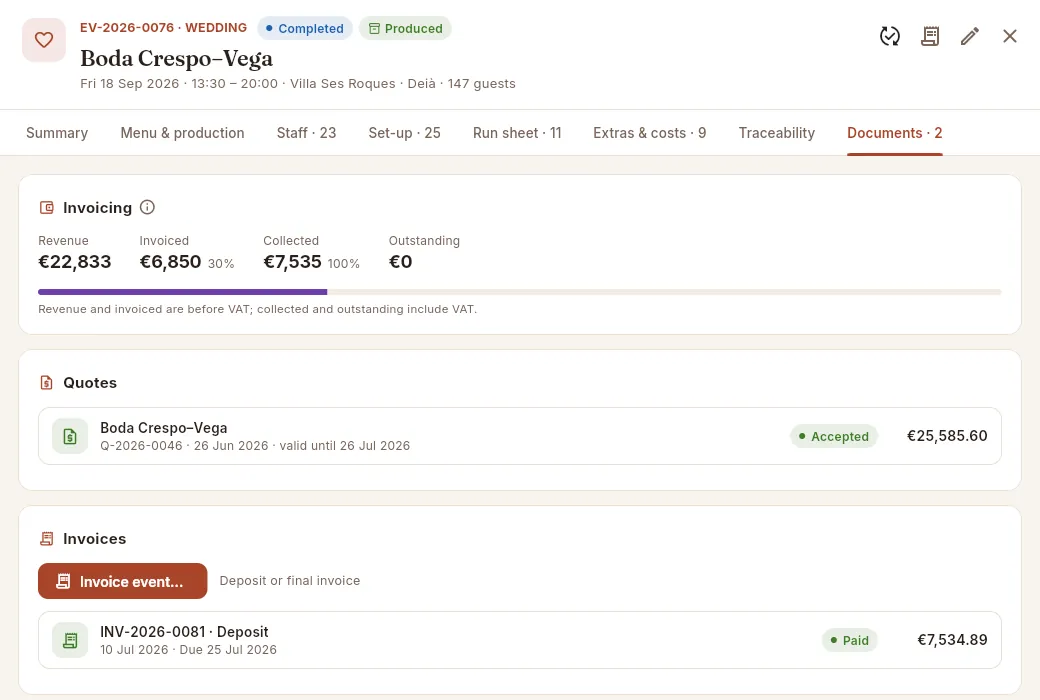 12345
12345
- 1The Invoice event… icon in the header opens the dialog from any tab.
- 2The Documents tab brings together the event's quote and invoices.
- 3Invoicing: the event's revenue, how much has been invoiced (excluding VAT) and how much has been collected and is still outstanding (including VAT).
- 4Invoice event…: deposit or final invoice. Next to it, a reminder of what comes next (or “The final invoice has already been issued”).
- 5The event's invoices with their payment status; click one to open its record.
Open the event and click Invoice event… (or, in Invoices, New invoice → Invoice an event and choose it).
Choose Deposit invoice. If the event hasn't taken place yet and has no invoices, it is already selected.
Check the Deposit percentage: it comes with your company's usual one (the one in Settings); change it if you have agreed a different one.
In the box, check the Event revenue (net) and what This invoice (net) will come to.
Click Issue deposit invoice. The invoice is created already issued (ready to send) and its record opens.
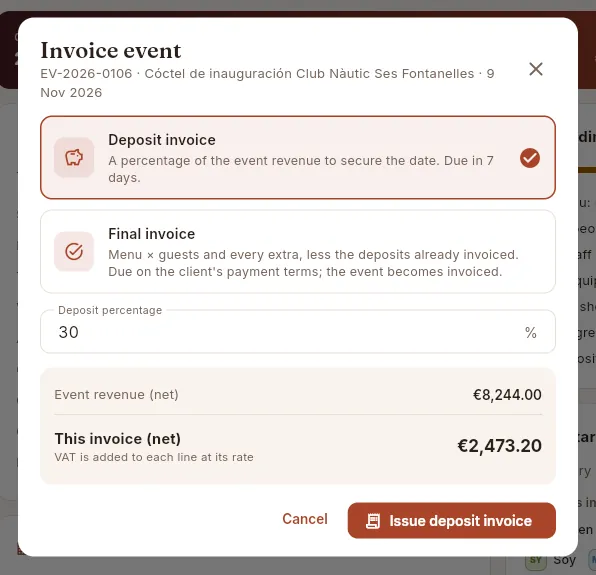 12345
12345
- 1Deposit invoice: a percentage of the revenue to reserve the date. Due in 7 days.
- 2Deposit percentage: the company's usual one; you can change it (between 0 and 100).
- 3Event revenue (net): menu × guests plus extras, excluding VAT.
- 4This invoice (net): the revenue times the percentage. VAT is added afterwards, at each line's rate.
- 5Issue deposit invoice creates and issues the invoice. Cancel closes without doing anything.
Once the event has taken place and you have the final number of guests, open the event and click Invoice event….
Choose Final invoice (if the event already has a deposit or has already taken place, it is selected for you).
Check the box: Event revenue (net), the Deposits already invoiced that will be deducted and the total of This invoice (net).
Click Issue final invoice. The event becomes Invoiced and the invoice opens.
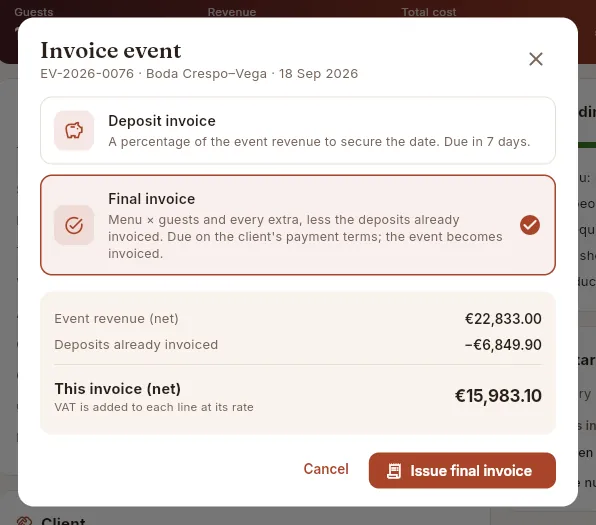 12345
12345
- 1Final invoice: menu × guests and all the extras, less the deposits. It falls due according to the client's payment terms.
- 2The event's full revenue, excluding VAT.
- 3Deposits already invoiced: what you already invoiced on account, which is subtracted.
- 4This invoice (net): what is left to invoice.
- 5Issue final invoice creates it as issued and marks the event as invoiced.
#Manual invoice
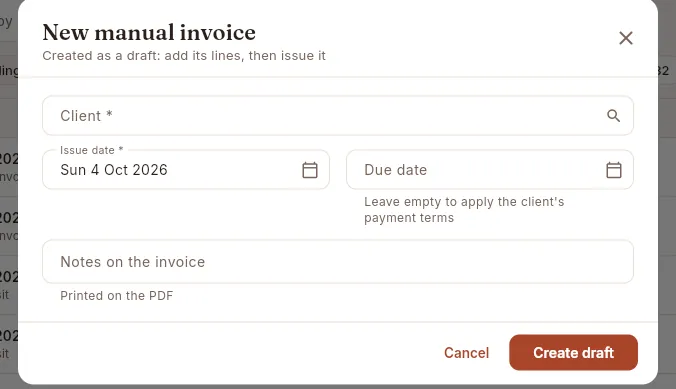 12345
12345
- 1Client (required): find them by typing their name.
- 2Issue date: today, unless you enter another.
- 3Due date: leave it empty and the client's payment terms will apply.
- 4Notes on the invoice: printed on the PDF (terms, the client's order reference…).
- 5Create draft saves the invoice without issuing it and opens its record so you can add the lines.
Click New invoice → Manual invoice, choose the client and click Create draft.
On the draft's record, click Add line and fill in Concept, Quantity, VAT (0, 4, 10 or 21 %) and Unit price (excl. VAT). Repeat for each line; click a line to correct or delete it.
If the invoice relates to an event, click Edit details and choose it under Event (optional).
When it is ready, click Issue invoice and confirm. From then on it counts as outstanding and can no longer be edited.
#The invoice record
When you open an invoice you see, from top to bottom, its actions, the notices, the payment figures, the lines, the payments and the client and event details.
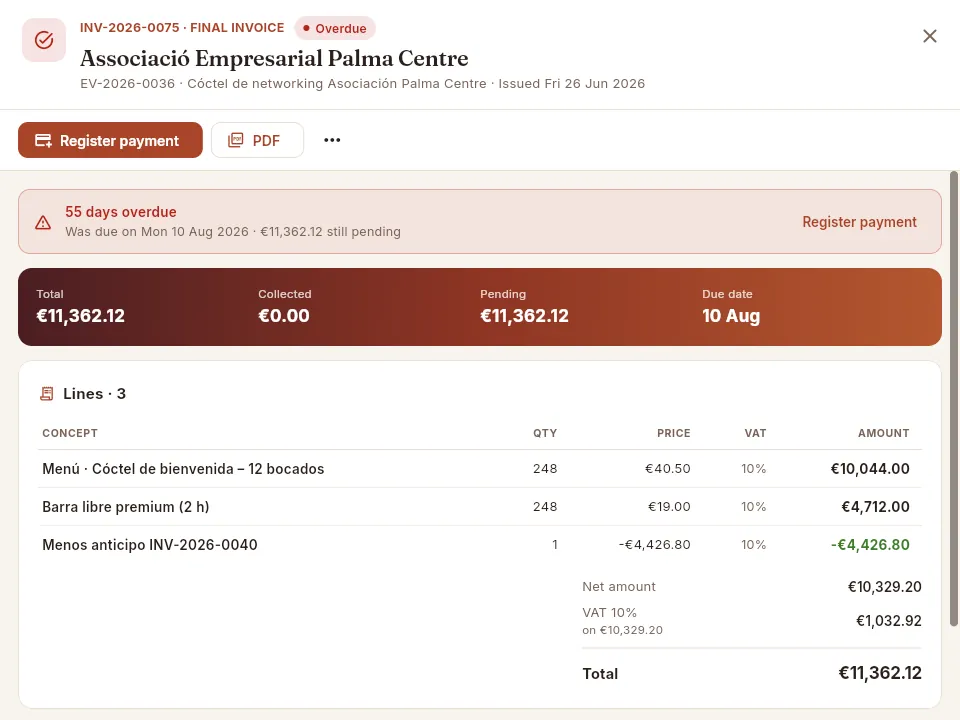 12345678
- 1Invoice number and type, with its payment status next to it; below, the client, the event and the issue date.
- 2Register payment: records a payment from the client (only if something is still outstanding).
- 3PDF: print the invoice or download it to send it.
- 4More options (…): Void invoice on issued invoices, Delete draft on drafts.
- 5The overdue notice: since when and how much is left, with a shortcut to Register payment.
- 6The key figures: Total including VAT, Collected, Pending and Due date.
- 7The “Less deposit” line subtracts, in green, the deposit that was invoiced earlier.
- 8Net amount, the VAT broken down by rate (“on” which amount) and the Total.
Depending on the status, the notice at the top changes: “Draft, not issued yet” (blue) on manual invoices not yet issued, “Void invoice” (grey) on void ones and “Paid in full” (green), with the date of the last payment, on paid ones. On a draft, the action bar shows Issue invoice and Edit details instead of Register payment.
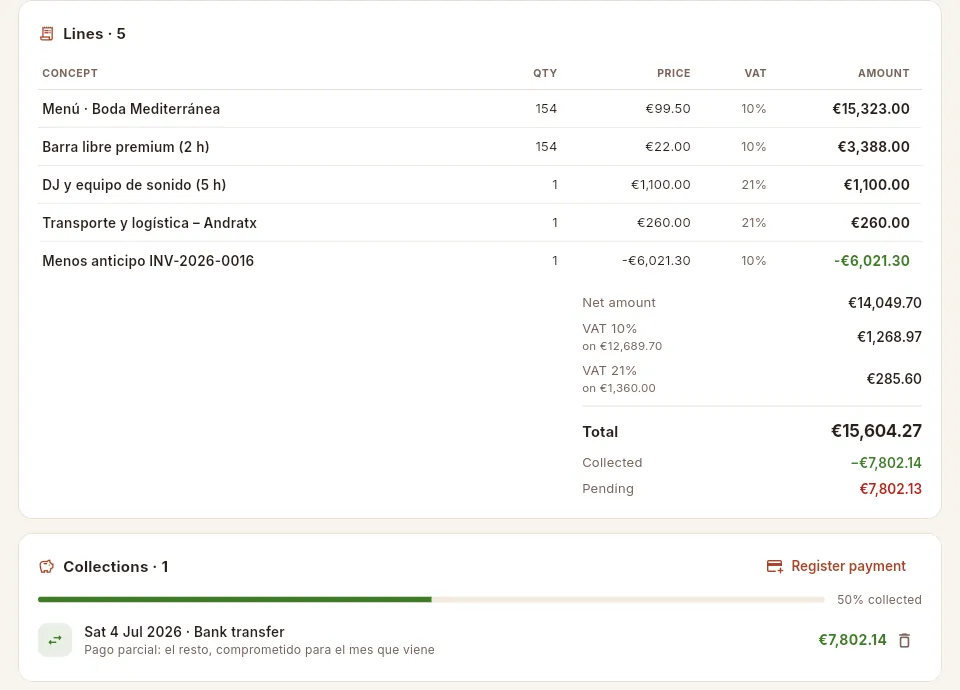 1234567
- 1Each line: concept, quantity, price, VAT rate and amount. Extras such as the DJ carry 21 %; food and drink, 10 %.
- 2The VAT of each rate, with the amount it is calculated on.
- 3With payments, Collected and Pending appear below the total.
- 4The bar shows how much of the total has been collected.
- 5Each payment: date, payment method, reference or notes and amount.
- 6The bin icon deletes a payment recorded by mistake (it asks for confirmation).
- 7Register payment is also on the collections card.
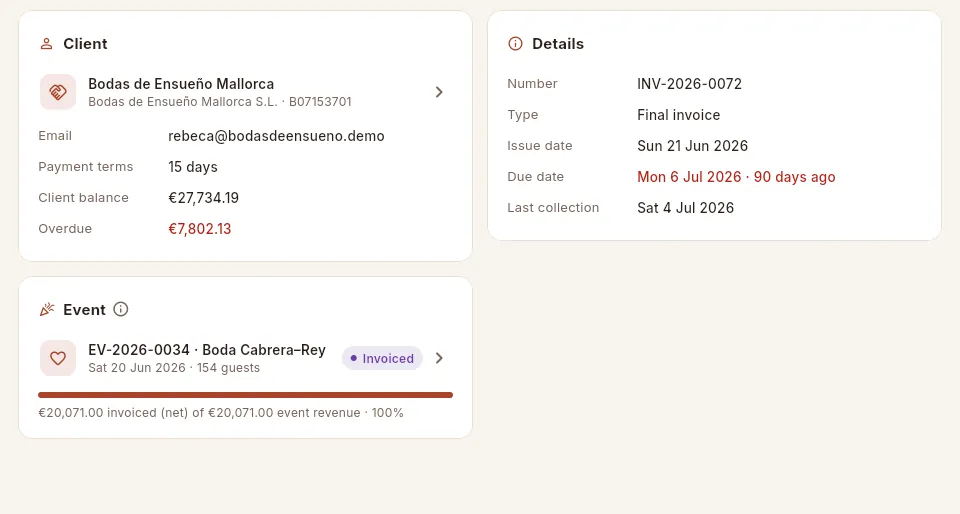 12345
12345
- 1The client: click to open their record.
- 2Client balance: everything they owe you across all their invoices, with the overdue part in red.
- 3Details: number, type, issue date, due date (and how long ago) and the date of the last payment.
- 4The invoice's event, with its status; click to open it.
- 5How much of the event is invoiced: deposits plus the final invoice against the event's revenue. At 100 %, it is fully invoiced.
#Registering a payment
Open the invoice (for example, from the Overdue filter) and click Register payment.
The Date is today and the Amount suggests everything outstanding; change it if the client has only paid part.
Choose the Method: Bank transfer, Card, Cash, Direct debit or Bizum.
If you like, note a Reference (the bank's, the card receipt…) and Notes.
Click Register payment to save it.
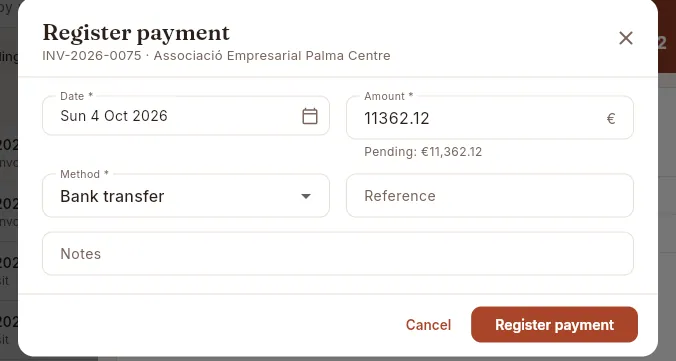 123456
- 1Date of the payment (today by default).
- 2Amount collected: it suggests the outstanding amount, which you can see below for reference.
- 3Reference of the bank transfer or receipt, so you can find it later.
- 4Payment method: bank transfer, card, cash, direct debit or Bizum.
- 5Free-text Notes (for example, “the rest next month”).
- 6Register payment saves the payment.
#The PDF, voiding and deleting
 12
12
- 1Print opens the print dialog (from which you can also save as PDF).
- 2Download PDF saves the file under the invoice's number.
 1
1
- 1Void invoice: asks for confirmation and leaves it void.
What the PDF contains. An A4 page with your company's header (name, registered name and tax ID, address, email, phone and website, as they are in Settings); the title —Invoice or Deposit invoice— with the number, the issue and due dates and, where relevant, a Draft, Paid or Void stamp; the Bill to block with the client's tax details; the Event block (reference, date, guests and venue); the table of lines (description, quantity, price, VAT and amount); the net amount, the VAT of each rate and the total, and if there are payments, the amount paid to date and the balance due; your notes; and at the foot, the instruction to pay by transfer to your IBAN quoting the invoice number. Voiding an issued invoice takes it out of what is outstanding and what is invoiced, but keeps its number on record. Before voiding an invoice that has payments, delete its payments. Deleting is only possible for drafts.
Open the invoice and click More options (…) → Void invoice.
Read the notice (“It will no longer count as outstanding or as revenue. Its number is kept for the record.”) and confirm with Void invoice.
If it was an event's final invoice, invoice the event again from the event when you need to.
#On your phone
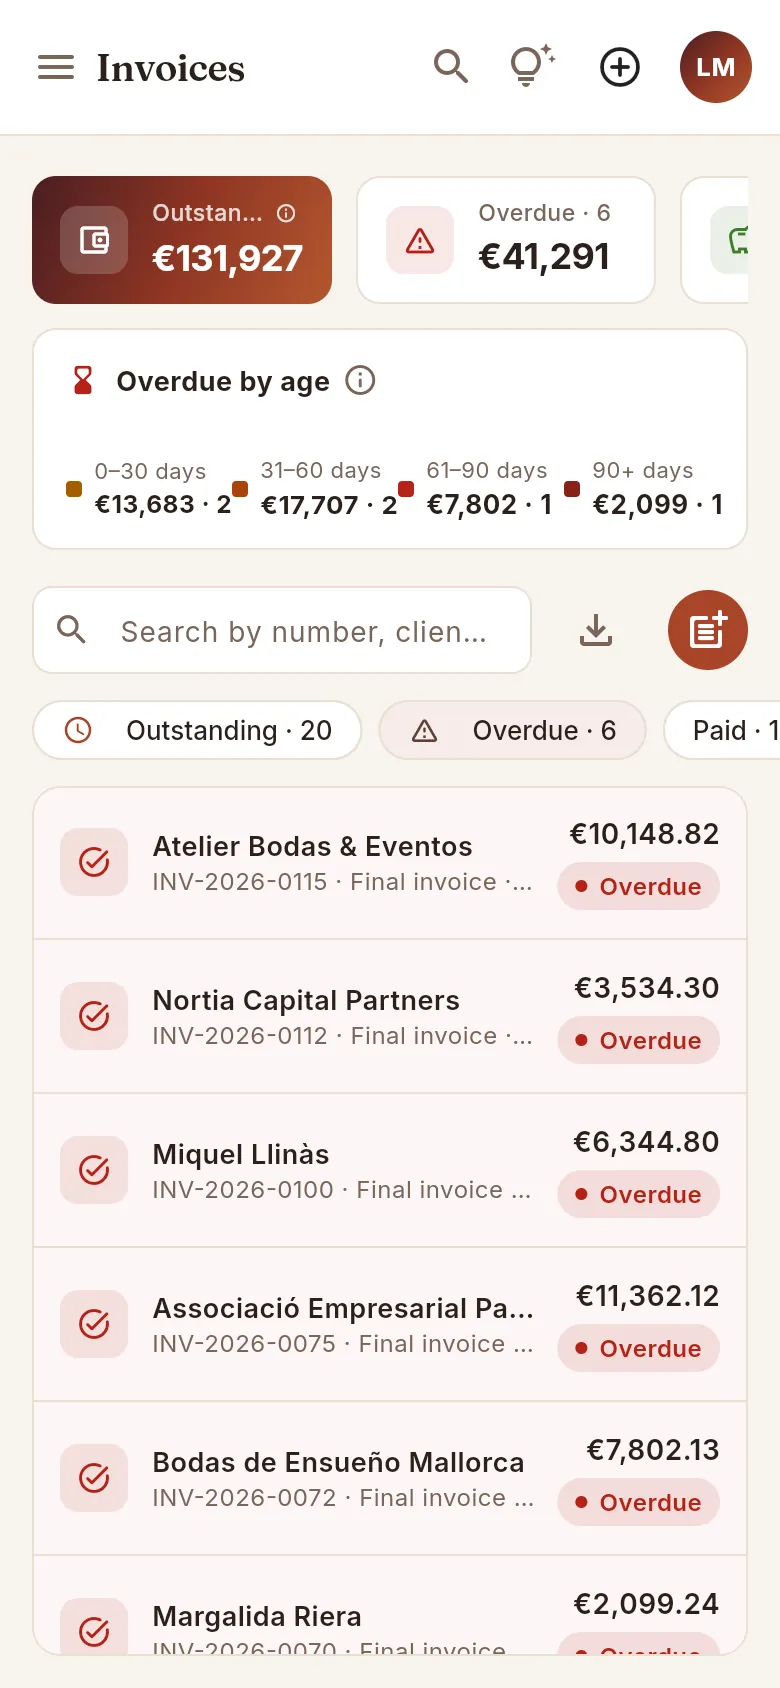 1234
1234
- 1The indicators scroll sideways.
- 2New invoice becomes a button with just the icon.
- 3The filters, by swiping sideways.
- 4Each invoice on a card: client, number, type, days overdue, pending amount and status.
Finance
Payables
The invoices from your suppliers — kitchen purchases and all other expenses — their due dates and the payments you make.
Payables is the other side of Invoices: it holds the invoices you receive from your suppliers and what you owe them. They come from two places:
- Kitchen purchases: when you receive an order in Purchasing, Mise creates the supplier's invoice by itself with what you received, its price, 10 % VAT and the due date based on the supplier's payment terms. You don't have to type it in.
- Other expenses: equipment hire, agency staff, transport, utilities, maintenance, marketing… You add these yourself with New expense, with or without a supplier and, if you like, linked to an event.
For each invoice you record the payments you make, and Mise tells you what is overdue and what falls due this week so you can plan your bank transfers.
- 1Order receivedIn Purchasing you receive the goods and note the supplier's invoice number.
- 2Other expensesHire, agency staff, utilities… you add them with New expense.
- 3Invoice to payWith its due date based on the supplier's payment terms.
- 4Due this weekThe indicators and the filters tell you what needs paying.
- 5Register paymentYou note the transfer and the invoice is marked as paid.
#The list of supplier invoices
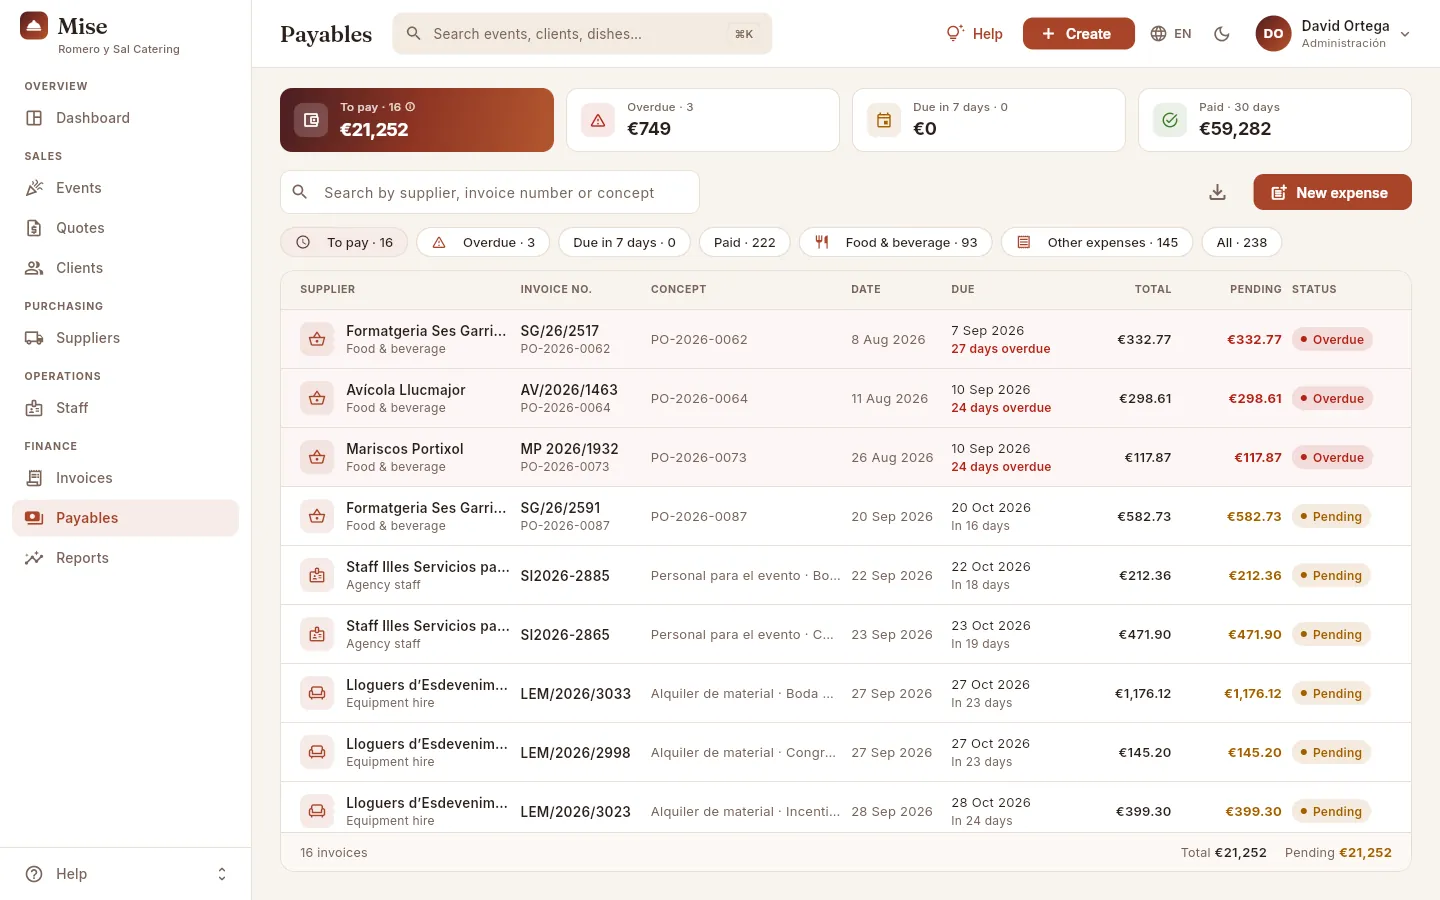 12345678
- 1To pay: what you still owe your suppliers (invoices including VAT minus the payments made) and how many invoices that is.
- 2Overdue: the part whose due date has already passed. Pay it as soon as you can to look after your relationship with the supplier.
- 3Due in 7 days: what falls due between today and a week from now (not counting what is already overdue). It is your transfer plan for the week.
- 4Paid · 30 days: the sum of the payments you have registered in the last 30 days.
- 5The search box finds by supplier, invoice number, concept, order number or category.
- 6Export CSV downloads the invoices you are looking at.
- 7New expense: registers a supplier invoice that doesn't come from an order.
- 8The filters: To pay (when you open the section), Overdue, Due in 7 days, Paid, Food & beverage, Other expenses and All.
The list is sorted by due date, from the most urgent to the one that takes longest to fall due, so the first things you see are what has to be paid soonest. Click a row to open the invoice.
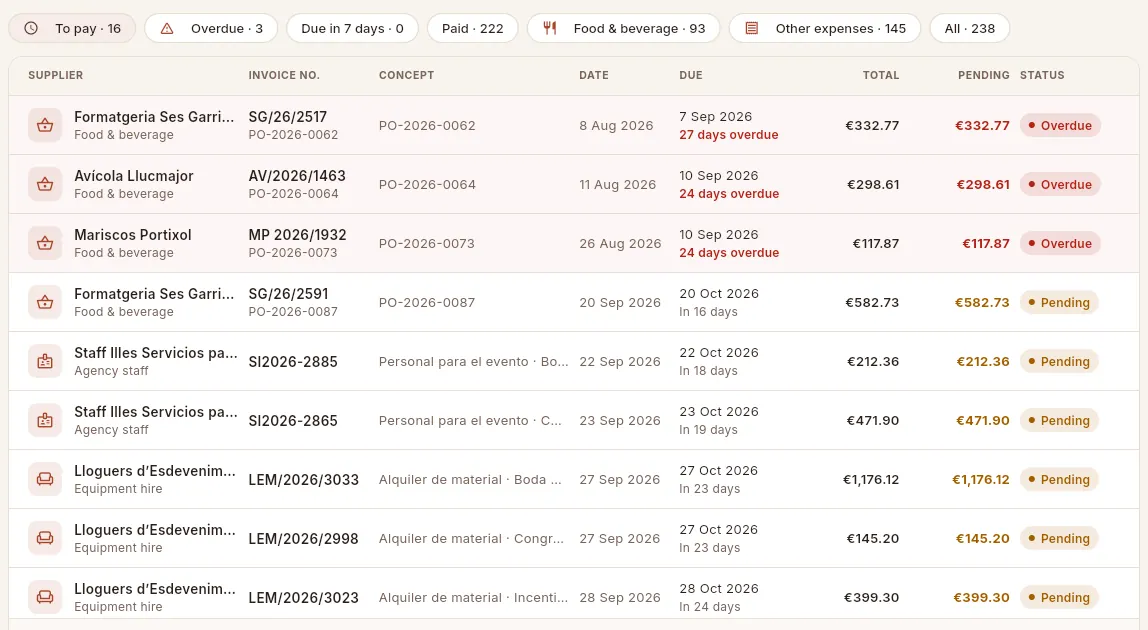 1234567
- 1Food & beverage: only the invoices for orders to food and drink suppliers.
- 2Other expenses: hire, agency staff, transport, utilities, marketing…
- 3Supplier and, below it, the expense category. Expenses with no supplier (electricity, fuel…) show as “No supplier”.
- 4Invoice no.: the number the supplier gave it and, below, the order it comes from (if it comes from Purchasing).
- 5Due: the date and how long is left, or how long ago it fell due (in red).
- 6Status: Pending, Part-paid, Paid or Overdue.
- 7An event expense: the concept says which event it is for (staff, flowers, equipment hire…).
#The supplier invoice record
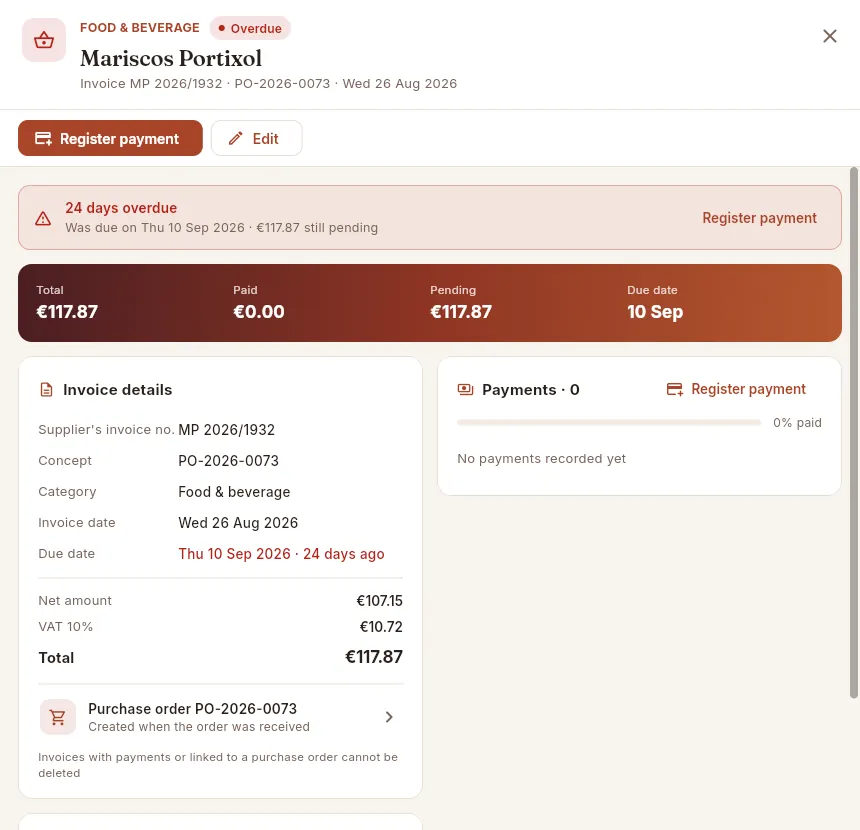 12345678
- 1The expense category and the payment status; below, the supplier, invoice number, order and date.
- 2Register payment: records a payment to the supplier (only if something is still outstanding).
- 3Edit: corrects the invoice details (and deletes it, if that is allowed).
- 4The overdue notice, with what is left and a shortcut to Register payment.
- 5Total, Paid, Pending and Due date at a glance.
- 6Under Invoice details: net amount, VAT and total, plus the number, concept, category and dates.
- 7The order the invoice came from (“Created when the order was received”): click to open it in Purchasing.
- 8Payments: the bar showing how much has been paid and the list of payments made.
Further down, the Supplier card shows their contact details, their payment terms, how much you owe them in total across all their invoices (Owed to this supplier) and the overdue part. Click their name to open the supplier's record.
 123456
- 1Agency staff category and Pending status (still within terms).
- 2The concept says what is being paid and for which event.
- 3The VAT on services is usually 21 %; on food and drink, 10 %.
- 4The event the expense belongs to: click to open it.
- 5The supplier: click to open their record.
- 6Owed to this supplier: everything you owe them, adding up all their invoices.
 123456
- 1With no supplier, the concept serves as the title.
- 2It is paid, so only Edit is left: there is nothing more to pay.
- 3Paid in full, with the date of the last payment.
- 4Each payment: date, payment method (here, direct debit), reference and amount.
- 5The bin icon deletes a payment registered by mistake.
- 6Invoices that have payments or come from an order cannot be deleted.
#Registering a payment
Filter by Overdue or Due in 7 days to see what is urgent and open the invoice.
Click Register payment.
The Date is today and the Amount suggests everything outstanding (you can see the outstanding amount below it); change it if you are only paying part.
Choose the Method (Bank transfer, Card, Cash, Direct debit or Bizum) and, if you like, note the transfer's Reference.
Click Register payment to save it.
 12345
12345
- 1Date of the payment.
- 2Amount paid; below it, the outstanding amount for reference.
- 3Payment method.
- 4Reference of the transfer or receipt.
- 5Register payment saves it.
#Adding an expense
The invoices for Purchasing orders arrive by themselves. Use New expense for everything else: the hire of a marquee, agency staff for a wedding, electricity, diesel for the vans, a repair…
 12345678
- 1Supplier (optional): search by name; leave it empty for utilities or one-off expenses.
- 2Supplier's invoice no., as it appears on their invoice.
- 3Category (required): Food & beverage, Equipment hire, Transport & fuel, Agency staff, Utilities, Maintenance, Marketing or Other.
- 4Concept (required): what it is, for example “Marquee hire · Smith wedding”.
- 5Due date: if empty, the supplier's payment terms apply. The Invoice date is today unless you change it.
- 6Net amount: the amount excluding VAT.
- 7VAT: normally 10 % on food and drink and 21 % on other expenses (0 % and 4 % are also available).
- 8Event (optional): links the expense to an event so you can find it easily. Below, free-text Notes.
Click New expense (or, from a supplier's record, New supplier invoice: the supplier and category are already filled in).
Fill in the Category, the Concept, the Invoice date and the Net amount, and check the VAT.
If you like, add the supplier, their invoice number, the due date, the event and some notes.
Click Save: the invoice is left pending payment and its record opens.
Open the invoice and click Edit: the Edit supplier invoice form has the same fields.
Correct whatever is needed and click Save.
To delete it, use Delete in that same form. It only appears if the invoice has no payments and doesn't come from an order; if it has payments, delete them first.
#From the supplier's record
 123
123
- 1The Invoices tab lists all the supplier's invoices, with their due date, status and amount.
- 2New supplier invoice opens the expense form with the supplier already chosen.
- 3Click an invoice to open its record and register the payment.
Finance
Reports
The profitability of the business over the period you choose: by month and by event type, where the money goes, top clients, menus and dishes, staff hours and supplier spend.
Reports answers the big questions: how much have we invoiced and how much have we kept? Which type of event leaves the most margin? Which menus sell best and which eat up the profit? Which suppliers do we buy from most? Everything is worked out from the confirmed, completed or invoiced events whose date falls in the chosen period, using the same costs you see on each event's Extras & costs tab. There is nothing to fill in: choose the period and read the blocks from top to bottom. Each block has its own ⓘ help explaining what it shows, how it is calculated and how to read it.
#The period and the summary
 12345678
- 1Preset periods: Last 3 months, Last 6 months (when you open the section), Last 12 months and This year. They run from the 1st of the month until today.
- 2Custom range: you pick the start and end dates on a calendar.
- 3The dates of the period you are viewing; its ⓘ explains which events count.
- 4Events in the period (with the average number of guests per event) and total Guests served.
- 5Revenue: what was sold at those events, excluding VAT (menu × guests plus extras).
- 6Margin: what is left after direct costs, as a % and in euros, with its rating: Healthy, Watch or Low.
- 7Food cost: the share of the menu price that goes on ingredients, against the company target.
- 8Average ticket: revenue per guest.
 1234
1234
- 1The range chosen so far.
- 2Click the first day and then the last: the days in between are coloured in.
- 3Save applies the period to all the reports (it doesn't change any data). The pencil next to it lets you type the dates instead of picking them.
- 4The ✕ closes the calendar without changing the period.
Click Custom range.
In the calendar, click the start day and the end day (you can move through the months).
Click Save. All the blocks are recalculated for that period; the ✕ at the top left closes without changing anything.
#Revenue, costs and margin by month
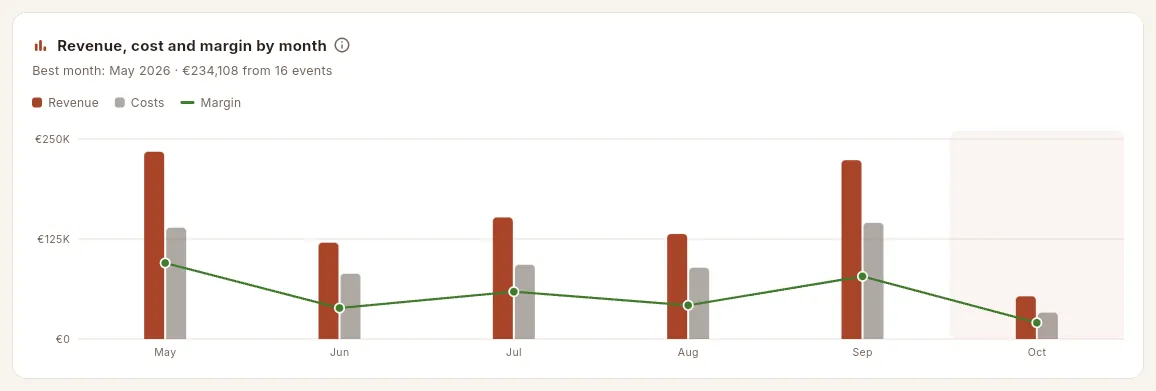 12345
12345
- 1The title and its ⓘ. If your profile can't see amounts or costs, the block is called Events by month and counts events.
- 2The best month of the period: its revenue and how many events it had.
- 3The legend: bars for Revenue and Costs, and the Margin line in euros.
- 4Each month, with its two bars. Hover over them to see the detail: events, guests, revenue, costs and margin (with its %).
- 5The current month is shaded: it isn't closed yet.
How to read it. Look for seasonality (wedding months compared with corporate ones) and, above all, for months where the costs bar grows faster than the revenue bar: the margin is narrowing and it is worth reviewing prices or costs.
#Profitability by event type
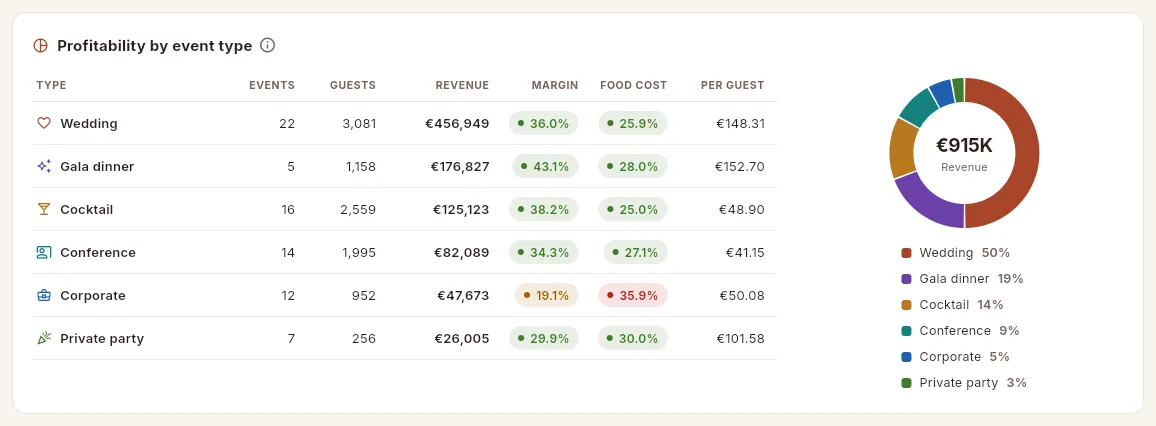 123456
- 1Each event type: how many events and guests it has had and its revenue. The table is sorted from highest to lowest revenue.
- 2Margin for that type: margin ÷ revenue, in green, amber or red.
- 3Food cost for the type: food cost ÷ menu revenue, against the target.
- 4Per guest: the average ticket for that type of event.
- 5A type to keep an eye on: amber margin and red food cost. Review its prices or its menus.
- 6The donut shows the weight of each type in total revenue (in the centre).
#Where the money goes and top clients
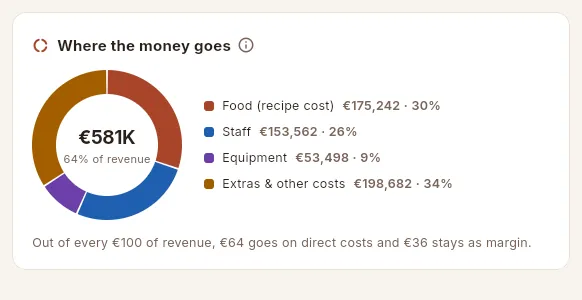 123
123
- 1In the centre, the total costs and what % of revenue they represent.
- 2The four items, with their amount and %: Food (recipe cost) (the menus' ingredients), Staff (hours × rate), Equipment (per-event cost of owned and hired equipment) and Extras & other costs (what the additional services and other event expenses cost, such as transport or hire).
- 3The takeaway in one sentence: out of every €100 of revenue, how much goes on costs and how much is left.
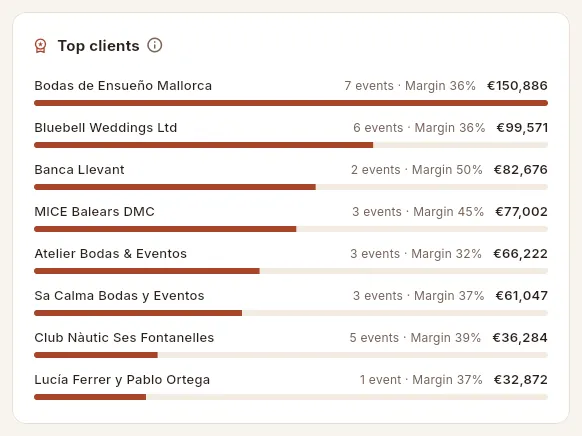 123
123
- 1The 8 clients with the most revenue, from highest to lowest; the bar compares with the first. Click one to open their record.
- 2How many events they have had and their margin.
- 3Their revenue in the period, excluding VAT.
Where the money goes is only visible to profiles with access to costs. How to read it: food and staff are usually the two big items; if Extras & other costs grows, it is often logistics (transport, set-up, hire) that isn't being charged to the client. In Top clients, look at those with a lot of revenue but little margin.
#Menus and staff hours
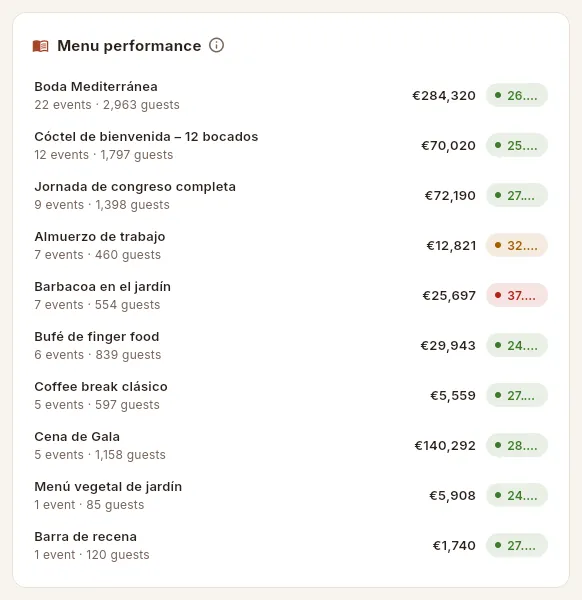 123
123
- 1Each menu: how many events and guests have had it and its menu revenue. Click to open the menu.
- 2A menu with a red food cost: the first one to re-cost or put up in price.
- 3In amber: slightly above the target.
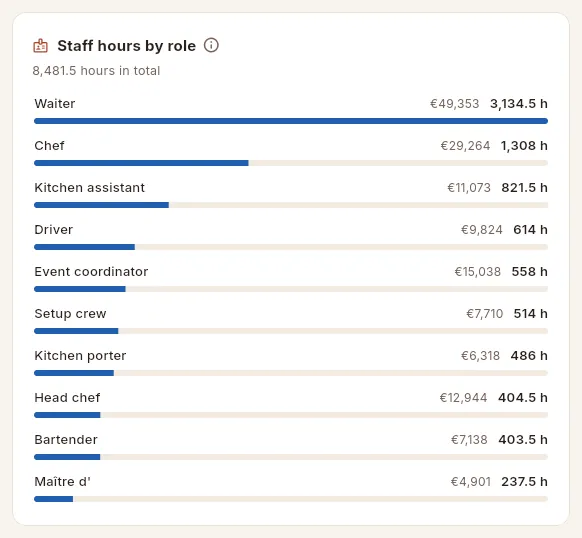 123
123
- 1The total hours assigned to events in the period.
- 2Each role (waiter, kitchen, set-up, coordination…) with its hours; the bar compares with the role that has the most.
- 3Its cost (hours × rate), if your profile can see costs.
Menu performance shows up to 10 menus, with the ones that have had the most events first. Staff hours by role helps you plan shifts and budget staff properly: compare the hours per guest between event types.
#Most served dishes
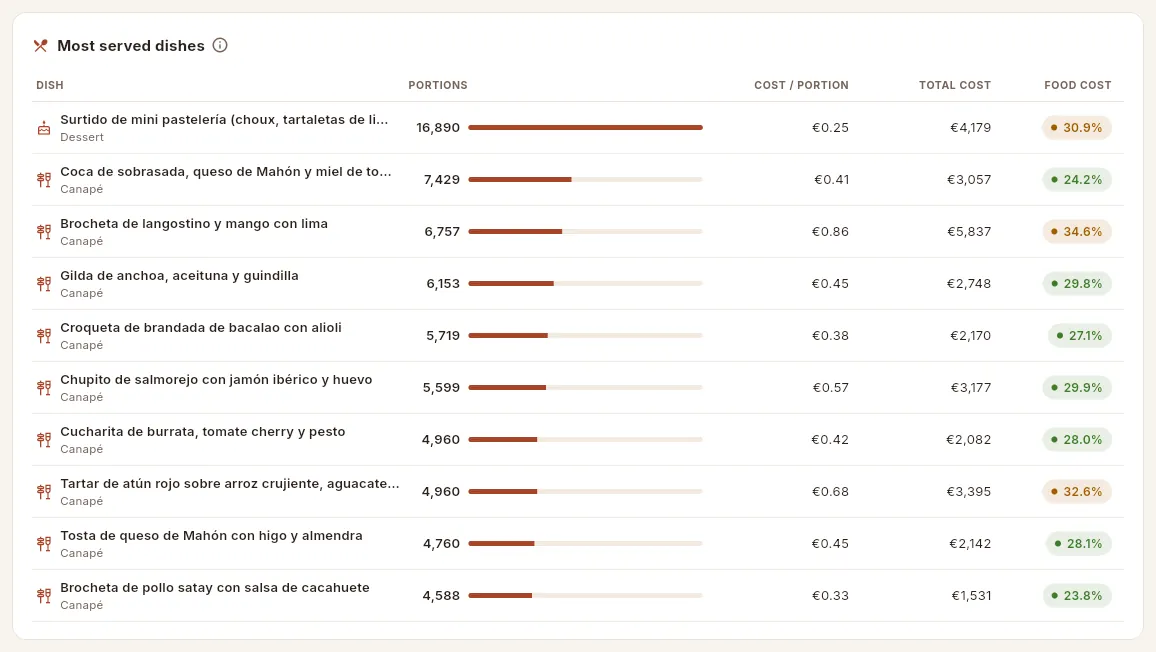 12345
12345
- 1The dish and its category (canapé, main course, dessert…).
- 2Portions served, with a bar comparing with the most served.
- 3Cost / portion: the current cost of its recipe costing.
- 4Total cost: portions × cost per portion.
- 5The dish's food cost: its cost ÷ its selling price. Amber means slightly above the target.
#Supplier spend
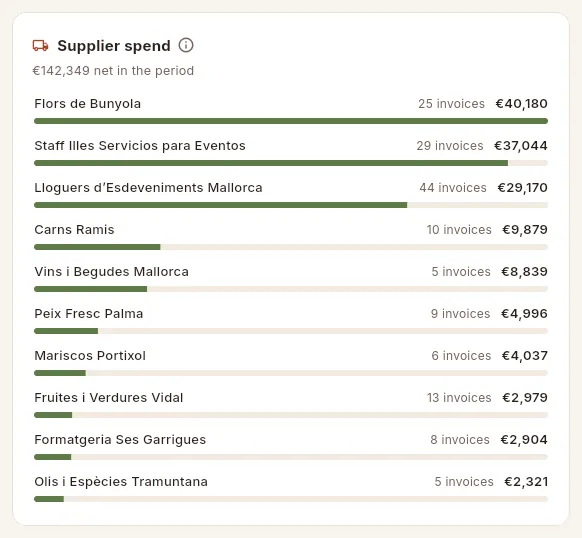 12
12
- 1The net spend (excluding VAT) with the suppliers in the list.
- 2The 10 suppliers you buy most from, with the number of invoices and the amount. Click one to open its record.
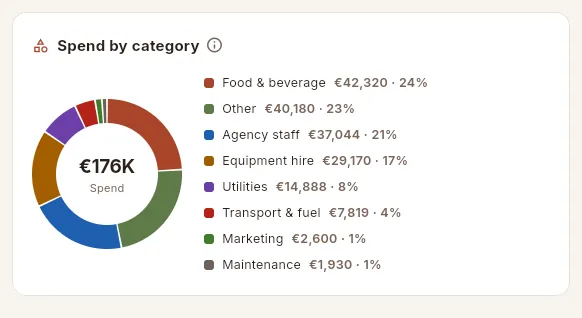 12
12
- 1The total spent in the period.
- 2Each expense category with its amount and %: kitchen purchases, agency staff, hire, utilities…
Both blocks come from supplier invoices (see the Payables chapter) dated within the period, both those from orders and the other expenses. Spend by supplier leaves out expenses with no supplier (electricity, fuel…), which do count in Spend by category. How to read it: spend concentrated in a few suppliers is an argument for negotiating prices and payment terms; keep an eye out for any odd rise in transport, hire or agency staff.
Administration
Users
Who can sign in to Mise and what each person can see and do: user accounts and access profiles, with a switch for every permission.
Users is where you decide who signs in to Mise and what each person sees. It has three parts:
- Users: the accounts (name, email, job title, password) and which access profiles each one has. There is no self sign-up: only an administrator can create accounts.
- Profiles: each access profile is a set of switches, one per permission: which menu sections it sees, which sensitive data (prices, costs, rates, contact details), what it can change, which Dashboard blocks it gets and what it can do from Claude.
- Claude: the access keys each user has connected Claude to Mise with, and what Claude has done with them (see Connect to Claude).
This section is for administrators only. Administrators see everything and need no profiles; everyone else sees exactly what their profiles allow. The full catalogue of permissions and the profiles that come ready-made are in the appendix Profiles and permissions.
#Where to find it
Users and Settings are not in the sidebar on a computer: you open them from your user menu, at the top right, and they only appear if you are an administrator. On a phone they are at the bottom of the side menu (☰), in the Administration group.
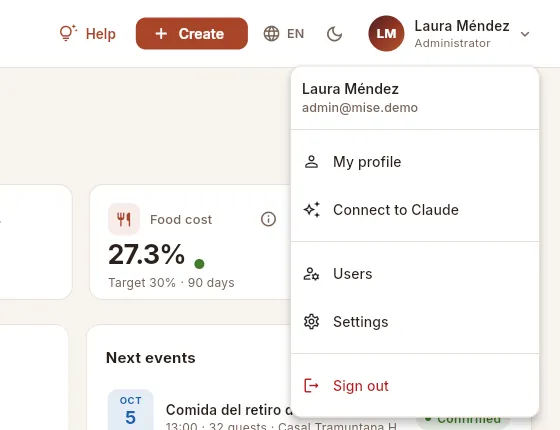 123
123
- 1Click your name to open the menu.
- 2Users: accounts, access profiles and Claude keys.
- 3Settings: the company's details and settings.
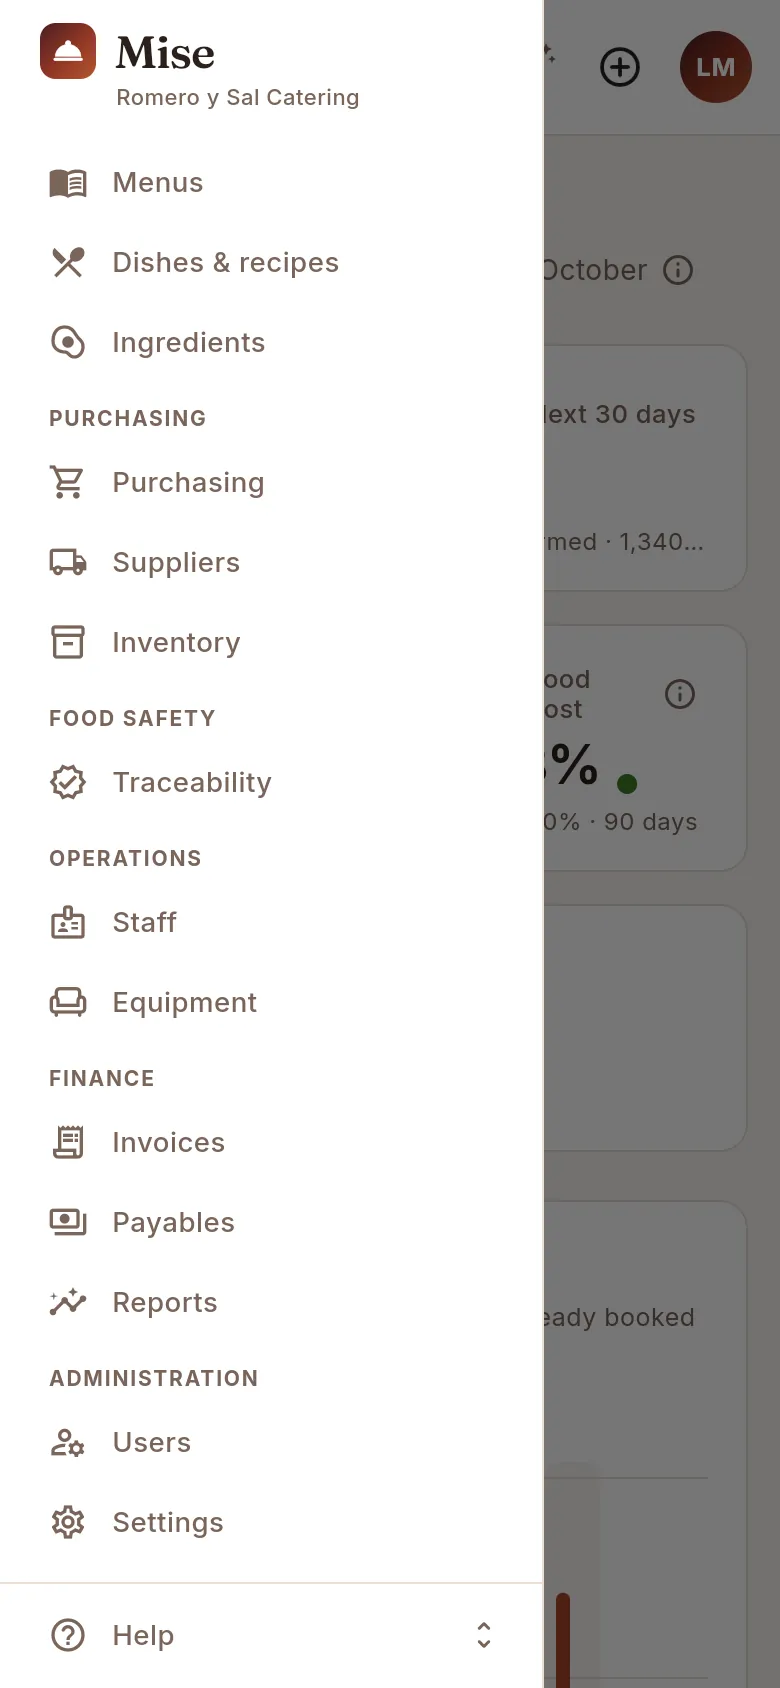 1
1
- 1The Administration group, for administrators only, with Users and Settings.
#The list of users
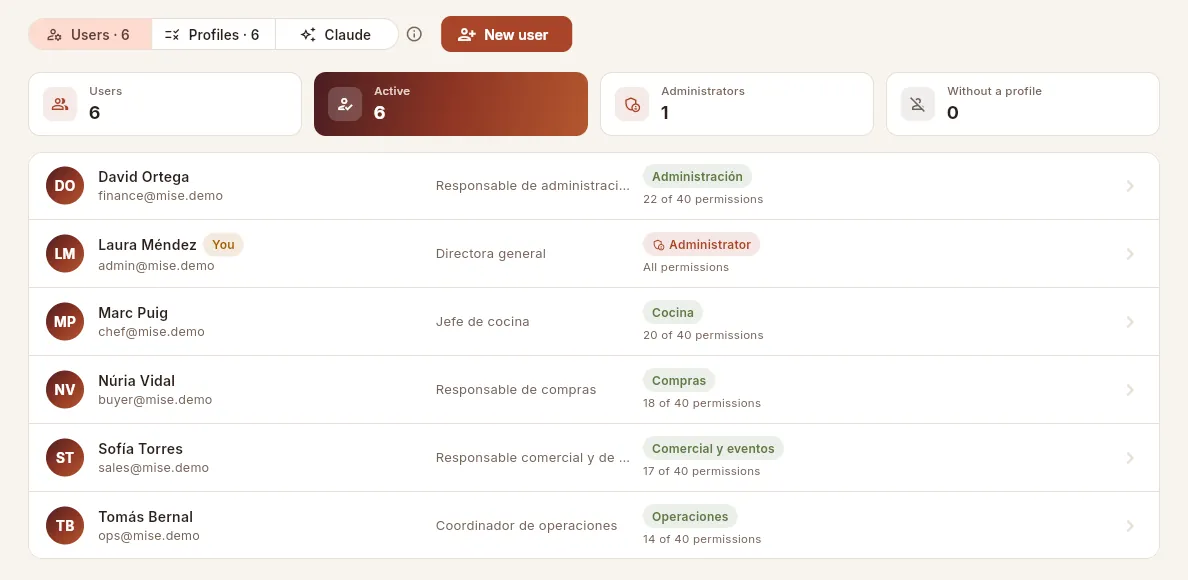 12345678
- 1Users, Profiles and Claude: the three parts of the section, with how many users and profiles there are. The ⓘ explains each one.
- 2New user creates an account.
- 3The indicators: users, how many are active and how many are administrators.
- 4Without a profile: active users who are not administrators and have no profile, so they would see nothing. Red if there are any.
- 5Your own account carries the You label. Under the name, the email used to sign in.
- 6An administrator: has every permission and needs no profiles.
- 7Everyone else, with their access profiles and how many permissions they give in total ("17 of 40 permissions").
- 8Click any user to change their details, profiles, status or password.
If a user is disabled they carry the Inactive label and their name is greyed out: they cannot sign in, but they are kept on events, quotes and the history. If someone shows a red No profile, they will still see nothing when they sign in: assign them at least one profile.
#Creating a user
Open your user menu → Users and click New user.
Type their name, the email they will sign in with and, if you like, their job title.
Type a password of at least 8 characters, or click the wand icon for Mise to generate one (it is shown so you can copy it).
Tick one or more access profiles and check in Effective access what they will be able to see and do.
Click Create user and give them their email and password securely.
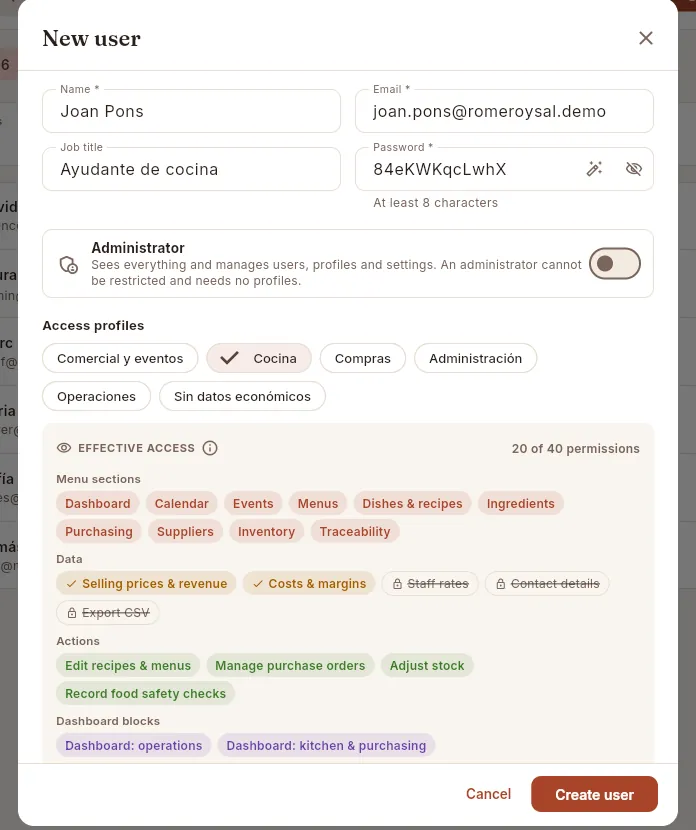 1234567
- 1Name, email (what they sign in with; it cannot be changed later) and job title.
- 2Password: the wand generates a strong one and the eye shows or hides it. At least 8 characters.
- 3Administrator: sees everything and manages users, profiles and settings. If you turn it on, the profiles disappear because they do not apply.
- 4The access profiles: click the ones you want to give them (they show a ✓). Hover over one to read who it is for.
- 5Effective access: what they will have with the profiles ticked, and how many permissions that is out of the total.
- 6Under Data, what they will not be able to see is struck through with a padlock: those figures will reach them empty.
- 7Create user creates the account (it has not been clicked in the screenshot).
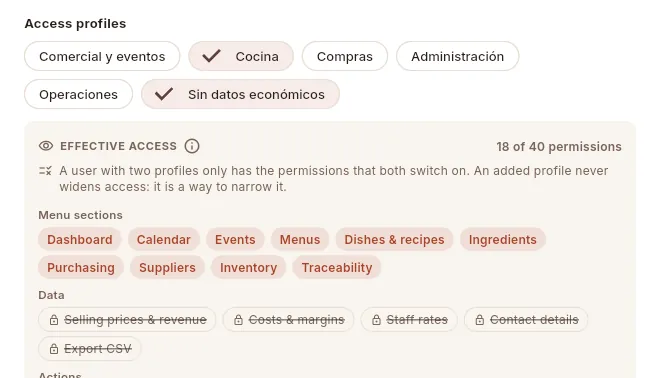 1234
1234
- 1Two profiles ticked: Cocina and Sin datos económicos.
- 2Mise reminds you of the rule: with two profiles they only have what both switch on.
- 3They now have fewer permissions than with Cocina alone.
- 4Neither selling prices nor costs: exactly what an assistant who must not see what dishes cost needs.
#Changing a user: profiles, status and password
Click a user in the list to open their record. You can change their name, job title, whether they are an administrator and their profiles (the email cannot be changed: it is their sign-in identifier). Further down is the Account block.
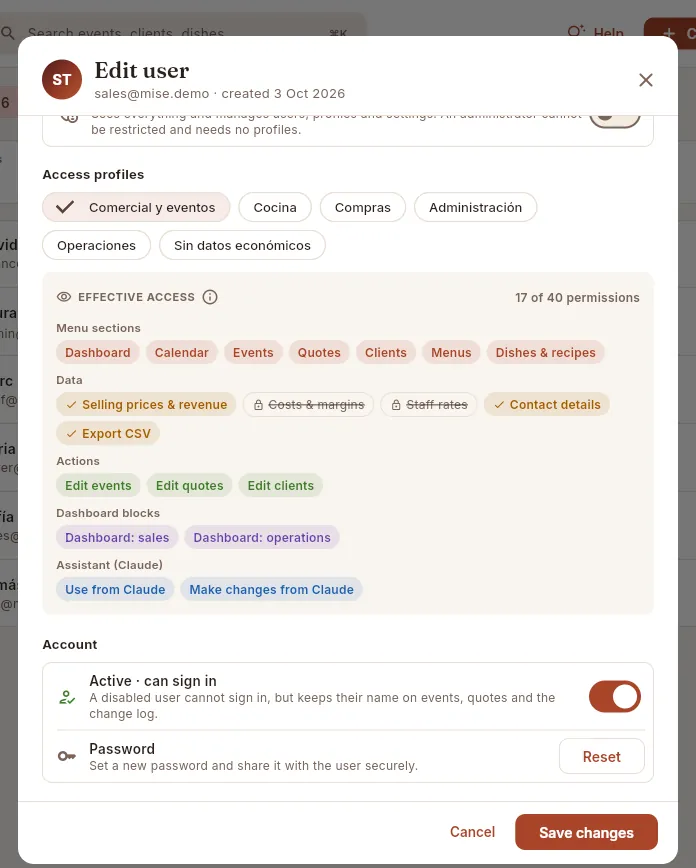 12345
12345
- 1Their profiles: tick or untick to change them. The effective access below is recalculated instantly.
- 2What they cannot see with their current profile, struck through: here, costs, margins and staff rates.
- 3Active · can sign in: turn it off to cut their access at once. Their name is kept on events, quotes and history.
- 4Reset sets a new password (if they have forgotten it or have left the company).
- 5Save changes applies the changes to name, job title, profiles, administrator rights and status.
 123
123
- 1Type the new password (at least 8 characters)…
- 2…or generate one with the wand; the eye shows it so you can copy it.
- 3Reset changes it immediately: the old one stops working. Give it to the user securely.
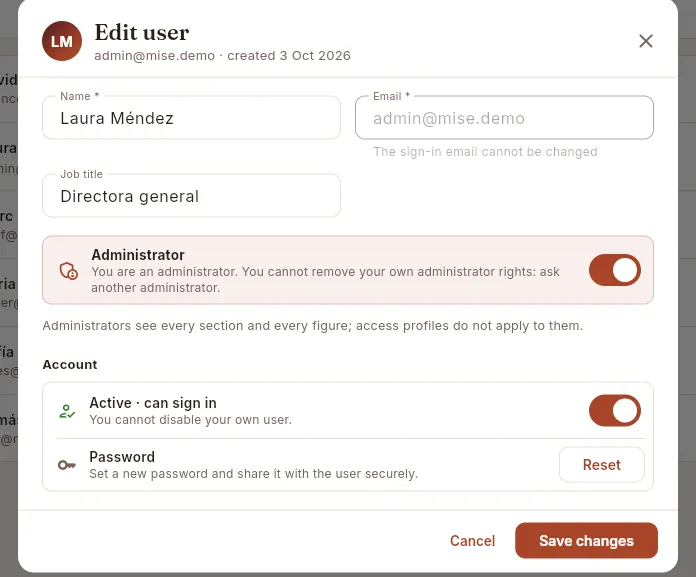 123
123
- 1An administrator cannot remove their own administrator rights: another administrator has to do it. That way you are never left without someone who can manage Mise.
- 2Profiles do not apply to administrators: they see every section and every figure.
- 3You cannot disable your own user either.
#Access profiles
The Profiles view holds the permission matrix: each row is a permission and each column a profile; the switch in each cell turns that permission on or off for that profile. Permissions are grouped into Menu sections, Data, Actions, Dashboard blocks and Assistant (Claude). The administrator is not listed because they have everything.
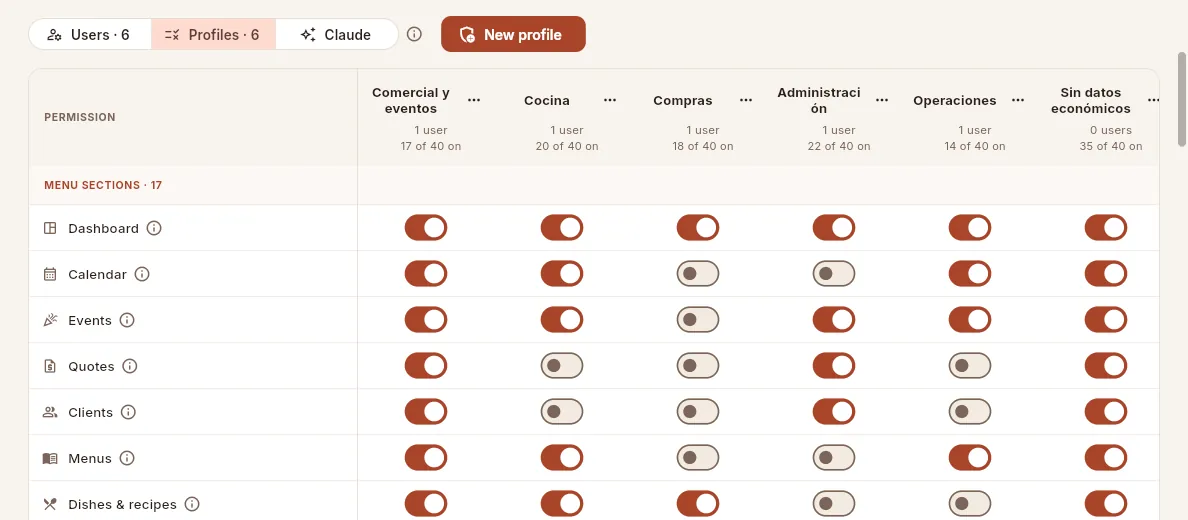 12345678
- 1The Profiles view.
- 2New profile creates an empty one or copies the switches of another.
- 3Each column is a profile, with how many users have it and how many permissions it switches on. Hover over the name to read its description.
- 4The ⋯ menu of each profile: edit its name, duplicate it or delete it.
- 5Permissions are in groups: first the menu sections the profile sees.
- 6The ⓘ of each permission explains what it allows, where it applies and what is left out.
- 7Each switch: on (coloured), the profile has that permission; off (grey), it does not. The change is saved as soon as you click.
- 8Here, the Cocina profile cannot see the Quotes section.
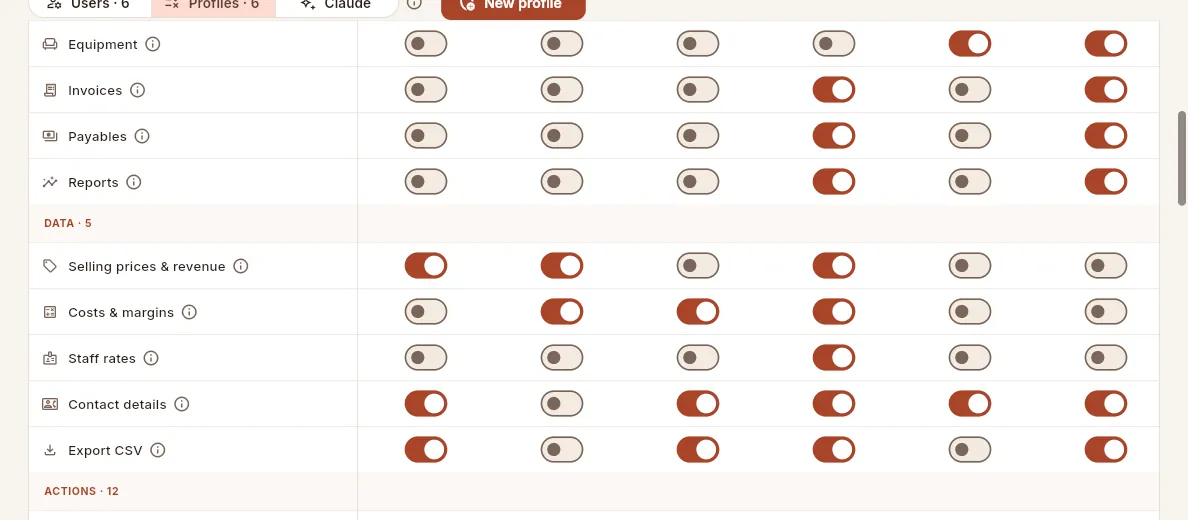 123456
- 1Data: which figures and personal details the profile sees and whether it can export.
- 2Costs & margins: purchase prices, costings, food cost, margins and the value of stock.
- 3The Comercial y eventos profile cannot see costs: its users see selling prices, but costs and margins come up empty.
- 4Cocina does see them: it needs the cost of each dish.
- 5Staff rates is separate from costs: usually only whoever handles payroll needs it.
- 6Actions: what it can create or change (events, quotes, recipes, orders, stock, invoices…).
At the end of the matrix is the Assistant (Claude) group, with what each profile can do from a chat with Claude (see Connect to Claude):
- Use from Claude: connect Claude to Mise and ask it about anything the profile can see. Without it, none of that user's keys work, not even the ones they already have.
- Make changes from Claude: let Claude create, change and delete on the user's behalf, only in what their actions already allow in the app. Without it, Claude only looks things up.
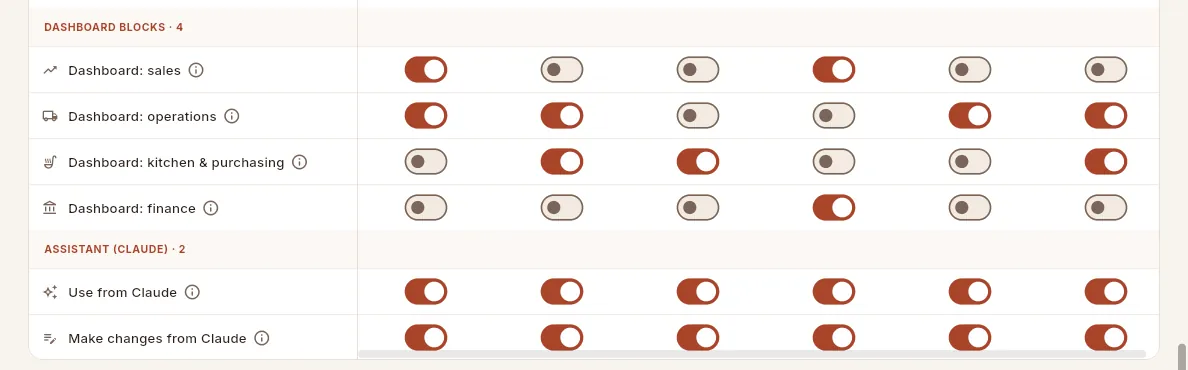 1234
1234
- 1Assistant (Claude): what each profile can do from a chat with Claude.
- 2Use from Claude: without it, the user cannot use Mise from Claude. Out of the box, every profile has it.
- 3Make changes from Claude: without it, Claude only looks things up, even if the user can edit in the app.
- 4Each switch belongs to a profile: here, Administración. Out of the box every profile has both; turn off "Make changes" for the one that should only look things up.
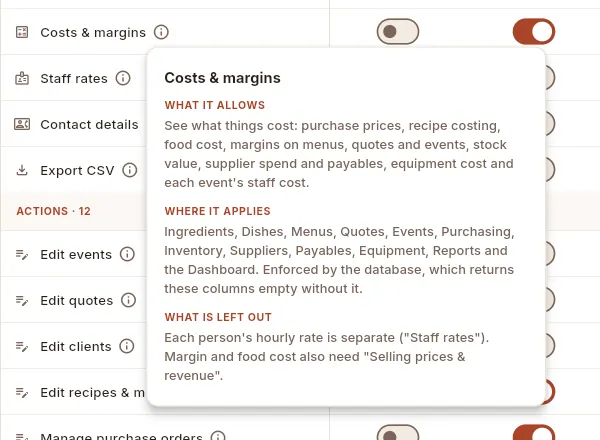 123
123
- 1What it allows: what can be seen or done with the permission switched on.
- 2Where it applies: in which sections and screens it takes effect.
- 3What is left out: what depends on another permission, so there are no surprises.
Your user menu → Users → Profiles.
Find the permission's row (click its ⓘ if you are not sure what it does) and the profile's column.
Click the switch. The change saves itself and applies to every user with that profile on their next query.
#Creating, duplicating, renaming and deleting profiles
 123
123
- 1Edit profile: change its name and description.
- 2Duplicate: create another one with the same switches.
- 3Delete profile is only possible if no user has it assigned; otherwise it is greyed out.
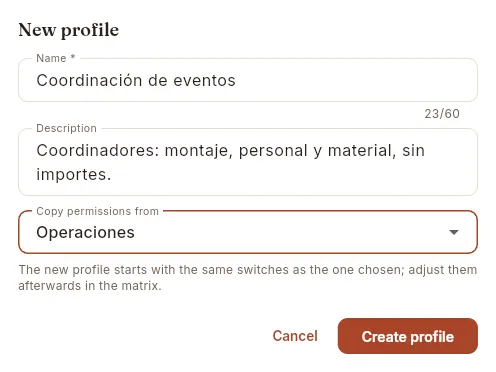 1234
1234
- 1The profile's name (up to 60 characters). If you duplicate, Mise suggests the original's name with "(copy)": change it to one that says who it is for.
- 2A description: who it is for and what it leaves out.
- 3Copy permissions from: the starting profile, or "Start with no permissions".
- 4Create profile; then you adjust its switches in the matrix.
- New profile opens this form: name, description and Copy permissions from (if you choose "Start with no permissions", the profile is born with everything off and you switch things on in the matrix).
- Duplicate opens the same form already filled in: the original's name with "(copy)", its description and itself as the starting profile.
- Edit profile changes only the name and description; permissions are changed in the matrix.
- Delete profile asks for confirmation and deletes the profile with all its switches. First you have to remove it from all its users.
#The change history
Below the matrix there are two cards. With several profiles the most restrictive wins recalls the rule with an example ("Cocina" + "Sin datos económicos" gives the kitchen sections without costs, margins or prices). Recent changes shows the last 20 changes to access, with who made them and when (hover over the time to see the exact date):
- profiles created (or copied from another), edited or deleted;
- switches turned on or off ("Switched on “Costs & margins” in “Comercial y eventos”");
- users created, with the profiles they were given, who was made an administrator or had it removed, who was disabled or re-enabled and whose password was reset;
- Claude keys created and revoked, with their name and whose they are.
The system itself writes this history every time there is a change and nobody can edit it from the application. As long as nothing has been changed, the card says "Nothing has been changed yet".
#Everyone's Claude keys
The Claude tab gathers the access keys each person has connected Claude to Mise with, and what Claude has done with them. Each user sees and revokes their own in their Connect to Claude panel; here the administrator sees everyone's and can revoke any of them, for example when someone leaves the company or loses their laptop.
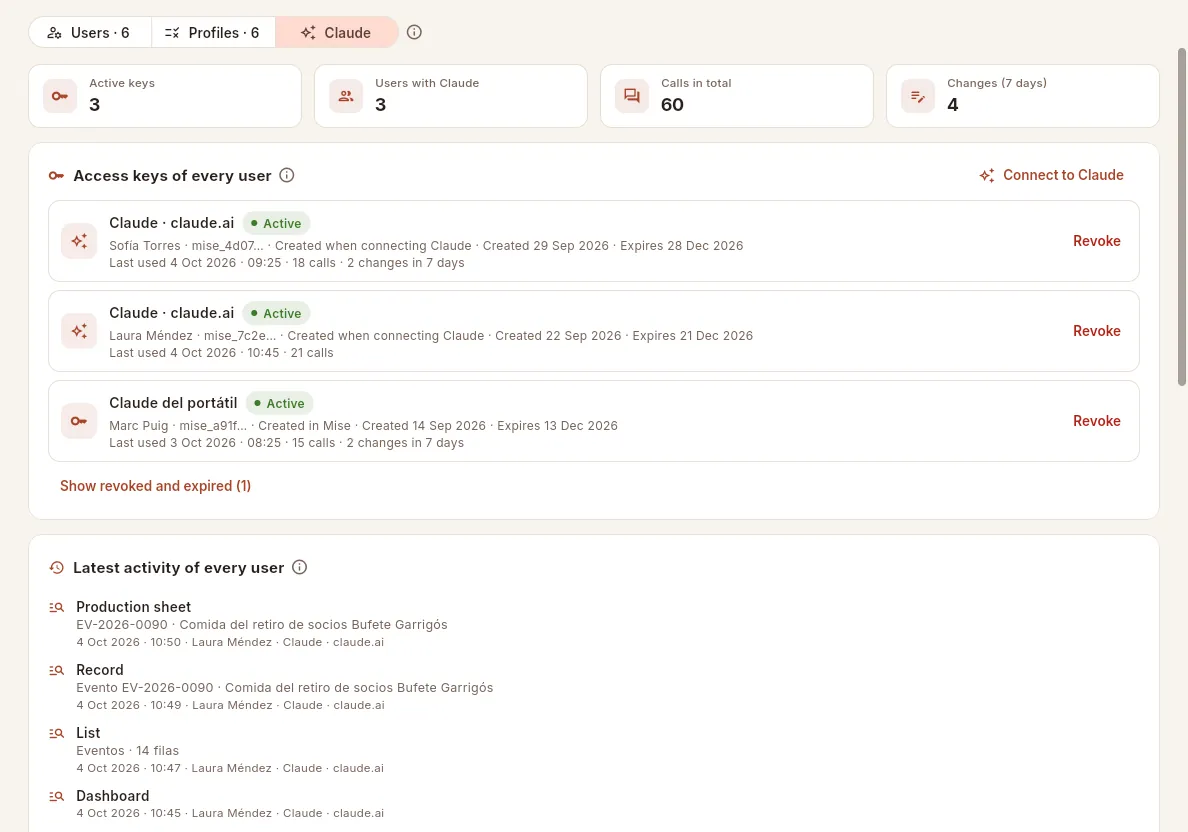 1234567
- 1The Claude tab.
- 2The indicators: active keys, how many users use Claude, total calls and changes in the last 7 days.
- 3Your own Connect to Claude panel, to create or revoke your keys.
- 4Each key with its owner, the start of the key, how it was created, when it expires, when it was last used and its calls.
- 5Revoke cuts that key's access on Claude's next request, whoever it belongs to. It asks for confirmation.
- 6The revoked and expired keys, with who revoked each one and when.
- 7Everyone's latest activity: what Claude has done, when, for whom and with which key.
Your user menu → Users → Claude tab.
Find their key under Access keys of every user and click Revoke.
Confirm. If the person has other active keys, revoke them too.
#Tips
- One profile per job, not per person. Create profiles such as "Cocina" or "Comercial y eventos" and assign them; if someone needs something different, duplicate the closest profile.
- To narrow, add a profile. The "Sin datos económicos" profile works as an add-on: added to another, it removes all amounts, costs and rates.
- Disable instead of deleting. When someone leaves the company, disable their user: they will not be able to sign in and their name is kept on everything they did.
- Always have two administrators, in case one is away: nobody can remove their own administrator rights.
- Check the Claude tab from time to time and revoke keys that have not been used for a long time or that belong to people who no longer need them.
Administration
Settings
Your company's details, which head quotes and invoices, and the settings used across the whole application: VAT rates, target food cost, quote validity, default deposit, minimum shelf life of goods and quote terms & conditions.
Settings holds your company's details and the defaults Mise uses everywhere: the VAT on quotes and invoices, the target food cost used to colour dishes, menus and events, the number of days a quote stays valid, the deposit you usually ask for, the minimum shelf life goods must arrive with and the terms & conditions printed at the foot of every quote.
Like Users, it is a section for administrators only: you open it from your user menu (top right) or, on a phone, from the Administration group of the side menu.
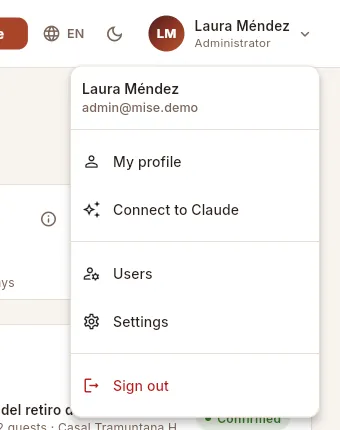 12
12
- 1Click your name, at the top right.
- 2Settings (only if you are an administrator).
#The settings screen
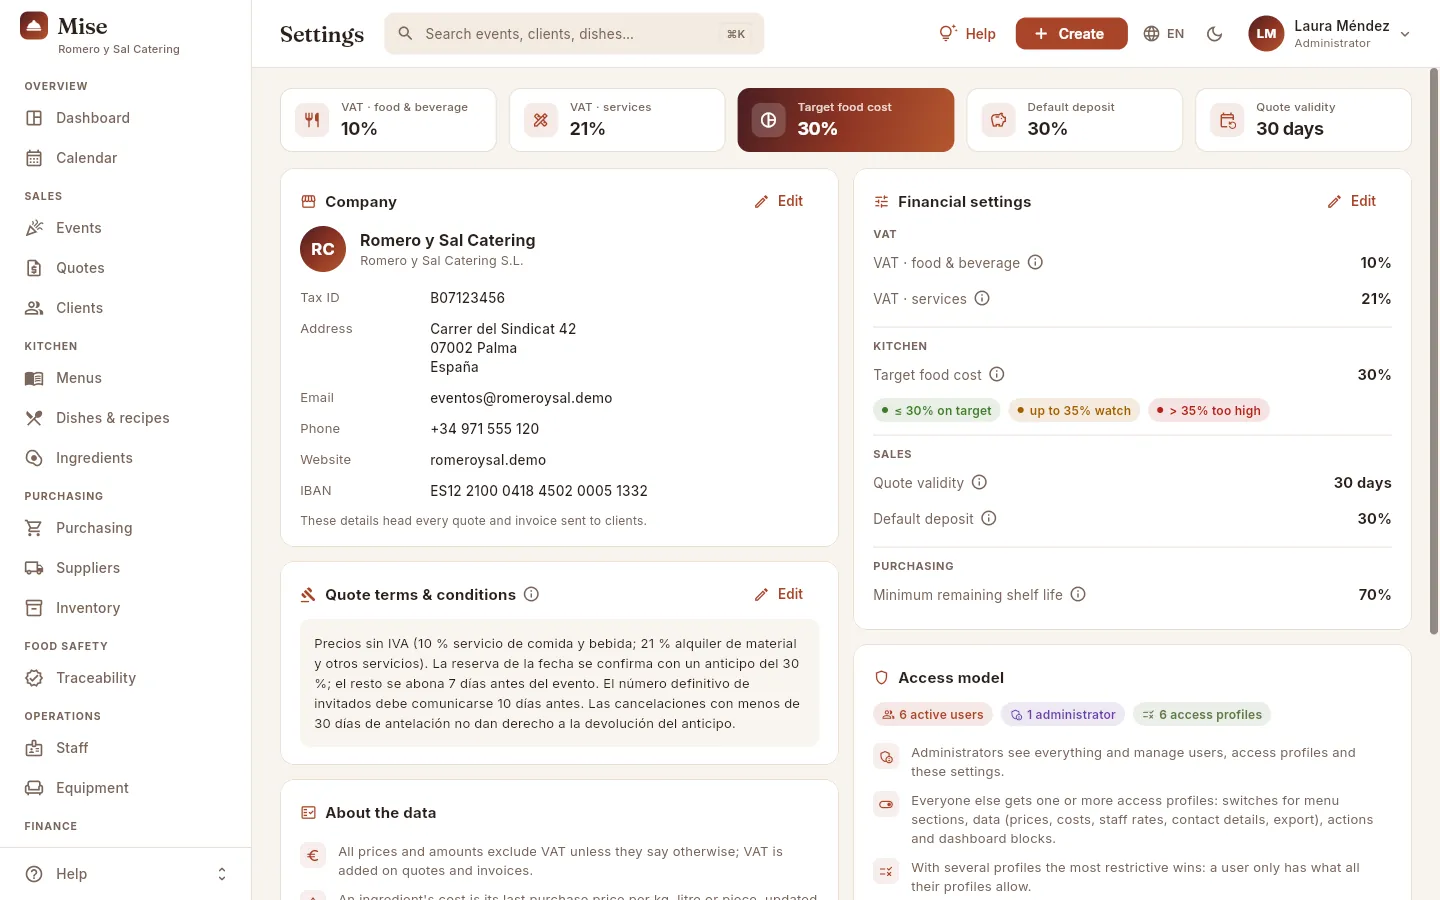 1234567
- 1The key values at a glance: VAT on food & beverage, VAT on services, target food cost, default deposit and quote validity.
- 2Company: name, legal name, tax ID (CIF/NIF), address, contact and IBAN. They head every quote and invoice.
- 3Each card has its own Edit, which opens its form.
- 4Financial settings: VAT, target food cost, validity, deposit and minimum shelf life. Each one with its ⓘ.
- 5Quote terms & conditions: the text printed at the end of every quote.
- 6Access model: how many users, administrators and profiles there are, and shortcuts to Users.
- 7About the data: how Mise calculates costs, margin and food cost (further down).
#Company details
The details on the Company card appear in the header of every quote and invoice you send to the client; the trading name also appears in Mise's sidebar. The IBAN is printed on invoices so the client can pay by bank transfer.
 123456
- 1Trading name: the one you use with clients; it appears in the sidebar and on quotes and invoices.
- 2Legal name: the company's legal name.
- 3CIF/NIF and IBAN: the tax ID and the account the client pays into by bank transfer.
- 4Address: street, postcode, city and country.
- 5Contact: email, phone and website the client will see.
- 6Save: quotes and invoices generated from now on use the new details.
#Financial settings
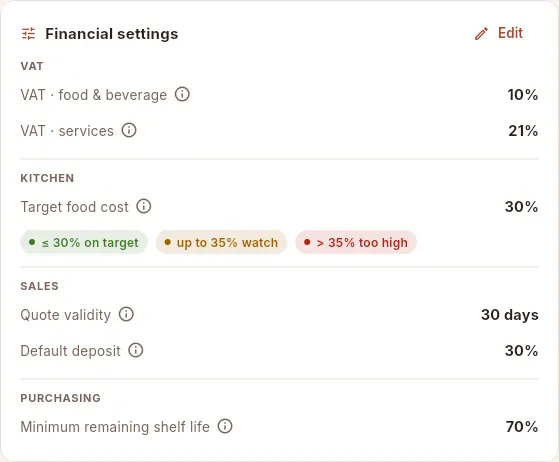 123456
- 1VAT: the rate on food & beverage (the catering service, 10 % in Spain) and on services (equipment hire, decoration, transport: 21 %).
- 2Target food cost: the most you want to spend on ingredients, as a percentage of the selling price.
- 3How each food cost in the application is coloured: green up to the target, amber up to 5 points above, red beyond that.
- 4Quote validity (days from its date) and default deposit (the % invoiced to confirm the date).
- 5Minimum remaining shelf life: on stock orders, the share of its shelf life that goods must still have when they arrive.
- 6Each ⓘ explains what the value is for, what it affects and how to read it.
What each setting does:
| Setting | What it is for |
|---|---|
| VAT · food & beverage | Default VAT for the menu lines of new quotes and for the menu line and deposit of event invoices. |
| VAT · services | Default VAT for extras that are not food (equipment hire, decoration, staff without food, transport). Each line keeps its own VAT, so a quote can mix the two rates. |
| Target food cost | Colours every food cost in the application (dishes, menus, quotes, events, reports and Dashboard). It does not change any price or cost. In catering, 25–35 % is usual. |
| Quote validity | Sets the "valid until" date of new quotes, which is printed on the quote; sent quotes past that date become expired. |
| Default deposit | The % suggested when issuing an event's deposit invoice. The final invoice then deducts all deposits. |
| Minimum remaining shelf life | On each line of a stock order, Mise suggests a minimum accepted expiry date: the delivery date plus this % of the ingredient's shelf life (on orders for an event, the event date). It is passed on to the supplier and, on receipt, a batch that does not reach that date is flagged and Mise suggests rejecting it. |
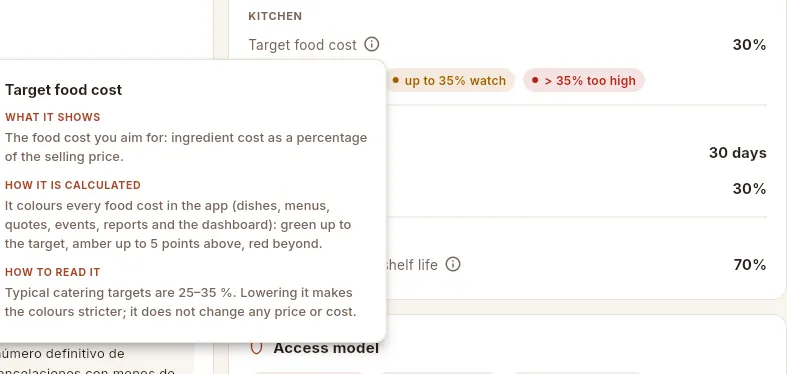 12
12
- 1Click the ⓘ of any setting…
- 2…to read its explanation: what it shows, how it is calculated and how to read it. Here, that the target colours food costs and that 25–35 % is usual in catering.
Your user menu → Settings.
On the Financial settings card, click Edit.
Change the value (percentages go from 0 to 100; validity is in days).
Click Save.
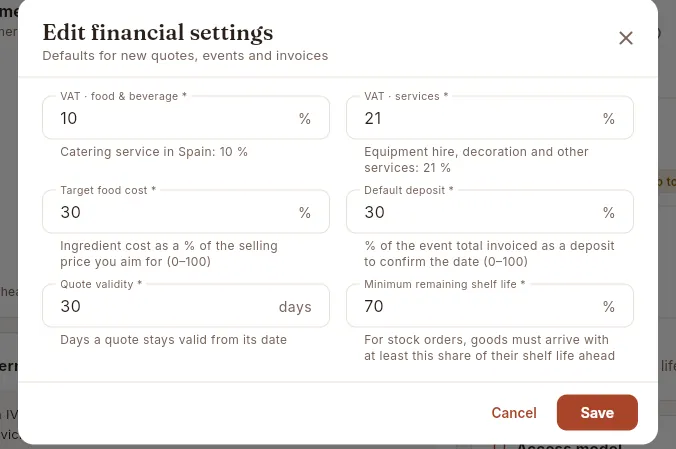 1234567
- 1VAT · food & beverage, in %.
- 2VAT · services, in %.
- 3Target food cost, as a % of the selling price (one decimal is allowed).
- 4Default deposit, as a % of the event total.
- 5Quote validity, in days (at least 1).
- 6Minimum remaining shelf life, as a % of the ingredient's shelf life.
- 7Save applies the values to the whole application.
#Quote terms & conditions
The general terms are printed at the end of every quote: the deposit that confirms the date, when the rest is paid, when the final number of guests must be given and what happens if it is cancelled. It is free text and line breaks are kept.
 12
12
- 1The text of the terms. Write each term on its own line so it reads well on the quote.
- 2Save: quotes printed from now on carry the new text.
#Access model and how data is calculated
 12345
12345
- 1How many active users, administrators and access profiles there are.
- 2The access rules in four lines: the administrator sees everything, everyone else according to their profiles, the most restrictive wins and Mise enforces it on the server.
- 3Manage users takes you to the list of users…
- 4…and Open profiles matrix, straight to the profile switches.
- 5About the data: how the cost of an ingredient, the costing sheet, staff and equipment costs, margin and food cost are calculated.
Appendices
Profiles and permissions
Who sees what in Mise: the access profiles that come ready-made, the complete catalogue of permissions explained, and how they combine when someone has more than one profile.
Everyone who signs in to Mise sees the application tailored to them: the sections of their job, the figures that concern them and the buttons for what they can change. It works like this:
- Administrators see everything, manage users, profiles and settings, and nothing can be taken away from them.
- All other users have one or more access profiles. Each profile is a list of permissions turned on with a switch: which menu sections they see, which sensitive data (prices, costs, rates, contact details), which actions they can perform, which Dashboard blocks they get and what they can do from Claude.
- A user with no profile sees nothing: on signing in, Mise tells them to ask an administrator to assign one.
Profiles are created and adjusted in Users → Profiles.
#The profiles that come ready-made
Mise comes with six starting profiles, designed for the usual jobs in a catering company. You can change their switches, rename them, duplicate them or create others. In the sample data, each one is held by one user:
| Profile | Sample user | Sees | Can do | Cannot see |
|---|---|---|---|---|
| Comercial y eventos | Sofía Torres, sales and events manager | Dashboard, Calendar, Events, Quotes, Clients, Menus, Dishes & recipes | Create and change events, quotes and clients; export | Costs, margins and food cost; staff rates |
| Cocina | Marc Puig, head chef | Dashboard, Calendar, Events, Menus, Dishes & recipes, Ingredients, Purchasing, Suppliers, Inventory, Traceability | Recipes and menus, orders, stock and production adjustments, food safety checks | Clients, finance; contact details; rates |
| Compras | Núria Vidal, purchasing manager | Dashboard, Dishes & recipes, Ingredients, Purchasing, Suppliers, Inventory, Traceability | Orders, stock, checks, suppliers and recipes; export | Selling prices; rates |
| Administración | David Ortega, administration manager | Dashboard, Events, Quotes, Clients, Suppliers, Invoices, Payables, Reports, Staff | Invoices and collections, supplier invoices and payments, clients and suppliers; export | — (sees all amounts, costs and rates) |
| Operaciones | Tomás Bernal, operations coordinator | Dashboard, Calendar, Events, Menus, Traceability, Staff, Equipment | Events (staff, set-up, run sheet), staff and equipment | Prices, costs and rates; cannot export |
| Sin datos económicos | — (add-on) | Everything | Everything | Selling prices, costs, rates and the sales and finance blocks of the Dashboard |
The administrator in the sample data, Laura Méndez (managing director), has no profiles: she is an administrator.
From Claude, every profile can look things up and make changes (see the Assistant (Claude) group, below).
#The catalogue of permissions
There are 40 permissions, in five groups. In the profile matrix each one has its ⓘ button with what it allows, where it applies and what is left out.
Menu sections (17). Each section of the sidebar is a permission: Dashboard, Calendar, Events, Quotes, Clients, Menus, Dishes & recipes, Ingredients, Purchasing, Suppliers, Inventory, Traceability, Staff, Equipment, Invoices, Payables and Reports. A section also lets you read the data it needs from others (the Calendar shows the client and staff of events; Events, the menus and dishes it uses), but not change them. Users and Settings have no switch: they are for administrators only.
Data (5). The most sensitive:
| Permission | What it lets you see |
|---|---|
| Selling prices & revenue | Price per guest of menus, selling price of dishes, quote totals, event revenue, invoices, collections and clients' balance. |
| Costs & margins | Purchase prices, costings, food cost, margins, stock value, purchases and payments to suppliers, equipment cost and staff cost of each event. Margin and food cost also need "Selling prices & revenue". |
| Staff rates | Each person's hourly cost and their cost over the last 30 days. It is separate from costs: a manager can see an event's staff cost without knowing each person's rate. |
| Contact details | Contact person, email, phone and address of clients; phone and email of staff. Names are always visible, and so is suppliers' contact information (it is company data). |
| Export CSV | The export button on each list. The file contains exactly what the user sees on screen, with hidden figures left empty. |
Actions (12). What they can create or change: Edit events (includes assigning staff and booking equipment), Edit quotes (also accepting and rejecting them), Edit clients, Edit recipes & menus (also ingredients and their prices per supplier), Manage purchase orders (includes receiving them), Adjust stock (waste, adjustments, counts and producing events), Record food safety checks, Edit suppliers, Edit staff, Edit equipment, Issue invoices & collections, and Record supplier invoices & payments.
Dashboard blocks (4). Dashboard: sales, Dashboard: operations, Dashboard: kitchen & purchasing and Dashboard: finance. Each block also needs the Dashboard section, and its amounts still depend on the data permissions (without them, only counts are shown).
Assistant (Claude) (2). What the user can do from a chat with Claude (see Connect to Claude):
| Permission | What it allows |
|---|---|
| Use from Claude | Connect Claude (claude.ai, the desktop and mobile apps, Claude Code) to Mise and ask it about anything the profile can see: events, quotes, dishes and costs, orders, stock, traceability, invoices… Claude enters with a personal key of the user and Mise applies their profiles to every request, exactly as in the app. Without this permission, none of that user's keys work, not even the ones they already have. |
| Make changes from Claude | Let Claude create, change and delete, and run operations such as accepting a quote, receiving an order, producing an event or invoicing it, on the user's behalf. Only what the profile's actions already allow in the app; Claude asks before deleting, issuing an invoice or producing an event. Without this permission, Claude only looks things up, even if the user can edit in the app. |
This is how the ready-made profiles come:
| Profile | Use from Claude | Make changes from Claude |
|---|---|---|
| Comercial y eventos | Yes | Yes |
| Cocina | Yes | Yes |
| Compras | Yes | Yes |
| Administración | Yes | Yes |
| Operaciones | Yes | Yes |
| Sin datos económicos | Yes | Yes |
If a profile should only look things up from Claude, just turn off "Make changes from Claude". Sin datos económicos has both because it only serves to remove the financial data (and it removes it from Claude too). Administrators can do everything from Claude except manage users, profiles, permissions and keys, which is never done from a chat.
#With several profiles the most restrictive wins
If a user has more than one profile, they only have the permissions that all of them switch on. That is why adding a profile never gives more access: it can only narrow it. If someone needs to see more, edit their profile or assign one that has what they need (instead of the one they have).
| User's profiles | Result |
|---|---|
| Cocina | The kitchen sections with costs, prices and food cost. |
| Cocina + Sin datos económicos | The same sections, without prices, costs or rates. |
| Cocina + Compras | Only what both have: for example, they see Purchasing and Inventory, but not the Calendar or Events (Compras does not have them). |
When creating or editing a user, the Effective access box calculates on the spot what they will have with the profiles ticked (see Users).
#It is enforced by the system, not just the screen
Permissions are not limited to hiding buttons: Mise enforces them on the server, on every query. What a user cannot see never reaches their device, not even in an exported file. On screen you notice it like this:
- Sections they do not have do not appear in the sidebar or in search.
- Columns and figures they cannot see disappear; where a single figure cannot be shown, a padlock appears (hover over it: "Hidden by your access profile").
- The buttons to create, edit or delete only appear with their action permission.
- A change of permissions takes effect on the user's next query, without signing out; their menu and buttons adjust when they change section.
- If the user has connected Claude, Claude receives exactly the same: what their profile cannot see does not reach Claude either (see Connect to Claude).
#The same screen seen by different profiles
This is how Mise changes depending on who signs in. First, the sidebar: each profile sees only its own sections.
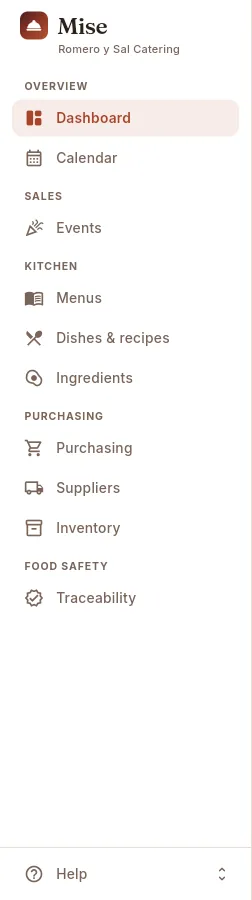 1
1
- 1Cocina sees the kitchen, purchasing and traceability sections, but not Quotes, Clients or anything to do with finance.
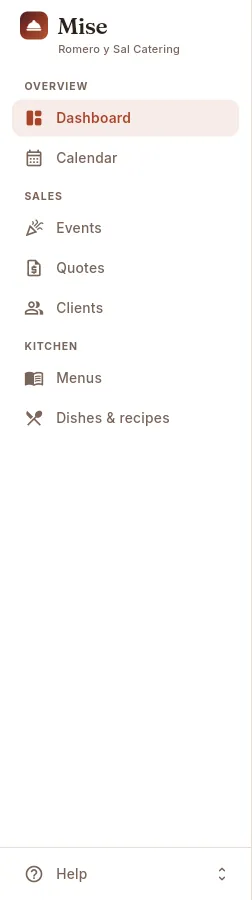 1
1
- 1Comercial y eventos sees sales (events, quotes, clients) and the menus and dishes for quoting, but not purchasing or finance.
A dish seen by the administrator and by the Comercial y eventos profile. The salesperson needs the selling price to quote, but cannot see what it costs.
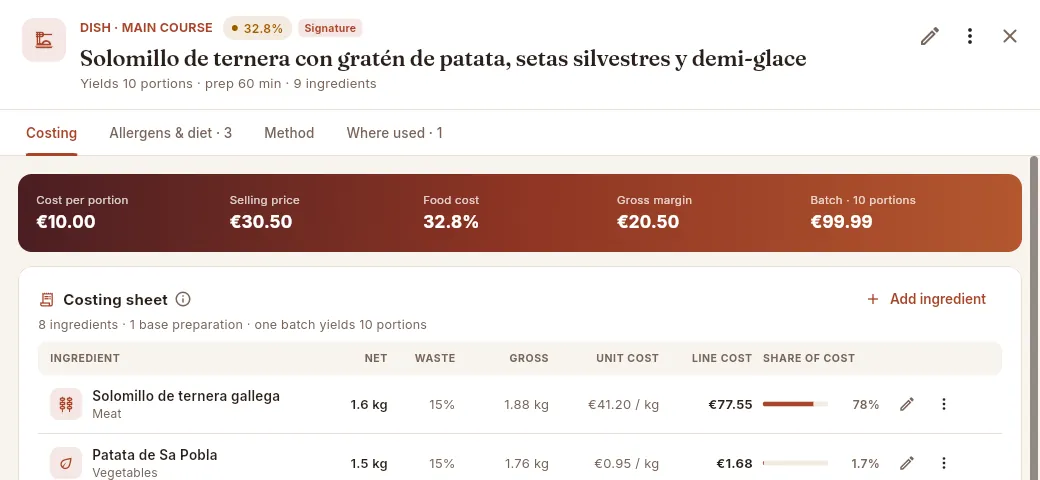 12
12
- 1Cost per portion, selling price, food cost and margin.
- 2The costing sheet with the cost of each ingredient and its weight in the total.
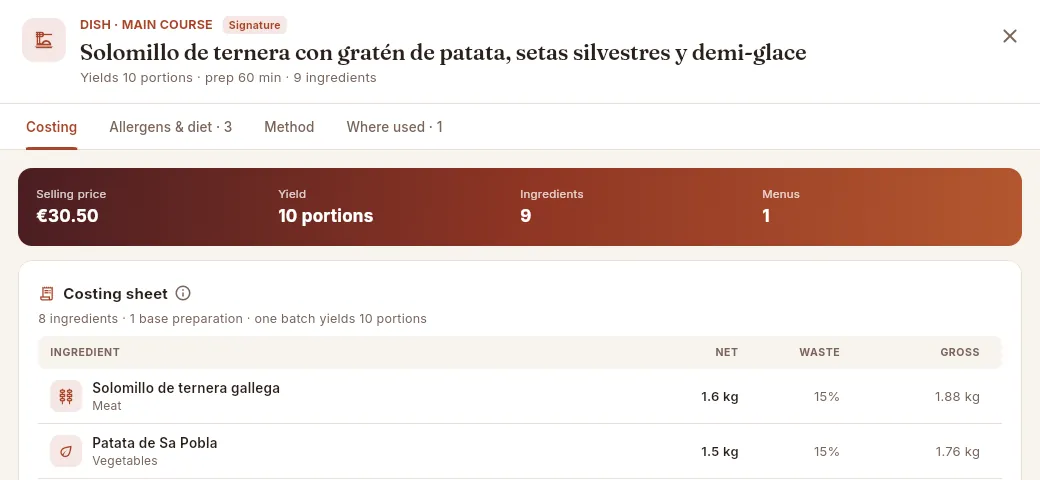 12
12
- 1Only the selling price: no cost, no food cost, no margin.
- 2The costing sheet with quantities only (net, waste, gross), no costs. They cannot edit it either.
A quote: the salesperson sees the prices, VAT and totals they present to the client, but not the cost or margin of each line.
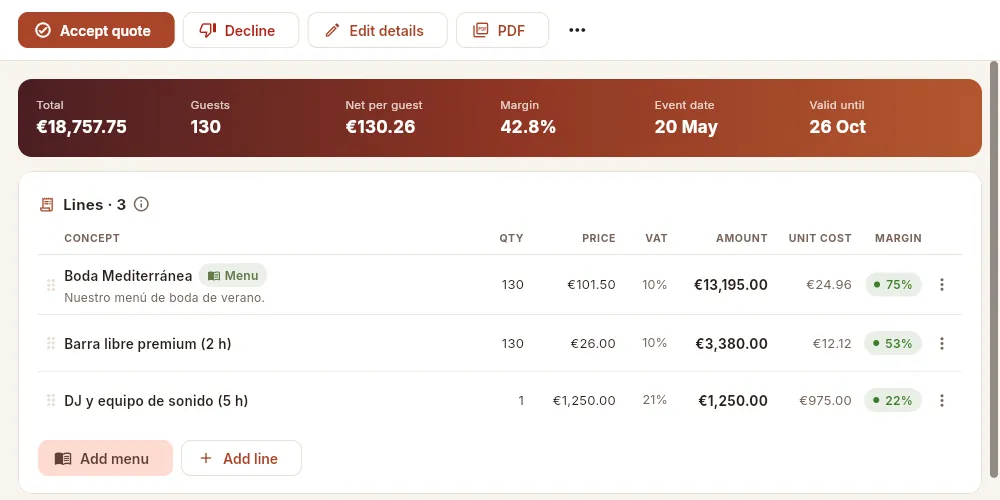 12
12
- 1The quote's estimated margin.
- 2The unit cost and margin of each line.
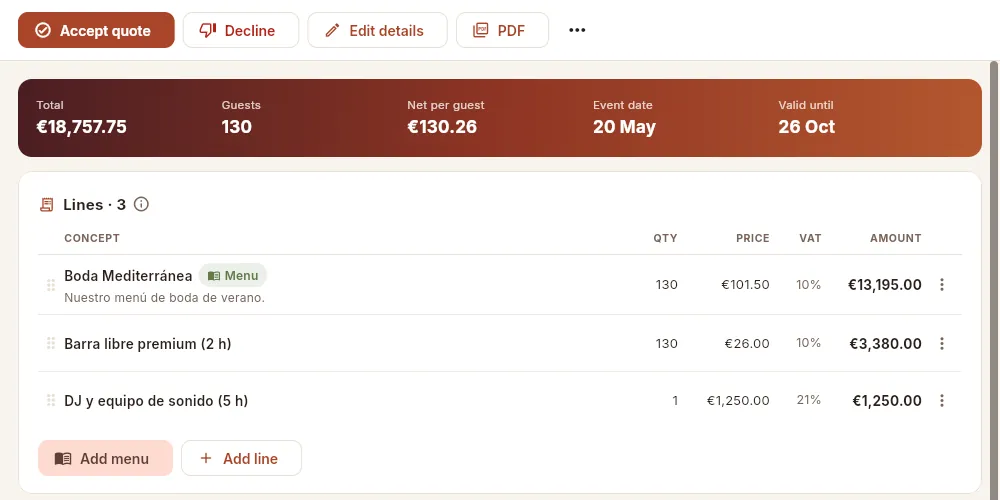 12
12
- 1Total, guests, net per guest and dates, without margin.
- 2Quantity, price, VAT and amount: what the client sees, without cost or margin.
And an event seen by the administrator and by Operaciones, who prepare it (staff, set-up, run sheet) without seeing any amount.
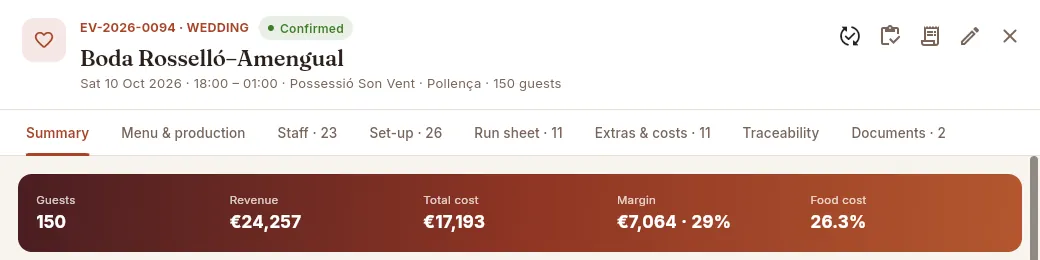 12
12
- 1The event's figures with its revenue, costs and margin.
- 2All the actions, including invoicing and producing.
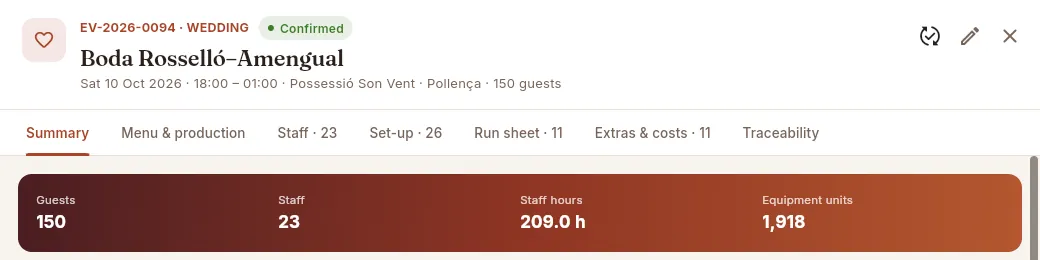 12
12
- 1Only operations figures: guests, staff, hours and units of equipment.
- 2Only the actions of their profile: change the status and edit the event; no invoicing or producing.
Appendices
Glossary
The kitchen, purchasing, food safety and management terms used in Mise, explained in one line and with the chapter where they appear.
| Term | What it means in Mise | Where |
|---|---|---|
| Allergens | The 14 allergens that must legally be declared. Each ingredient carries its own and Mise inherits them in the recipes, dishes and menus, also through preparations, showing where each one comes from. | Dishes & recipes, Menus |
| Deposit | An invoice for part of the event (a percentage) issued before it is held. The final invoice deducts it. | Invoices |
| HACCP | The company's Hazard Analysis and Critical Control Points plan. It sets, for example, the minimum temperature at the core of the product; Mise records the checks. | Traceability |
| Gross / net | Net is the amount that goes into the recipe once prepared; gross is what has to be bought to obtain it: gross = net ÷ (1 − waste). | Dishes & recipes |
| Accepted use-by date | The earliest (and, if you wish, latest) use-by date you ask the supplier for on each line of an order. Mise suggests it and warns on delivery if what was delivered falls outside it. | Purchasing |
| Claude | Anthropic's artificial intelligence assistant. With the Mise connector it works with your data from a chat (claude.ai, the desktop and mobile apps, Claude Code), with your own permissions. | Connect to Claude |
| Access key | A personal code (it starts with "mise_") that Claude uses to enter Mise as you. Mise only stores its fingerprint, so it is shown only once; it expires or is revoked with a button. | Connect to Claude |
| Connector (MCP) | The link between Claude and Mise. MCP (Model Context Protocol) is the open standard that artificial intelligence assistants use to connect to other applications; the address of the Mise connector ends in /mcp. | Connect to Claude |
| Frozen cost | When an event is produced, its food cost per guest is fixed at that day's prices: later price changes no longer alter its margin. | Events |
| Cost per portion / per guest | What it costs, at the latest purchase prices, for one portion of a dish or for one guest's food on a menu. | Dishes & recipes, Menus |
| Rota | The staff's weekly calendar with each person's events and double bookings. | Staff |
| Preparation (base recipe) | A recipe that is not served on its own but inside others: stocks, sauces, doughs… Its cost and allergens pass on to the dishes that use it. | Dishes & recipes |
| Production batch (of an event) | A record of a dish produced for an event: which batches it used, its temperature checks and its witness sample. | Traceability |
| Sales pipeline | Quotes and events by stage (enquiry, quoted, confirmed…) to see how many convert. | Dashboard |
| Run sheet | The timetable for the day of the event: set-up, guests arriving, each service, breakdown… step by step. | Events |
| Costing sheet | The breakdown of a recipe: each ingredient or preparation with its quantity, waste, cost and weight in the total. It gives the cost per portion. | Dishes & recipes |
| FEFO | First Expired, First Out: whatever expires first goes out first. Mise uses batches this way when producing and for stock issues. | Traceability |
| Food cost | The cost of the food divided by its selling price, in %. It is compared with the company target (in Settings). | Dishes & recipes, Menus |
| Putting a batch on hold | Blocking it so that it is not used while a problem is investigated. It does not appear in production or stock issues. | Traceability |
| Guests (pax) | The number of diners at an event or in a quote. It multiplies the portions, the recommended staff and the equipment. | Events |
| Set-up kit | An automatic suggestion of equipment (tables, chairs, crockery, glassware…) for N guests according to the service style. | Events |
| Batch | Each delivery of an ingredient: supplier batch, delivery note, use-by date, temperature and how much is left. An ingredient's stock is the sum of its batches. | Traceability, Purchasing |
| Margin | What is left after subtracting the cost from the price or revenue, in euros and in %. For an event it includes food, staff, equipment and other costs. | Events, Reports |
| Waste | What is lost when cleaning or preparing an ingredient, in %. Each ingredient has its own and a recipe may specify another. | Ingredients, Dishes & recipes |
| Equipment (set-up) | The equipment booked for an event and its availability that day. | Events, Equipment |
| Witness sample | A portion of each dish served that is kept chilled, identified and dated, so that it can be analysed if there is an incident. | Traceability |
| Access profile | A set of permissions (sections, data, actions, Dashboard blocks) that decides what each user sees and can do. | Profiles and permissions |
| Purchase planning | Works out, from the confirmed events, what has to be bought by supplier (deducting stock and open orders) and prepares the drafts. | Purchasing |
| Readiness | An event's checklist (menu, staff, equipment, run sheet, allergies, deposit…) showing what is ready and what is missing. | Events |
| Producing an event | Confirming that the kitchen has prepared it: it deducts stock batch by batch, records the production batches and witness samples, and freezes the cost. | Events |
| Portions per guest | How many portions of each dish on a menu are served per guest (e.g. 2 canapés, 1 main course). | Menus |
| Stock count | A physical inventory: you count what is there and Mise adjusts the stock by the difference. | Inventory |
| Over-booking | When the events on the same day ask for more units of an item of equipment (or more hours from a person) than are available. | Events, Equipment |
| Food alert drill | A forward-traceability exercise: from a suspect batch to the events, diners and clients that received it. | Traceability |
| Minimum stock | The quantity below which an ingredient shows as “below minimum” and should be ordered. | Inventory, Ingredients |
| Traceability | Knowing where each ingredient came from and where it went: backwards (dish → batches → suppliers) and forwards (batch → events → clients). | Traceability |
| Shelf life | The days an ingredient lasts from the moment it arrives. It is used to suggest the use-by date of batches and the accepted use-by date on orders. | Ingredients, Settings |
Appendices
Frequently asked questions
Quick answers to the most common questions, with a link to the chapter where each thing is explained in detail.
#Access and permissions
I cannot see a section, a button or a figure that a colleague can
That is decided by your access profile: each profile switches on certain sections, certain data (amounts, costs, rates, contacts), certain actions (editing events, managing orders…) and certain Dashboard blocks. If you need something more, ask an administrator. See Profiles and permissions.
I see a padlock instead of an amount
It is data that your profile does not allow you to see (for example, costs and margins for the sales team). If you hover over it, it says so: “Hidden by your access profile”. It is not an error: the database itself does not send it to you.
An administrator has given me a new permission and I cannot see it
Permissions are reloaded when you change section: click any section in the sidebar (or sign in again) and the sidebar, buttons and figures adjust.
I have forgotten my password
Ask an administrator to set you a new one from Users; you will then be able to sign in with it.
When I sign in it says I have no access profile
Your user exists but does not yet have any profile assigned, so it cannot see anything. An administrator must assign you one in Users.
#Costs and prices
Why has the cost of a dish changed if I have not touched the recipe?
Because the cost of each ingredient is its latest purchase price. When you receive an order at a different price (or change the price on the ingredient's record), Mise instantly recalculates all the dishes, preparations, menus and quotes that use it. The ingredient's record keeps the price history. See Ingredients.
Will the profitability of an event already served change if prices rise?
No. When an event is produced, its food cost per guest is frozen at that day's prices. Events not yet produced are recalculated at current prices. See Events.
What is a good food cost?
The target is set by the company in Settings (in the sample data, 30%). Mise colours the food cost of each dish and menu against that target, and each ingredient's record warns which dishes would go over if its price rose by 10%.
Does a quote's margin include staff and equipment?
Yes: the estimated margin adds to the food cost an estimate of staff and equipment based on previous events of the same type. See Quotes.
#Events and kitchen
I have accepted a quote: where is the event?
When you accept it, Mise creates the confirmed event with its client, menu, guests and price (or confirms the one already linked). You will find it in Events, in the Calendar and in the documents tab of the quote itself.
Mise will not let me produce an event: it says goods with a valid batch are missing
To produce, each ingredient must be covered by batches with stock that do not expire before the date of the event (and are not on hold or rejected). The warning lists what is missing: receive it in Purchasing or record it with a delivery without an order in Traceability, and try again.
How do I know what staff and equipment an event needs?
The event's staff tab recommends a team according to the guests and the service style, and the equipment tab suggests a standard equipment kit. Both warn you if someone or something is already committed that day. See Events.
Can I delete an event?
Only if it has not yet been produced, has nothing invoiced and is neither completed nor invoiced. In all other cases, change it to “Cancelled”: it stops counting in the staff and equipment schedule, and the history remains.
#Purchasing, stock and traceability
Goods have arrived in poor condition or out of temperature
When receiving the order, note the temperature and use-by date of each line: if they fall outside what is accepted, Mise flags it and suggests rejecting it. The rejected line stays pending on the order and its batch, as rejected, with the reason. See Purchasing.
The stock in the app does not match what is in the cold room
Correct it in Inventory: a one-off adjustment (waste, adjustment) or a full stock count by category. Stock issues use the batches that expire first, so the stock by batch still adds up.
A supplier warns us of a problem with a batch: who did we serve it to?
Use the food alert drill in Traceability: look up the batch and you will see the events, dishes, diners and clients it reached, with their contact details. From there you can put the batch on hold and copy the list of clients to warn them.
How long must witness samples be kept?
At least 7 days (Royal Decree 1086/2020, Article 30). Mise takes one sample per dish when producing and tells you which ones can now be discarded. See Traceability.
#Invoicing
How do I invoice a deposit and then the rest?
From the event's record, “Invoice event…”: first a deposit (a percentage) and, once it has been held, the final invoice, which automatically deducts the deposits. See Invoices.
Where do supplier invoices come from?
When you receive an order, Mise creates its supplier invoice; other expenses (rentals, services…) are entered by hand. They are all paid from Payables.
#Claude
Is it safe to connect Claude to Mise?
Yes. Claude enters as you, with a personal key: Mise applies your access profiles to every request, exactly as in the app, so it can never see or do more than you. Mise does not store the key, only a fingerprint; you can revoke it whenever you like and every call from Claude is recorded in the activity. Users, profiles and keys cannot be managed from a chat, and Claude asks you to confirm before deleting, issuing an invoice or producing an event. See Connect to Claude.
What does Claude see of my data?
The same as you see in the app, no more and no less, and only what it looks up to answer you: if your profile cannot see costs, neither can Claude. What it looks up becomes part of your conversation, which stays in your Claude account. Without the "Export CSV" permission, it gets at most 50 rows per query.
I have lost a key or think someone has seen it
Revoke it in your user menu → Connect to Claude → My access keys: Claude stops getting in with it on its next request. Mise cannot show it to you again (it only stores its fingerprint), so create another or connect Claude again with your user. If you cannot sign in to Mise, ask an administrator to revoke it from Users → Claude.
Can Claude delete things?
Only if your profile has "Make changes from Claude" and you can delete that same thing in the app; Claude follows the same rules as the app. Even so, it asks you to confirm before deleting, issuing an invoice or producing an event, and everything is recorded in the activity. If you want a profile to only look things up, turn off "Make changes from Claude" for it.
Do I need a paid Claude account?
No. Custom connectors are available on every Claude plan: Free (with a single custom connector), Pro, Max, Team and Enterprise. On Team and Enterprise, an organization owner adds the connector once and then each person connects it with their Mise user.
Claude says it can no longer get into Mise
The key has been revoked or has expired, or your profile no longer has "Use from Claude". Check the status of your keys in Connect to Claude and connect Claude again with your user or with a new key. On the public demo the data goes back to its initial state every day at 12:00, but keys are kept.
#General use
Can I get the data out to Excel?
Yes: the lists have the Export CSV button, which downloads what you see (with the filters applied) as a file that Excel opens. It appears if your profile has the export permission.
Does it work on a phone or tablet?
Yes. On small screens the sidebar becomes a drop-down menu (☰ button), lists turn into cards and records fill the whole screen. See The screen and what is common to all sections.
How do I change the language or switch to dark mode?
With the globe and the moon in the top bar, or in “My profile” from your user menu. Mise is available in Spanish, Catalan and English, and remembers your choice.
I am lost on a screen: is there help inside the app?
Yes: the Help menu at the foot of the sidebar opens this manual at the chapter for the screen you are on, and the F1 key opens the interactive guides for that screen. The ⓘ icons next to each indicator explain what it shows and how it is calculated.